Washed concrete is a modern technology for manufacturing decorative products from ordinary general construction cement, coarse and fine filler. Initially, the “washed concrete” technological process was developed and implemented in the United States of America and the countries of old Europe.
Subsequently, thanks to its uniqueness, washed concrete became and continues to become widespread in the CIS countries: the Russian Federation, Ukraine and Belarus.
Application area
This type of structural and building material is 100% used in the production of decorative concrete products. In particular, washed concrete technology is used in the construction and production of the following products and structures:
- Decorative tiles for finishing the local area.
- Making outdoor flowerpots and plant pots.
- Production of outdoor tables, benches and other garden furniture.
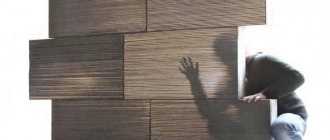
- Production of tiles for finishing the surfaces of load-bearing walls.
- Production of slabs for arranging garden paths.
Washed concrete is a unique decorative and finishing material, therefore it is used exclusively for decorative purposes. Washed concrete is not used for the construction of load-bearing concrete structures.
Origin of material
The concept of “washed concrete” came into wide use in the 80s of the last century, only initially it was called “washed concrete”. The first use of washed concrete began in the 70s during the construction of multi-storey panel buildings. Now washed concrete is widely used for the manufacture of decorative products and elements.
The process of obtaining such material was invented and began to be used in the USA, then the technology was adopted by European countries, and then by the USSR. In the post-Soviet space, the technology is widely used in the Russian Federation, Ukraine and Belarus.
Washed concrete production technology
The technology for the production of paving slabs from washed concrete, flowerpots from washed concrete and other products from washed concrete is based on creating conditions when the main, inner layer of the product sets and hardens much faster than the top, decorative layer.
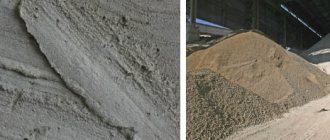
In this case, the concrete for the inner layer is prepared according to the standard recipe of heavy concrete based on general construction Portland cement CEM I 32.5N PC (M400) or CEM I 42.5N PC (M500), sand, water and aggregate (crushed granite, pebbles, gravel) with a fraction size of 10-20 mm.
The concrete mortar for the outer layer is prepared on the basis of standard Portland cement grades TsEM I 32.5N PC (M400) or TsEM I 42.5N PC (M500), clean sand and decorative filler for washed concrete: quartzite, marble chips, river or sea pebbles, small multi-colored granite crushed stone, dolomite, beautiful multi-colored gravel.
The “highlight” of the technology is the treatment of the outer layer or surface of the form for pouring with a special substance - a retarder for washed concrete (deactivator) of concrete hardening. For example, a gel retarder for washed concrete “Setting retarder for the surface layer of concrete Bisil Retarder SF”.
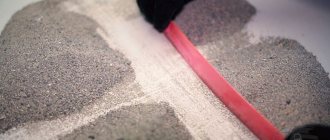
The retarder for washed concrete penetrates into the “body” of the decorative layer to a depth of up to 8 mm and creates conditions for “washing out” the decorative layer of concrete with a stream of water to the specified depth without destroying the concrete structure or product.
The result of treating an uncured layer of concrete with a stream of water is the washing out of the binder solution and the “exposure, drawing” of particles of decorative aggregate. Planters made of washed concrete, flowerpots made of washed concrete, tiles, fence blocks made of washed concrete, pillars made of washed concrete, slabs of garden paths and other concrete products acquire the relief, decorative and presentable appearance of “natural wild stone”.
Accordingly, the appearance of the final product made using washed concrete technology is influenced by: the size of the decorative filler fraction, the color of the filler elements and the depth of “washing”.
Therefore, if the task is to produce exclusive “washed” concrete products, you should use multi-colored fillers, it is best if it is a special mix consisting of: marble chips, fine granite crushed stone, sea or river pebbles, small gravel.
Site preparation and formwork
Before starting work, the area is leveled and the soil is removed down to the clay. If you do not do this, after a while the ground may sag and the path will warp. According to Canadian standards, it is necessary to ensure a slope from the house to the property boundaries of at least 2%. To do this, a hardware store rents a small bulldozer with a trailer for $300 a day.
The formwork is installed taking into account the slope to the fence. The minimum thickness of concrete should be 100 mm with reinforcement 600x600 mm. For reliability, it is better to make a layer of 150 mm and a mesh of 300-450 mm. The formwork is attached to metal pins using self-tapping screws through prepared holes. The rounded formwork elements are made from several sheets of plywood glued together.
After installing the formwork, crushed stone of a 25 mm fraction mixed with sand is poured and compacted every 5-10 centimeters.
A damper tape is attached at the main entrance to the house so that the concrete layers are not connected.
How to make washed concrete with your own hands
The technological process for producing washed concrete products is not complicated, so it can be implemented in a private or country house. To make washed concrete products at home, you will need the following materials and tools:
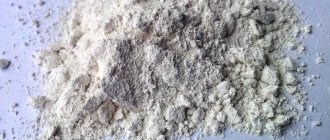
- General construction Portland cement grade CEM I 32.5N PTs (M400) or CEM I 42.5N PTs (M500).
- Quarry or river sand.
- Pure water.
- Fine filler.
- Retarder. Depending on the required depth of “drawing” of decorative elements, use Concrete Set Retarder Gel “Standard-1”, “Standard-2”, “Standard-3”, “Standard-5” or “Washed Concrete Deactivator Paper” allowing for a depth of washout : 1, 3 and 5 mm. The retarder gel is applied to the surface of the product, and the molds are lined with paper for filling.
- Concrete mixer, trowel, trowel, shovel, buckets.
- Ready-made or homemade vibrating table for compacting concrete mixture.
- Homemade or purchased forms for washed concrete.
- Conventional spray gun for applying retarder.
- An installation that creates a high-pressure jet of water and a sprayer to wash concrete from the surface layer of the product.
Production stages:
- Preparation of the solution. Proportions of washed concrete: 1 part cement, 1.5 parts sand, 3.5 parts decorative filler. Mix the dry ingredients in a concrete mixer for 3 minutes. Add water in an amount of 0.5 from the volume of cement, mixing until smooth. If necessary, re-add the mixer and then mix until the solution reaches a creamy consistency.
- Preparing the mold for pouring. Preparing the mold involves degreasing and applying a retarder to the pouring surface or lining the surface with deactivator paper.
- Place the form on the work plate of the vibrating table, fill the form with concrete solution, vibrate for several minutes. If necessary, add solution and vibrate again.
- Dismantling the form. Holding stationary for the time required for the inner layer of the product to set.
- Removing the product from the mold and washing out the concrete from the outer layer with a powerful stream of water.
Large blocks of washed concrete and other large-sized reinforced concrete products are poured not into molds, but into the formwork structure. Therefore, the technology for producing washed concrete for these products involves treating the surface of the formwork with a retarder (lining the surface with deactivating paper), stripping the formwork after the main mass of the structure has set, and washing out the concrete solution from the front part of the product.
What is needed for production?
Before we tell you how to make washed concrete with your own hands, let's look at what is required to make it. To facilitate the production process, you should acquire a concrete mixer and a vibrating table. A water pump can be used for washing, but if one is not available, a portable car wash will do. It is easy to use and allows you to adjust the width and pressure of the water jet.
In addition to equipment, it is necessary to prepare raw materials for the production of concrete mass. The material includes:
- sand;
- cement (it is better to take M400 grade);
- water;
- retarder;
- fillers.
Any suitable materials with a hard surface are used as filler - for example, colored pebbles, granite or marble chips. It is advisable not to use aggregates with a porous surface, since during the manufacturing process cement “milk” will penetrate into the pores, which is difficult to remove.
Practical advice
- Premature removal of the product from the mold or premature demoulding leads to increased leaching of the solution and excessive exposure of the decorative filler. To avoid an unpleasant effect, experimental pouring should be carried out with control of the setting time of a particular concrete solution.
- Overexposure of the product in the mold or formwork leads to the impossibility of washing out the layer of concrete solution to the planned depth. Therefore, as in the previous case, the time for removing the product from the mold or formwork is determined empirically (experimentally in each specific case).
- When washing the surface layer, concrete products are placed at a slight slope to the plane of distribution of the water jet. This promotes the fastest possible leaching of unset material.
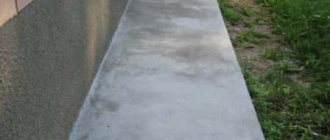
Coating with a protective layer
To protect the surface, the concrete is coated with varnish. In this case, glossy acrylic varnish is used with a wet effect and color enhancement. It protects the surface from the appearance of white deposits, dirt and clogging.
Such a path will last 50 years. Cracks that appear over time will not be noticeable, since they will be inside the seams.
Painting a concrete fence
Concrete fences can be decorated in different ways, but the most popular method is painting. The paint performs the following functions:
- decorative coating protects concrete from negative external factors,
- the paint extends the service life of the fence, protects against cracking and crumbling of the surface,
- paint makes the fence more attractive and neat,
- the right shade will make the fence more harmonious, allowing it to fit perfectly into the surrounding landscape.
Preparing for painting
Green spaces often grow near the fences, there are benches and other landscape items, so before painting it is necessary to prepare the structure. In addition, the surface of the concrete fence must be cleaned of dirt and dust, and all defects must be eliminated, including cracks, chips and others. For pre-painted fences, it is recommended to sandblast the surface, which will give the concrete a slight roughness. In this case, adhesion will improve and the paint will last much longer.
If there are benches nearby, it is better to move them aside and temporarily dismantle decorative elements, including trash cans and lanterns. Sensors, gate hinges and the gate itself must be covered with film to prevent paint from getting on them.
The contaminated surface should be washed with water and all traces of dust and bird droppings should be removed. To do this, the concrete is generously moistened with water, left for 15 minutes, after which the surface should be treated with a very stiff brush using special cleaning agents. If possible, you can use special cleaning equipment, for example, a Karcher vacuum cleaner.
A clean and dried surface is covered with a layer of primer, which improves adhesion, removes dust and extends the service life of the decorative coating.
Paint selection
To paint concrete fencing, paints with the following properties are used:
- moisture resistance,
- resistance to temperature changes, heat,
- frost resistance,
- UV resistance.
Usually matte facade paint is used that meets all these requirements. This option is suitable for the sunny side; for the northern side, you can choose glossy materials. It is recommended to choose water-based paint, acrylate, acrylic, latex or silicone. The last option is the most preferable, but also the most expensive.
When calculating the amount of paint, it is necessary to take into account the porosity of the surface, the relief, and the area of the surface to be painted. Typically, 300 ml of paint is used per square meter of surface, but with high porosity the volume can be large.
The colors for the fence can be different, but it is best to use beige, green, gray, brown, blue, which will harmonize perfectly with the surrounding landscape. You should not use overly bright or dark shades, as such a fence will look like a sharp dissonance for the site.
Painting a concrete fence with your own hands
The fence can be painted as a finishing coating, but it is better not to do this immediately after installation - the structure may shrink and crack.
Typically, finishing work is carried out approximately six months after completion of all work; it is recommended to prime the surface first.
In general, preparatory work includes:
- the surface is thoroughly cleaned of dust, dirt,
- all cracks, chips and other defects are carefully repaired,
- the concrete is coated with a layer of primer to enhance protection and improve adhesion,
- The fence is painted, for which you can use rollers, sprayers or brushes.
When finishing the surface, it is recommended to adhere to the following rules:
- for porous concrete fencing it is better to use sprayers or special equipment for professional painting,
- when restoring an old fence, you first need to cover the surface with a layer of putty, wait for it to dry, and remove all unevenness,
- the surface is covered with a primer, after a day you can apply a second layer of primer, wait for it to dry,
- The fence is painted one day after preparation; work is not carried out in cold weather.
Classification of retarders: effect on concrete composition
The most suitable classes for these purposes are the first, second and fourth.
- Additives of the first class are electrolytes that change the solubility of binders. These include amines, organic acids, and alcohols. At the moment they are in less demand.
- Additives of the second class interact with binders, creating poorly soluble or slightly dissociated compounds. The retarding effect of additives of this class can be explained by the appearance of shielding films that are obtained from the reaction products.
- Additives of the fourth class are the most suitable additive option. These include surfactants that can be adsorbed on both binders and hydrate formations. There are two main types of moderators: chemical and physical effects.
The first are based on inhibition of the growth process of the crystal lattice in the mixture. Thanks to its slow growth, the lattice acquires a more complex and uniform appearance, which has a positive effect on the strength of the finished concrete. Among the advantages, one can also note the increased frost resistance and water resistance of the entire structure. But here, as mentioned above, it is necessary to adhere to a strict dosage. An excess of additive in the solution can lead to a critical loss of concrete strength.
The latter form a difficult-to-permeate film on the cement grains themselves, slowing down their setting. This increases adhesion and moisture protection, but has a bad effect on the overall strength of the finished structure.
Decorative posts
1.3 "Antwerp"
- 80 Weight, kg
- 420 Height, mm
- 300x550 Width, mm.
- Price
- RUB 2,500.00 without invoice
- RUB 3,700.00 with stone chips
2.4 Montreal
- 125 Weight, kg
- 340x340 Width, mm.
- 720 Height, mm
- Price
- RUB 5,000.00 without invoice
- RUB 7,500.00 with stone chips
- RUB 12,500.00 under granite
3.3 "Bremen"
- 670 Height, mm
- 500 Diameter, mm
- 260 Weight, kg
- Price
- RUB 5,500.00 without invoice
- RUB 8,000.00 with stone chips
- RUB 13,900.00 with polished surface
- RUB 15,000.00 under granite
4.1 "Amsterdam"
- 776 Height, mm
- 448x448 Bottom part, mm
- 250x250 Upper part, mm
- 210 Weight, kg
- Price
- RUB 6,200.00 without invoice
- RUB 9,200.00 with stone chips
- RUB 15,000.00 with polished surface
- RUB 16,800.00 under granite
Go to the decorative columns section
With stone chips
300x300x30 mm.
- 7.92 Weight, kg
- 87.2 Weight m2, kg.
- 11 Qty. PC. m2
- Price
- RUB 1,500.00 with stone chips
- RUB 3,400.00 with polished surface
315x315x40 mm.
- 10 Qty. PC. m2
- 9.12 Weight, kg
- 91.3 Weight m2, kg.
- Price
- RUB 1,650.00 with stone chips
- RUB 3,550.00 with polished surface
400x400x50 mm.
- 115 Weight m2, kg.
- 18.4 Weight, kg
- 6.25 Qty. PC. m2
- Price
- RUB 1,720.00 with stone chips
- RUB 3,620.00 with polished surface
500x500x50 mm.
- 28.75 Weight, kg
- 115 Weight m2, kg.
- 4 Qty. PC. m2
- Price
- RUB 1,720.00 with stone chips
- RUB 3,620.00 with polished surface
600x600x55 mm.
- 2.77 Qty. PC. m2
- 51.3 Weight, kg
- 142.2 Weight m2, kg.
- Price
- RUB 2,200.00 with stone chips
- RUB 4,400.00 with polished surface
300x600x62 mm.
- 25.6 Weight, kg
- 142.2 Weight m2, kg.
- 5.54 Qty. PC. m2
- Price
- RUB 2,200.00 with stone chips
- RUB 4,200.00 with polished surface
300x900x80 mm.
- 163.9 Weight m2, kg.
- 49.6 Weight, kg
- 3.3 Qty. PC. m2
- Price
- RUB 2,600.00 with stone chips
- RUB 5,200.00 with polished surface
900x900x80 mm.
- 149.1 Weight, kg
- 1.1 Qty. PC. m2
- 163.9 Weight m2, kg.
- Price
- RUB 2,500.00 with stone chips
- RUB 5,000.00 with polished surface
Go to the section with stone chips
Final stage
The formwork should be removed no earlier than two days after the final fixation of the last layer of fill. The block should then be left to cure for five days at 20-degree temperatures and 95 percent relative humidity.
During this period of time, the material should gain about 80 percent of its maximum strength, so further processing will not degrade its quality in any way. After removing the block from the formwork, it must be thoroughly sanded. This need is due to the fact that during production the ends of the optical fiber bundles are covered with concrete milk, which prevents the free passage of the light source. To grind the working side of the blocks, which is perpendicular to the direction of laying the fiber, you need to use diamond discs.
Without a doubt, translucent concrete is a real work of construction art. This material has many unique properties and characteristics, including excellent strength, reliability and decorative appeal. With its help, you can equip wall partitions, giving buildings unique properties and adding sunlight.
If you don’t have the financial ability to buy the material in a store, you can try to create it yourself. The main thing is to follow the step-by-step guide and calculate the proportions correctly.
Decorative balls
Ball D=140 mm.
- 5 Weight, kg
- Price
- RUB 700.00 on gray cement
- RUB 1,100.00 on white cement
Ball D=180 mm.
- 8 Weight, kg
- Price
- RUB 900.00 on gray cement
- RUB 1,350.00 on white cement
Ball D=200 mm.
- 9.6 Weight, kg
- Price
- RUB 1,100.00 on gray cement
- RUB 1,700.00 on white cement
Ball D=250 mm.
- 20 Weight, kg
- Price
- RUB 2,300.00 on gray cement
- RUB 3,500.00 on white cement
Ball D=300 mm.
- 32.5 Weight, kg
- Price
- RUB 3,500.00 on gray cement
- RUB 5,300.00 on white cement
Ball D=330 mm.
- 50 Weight, kg
- Price
- RUB 3,700.00 on gray cement
- RUB 5,600.00 on white cement
Ball D=330 mm. on a pedestal
- 330x330 Size, mm
- 490 Height, mm
- 84 Weight, kg
- Price
- RUB 4,700.00 on gray cement
- RUB 7,100.00 on white cement
Ball D=450 mm.
- 109.7 Weight, kg
- Price
- RUB 4,700.00 on gray cement
- RUB 7,100.00 on white cement
Ball D=500 mm.
- 145 Weight, kg
- Price
- RUB 5,600.00 on gray cement
- RUB 8,400.00 on white cement
Ball D=500 mm. on a pedestal
- 600x600 Size, mm
- 740 Height, mm
- 325 Weight, kg
- Price
- RUB 8,600.00 on gray cement
- RUB 12,900.00 on white cement
Ball D=600 mm.
- 259 Weight, kg
- Price
- RUB 9,300.00 on gray cement
- RUB 14,000.00 on white cement
Ball D=600 mm. on a pedestal
- 600x600 Size, mm
- 850 Height, mm
- 447 Weight, kg
- Price
- RUB 12,500.00 on gray cement
- RUB 18,800.00 on white cement
Ball D=800 mm.
- 616.3 Weight, kg
- Price
- RUB 12,500.00 on gray cement
- RUB 18,800.00 on white cement
Ball D=900 mm.
- 990 Weight, kg
- Price
- RUB 16,000.00 on gray cement
- RUB 24,000.00 on white cement
Ball D=1000 mm.
- 1150 Weight, kg
- Price
- RUB 23,000.00 on gray cement
- RUB 34,500.00 on white cement
Ball D=1000 mm. on a pedestal
- 1400 Height, mm
- 1000x1000 Size, mm
- 2070 Weight, kg
- Price
- RUB 29,000.00 on gray cement
- RUB 43,500.00 on white cement
Ball D=1300 mm.
- 1900 Weight, kg
- Price
- RUB 34,000.00 on gray cement
- RUB 51,000.00 on white cement
Go to the decorative balls section
Types of concrete fences
Concrete fences can have different appearances:
- stacked fences,
- monolithic structures,
- block fences,
- self-standing concrete fences,
- double-sided decorative fences.
Stacked fences are a structure made of individual slabs with decorative elements installed on the top. There may be gaps between neighboring ones, then the fence will be blown through, and the structure may also be solid. The surface of such a fence can be smooth or imitate stone, natural wood or other materials.
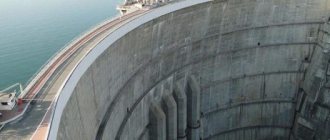
Monolithic concrete fences are considered the most reliable; they are placed on a strip or column base; smooth or textured reinforced concrete slabs are used as sections. For industrial sites, standard slabs are usually used, for country houses - painted sections with a pattern.
Block fences are assembled from small concrete blocks held together with cement mortar. Hollow blocks are used as the main material; plaster or tiles are used for decorative finishing, which improves the aesthetics of the fence. Support pillars are not required for this design; a foundation is preferable. In appearance, the fence resembles brickwork, but with very large blocks.
Self-standing fences are made of reinforced concrete slabs; they require spikes mounted in cups. It is these spikes that serve as support pillars, which eliminates the need to use a foundation. If necessary, such a fence can be moved to another place.
Double-sided fences are assembled from decorative sections; they have two shaped surfaces and are usually used for office centers, country houses and country houses.
Base pedestals for balls
1. Pedestal for a ball
- 320x320 Width, mm.
- 160 Height, mm
- 36 Weight, kg
- Price
- RUB 1,000.00 without coloring
- RUB 1,400.00 with stone chips
- RUB 2,000.00 with polished surface
- RUB 2,000.00 under granite
2. Pedestal for a ball
- 600x600 Width, mm.
- 240 Height, mm
- 190 Weight, kg
- Price
- RUB 3,000.00 without coloring
- RUB 5,000.00 with stone chips
- RUB 10,000.00 with polished surface
- RUB 10,000.00 under granite
3. Pedestal for a ball
- 1000x1000 Width, mm.
- 400 Height, mm
- 800 Weight, kg
- Price
- RUB 5,000.00 without coloring
- RUB 7,500.00 with stone chips
- RUB 14,000.00 with polished surface
- RUB 15,000.00 under granite
Go to the section pedestals-bases for balls