The installation of a cement screed is considered one of the most important and most important tasks in construction and repair work. But many people make mistakes when carrying out this operation. Often, these errors are related to the solution manufacturing technology. Often the ratios of ingredients in the solution do not meet certain requirements. The quality of the future foundation depends on the correct selection of proportions, so it is very important to be able to make the correct and high-quality solution for floor screed.
Everyone who makes renovations dreams of a perfectly level floor base. Even in those apartments that have just been put into operation, the floors sometimes leave much to be desired. With a properly made solution, it will be very easy to level the base with any differences in height.
Any work on the floor must begin with the process of surface preparation and maximum leveling of the base. Today, dry and wet technology is used for these purposes. Cement screed is perfect for any room with any microclimate.
What is needed for the solution
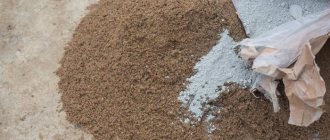
To mix a classic concrete mortar for floor screed, you will need cement, sand and water. Plus, various plasticizers can be added to them to improve the plasticity and strength of concrete. But usually at home it is customary to do without these additives.
In construction, it is also common to add filler in the form of gravel or crushed stone to a cement-based solution. However, concrete for screeding a subfloor in a cottage or apartment is mixed without them.
Additives for screed
Its basis should be only a fine-grained cement-sand mixture (sand concrete, CPS). Inclusions larger than 1.5 mm are not allowed here. Moreover, if a mixture is being mixed for pouring a cement screed in a garage, then adding small crushed stone to it is permitted. In living rooms it is possible to use only expanded clay, and then only as a thermal insulation bedding underneath.
Features of preparing cement mixture
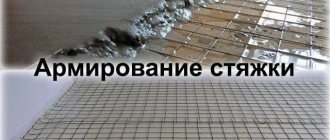
To reinforce the floor screed, a metal mesh or polyethylene fiberglass measuring 12–18 mm is used. The first option is laid on the floor for further pouring with a cement mixture, and the second is added directly to the CFB when mixed in a proportion of 0.3 to 1.5 kg per cubic meter of concrete.
Tools for preparing screed mortar will require:
- trowel and shovel;
- construction mixer or drill with an attachment;
- bucket or other container for mixing.
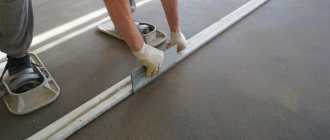
To directly pour and level the mortar on the floor, you also need a rule and a grater. Plus, to perform a monolithic screed you need a building level and beacons. It doesn't hurt to have a tape measure with a pencil on hand.
Ingredients for concrete screed
Effective thermal insulation material
| Photo | Name | Rating | Price | |
| #1 | Extruded polystyrene foam | ⭐ 99 / 100 | More details | |
| #2 | Penolast | ⭐ 97 / 100 | More details | |
| #3 | Expanded clay | ⭐ 96 / 100 | More details | |
| #4 | Basalt wool | ⭐ 80 / 100 | More details |
In order to make the floors as warm as possible, it is important not to skip the thermal insulation stage. Expanded clay, basalt wool, and polystyrene foam are used as materials that help retain heat. Laying the material is simple - slabs or layers of any of them are mounted end-to-end, without gaps, on a surface insulated from water. In this way, it will be possible to obtain a base that maximally retains the heat that tends to leave the house.
Attention! After laying the insulation material, it is recommended to lay another layer of waterproofing. This will allow you to fill the screed evenly and protect the insulation as much as possible from getting wet in the event of flooding. Wet insulation often loses most of its properties.
Using polystyrene foam for floor insulation
Extruded polystyrene foam
The most convenient and simplest option is polystyrene foam. In addition to its thermal insulation functions, it makes floors stronger. It is obtained by mixing granulated polystyrene and a special foaming agent at high temperatures and created pressure, followed by extrusion from the extruder.
Extruded polystyrene foam
pros
- good thermal insulation;
- low water absorption rate;
- low vapor permeability;
- durability;
- ease of installation.
Minuses
- high price;
- flammable material.
Penoplex for floors
Styrofoam
Polystyrene foam can also be used as insulation. In this case, PSB50 grade material is used for garages and warehouses, and PSB35 is used for residential premises.
Brands and characteristics of foam
It is important to protect polystyrene foam from contact with cement, which can destroy the material. To do this, the foam must be covered with plastic film.
pros
- low cost;
- good thermal insulation;
- light weight;
- long service life;
- is not a medium for the development of microorganisms and fungi;
- ease of installation.
Minuses
- subject to mechanical damage;
- when burning, releases toxic substances;
- hygroscopic;
- afraid of sunlight;
- we love rodents;
- unstable to solvents.
Styrofoam
Expanded clay
This material consists of small granules with low mass, which is achieved thanks to the ubiquitous pores. Expanded clay is a heat insulator that meets environmental standards.
Expanded clay
pros
- environmentally friendly material;
- good heat and sound insulation properties;
- light weight;
- resistant to fire;
- long service life;
- easy installation.
Minuses
- a thick layer of insulation “eats” the height of the room.
expanded clay
Basalt wool
Basalt insulation (or rock wool) is an insulation based on ordinary mineral wool, but basalt rock is used as a filler.
Basalt wool
pros
- environmentally friendly material;
- excellent thermal insulation properties;
- non-flammability;
- durability;
- resistance to rodents and insects;
- easy installation.
Minuses
- tends to absorb moisture, which is why waterproofing measures must be carried out especially carefully.
stone wool
Composition and proportions of concrete
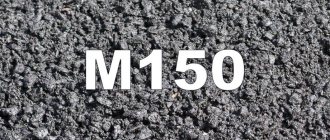
To calculate the consumption of components for screed mortar and their proportions, you must first determine the required class of concrete. At a minimum, according to SNiPs, it should be B12.5 (M150), but it is better to initially mix its more durable analogue B15 (M200). At the same time, such a mixture for floor screed can be prepared from different brands of cement, the choice of which directly determines the amount of sand required. If the mixing technology is not followed, the strength and wear resistance of the screed may suffer. For concrete B15 (M200), the optimal proportion of mixed components is the ratio of sand to cement M300 or M400 - 3:1.
Calculation of proportions for concrete screed
Moreover, if you add more of the latter, the solution will set faster. It is more difficult to work with such a mixture, and the slightest delay in its preparation will inevitably lead to the solidification of the liquid composition in the bucket. And if you don’t add a little bit of cement, the floor screed layer will be less durable.
According to the standards, the minimum grade of concrete should be as follows:
- M150 – for leveling layers;
- M200 – for pouring polymer coatings from above;
- M200 – with underlying heat and sound insulation.
Material consumption and proportions for screed
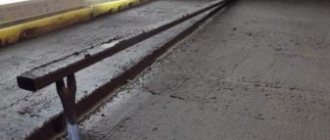
According to building regulations, the thickness of the cement screed must exceed 20 mm. But if it involves laying pipelines for a water-heated floor or water supply, then the concrete layer increases the diameter of these pipes by at least 45 mm.
The final choice of characteristics and thickness of the cement-sand screed depends on the purpose of the room, the type of finishing coating and the characteristics of the base. For the floor in an industrial building, it will have to be made as strong and thick as possible. In a private house and apartment, the loads are completely different. Here you can save a little on the rough layer by making it thinner and from concrete of lower strength.
Advantages of different types of screeds
Foundation preparation process
All work on arranging a rough screed begins with careful preparation of the soil base. To begin with, it is important to identify the highest and lowest points, taking into account the level of the soil and the evenness of its surface. A laser level will help determine their values. This procedure is necessary in order to evaluate for yourself the entire scope of work, as well as determine how much building materials may be required.
It is also important to pay attention to thoroughly compacting the soil. To do this, you can use special construction equipment - for example, a roller or vibrator. The procedure is necessary so that in the future the soil does not sag significantly and this does not lead to cracking of the rough screed, which will undoubtedly negatively affect the finishing floor covering.
Pneumatic rammer for soil compaction
After the soil has been thoroughly compacted, a sand and gravel cushion is laid. It can also be made of clean, washed and river sand. The thickness of this layer should not be more than 60 cm. In the latter case, a layer of gravel or expanded clay is also poured on top, which will make it possible to create a more durable base.
Attention! Before the soil is compacted, it is important to cut off the entire fertile layer, if any. It can be found in a more worthy use than burial under the house. The soil layer is removed approximately 35 cm.
It is also recommended to fill the pillow not all at once, but in layers - for example, 20 cm each. In this case, each layer is well compacted separately. The procedure will make the base as dense as possible. Before compacting, the pillow is moistened with water. The thickness of the expanded clay layer can be at least 10 cm. This layer is also compacted separately.
Expanded clay backfill
Prices for popular models of electric vibratory rammers
electric vibrating rammer
Requirements and recommendations for floor screed
If the proportion of DSP components is incorrectly selected:
- adhesion of the solution to the base decreases;
- the wear resistance of the screed decreases;
- the strength of the concrete layer deteriorates;
- the risk of cracking of the rough coating increases.
If the plastic pipe for water in the bathroom is incorrectly selected, this can lead to leaks immediately when the tap on the riser is opened. And if you mix the cement mixture for floor screed incorrectly, problems may appear several months after pouring. In this case, both detachment of the screed from the base and its banal destruction are possible.
In order not to make a mistake with the proportions, it is recommended to take ready-made mixtures with cement as the main binding component. The content of all components in them complies with the requirements of building codes. It is enough to add water and the concrete composition is completely ready for pouring.
Proportions for preparing the mixture for screed
Manufacturers of ready-mixes
Dry formulations are purchased from well-known and reliable manufacturers who care about the quality of the product and do not violate technology. Such brands include Knauf, Lafarge, Cemex. Plastic compositions are easy to install, reliable and durable.
Ceresit, Thomsit, Bergauf are popular . Manufacturers carefully select and weigh components; there is operational control at each stage of production. Plasticizers and hardening accelerators are added to the composition. There are frost-resistant and water-resistant mixtures.
Eurocement Group, Hercules, and Novoroscement have shown themselves on the domestic market. Manufacturers do not lag behind foreign competitors in quality.
Features of preparing the solution
Self-preparing a floor screed solution is done in four steps:
- A mound of sand is poured onto an iron sheet or moisture-resistant plywood.
- At the top of this pile, an indentation is made into which the cement is poured.
- Then water is added there in a ratio of 0.45–0.55 per 1 volume of CPS.
- Afterwards, kneading is carried out with a shovel or trowel until a homogeneous composition is obtained.
Preparation of concrete mixture for screed
To simplify the work, the solution can be mixed in a bucket with a drill or in a concrete mixer. Liquid plasticizers are added to water before it is poured into the cement-sand mixture, and fiber fiber is added at the last stage after obtaining a homogeneous concrete mixture.
Recommendations for preparing the mixture
Before mixing, sand and cement must be sifted. There should be no lumps, foreign inclusions of clay or earth, as well as organic matter, etc. left in them. Any such inclusion will become a stress point in the concrete layer. And the floor screed there will inevitably begin to collapse over time.
You should mix as much concrete at a time as can be leveled in an hour. You cannot keep the prepared solution longer; it will set and harden. Afterwards you will have to throw it away. And this is a consumption of materials unforeseen by calculations. If when connecting a dishwasher to the water supply, it is extremely difficult to overuse pipes, then when working with concrete you need to be very careful. The slightest delay threatens to harden it and throw it away.
Ready-made mixtures for concrete screed
What factors influence the construction technology of rough screed
Ground water level.
Ground water level
If they come closer than two meters to the surface, then be sure to add sand and gravel. The bedding serves to prevent the absorption of moisture by soil capillaries. If there is a bedding, then the use of a film to retain cement laitance is mandatory. If the rough screed is done directly on the ground, then the film does not need to be placed.
The photo shows crushed stone bedding
Important. The location of groundwater must be determined in the spring; it is during this period that it rises the most.
If the floor structure is intended to accommodate heat transfer fluids, then the rough screed must have a compensating gap between the foundation. Such designs eliminate the negative impact of thermal expansion and eliminate the possibility of cracking or swelling of the rough screed.
Compensating gap
If the planned load on the floor can exceed 200 kg/m2, then reinforcement is required. The fittings parameters are selected individually for each case. The same approach is needed in cases where it is planned to install interior partitions on the floor. You should not rely only on the reinforcement of the finishing screed; its physical characteristics do not allow it to withstand heavy loads.
Is it profitable to make a rough concrete screed on the ground?
The issue worries all developers without exception; it should be considered more carefully. We will compare it with the option of using factory reinforced concrete slabs for these purposes.
Floor slabs
- Reinforced concrete slabs require mandatory ventilation of the underground; for this purpose, ventilation holes are provided in the tape - an additional loss of time and money.
Vents in the basement
According to regulations, the distance from the ground to the slabs must be at least 50 centimeters, otherwise it is impossible to ensure effective natural ventilation using vents. Such requirements limit the options for using slabs; special foundations must be installed under them. Ordinary budget grillages are not suitable.
- The total weight of floor slabs can exceed tens of tons. This is a significant additional load on the foundation; such operating conditions must be provided for at the design stage. High loads require special construction measures to increase the bearing capacity of the foundation; the total increase in the cost of construction work can exceed 15%.
Floor slabs create high loads
- After installing reinforced concrete slabs, they must be lined with several rows of bricks to fill unused spaces. It also costs money.
Installation of slabs using a truck crane
The simplest calculations taking into account the cost of slabs and additional work and materials and rough screeds on the ground show savings of up to 25%. And this is only based on the most approximate calculations. Payment for expensive loading/unloading equipment, delivery costs, etc. were not taken into account.
Cost of work
The process of preparing CSP with your own hands is not easy for beginners who are encountering construction work for the first time. To avoid needlessly translating materials, it is best to seek help from experienced professionals. What is the cost of preparing and pouring a concrete screed?
It’s worth saying right away that the average price of preparatory work depends on several factors:
- base area;
- type of rough coating;
- brands of materials used;
- volumes of related work (dismantling of old coating, communications).
The price of pouring the mortar mixture itself ranges from 4 to 7 dollars per m2 of rough coating. At the same time, for preparing m2 of floor (priming, sanding) you will have to pay from 2.2 to 3 dollars.