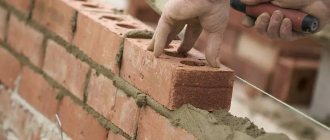
Brick is not a cheap material. But this did not make brick houses any less popular. The reason is the high durability of buildings, which is measured over centuries. But in addition to bricks, the mortar that holds the blocks together is also important in masonry walls. Read to the end and you will understand how to make mortar for laying bricks.
Mortar for brickwork Source kirpich152.ru
Classification of solutions
Basically, masonry mortars are divided according to the type of binder. To do this, either lime or cement is added to the mixture. But in this case there are four types of solutions:
- Lime.
- Cement.
- Lime-cement.
- Clay.
Let’s give several characteristics to each type, indicating their pros and cons accordingly:
- Cement mortar is the most commonly used in brickwork. It has increased strength and low moisture permeability. Today it is used in the construction of buildings and structures of various heights and complexity. It is cement mortar that is used in the construction of brick or block foundations.
- Lime. It has high plasticity and good thermal insulation properties. It has low shrinkage and low specific gravity. It is very convenient to work with such a solution. But it is recommended to use it in low-rise construction, because the mixture will not withstand heavy loads.
Lime mortar for masonry Source kamtehnopark.ru
- Cement-lime. This solution has all the characteristics of the two previous varieties. There are no restrictions on use in construction.
- Clay. It is rarely used in construction today, although it has a number of worthy advantages. For example, high plasticity and frost resistance. The only thing that discourages builders from using it is the complexity of the batch associated with the preparatory work. To do this, the clay must be sifted and cleared of debris, plus crushed to the required state.
We will discuss below how to prepare mortar for bricklaying with different binders. Now let's continue to look at the classification.
The next point of division is the complexity of preparation. There are two types:
- Simple. Essentially, it is a mixture of one binder and sand. That is, it can be a cement-sand or lime-sand mixture.
- Complex ones, where two binding components are involved at once. That is, it is a cement-lime mortar.
Another position is on functional and technological properties. There are three types:
- fatty solutions;
- normal;
- skinny.
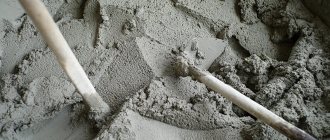
Preparation of masonry mortar Source promtech33.ru
They differ from each other only in the amount of binder added. The more of the latter, the “fatter” the solution. It is this material that has increased strength, but at the same time it has the highest shrinkage, which leads to cracking of the applied mass after hardening. It is clear that the skinny version has low strength and ductility. It belongs to budget options. It is better not to use both the first and second in private housing construction. Therefore, it is recommended to mix normal solutions.
And the last position of the classification is by specific gravity. There are two types:
- heavy – weighing more than 1500 kg/m³;
- light – up to 1500 kg/m³.
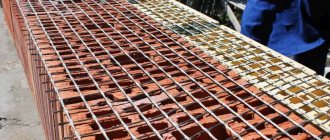
Clay mortar for bricklaying Source 2proraba.com
Textured coatings using cement-lime plaster
To save on materials for decorative finishing, you can also use cement-lime plaster. There are several application techniques to create different surfaces.
Creating a textured coating using cement-lime plaster
Fur coat finish
First of all, shallow furrows are made on the prepared surface. Then prepare a solution with the consistency of thick sour cream, add decorative mineral fillers and dyes to it. Then applied using one of the following techniques:
- Through the grid. The first step is to make a wooden frame 1x2 m and install a metal net with 2.5 mm cells on it. Wooden slats about 10 cm long are stuffed into the corners of the structure so that the frame can be installed at the same distance from the surface. The plaster is spread in even portions using a falcon through the mesh. The container with the material will need to be constantly moved, so it should be as light as possible.
- Spray with a broom. The broom rods are cut so that they do not fly out along with the plaster. Then the tool is dipped into the solution, brought to the surface, and hit the broom several times with a stick. The entire surface is treated in this way.
- Spray with a brush. A stiff brush is dipped into the prepared solution and brought to the surface with the bristles up. Then a stick is passed over it, causing the plaster to splash across the surface.
Finishing with rollers and stamps
You can make these tools yourself, but it is easier to buy them at a hardware store. The stamps are moistened with a soap solution, after which they are pressed tightly against the recently treated wall and abruptly torn off. The result is relief designs. Working with a roller is even easier. There is a relief on its surface, with which the wall is decorated. Roll a roller soaked in soapy water over a fresh cover and leave to dry.
Rollers and stamps allow you to create a spectacular relief pattern on plaster
Peel-off technology
In this case, a visual imitation of sand dunes is formed on the walls. A grater is pressed against the fresh plaster and pulled back sharply. Part of the material will be pulled behind the tool, which will provide the necessary visual effect. You can also use a brush. It is leaned against the surface and the entire wall is treated. Movements should be sharp and chaotic. A hard brush will give clear marks, while a soft brush will give blurrier marks.
Creating sand dunes with a brush
Using loops
This tool is a steel plate with a sharpened edge, it is used for finishing. The surface is drawn into rectangles, a rule is applied to the bottom edge, the scraper is pressed to the surface with the other hand and drawn along the rule, while pressing the tool firmly. The teeth of the cycle will cut into the surface, creating a pattern. You can also get an unusual pattern by making circular movements with the tool.
Drawing on plaster created using a cycle
Checker drawing
The surface is divided into squares using a level and lined. Each square is then treated with a trojan in a criss-cross motion. In some cases, bush hammer, which is simply used to stamp the surface. It is also possible to combine both tools within one checker.
Preparing mortar and finishing walls with cement-lime plaster are fairly simple processes, but to obtain a high-quality coating, you must strictly follow the above instructions.
How to prepare solutions
So, having dealt with the classification, let’s move on to the question of how to prepare mortar for brickwork. Let's start with an important point - the proportions of ingredients.
Proportions of masonry mortar
Builders recommend that before mixing the mortar, pay attention to three important components: the type of soil on the construction site, the type of object being built, and the number of floors of the building. Taking this as a basis, we can talk about proportions:
- Cement mixture. Classic recipe: cement-sand – 1:3. This ratio can be changed up to 1:6, taking into account the conditions of use of the material. That is, what loads it will be subjected to. The less load, the greater the ratio. Next, the moisture content of the sand and the brand of cement itself are taken into account. The higher the brand, the greater the ratio of the two components.
- Lime. Here the proportions are from 1:2 to 1:5.
- Cement-lime. Here the cement-lime-sand ratio is from 1:1:6 to 1:3:15.
- Clay. Proportions of clay and sand: 1:1 or 1:2.
The question of how to prepare a mortar for bricklaying in proportions is closed, let's move on to the next section.
Proportions of masonry mortars in the table:
Source center-esm.ru
See also: Catalog of brick house projects
Brands of masonry mortars
Before moving on to labeling, I would like to dwell on an important point. This is a waste of material. For private developers it is very important, because the budget for building a house depends on it.
So, 0.25 m³ of mortar mixture is required for 1 m² of brickwork. Let us add for information that if the house is built from blocks, then the consumption will be only 0.05 m³. We also note that if hollow bricks are used to build walls, then the consumption will increase significantly due to the material getting inside the blocks. Therefore, builders recommend mixing a thicker solution. Somewhere of medium thickness. This mixture does not spread over the surface of the masonry.
Now let's move on to the markings:
- grades 0 and 2 are practically not used;
- but 4, 10, 25, 50 and 75 are the most common;
- There are so-called specialized masonry mortars with grades 100, 150 and 200, which are not used in private construction.
Brands of ready-made cement mortar in the table:
Source atlant-shop.com.ua
The marking includes not only numerical designations, but also letters. Usually the letter "M" is added to the number. For example, M10. This suggests that the masonry mortar can withstand a load of 10 kg/cm². In fact, it is a physical quantity called strength.
And another important characteristic is the mobility of the masonry mass. That is, to what extent the solution spreads over the brickwork and fills the pores. This parameter is determined by lowering a metal cone weighing 0.3 kg into the solution. Then the depth of immersion in centimeters is measured. This will be the plasticity of the solution.
This parameter, for example, for red brick should be 13 cm, for hollow brick 8 cm. It is recommended to increase the plasticity in summer, for which liquid plasticizers are usually used.
How to determine the mobility of masonry mortar Source ds04.infourok.ru
Features of masonry mortars
What mortar is needed for laying bricks:
- with high strength, because brick walls are always affected by external factors;
- with reliable adhesion, meaning high bonding with bricks;
- with sufficient manufacturability that allows you to apply the mixture in a thin layer;
- with good insulating qualities, for example, thermal insulation properties, sound insulation and moisture resistance.
See also: Catalog of companies that specialize in installation of ventilation, air conditioning and autonomous gasification equipment
Kneading technology
Having dealt with all the positions that answer the question of which mortar for laying bricks is best to choose, let’s move on directly to the main thing. And the first thing you need to pay attention to is kneading the mixture. This is done simply:
- The components of the bulk mass are prepared. Namely: cement, sand, water, plasticizers. If lime is required, then it is slaked.
- All main bulk components are mixed in the required proportions. That is, a dry mixture is formed. Then water and plasticizers are added to it in portions with stirring.
- Knead until the mixture becomes homogeneous.
Attention! The “life” of masonry mortar is short. After 1.5-2.0 hours it can no longer be used, because it simply begins to harden and, accordingly, lose its technical characteristics.
Water is added to the finished dry mixture Source sense-life.com
Technology for preparing solutions
With a simple masonry mortar everything is clear. We mixed cement and sand, then added water to the composition - and everything was ready.
With complex solutions everything is more complicated. Firstly, slaked lime is used for this. Essentially, this quicklime is filled with water and kept in this state for several hours. A so-called lime paste is formed. To prepare it, one portion of water is poured into three portions of the material.
It should be noted that the amount of lime added to the solution will depend on the brand of cement added. Therefore, we suggest you figure out how to make a mortar for bricklaying - the proportions of sand and cement with the addition of lime:
- If you need to make a mortar of M10 grade, then add it in different proportions: cement M150 - 1 part, lime - 1.2 parts, sand 9.5.
- Solution grade M25. It can be made by adding different grades of cement. For example, the ratio of the components cement-lime-sand, where M300 cement is used, will be: 1: 1.4: 10.5. If M200 grade cement is added, the ratio changes to 1:0.8:7. That is, the higher the grade of cement, the higher the proportions of other components.
- Brand of masonry mixture M50. There are more variations of recipes and preparations here. Let’s just list the ratios: with M400 cement – 1:0.9:8, with M300 – 1:0.6:6, with M200 – 1:0.3:4.
- Same for M75. With cement M500 – 1:0.8:7, with M400 – 1:0.5:5.5, with M300 – 1:0.3:4, with M200 – 1:0.1:2.5.
For load-bearing walls, M50 grade mortar is used Source 2.bp.blogspot.com
Determination of mobility
Since the mobility of the composition is one of the key characteristics, it must be measured with high accuracy. To check the solution for optimal mobility, you need to use a cone with an angle of 30°, a height of 15 cm and a mass of 300 g. The cone is placed in the solution, and the mark where it hardens will indicate the degree of movement.
There are different principles to follow when choosing optimal mobility:
- For solid bricks, a mortar with a mobility of 9-13 cm is used.
- Hollow brick should have a value of 7-8 cm.
- When carrying out repair and construction work during the hot period, you will need to use a mixture with indicators of 12-14 cm.
Calculation of masonry mortar
It was already mentioned above how much masonry mortar is needed for brickwork. More often they oppose the ratio taking into account per 1 m³ of wall being built. Typically, 20-30% of the finished mixture is used for this parameter.
In fact, today there is no need to count anything. There are tables freely available on the Internet where all the relationships are defined. For example, if you need to mix a solution of M50 brand, then for this you will need:
- cement grade M400 - 175 kg, based on the yield of 1 m³ of finished masonry mixture;
- M300 – 225 kg;
- M200 – 325 kg.
Consumption of solution depending on the type of work performed Source minkor.ru
Universal option
Cement-sand mortar according to the recipe given below can be used in many construction works.
To make a solution, you first need to prepare all the ingredients: cement, sand, water, detergent, which plays the role of a plasticizer. Detergents such as dishwashing liquid or liquid soap are a cheap substitute for special additives. They increase plasticity; add them in the amount of 1 teaspoon per bucket of cement. The grade of cement should be M 400 or M 500, sand with a fraction of 2 mm.
The proportions depend on the purpose of the composition. A mortar of grade M25 with a 5:1 ratio of sand and cement is used for most work, but for critical places where special strength is required, for example, for foundations, plinths, grades M50 (with a ratio of 4 to 1) and M75 (3 to 1) are used. .
A solution of grade M25 is prepared as follows. 1 cubic meter is obtained from:
- 2064 kg of sand;
- 268 kg of cement;
- 340-350 liters of water.
Usually the dry ingredients are mixed first and then diluted with water, but you can do it differently. First, pour water into the concrete mixer, and then gradually add the dry ingredients. This sequence will allow you to better control the thickness of the mixture.
First, detergent is poured into the water poured into the concrete mixer. After stirring for a few minutes it will foam. Next, sand is poured.
Attention! First, only half of the sand is poured.
After sand, add cement and mix until smooth. Then add the remaining half of the sand and mix thoroughly again. As a result, the consistency of the mass should be like thick sour cream. Checking the thickness of the mixture is simple: if you run your finger over it, there should be a clear trace that does not blur.
After mixing all the ingredients, stir them for 2 minutes. After this, the mixture is ready for use. To prevent the cement from delaminating, it also needs to be stirred occasionally during work.
You should not prepare a lot of working mixture at once. Remember that within one and a half to two hours it begins to harden and becomes unusable due to loss of plasticity.
Ingredient Requirements
The question of how to properly prepare a mortar for bricklaying requires not only the precise addition of components, but also the correct selection of materials according to their characteristics. This is mainly about cleanliness.
The sand should have minimal organic and mud inclusions. The cleaner the better, the higher the technical characteristics of the solution. The same goes for water. But here, special attention is usually paid to the hardness of the latter, and its composition in terms of the quantitative content of salts. Therefore, for laying bricks they try to use tap water, possibly from wells and wells.
Cement-lime plaster everything you need to know about these types of building mixtures
The liberated cochina limestone is also the "eternal stone" in the buildings of ancient Rome, since in our latitudes and mountains limestone is unstable and our ancestors of white stone buildings regularly overlap. As the pressure increases, the solubility of CO2 increases with decreasing pressure, the solubility decreases and releases carbon dioxide. Indeed, the gas drops quickly when the pressure drops, be it mineral water or champagne - cooled and cooled to reduce the rapid release.
When diving inside, it is known that the pressure and temperature increase, and the balance of solid calcite and solution changes. It was found to be soluble and then stable, as described in the Epigenesis chapter.
When the composition is homogeneous, the origin of the limestone is not the same, although it is mainly biogenic.
These are shells and skeletons of organisms. Limestone from large clusters, mainly consisting of the shells and skeletons of organisms.
Biogenic limestone began to form in significant quantities from the beginning of the Paleozoic, when mollusks began to build their shells from calcite and aragonite. It was a kind of ecological revolution for some organisms, and disasters for others - in more than a geologically short time - significantly changed the composition of the atmosphere: this lost CO2 became lighter, more transparent, the greenhouse effect began with the cooling of the planets.
Prejšnja14151617181920212223242526272829Naslednji
Submission date: 2015-06-27; Total 443;
SEE MORE:
Lime mortar is very actively used in construction as a material for finishing the interior of a house, and also as a connecting component between different types of materials.
The composition of lime mortar used in construction consists of lime paste or quicklime ground lime with the addition of sand and water. Ground quicklime began to be used for construction needs as a binder in mortars relatively recently.
Apply without preliminary slaking, like ordinary cement.
If it is then properly mixed with sand, the result is a solution of excellent quality, much stronger than using slaked lime. Ground quicklime is not stored for a long time, because it quickly absorbs moisture from the air and turns into fluffy lime.
Read more at https://stroivagon.ru mortars
Therefore, it should be stored in well-closed barrels for no more than two months.
Such lime can be stored in paper bags for no more than ten days. If a lime mortar is prepared based on ground quicklime, then add no more than 1/2 of the total volume of lime. (For example, add one and a half buckets of water to one bucket of ground quicklime).
To increase the plasticity and strength of the lime mortar, as well as to reduce the hardening time, add a little cement. This solution is more convenient to lay and process.
In a humid environment, lime mortar hardens very slowly, so to speed up the setting process and give it the necessary strength, cement is added to the mortar.
Read more on the website Mortar for laying a furnace
All components of the lime mortar are strictly dosed and mixed thoroughly.
Fluff lime is available in hardware stores, mostly packaged in bags. It’s better to seal it with water right away, because it quickly deteriorates from moisture in the air.
A mixture of grades M125, 150 and 200
The masonry mixture for bricks M125 is suitable for the construction of walls made of stone and various blocks. The composition for laying gypsum tiles is often used. The fraction of sand used can vary from 0.5 to 1 mm. The M150 grade mixture is characterized by increased hardness. The material is suitable for masonry, and in domestic construction it is used for ceramics and finishing concrete structures. This mixture is good in that it is not sensitive to low temperatures, but requires adherence to a temperature range ranging from +5 to +35 °C during the work process. Heat-resistant masonry mixture M200 is characterized by its refractoriness and water-repellent characteristics. Use washed mountain sand without organic compounds for preparation. Among other things, shells and limestone fragments are used, the fraction of which is approximately 3 mm.
HOW TO DETERMINE IF THE SOLUTION IS PREPARED CORRECTLY?
If the solution is made according to all the rules, then it has the appearance of thick sour cream. Checking its quality is very simple: you need to take a little of the resulting mixture on the tip of a shovel and see how it spreads (if the solution spreads slowly, this means that it is of high quality).
Making your own quicklime
It should be said right away that it is easier and faster to purchase burnt lime, but if you want to carry out the entire process from start to finish, then you need to buy ordinary lime. The material is used in many industries, so if there are factories nearby that produce building mixtures or bricks, you can find out there. Otherwise, you will have to look for a supplier online.
Construction quicklime
The next operation will require a furnace. It needs to be melted with coal, after the temperature rises, add a little more coal and spread it in an even layer in the oven. Lime is spread on it as quickly as possible, a small amount of coal dust is sprinkled on top, the stove is closed and left overnight. In the morning, the lime is removed from the kiln into a metal container. The temperature of the material will still be high, so pliers, protective gloves and goggles must be used. After the lime has cooled, you need to crush it with a hammer and begin slaking.
Color mixtures
Modern houses are increasingly becoming colored; this has become possible to achieve thanks to pigments. Today, dark or white cement is used, which is supplemented with polymers and dyes. The production produces a wide range of shades, they can be, for example, rich green. Polymer additives fix the composition, so the seams do not change color even under the influence of precipitation. Today, a white masonry mixture is produced for bricks; fine-grained sand is used as a filler, which is supplemented with polymers. This ensures low water absorption and high plasticity. Different shades of the mixture allow you to combine the color of the brick and seams, embodying bold design solutions. If you use this composition only for jointing, you will be able to reduce consumption. An example is the masonry mixture PEREL SL 0001, which has a snow-white hue.
Specifications
The composition of such a solution must include cement, sand, slaked lime and water.
It is worth paying attention to the fact that it is slaked lime that needs to be added. Otherwise, the quenching reaction will begin in the solution itself when water is added, and bubbles, forming inside the solution, will lead to cracking of the plastered surface
This process of bubble formation will lead to deterioration in the quality of the solution and to brittleness after it dries.
Construction mixtures, their composition and properties are regulated by various GOSTs. This is necessary for standardization and regulation of norms in construction. GOST 28013-98 is the main legal act regulating the technical requirements for building mortars and materials included in the composition.
This standard also includes characteristics of quality indicators, acceptance rules and conditions for transportation of finished solutions. It contains the qualitative and quantitative characteristics of masonry mortars, materials for plastering and for interior work, used in various operating conditions.
Why are plasticizers needed?
Plasticizer is a special compound added to the solution to increase its plasticity and elasticity.
Beneficial effect of using a plasticizer:
- Reducing the amount of water that impairs the hardening of the solution.
- Increasing the moisture resistance of the seam.
- Increased frost resistance.
Plasticizers have different purposes:
- Catalysts. Serve to speed up and increase the strength of the hardening of the solution.
- Modifiers. Allows you to obtain additional capabilities of seams - greater resistance to mechanical stress, moisture resistance, etc.
In addition, plasticizers make it possible to obtain a more elastic seam that compensates for thermal expansion of the cladding. This ability helps maintain the strength of connections with the load-bearing wall and prevents the appearance of cracks in the seams that can accumulate moisture.
Scope of cement application
To better understand the question of how to properly dilute cement, you should indicate the main ways of using this unique and irreplaceable building material:
- Production of heavy and other types of concrete.
- Preparation of masonry mortars.
- Preparation of different types of plaster solutions.
- Production of material for creating sculptures, flowerpots, flowerpots and other decorative products made of concrete.
- Production of paving slabs, curbs and paving stones.
Generally speaking, the use of cement can be divided into two main types:
- Binder for concrete of various types and purposes.
- Binder for solutions of various types and purposes.
Next, we will look at various formats and nuances of using the universal “binder”.
Application of cement-lime plaster
The first layer is called spray. It serves to ensure maximum tight contact of the plaster with the wall. To do this, prepare a more liquid solution, which is collected on a trowel or spatula and simply thrown onto the wall. In most cases, leveling is not required, but it is better to stretch the mixture a little across the surface using one of the hand tools.
The next layer is soil. This is the main part of the plaster, so its thickness can reach 5 cm. The material is applied with a wide spatula at the level of the beacons, after which it is passed over the surface as a rule. You need to move from bottom to top, making zigzag movements, after which the procedure is repeated.
When working with the rule, the solution remaining on the tool blade must be thrown onto the upper parts of the wall.
After this, you should wait several hours until the solution sets and remove the beacons. The resulting furrows are sealed with a mixture of the same consistency as for the main work, after which the corners and areas near the ceiling and floor are finished using narrow spatulas.
Lastly, apply the covering. This layer is the finishing layer, so its thickness is no more than 3 mm, and the quality of the coating must be high. The material is applied with spatulas and trowels, leveled, and after drying it is processed with graters and sanded.
After drying, the plaster is rubbed using a trowel.