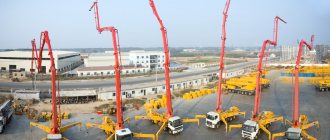
Concrete-mortar units are specialized installations that are designed for producing concrete. The use of automation methods in the operation of these units greatly reduces labor costs for the implementation of the technical process.
The use of a large number of variable parameters makes it possible to produce concrete mixtures with different preparation recipes. A concrete mixing unit with minimal use of production space and high equipment reliability ensures highly efficient production of building mixtures in large volumes.
This is also facilitated by increased resistance to external factors.
Description of different types of mortar units
Today, two types of mortar units are known:
- stationary;
- mobile
The first is a technological chain, which is organized in close proximity to large-scale production of reinforced concrete products. They are focused on the production of certain brands of mixtures.
As for mobile options, they are used at the construction site and can be rented. There are also semi-permanent units that can be partially disassembled and moved within the site.
Selection rules
The main criterion that must be taken into account when choosing a BRU is the purpose of the installation. For small companies, the best option would be mobile mini-models, whose productivity varies between 10-15 cubic meters of solution per hour, and for factories producing trademarks, it will be necessary to purchase installations with a productivity of 30 cubic meters and above. This is due to the fact that with lower productivity, energy costs for production will not pay off.
If you plan to prepare batches with different compositions, then the optimal devices are those that are equipped with three or more bins designed for inert fillers.
Models of installations with gravity mixers are the best option for construction companies constructing small projects in Moscow and other large and small cities. Such equipment is not recommended for the preparation of heavy and rigid solutions. The advantage of these BSUs is their low electrical energy consumption.
When purchasing a unit, it is recommended to pay special attention to the quality of the metal used in the manufacture of individual elements. If you purchase a used unit, you need to evaluate the condition of the blades and walls, as well as the degree of wear.
When purchasing a BSU, it is recommended to evaluate maintainability and the possibility of making changes to improve operation and increase productivity.
Description of mortar units based on operating principle
The mortar unit can also be classified according to the characteristics of the mixture preparation technology. According to it, such mini-factories are divided into cyclical installations and those that provide continuous operation. In the first case, we are talking about units that prepare concrete in separate portions. This indicates that the components can be reloaded after the mixer has been released.
Continuous installations allow you to obtain a larger volume of solution in a certain time. This is due to the fact that the supply, subsequent mixing and unloading of the solution are carried out in parallel. The disadvantage of such installations is the inability to quickly switch the device to produce mixtures of different brands. In addition, the resulting solution is not always stable.
The mortar unit can also be classified according to seasonality of use. Some mini-factories can be operated only in the summer, others - all year round. For year-round production of the solution, winter modifications are used. They have thermal insulation lining and heating systems. However, even such designs are characterized by a decrease in productivity in cold weather by almost half, this is due to the fact that a huge amount of time is spent warming up the components of the mixture.
Specifications
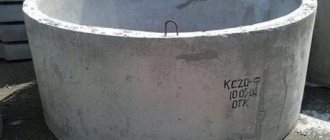
The mortar unit consists of several modules, including:
- mixer hopper;
- containers with strain gauges and dispensers;
- tank with filtration system and water;
- Control block.
To ensure full operation, the node must have transport modules, namely:
- grab lifts;
- conveyors;
- skip lifts.
Without tanks for loading and storing dry components, as well as a vibrating machine, auxiliary mechanisms and services, the mortar unit remains a conventional concrete mixing plant. When choosing a mortar-concrete unit, you need to pay attention to the main technical characteristics, including power and productivity.
Mini-plants are capable of producing approximately 10-25 m3 of concrete per hour. If we are talking about standard installations, then they will produce 400 m3/h. The characteristics of working elements may vary, so when ordering it is important to pay attention to the following parameters:
- number of containers;
- volume of tanks;
- availability of dosing units;
- type of mixing hopper.
As for the number of containers, they will contain fillers of different fractions.
Do-it-yourself mortar unit for fertilizers - subtleties
So, let’s go through the main elements of mortar units, the design of which has been worked out by us for many years and has shown its reliability and performance.
Main tank with hydromixing system. You can use plastic containers of 2, 4.5 and 11 m3 or stainless steel containers of 4.5, 6, 15 m3 and other volumes. Several tanks can be combined - for example, a switchgear with a volume of 9 m3 from two connected tanks of 4.5 m3 each, or a switchgear of 22 m3 - 2 tanks of 11 m3 each. When choosing plastic containers, you should take into account wall thickness, mechanical strength, and UV protection. We recommend the company's containers - A hydromixing system must be installed in the main container(s) - it is necessary to create a homogeneous solution of the required concentration when a concentrated solution enters it from a mixer.
When making a mortar assembly with your own hands, choose a high-quality container so that it will serve you for many seasons and will not collapse prematurely from the sun, chemicals and transportation.
Mixer. It is a stainless steel barrel with a powerful hydraulic mixer, usually with a volume of 200, 300 or 600 liters. For mixers over 600 l, we recommend installing a frame mechanical mixer with a gearbox. Hydromixers can be of two types - a) hydromonitor, structurally - a pipe with holes and a mesh filter at the inlet, fertilizers are mixed due to a powerful whirlpool and passing through a small filter cell and b) ejector, manufactured by Arag, these are used on sprayers.
The Agrosector company can produce for you a mixer of any volume, with a hydraulic and/or mechanical stirrer.
Pump . Provides a) operation of the mixer, b) hydromixing in the main container, c) refueling of the sprayer or transport tanks. The pump must provide high pressure, be highly efficient and resistant to aggressive liquids. For these purposes, we recommend stainless steel electric pumps Aquastrong ESST80-65-160/75 (72 m3/h, 24 m) and ESST 100-80-125/75 (114 m3/h, 12 m) and chemical-resistant motor pumps HYPRO1543Р – 130SP (13 l .s, Qmax = 100m3/hour, Pmax = 4 atm). In mortar units where the preparation of UAN is not planned, a Speroni pump (Italy) CS32-200V can be used for the mixer; it is cheaper and with fertilizers (in the absence of UAN) it lasts a long time.
On mobile RUs of 1-10 m3, one pump is usually sufficient, which, using a system of taps, is switched either to the mixer operating mode, or mixing in the main tank, or unloading. In stationary units, and at the request of the customer in mobile units, to increase productivity it is advisable to install 2 pumps - one for the mixer, the second for the mixer in the main tank and unloading.
Filters. A large mesh filter on the intake line of the hydraulic mixer, a mesh filter for unloading, filters for the neck of the tank and the neck of the mixer.
Liquid level indicators in the mixer and containers.
Electrical panel - control panel for the pump/pumps.
Shut-off and connecting valves - a system of pipelines, ball valves, a filling (discharge) hose and quick-release connections made of stainless steel and chemical-resistant plastic.
Description of the solution-salt unit
The solution-salt unit is intended for the preparation of solutions with different specific gravity. The composition must be free from insoluble impurities of suspended particles that would be harmful to the oil reservoir. Such installations are used to produce liquids that are used in killing wells.
The units operate in a semi-automatic mode, and operability is ensured by the presence of maintenance personnel. The equipment is equipped with flow meters and control instruments that allow you to monitor the cooking process visually and remotely.
Preparation of solutions
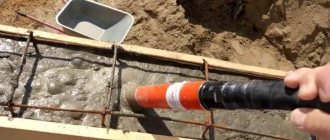
The preparation of solutions at concrete mortar units is carried out using a certain technology. It may involve the use of a continuous or volumetric dosing principle. The dosing accuracy for cement is 2%, for water – 1%, for lime milk – 0.5%. As for sand, the accuracy in this case can vary depending on its moisture content in the range from 1 to 3.5%.
A belt doser is used for dosing sand, and a screw doser for cement. The liquid is supplied under constant pressure, which is provided by the tank. The horizontal mortar mixer ensures mixing of the components. The finished solution passes through a vibrating sieve and is supplied to the point of consumption using a solution pump. Mortar units are economical, and their use allows reducing the cost of preparing the mixture by 30 to 50%.
Pyotr
I don’t know if anyone has made a mortar assembly according to my description or not. I would like to hear opinions and feedback from practitioners. I didn’t like the irrigation control using timers (programmer). Disadvantages in my opinion: 1) To see the time and duration of watering, you need to scroll through the menu of all timers. Is it okay if 1-2 waterings a day, but what if 8-10? Moreover, you need to make sure that there are no overlaps. 2) Watering time is a multiple of 1 minute, i.e. you cannot set, for example, 1.5 minutes. 3) When the weather changes, you need to reprogram all timers, which is very inconvenient. The advantage of the above programmer is its ease of manufacture. To eliminate the shortcomings, I decided to remake it. I used Arduino Uno as a basis. I set the start time of watering according to fur. timer, so that by looking at the timer you can see the beginning of the first watering, the beginning of the last watering and their number per day. The interval between watering is 30 minutes, 45, 60, etc. in increments of 15 minutes. I want to emphasize that the timer only sets the beginning of each watering or cycle, but not the duration. The duration of watering of each crop (in a specific example there are 3 of them) is set using the potentiometer knob from 1.5 to 6 minutes (for a specific program). Programmer operation algorithm (let there be option 2): Using segments on the timer, set the watering time by pressing 1 segment opposite the numbers on the scale. Use the handles to set the duration of watering for each crop. When the set time approaches, the watering pump and the first valve will turn on for time t1, after t1 the first valve will turn off, and the second will turn on for time t2, with the third valve doing the same. After t3, the pump and the third valve will turn off. Everything will freeze until the next command from the timer. The duration of watering for each crop depends on the growth phase and nutritional consumption. solution. The number of watering valves, as in the previous version, is limited by the ratio of the cycle duration to the duration of one watering.
I'm posting a schematic diagram. Of course, this is for those who distinguish a transistor from a resistor and know how to hold a soldering iron in their hands. This can also be assembled on relay shields. It will be easier, but a little more expensive.
I drew it for myself on paper, so it’s clumsy :) If anything, ask... Meh. The timer needs a little modification. The timer microswitch (in diagram SB1) must be disconnected from the switched circuit and connected according to the diagram. Those. it turns from a load switch into a tact button, and its place is taken by relay contacts K4. According to the scheme. R5-R12 – 5.6 kOhm, R18-R20 – 820 Ohm, R15-R17 – 2.4 kOhm, R14 – 470 Ohm, VD1-VD4 – any silicon low-power KD522, etc. VD5-VD8 – for a current of more than 0.2 A and arr. voltage 30 V. VD9-VD13 – LEDs. VD14-VD24 – 1 A. 50 V. K1-K4 – relay 12 V. Valve1-VD24 – watering valves for 220 V. A1-A3 and B1-B3 – valves mat. Solutions for 24 V 0.4 A. VT1-VT3, VT8, VT10, VT12 – KT3102. VT6 – KT814. VT7 – KT972, VT9, VT11, VT13 -KT973 Using switches SB2-SB4 we turn off unnecessary valves. Powered by two 12 V batteries connected in series. The uninterruptible power supply also works from them, so there are no power supplies and independence from power engineers. This is what it looks like to me.
It can be seen that 12 irrigation systems are installed. In the morning and evening after an hour, during the day after 45 minutes. This is in sunny weather, the temperature in the shade reaches +35 * C. Individual droppers 2 l/h. 2 waterings with solution A, 2 waterings with solution B, etc. Program code (sketch) for Arduino Uno. This is my first sketch, so don’t kick me too hard) It’s been working for 2 months.
// watering timer. Author
#define BUTTON_PIN 4 //button on pin 4 #define POT_PIN A1 //potentiometer outputs #define KL3_PIN 11 //watering valves #define KL2_PIN 12 #define KL1_PIN 9 #define AB_PIN 10 //mat. solutions A and B boolean buttonWasUp = true; // was the button released? byte val=0;
void setup() { pinMode(KL1_PIN, OUTPUT); //set PINs to the output pinMode(KL2_PIN, OUTPUT); pinMode(KL3_PIN, OUTPUT); pinMode(AB_PIN, OUTPUT); digitalWrite(AB_PIN, LOW); digitalWrite(KL1_PIN, LOW); //valves are disabled digitalWrite(KL2_PIN, LOW); digitalWrite(KL3_PIN, LOW); pinMode(BUTTON_PIN, INPUT_PULLUP); //pull the input to +5 V } void loop() { boolean buttonWasUp =digitalRead(BUTTON_PIN);//previous state. buttons delay(100); boolean buttonIsUp = digitalRead(BUTTON_PIN);//present status. buttons // ...if “the button was released and (&&) is not released now”... if (buttonWasUp && !buttonIsUp) { delay(10); // let the button completely “calm down”... buttonIsUp = digitalRead(BUTTON_PIN); // ...and read the signal again if (!buttonIsUp) { // if it is still pressed......it's a click! digitalWrite(KL1_PIN, HIGH); //on 1 valve delay(10); unsigned long rot = analogRead(POT_PIN); //define continuation. 1 watering rot=map(rot,60,900,90000,360000); delay(rot); digitalWrite(KL1_PIN, LOW); //off 1 valve digitalWrite(KL2_PIN, HIGH); //on 2 classes delay(10); rot = analogRead(POT_PIN); rot=map(rot,60,900,90000,360000); delay(rot); digitalWrite(KL2_PIN, LOW); digitalWrite(KL3_PIN, HIGH); delay(10); rot = analogRead(POT_PIN); rot=map(rot,60,900,90000,360000); delay(rot); digitalWrite(KL3_PIN, LOW); //off 3 valve val++; if (val>=2){ //if 2 waterings have passed, switch the mat. solutions digitalWrite(AB_PIN,!digitalRead(AB_PIN));//invert the state of the pin val=0; } } } }
Equipment for greenhouses
Greenhouse mortar units are used to prepare a nutrient solution, conduct and plan drip irrigation in greenhouse production. Such devices allow you to organize the supply of solution for individual zones according to watering time and solution consumption.
Using a specific program, you can schedule watering throughout the day. Depending on the capabilities of the system, the program allows you to start watering, taking into account several types of influences. Among them are:
- time;
- amount of solar radiation;
- substrate humidity level;
- temperature.