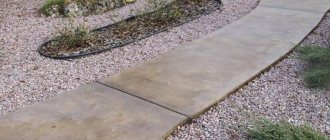
A concrete path on a personal plot or near a private house is a practical and convenient solution. And if you make it with creativity and taste, it will also become a wonderful decorative element. Moreover, to cope with such work, it is not at all necessary to be an experienced builder.
Every home craftsman is quite capable of making a path and surrounding the area with a fence. And today we will tell you about the various intricacies of making paths, we will tell you what kind of solution to put the paste on, how to fill the product with a mixture with a mesh, in what proportions it is worth making a solution for concreting paths and much more.
Necessary materials
A sidewalk path can consist of different materials. Concrete, stone, gravel, slabs, brick, sand - this is not a complete list of possible coatings. Each material has its own positive and negative characteristics. Today we will get acquainted with concreting technology. Using concrete is a cheap, quick way to make paving.
A certain composition of materials for preparing the solution is common:
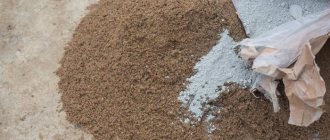
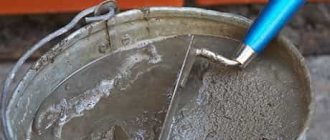
- Cement is the main component that connects all components. Portland cement has high bonding properties and is best suited for mortar. In terms of strength, grade 500 is more suitable; grade 400 can be used, but the difference may affect the service life. Be sure to pay attention to dryness and flowability; the cement should not look damp or crumpled.
- Sand. The size of the fractions corresponds to values from 1.5 to 5 mm. The total mass must be uniform, the discrepancy should not be more than 2 mm. The sand must be taken clean, without foreign impurities. The ideal option is river water; it is more expensive, but it does not contain clay or other impurities. If you doubt its purity, sift it.
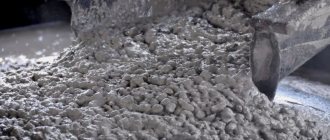
- Main components of concrete.
Crushed stone. The strength of the solution is given by the aggregate - crushed stone, gravel. You should not use sea stone; it is polished with water and does not have sufficient grip. The size of crushed stone varies from 8 to 35 mm. As with sand, the aggregate should be free of dust, dirt and clay impurities. When preparing concrete, select a filler yourself, consisting of fractions of different sizes, or combine large and medium crushed stone. When mixing components, such dimensions will ensure a tight bond between each other and will not cause the formation of voids.
- The necessary fluidity and viscosity of concrete will be provided by additives and plasticizers. Carefully study the instructions for using the additives included in the solution.
Return to contents
In what order should you pour the self-mixing ingredients into the concrete mixer?
The volume of Lipon's concrete mixer is 180 liters. He loaded the pear like this:
- I filled in 11 liters of water.
- Then he threw 20 liters of crushed stone into the pear.
- Then 10 liters of cement.
- Added 20 liters of sand,
- I poured in 0.2 liters of plasticizing additive.
- I threw in another 20 liters of crushed stone.
- Now Liponya filled in another 10 liters of sand.
During the mixing process, we look at the density of the concrete. Add water from the remaining liter. At the finish we throw in 10 liters of crushed stone. The components were poured into 10 liter buckets.
I mixed concrete in a 160 liter concrete mixer. The mixture proportions are 1:3:4. I threw the ingredients in 12 liter buckets. Mesil like this:
- I poured 8 liters of water into the concrete mixer.
- Added liquid plasticizer to the water.
- I poured out all the rubble. It will be washed with water and removed dust.
- I filled in all the cement. I wait 3 minutes. If necessary, I change the angle of the pear.
- I filled up the 1st and 2nd buckets of sand. I am waiting. If the mixture is thick, add a little water.
- I pour out the 3rd bucket of sand.
FORUMHOUSE member 7profy shared the proven composition of concrete and the algorithm for pouring components into a concrete mixer.
I make concrete grade M250 in a 180 liter concrete mixer. Concrete composition by weight:
- cement M400 - 16 kg;
- river sand - 32 kg;
- crushed stone fraction 5-20 - 62 kg;
- water - 8 l.
- plasticizer - 250 ml.
Now, the same concrete volume in 8 liter buckets:
- cement - 1.5 buckets;
- sand - 3 buckets;
- crushed stone - 5 buckets;
- water - 1 bucket;
- plasticizer - 1 measuring cup.
I load the ingredients into the concrete mixer like this:
The mixture does not flow out of the pear. The output from one batch is up to 70 liters of concrete. The mixture is hard. Filled with a deep vibrator. If the crushed stone and sand are completely dry, then add 0.5 liters of water. If there is sand and gravel after rain, then I reduce 0.5-1.0 liters of water. If the mixture in the concrete mixer is overflowing and not overflowing, then there is enough water.
After experimenting, I came up with the following composition: 1 bucket of cement + half a bucket of water + 2 buckets of river sand + 3 buckets of crushed stone with a fraction of 5-20 mm. After gaining strength, the concrete rings when hit by a hammer. But without a plasticizer you cannot mix a rigid mixture. Take this into account!
We maintain proportions
Compliance with the correct proportions of components affects the quality of the solution and the strength of the product. Sand and cement are mixed together, then water is added, and crushed stone is added last. It is important to maintain consistency for a positive result. The composition is mixed until smooth.
Pedestrian paths
The pedestrian path does not need to withstand heavy loads. The proportion maintained for the mixture is as follows: 1 part cement, 2.5 - sand, 4 - crushed stone.
Automotive
The path for a car drive is loaded with increased weight, so the ratio of the components will change: 1 part cement, 1.5 sand, 2.5 crushed stone.
Garden
Such paths require the base to be poured with concrete. In this case, you can use gravel and apply the following ratio of components: 1 part cement, 9 parts sand, 1 part gravel.
Foundation
The base solution must be strong. Grade 400 is maintained in a ratio of 1 part cement, 3 parts sand, 5 parts crushed stone and half part water. The solution should mix well (with a little effort), but not drain. Remember: it is better to pour the foundation in warm weather, otherwise it is worth heating the water to prevent rapid setting.
Proven recipes for self-mixing concrete: print and use
When it is not possible to order a mixer with concrete, or you need to concrete structures of small volumes, self-mixing concrete comes to the rescue. The only question is how to cook it? At first glance, it seems that nothing is simpler. We take the “folk” proportion 1:3:5. That is, for one part cement, three parts sand and five parts crushed stone, add water “to taste.” Let's also pour some detergent into the concrete mixer. After all, everyone does it. And... voila, self-mixed concrete is ready. Do not hurry! Most often this leads to problems. The foundation filled with such self-mixing crumbles next year. The blind area cracks and the lintels burst. To prevent this from happening, read our article, which contains time-tested recipes for self-mixing concrete.
Mortar for garden paths: revealing the secrets and subtleties of its manufacture
A concrete path on a personal plot or near a private house is a practical and convenient solution. And if you make it with creativity and taste, it will also become a wonderful decorative element. Moreover, to cope with such work, it is not at all necessary to be an experienced builder.
Every home craftsman is quite capable of making a path and surrounding the area with a fence. And today we will tell you about the various intricacies of making paths, we will tell you what kind of solution to put the paste on, how to fill the product with a mixture with a mesh, in what proportions it is worth making a solution for concreting paths and much more.
Brands of concrete for paths and ingredient composition of the mixture
The mortar for concreting is selected according to the purpose of the path, the planned load on the surface, while the grade is the calculated value of the compressive strength of the concrete product, and the class is guaranteed. The most popular brands are M200, M250 and M300, which correspond to strength classes B-15, B-20 and B-22.5, respectively. It is recommended to observe the proportions of concrete components as shown in the table:
| Coating | Cement, part | Sand, part | Crushed stone, part |
| Garden paths | 1 | 9 | 1 |
| Pedestrian sidewalks | 1 | 2,5 | 4 |
| Roads | 1 | 1,5 | 2,5 |
Garden path solution
Product Features
In order for the finished concrete path to serve for a long time and not be pressed underfoot, care should be taken to properly prepare the base.
- Having previously drawn it on paper, mark the outline of the future path on the site using pegs and a stretched rope.
- Remove a layer of earth (twenty centimeters) and fill with crushed stone in a layer of ten to fifteen centimeters.
- Then they lay a special polymer material – geotextiles. It will give strength and prevent weeds from growing.
- The last layer is sand, which must be moistened (so that moisture from the concrete does not go into the ground) and compacted. The sand layer is four to five centimeters.
- Then formwork made of boards is placed along the edges of the path.
The solution, as a rule, is poured into molds, which can be of different designs: rectangular, polygonal, round, imitating natural stone. There are often molds made of polypropylene on sale, with which you can quickly make whole pieces of a path with a beautiful pattern.
The outer walls of this stencil, which can withstand at least a thousand pours, have a thickness of 6 millimeters, and the inner walls are 3 millimeters. Height – from 5 to 6 centimeters. It is equal to the thickness of the tile.
Read below to learn how to make a strong cement mortar (cement mortar) for a garden path and how to prepare concrete mortar for pouring.
Composition and structure
Ingredients
So, let's try to prepare a high-quality solution for the garden path at the dacha with our own hands. For the solution, classic materials are used - cement, sand, crushed stone and water. They must be of appropriate quality:
Recipe
Now let's talk about the recipe. It may be different. You can, for example, make a solution only from sand and cement (without using crushed stone). Or vary the ratio of ingredients. By the way, it is not advisable to purchase a ready-made solution. It may be of poor quality.
And here are the recipes:
- One part cement plus three parts sand plus water (you can add a little clay).
- One part cement plus three parts sand plus three parts crushed stone plus water.
- One part cement plus two parts sand plus two parts crushed stone plus water.
To give the desired shade, coloring pigments-additives can be added to the solution for garden paths. For example, the HLV brand. This pigment, produced in four main natural colors (red, green, yellow, brown), will require about 250 grams per 25 kilograms of dry cement.
The following video will talk about popular mistakes when making garden paths:
Manufacturing
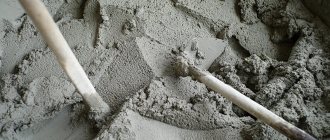
After measuring out the dry ingredients, mix them. You can do this in some clean container using a shovel or hoe. If you have a concrete mixer, then it is better, of course, to use its help. Water must be added little by little so that the finished mixture does not flow, but drips slowly (like thick sour cream from a spoon).
Having prepared the base as described above (removing the turf from above, pouring crushed stone, sand, laying geotextiles and making formwork), you can begin to create a path. The easiest way to do this is using a ready-made plastic mold. It is placed on damp compacted sand and the solution is poured into it. After twenty minutes, the mold can be carefully removed and the process repeated.
While the mixture has not hardened, you can decorate the path. By pressing, for example, pieces of tiles or pretty stones into its surface, laying them out in a beautiful pattern. To strengthen it, within two hours after pouring the solution, you can cover it with cement laitance using a brush.
Recipes for filling a concrete mixer
According to the rules, in order to prepare high-quality self-mixed concrete, you need to find the voids and moisture content of the sand and crushed stone that was brought to your site. Calculate the bulk density of cement and the density of cement mortar. Tell me honestly, who will do this on a real construction site? Especially if hired workers are building your house. Exit - print this article and use it as a cheat sheet when making self-mixed concrete.
I want to prepare self-mixing concrete. There is a 132 liter concrete mixer. I want to know the proportions of the concrete mixture for pouring the foundation for one batch, so as not to overload the concrete mixer.
FORUMHOUSE participants answer the question.
I am making a columnar foundation for a bathhouse. Concrete mixer for 130 l. Mixture proportions:
- 2.5 shovels of cement grade M500;
- 6 shovels of sand;
- 8 shovel granite crushed stone of fraction 5-20;
- some water.
When I trimmed the pillars to the level, the concrete was hardly sawed by a powerful grinder with a diamond blade with a diameter of 230 mm.
I concreted fence posts. The concrete was mixed like this:
- 1 bucket of cement M500;
- 2.5 buckets of sand;
- 4 buckets of crushed stone fraction 5-20;
- Less than a bucket of water.
I took the components of the mixture from the table below.
I came to a conclusion for myself: don’t skimp on mixing cement yourself! My proportions:
The concrete turns out to be so strong that it is difficult for a hammer drill to pick it up.
When making self-mixed concrete, the most important factor is the water-cement ratio! W/C is the proportion of the weight of cement and water used to prepare the concrete mixture. Along with the grade of cement, W/C determines the grade of concrete at the output. The water-cement ratio for the concrete mixture is given in the table below.
Another question was asked by a user with the nickname Serejik1987. He has a 155 liter concrete mixer. How to prepare M200 concrete in it, and how many buckets of components to fill for a full load.
If you measure in buckets, then it is recommended to fill a pear of this volume: 1: 2.8: 4.8, (cement-sand-crushed stone), but I recommend a different proportion - 1: 2: 3. As a last resort - 1:2.5:4. The main thing is not to overfill the water! To make the mixture workable, add a plasticizer.
But I’m wondering why, in a higher proportion, reduce the amount of aggregates? What does this give?
It is difficult to turn a mixture with a water-cement ratio less than 0.6 in a gravity concrete mixer. Rigid mixtures are processed using forced-action concrete mixers, but they are expensive. So you have to specifically choose proportions with a high cement content in order to end up with a foundation that will not fall apart in a few years.
And I prepare self-mix according to the recipe of the guys who make concrete pools. Proportions of concrete M350, on granite crushed stone of fraction 5-20:
- Cement M400 – 20 l or 25 kg.
- River sand, washed - 30 l or 42 kg.
- Crushed stone - 50 l or 67.5 kg.
- Water – 12 l.
- Superplasticizer – 0.2 l.
Previously, I poured the foundation in a ratio of 1:3:5, now I would do it myself in a ratio of 1.5:3:5.
Do it yourself
Coloring composition
Decorative (colored) concrete on the path looks elegant and beautiful.
- To create it, you can buy ready-made pigment and introduce it at the time of preparing the solution.
- You can also add a little acrylic paint.
- Another option: rub the wet concrete surface with a mixture of cement (two parts) and dye (one part). This is called ironing: To make a path yellow, for example, ocher is added to cement.
- The red color comes from one portion of white cement, two portions of sand and half a portion of umber.
- A green tint is achieved by adding glauconitic green to sand and white cement.
- Black - taking one part of gray cement, one and a half parts of sand and 0.15 parts of ordinary soot.
If, when pouring a garden path, you need to trim it, the following video will help you with this:
Supplements
We have already told you how to make a standard solution.
- Now we should mention the additives that are introduced, in particular, to increase strength (for example, propylene-based fiber).
- Special components designed specifically for concrete garden paths (HLV-15) are also sold.
- If there is a desire to imitate natural stone, then stone chips and an appropriate dye are added to the solution for credibility.
In addition, the surface of the finished path can also be treated with a hardening compound.
- Impregnation made on the basis of wax and synthetic resins gives a good result. It is applied with a brush or spray.
- Coating with liquid glass, in addition to significantly increasing strength, gives a very beautiful smooth surface.
Forms for paths
Ready-made plastic molds are convenient, but they require certain costs. If you want to save money on this, then it is quite possible to make these elements yourself. For example, like this:
- Let's place thin boards on edge directly in the formwork, using them to create partitions in the right places and get the desired pattern. We use a “half-tree” connection.
- Let's put together a rectangular frame from wooden blocks. The bottom (which does not need to be secured) is a sheet of metal or plywood. The plywood is placed on the table and the frame is placed on top. At the bottom (if there is such an idea) a mosaic of pebbles or tiles is laid. Then the solution is poured in two portions, between which a metal reinforcing mesh is placed.
- To obtain round tiles, take a plastic basin. To make it easier to remove the mold, we put plastic film on the bottom.
- To make a template to imitate natural stone, you will need the stone itself (cobblestone, granite, marble) and sculptural plasticine. The plasticine mass is softened (dipped in a bag in hot water) and a stone is pressed into it. Then wooden formwork is made around it. Pour in the solution.
- You can make templates from hoops from old barrels. They are bent as needed. And some craftsmen use tin cans by removing the bottom and connecting them like a honeycomb.
The following video talks about the advantages of a polypropylene mold for a garden path, and how to work with it:
Our advantages
Manufacturer with reputation and reliable production.
More than 2000 satisfied customers. RBU (Germany) > 80 m3/hour each.
Guarantee of high quality raw materials and products
Control is carried out at all stages by our own certified laboratory
Accuracy and timeliness of deliveries.
Weight control. Professional logistics.
Uninterrupted and convenient delivery to any area. Pickup.
Favorable geographical location of production sites.
Favorable prices. Any form of payment.
Without intermediaries. Discounts up to 20% on purchase volume.
High level of service and 100% mutually beneficial cooperation.
Free consultations and visits. We build long-term relationships.
How to prepare the “correct” solution with your own hands for a garden path
It turns out that one of the most important factors influencing the quality of your future garden path to the dacha is a cement mortar that is properly prepared with your own hands.
It is highly not recommended to buy ready-made cement mortar in the store for construction work on your site. There are several reasons that should convince you to start preparing cement mortar with your own hands.
These are the reasons:
- The finished solution will not be able to give you the necessary information about its quality and composition, which can subsequently have a detrimental effect on the condition of your garden path;
- The solution from the store requires immediate use. Since it hardens quickly (this is a property of any cement mortar), you will have to involve several people to lay your path and at the same time provide each with a form for creating a garden path.
If we have convinced you of making your own cement mortar, which you can slowly prepare in small portions, then you just need to know what tools you will need to acquire for these construction works:
- Dry cement;
- Regular sand (preferably river sand);
- Water;
- A concrete mixer (the best option), or a special trough and a drill with an attachment;
- Shovel and hoe.
For your convenience, we present a table of clay-cement mortars:
Cement: clay: sand
For each type of construction work, a specific brand of cement is used. To obtain the desired result, pay special attention to this factor and purchase exactly the brand of cement indicated in this table. An indicator of the quality of cement is its rapid drying and durability in use.
Aluminous cement is very popular because it has such important properties as heat resistance, moisture resistance and quick drying.
Also worthy of your attention are the numerous brands of Portland cement present on the market, which are able to satisfy any buyer with their characteristics - drying speed and strength.
To understand. What brands of cement are the highest quality? Pay attention to the labeling indicated on the packaging. The numbers 500-600 will tell you that you have the highest quality cement in front of you. Medium quality varieties include M300 and M400; everything below M300 has the poorest quality and low drying speed.
It is difficult for an inexperienced builder to understand the many additional markings of cement; a sales consultant can help him with this; here are just a few explanations as an example:
- Cement marked PC D0 or M D0 is Portland cement that does not contain any additional additives;
- The marking on the package D20 will tell you about the presence of 20% additives in the cement;
- The big letter B will tell you that this is quick-drying cement.
If you set a goal, you can easily remember all this and understand it in detail, but this is... IF!
The color of cement can also tell about its quality. The darker the color, the higher the quality of the material!
Let's pay some attention to one more material that will make up the solution for the garden path. Attention – this is an essential component of the solution, SAND.
Sand can be fine, medium and coarse. Sand of medium fraction is best suited, as it will not absorb excess moisture and will give the path the necessary smoothness and uniformity.
Before use, clean your sand; there should be no debris in it - this will affect the quality of the cement mortar. If necessary, the sand can be sifted, washed and dried.
What should be the ratio of all the components of the cement mortar in order for the garden path to acquire the strength necessary for the upcoming loads?
As you understand, it is not enough just to purchase quality material. In order for the original product to have all the necessary characteristics, we need to KNOW how much and what needs to be poured and poured in order to give the original product the required strength and quality.
Every owner of a personal plot has a very important device - a BUCKET, and we will use it as a measuring device.
In front of you is a certain container (a trough or a concrete mixer), pour one bucket of cement and three sand into it, mix everything thoroughly. Water should be poured in small portions and stirring constantly. When the consistency of the solution thickens, but still remains fluid, the solution for the paths is ready for use!
Now you know exactly all the components of the resulting solution and can safely judge its quality - which could not be said about purchased material! And since the master is confident in the quality of the material, it means that work at the dacha can be done easily and at the right pace.
Advantages of paths in the country and not only
The modern building materials market offers a whole range of materials for the construction of garden paths. But cement, or rather concrete, is the most in demand. It has an affordable price , while being characterized by strength and durability , resistance to moisture, frost and mechanical stress.
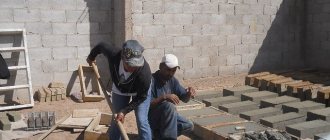
But the most important advantage is the ability to independently create a track of any configuration. The path can last for more than a dozen years, provided that a number of requirements are met. The advantages ensure the popularity of concrete bumpy paths in the design of summer cottages and garden plots. Their demand is also due to the combination of ease of manufacture and original appearance. The path is suitable for decorating any landscape. The finished coating can withstand increased loads. The process includes several stages. Work with cement can be done by one person, but it will be more convenient to involve assistants.
Making a concrete path with your own hands. Step-by-step instruction
Let's take a step-by-step look at how to make a concrete path.
Step 1. Designing the tracks
Before you begin the process of making a track, you need to choose a location and make preliminary calculations in order to do everything correctly.
Think carefully about where the paths will lie, what shape and design they will have:
Choose places for paths where traffic has already naturally formed.
In a small area, concrete paths may be narrow, but if the area allows, it is advisable to design a width of at least 60–80 cm.
Decide whether curbs will be used. If you decide to do without them, the path should be slightly raised above the soil level.
You should not lay concrete paths under large trees; their roots can damage the coating over time, and water dripping from the crowns will create conditions favorable for concrete corrosion.
Avoid installing paths above communications; this may make them difficult to repair.
Should I use curbs?
For paving stone paths, curbs are necessary. In the case of concrete pavement, there is no clear answer to this question.
beautiful smooth edge of the path;
the edges of the path do not crumble or crumble;
protection against subsidence;
reduction in the volume of land work.
The disadvantages of curbs are that they increase the cost and complicate the work.
The next step is marking.
Step 2. Marking the tracks
Having decided on the location, width and configuration of future paths, proceed to marking.
In order to prevent the appearance of puddles on the path, a slope must be provided. It is enough to make a slope of 2 mm for each meter of the path. The slope across the path is especially important, but it is also advisable to provide it in the longitudinal direction. Direct the flow towards the natural decrease in the relief so that the water does not stagnate; do not divert water towards buildings, especially if the path is adjacent to the wall of the house.
To determine the level, use a level or a level with which marks are set.
Drive pegs along the perimeter of the path every 3–5 m and always in the corners.
Pull the twine or fishing line along the marks.
Step 3. Preparatory work
After the paths are marked, the preparatory work phase begins.
At this stage, curbs are installed, if they will be used, or formwork is constructed.
How curbs are installed:
Grooves are dug along the edges of the path with a shovel.
Concrete solution is poured into the bottom of the grooves.
Curbs are installed on the concrete and compacted by tapping with rubber or wooden milk. The upper edge of the borders is oriented along the stretched fishing line.
Using the fishing line, we align the inner edge of the curb.
Installation of formwork and sand “cushion”
If curbs are not used, formwork is installed:
Dig a trench along the width of the path, 15–20 cm deep if the path is pedestrian, or 20–40 cm for a path along which vehicles will travel, or for a path on soft ground.
Compact the soil with a tamper or spill it with water several times and allow it to dry.
For formwork, boards 20–30 cm thick are used (one edge of an unedged board needs to be trimmed) or thick plywood (10 mm), cut into strips 15–20 cm wide. The upper edge of the formwork is aligned with a stretched fishing line. To strengthen the formwork, you can fill it with earth from the outside.
The use of plywood has its advantages and disadvantages. Plywood bends easily, allowing you to give the path a smooth shape, but it is less stable than a board, so the pegs will have to be driven in more often.
Every 1.5–2.5 m of the path it is necessary to install transverse partitions made of wood, metal or glass. Thus, concrete will be poured in sections, and temperature-expansion joints will remain between the slabs, compensating for seasonal loads. If you plan to reinforce the path, partitions can be made less frequently.
The formwork is lubricated with detergent or waste so that it can be easily removed later.
The base of the path is laid on top of the compacted soil - geogrid or geotextile is laid and sand or sand-gravel mixture is poured. Sand acts as a “cushion” that reduces concrete deformation and has drainage functions, and a textile layer is necessary to prevent sand from getting into the soil.
Sand or ASG is poured a little more than half the depth of the trench. Another option is to pour a layer of crushed stone on top of the sand layer.
When choosing crushed stone for a path, do not forget that you need to get an even surface. Large crushed stone complicates this task, so choose material with a fraction of 5–20 mm.
Reinforcement
To strengthen the paths, especially those that will be subjected to heavy loads, and prevent cracks, it is necessary to reinforce them with a metal mesh 3–5 mm thick and a cell size of 50–100 mm. At expansion joints, the mesh is separated.
The mesh is laid so that the largest possible layer of concrete, at least 3 cm thick, covers it on top. This is necessary to protect it from corrosion.
Video: Path 2 years later
In private construction, reinforcement is not always used for small garden paths. It can be replaced by adding fiber fiber to the concrete solution. In the case where reinforcement is performed, the addition of fiber fiber provides the track with additional strength.
Step 4. Preparing the concrete mixture
How to pour a concrete path with your own hands?
To fill the paths, use cement-based mixtures of grade 32.5-42.5 (according to the old marking M400-M500).
The composition of the mixture can be different, but usually the recommended proportion is: for one part of cement, 2-3 parts of sand and 2-4 parts of crushed stone. Water is taken in such quantity as to obtain a thick mixture (about 1 part).
How to prepare a concrete mixture
The concrete solution is mixed with a concrete mixer or construction mixer in a suitable container. Usually, large aggregates are poured into a concrete mixer, then cement, and only after that water is poured, but some home craftsmen prefer to pour water first, then pour in aggregates and only finally cement, since in small concrete mixers this method produces a more homogeneous solution.
When pouring paths, a very thick solution is prepared, while in home concreting, due to the lack of professional tools, vibration treatment of concrete is usually not available. Concrete of the required consistency may lie loosely, with voids, which will contribute to the low operational strength of the coating. Therefore, in conditions of self-concreting without the use of special equipment, a critical step is adding a plasticizer to the concrete mixture. It reduces the amount of water in the mixture while increasing the workability and workability of the mortar and the strength of the finished concrete. Some plasticizers have a complex effect, providing water-repellent, water-reducing and other properties of concrete. Liquid plasticizer can be added to the mixing water or directly to the concrete during mixing.
Video: DIY garden path
Step 5. Laying concrete
The concrete mixture must be laid in the formwork in a layer of 4–6 cm for pedestrian paths and 6–10 cm for paths that will be used for access and parking of vehicles.
A polyethylene film, foamed polyethylene or geotextile is laid on the leveled ASG, and concrete is poured on top.
If it is impossible to fill the solution in one day, interrupt work on the expansion joint.
The concrete is leveled with a board or trowel. The top layer is well leveled by imitation vibration, performed using a bar.
At the same time, cement laitance is released on the surface.
Step 6. Concrete care
The concrete solution poured into the mold does not just dry out: it hardens. In order for a mixture of cement, ASG and water to become a durable artificial stone, it is necessary that it undergo hydration reactions, during which new chemical compounds are formed. For these reactions to occur successfully, certain conditions are required: air temperature 18–20 ° C and high humidity.
When concrete dries, hydration reactions stop, which negatively affects the strength of the finished product.
Therefore, after 3–4 hours, when all the beacons have been removed, the concrete is covered with film. In hot, dry weather, it is advisable to water the concrete several times during the first day.
After 5–7 days, you can remove the formwork and apply a small load, but the concrete will reach its final strength no earlier than after 4 weeks.
The optimal time for pouring a concrete path is late spring or early autumn, when the air temperature is above zero, but not too hot. If it is necessary to make a path in conditions of low temperatures (5° C and below), use anti-frost additives for concrete.
Pouring technology
Preparing the base for a garden path
First of all, a sketch is made on paper, and then the marking of the future path is carried out directly on the territory and fixed with a cord and pegs. After which the top layer of soil is removed. Next, formwork is constructed; for this purpose, self-tapping screws and a board as wide as the future height of the sidewalk are used. The outer edges are secured with pegs and additionally secured with transverse jumpers. For waterproofing, the bottom is covered with polyethylene film. It would be useful to create expansion joints; they are created by dividing the formwork space into sections with a lubricated steel sheet for the purpose of free removal from the hardening solution.
Reinforcement
To increase the strength of the base, a metal structure is fixed to the middle of the formwork on supports. It can be wire, pipe, chain-link mesh or welded from thick rods. The optimal cell size is 10x10 cm. The reinforcement not only increases the rigidity of the base and prevents concrete cracking, while increasing its service life, but also reduces the thickness of the pouring layer, reducing the amount of work and materials.
Filling the track
To fill the base for a garden path, you need to additionally make a solution of 1 part cement, 3 parts sand, 5 parts crushed stone, and then add 0.5 parts water. To impart fluidity and viscosity, additives and plasticizers are used, which are added strictly according to the instructions. The main prepared solution is placed into the formwork using a trowel or spatula, achieving uniform compaction by tapping and piercing the mixture. The surface is leveled according to the rule; in addition, a slight slope is formed for water drainage. After pouring is completed, the entire structure is covered with polyethylene. Decorating with drawings can begin after a day, after another two - the path will dry, and after 5 days you can remove the formwork.
Processing and decoration
The daily solution can be decorated with a pattern, which is applied with a sharp object, or roughened using a stiff brush. Decorate with decorative embossing with a special stamp with various ornaments or images of animals, birds, plants and others, or create an imitation of brick, tile or stone. An already dry path can be polished, painted or lined with marble or mosaic. Impregnations not only add shine, but also, by filling all the voids of concrete, create additional protection from moisture and wind.
Source
Decorative concrete
A simple concrete path is a practical and beautiful structure, but sometimes, in accordance with the author's intention, something more elegant is required, for example, introducing color or imitating a paving stone path.
In these cases, use one of the many decorating techniques that you can use yourself. By combining them, you can get interesting decorative effects.
On construction markets you can purchase special pigments of any color for concrete.
Ordinary cement has a gray tint, which remains even when tinted, giving any color a gray tint. To get bright colors, use special super white cement.
To save pigment and expensive white cement, you can prepare 2 types of mortar and pour it in two layers: first regular, and colored on top. The interval between fillings is no more than 20 minutes.
You can tint concrete not only in bulk, but also on the surface. To do this, you can use a colored concrete fixer. It is scattered over the surface of freshly laid concrete and smoothed.
Then, to get an even tone without bald spots, scatter a little more fixative and smooth it out again. The top layer of concrete is thus painted in the chosen color, but has a grayish tint and looks very natural.
Inlay
A good way to decorate a concrete walkway is to inlay it with pieces of colored tiles or pebbles pressed into the surface of the freshly laid concrete. You can lay out decorative elements randomly or, in accordance with the idea, in the form of an ornament.
Relief
Freshly laid concrete can be given a relief that imitates paving stones, stone, wood or other texture by stamping. Forms for stamping are soft and hard. The stamps are applied to the concrete and pressed, and then removed and the design is sprinkled with sand; a relief pattern is obtained.
You can even apply a design to fresh concrete with your finger or a spatula.
After this, the “seams” are sprinkled with sand and the concrete is allowed to set. The result is a relief surface.
Impregnation can be applied over the relief, which can give the surface, for example, gloss, the appearance of wet stone and other decorative effects.
Concrete paths can be made with your own hands, and they can be not only a utilitarian, but also a decorative structure. Using techniques for decorating concrete, you can create a garden path that is not inferior in aesthetic qualities to paving stone structures, saving time and money. In the absence of special equipment for processing concrete, the use of special additives for concrete, primarily plasticizers and fiberglass, and, if necessary, antifreeze additives and impregnations for concrete, becomes of great importance.
conclusions
In the article we touched on the main issues related to self-mixing concrete. Now you can prepare it yourself and, taking a proportion of 1:2:3 (cement-sand-crushed stone fractions 5-20) with a W/C of 0.6 - 0.65, you can’t go wrong with strength. In conclusion, one more piece of advice from FORUMHOUSE:
This “folk” method is practiced when laying facing bricks, where high strength is not required from the mortar, but it is completely unsuitable for concrete. To increase the mobility of rigid concrete, use plasticizers. They are inexpensive, and you will see the effect immediately and without compromising the quality of concrete in the long term.
Everything you need to know about self-mixed concrete is collected in one topic: Do-it-yourself concrete: calculation of proportions, reinforcement, formwork.
- Formwork: which design is better or, How and from what to make formwork for the foundation so that it does not burst when pouring concrete.
- Are you tired of efflorescence on your brickwork? Find out why they appear, how to remove efflorescence from facing bricks, and what the consequences of ignoring this problem will be.
- We make an armored belt in a house made of aerated concrete. FORUMHOUSE offers a recipe for a formwork “pie” for making an armored belt in an aerated concrete house.
Source
Garden concrete path
Many people make paths in their gardens from gravel, brick, paving slabs, wood and other similar materials themselves. Some things are difficult, some require a lot of money, and some are very cheap and take little time.
Concrete is a relatively inexpensive material. It makes durable, beautiful paths. If you get your hands on a special plastic mold, and you can buy it at a construction supermarket or order it from an online store, then you won’t spend much time creating such a path. But the result... Beauty!
Our concrete pumps for concrete supply
Truck-mounted concrete pump – 16 m
Price per shift (8 hours) of work, including VAT, 18% 14 000 ₽
Price per hour of work, including VAT, 18% 1 800 ₽
Truck concrete pump 18 m
Price per shift (8 hours) of work, including VAT, 18% 16 000 ₽
Price per hour of work, including VAT, 18% 2 000 ₽
Truck concrete pump 28 m
Price per shift (8 hours) of work, including VAT, 18% 18 000 ₽
Price per hour of work, including VAT, 18% 2 250 ₽
Truck concrete pump 32 m
Price per shift (8 hours) of work, including VAT, 18% 19 500 ₽
Price per hour of work, including VAT, 18% 2 440 ₽
Truck concrete pump 36 m
Price per shift (8 hours) of work, including VAT, 18% 22 000 ₽
Price per hour of work, including VAT, 18% 2 750 ₽
Truck concrete pump 42 m
Price per shift (8 hours) of work, including VAT, 18% 30 000 ₽
Price per hour of work, including VAT, 18% 3 750 ₽
Truck-mounted concrete pump 46 m
Price per shift (8 hours) of work, including VAT, 18% 35 000 ₽
Price per hour of work, including VAT, 18% 4 375 ₽
Truck concrete pump 52 m
Price per shift (8 hours) of work, including VAT, 18% 38 000 ₽
Price per hour of work, including VAT, 18% 4 750 ₽
Truck-mounted concrete pump 56 m
Price per shift (8 hours) of work, including VAT, 18% 46 000 ₽
Price per hour of work, including VAT, 18% 5 750 ₽
Truck concrete pump 60 m
Price per shift (8 hours) of work, including VAT, 18% 51 000 ₽
Price per hour of work, including VAT, 18% 6 375 ₽
Truck concrete pump 62 m
Price per shift (8 hours) of work, including VAT, 18% 53 000 ₽
Price per hour of work, including VAT, 18% 6 625 ₽
* The minimum operating time of a concrete pump is 8 hours (7+1) * Rent a concrete pump, the price is within 30 km. from Moscow
Necessary materials and tools for making a concrete path with your own hands:
- Plastic form. Can be of different sizes and shapes;
- Sand;
- Gravel;
- Cement;
- Water;
- Personal protective equipment: gloves, respirator;
- Level;
- Long string, chalk or lime;
- Manual rammer;
- Shovel;
- A bucket, another container or a sheet of steel - for mixing cement mortar;
- A drill with a nozzle for mixing cement mortar or a shovel;
- Master OK;
- Machine oil. Can be recycled;
- Brush or old toothbrush;
- Hard brush.
You can prepare the solution using the “old-fashioned method”. Place a 2 x 1 m sheet of galvanized steel on the ground, pour in all the ingredients for the solution and mix thoroughly with a shovel until the required consistency is obtained.
The advantage of this method is that you can prepare the solution in the volume required to fill the entire mold in one go, instead of several batches in a bucket.
Which sand is best for paths?
When paving paths, sand with a grain size of 0-7 mm is used, which serves as a base for stone or tiles. The sand base layer should be 5-7 cm thick and carefully leveled.
Interesting materials:
Why does a cyst form on the ovary? Why does soot form in a pipe? Why do cysts form? Why do stretch marks form? Why is communication important for every person? Why do peeled potatoes turn dark when exposed to air? Why do cucumbers turn yellow and fall off? Why did Onegin accept Lensky's challenge to a duel? Why do cherry plum fruits fall? Why is the gum under the crown swollen?
Making a concrete path
Preparation of the bridgehead
There is no need to particularly level and ensure that the base under the path is strictly horizontal. It's even better if it has some slope. In winter, this will allow water to drain from it and not freeze in the spaces between the stones.
What you should pay attention to is the hardness or strength of the base. If the concrete path runs along a well-trodden path, this is normal - the soil underneath is moderately compacted. All that remains is to remove the top layer of turf - about 5 cm - and fill it with gravel or sand. To level out unevenness, you will have to remove a little more than 5 cm of soil in the right places, as necessary.
Outline the contours of the future concrete path with a stretched cord. This can be done with chalk or lime on the soil or grass itself.
Now you can start digging.
You should end up with something like this.
Fill the dug trench with gravel and sand, maintaining the desired layer thickness. Level the laid gravel layer, check the slope with a level. Take a compactor and compact the path well.
Where there is not enough gravel, add more and continue compacting. In this case, we used a simple log with comfortable “handles” and a flat base.
Water the compacted trench with water.
Measuring the volume of a mold
Forms for concrete paths come in different shapes. Thanks to one, you can make a path from individual pebbles. It can be supplemented with a low border, but this is not necessary.
In our case, we used a form that involves casting slabs with a solid base and imitation stones on top of it. In addition, the volume of forms may differ. Therefore, it must be measured before preparing the solution.
Pour sand into a plastic mold. The amount of sand that goes into it is approximately the same amount that will be needed to prepare a solution for pouring one mold.
In this case, buckets with tags come to the rescue.
Thus, you will find out the required volume of solution in liters for pouring one element of a concrete path. But you can measure with buckets, scoops or shovels - whatever suits you. For example, to get a solution in a ratio of 3 to 1 (sand and cement), you need 27 liters of sand, 9 liters of cement and approximately 9 liters of water.
The amount of sand for your mold may vary as manufacturers make molds of different sizes. The amount of water also depends on the moisture content of the sand itself. The main thing is that the solution is moderately fluid (like thick sour cream). Only in this consistency will it fill the sharp corners of the mold. In addition, it will be easier for you to work with it.
Once you know how much sand you need, you will also know the required amount of cement. To do this, divide the resulting number (liters) by three, and you will find out the amount of cement for one mold.
You can immediately roughly calculate the amount of sand and cement or concrete mixture to make the entire path with your own hands.
Preparing the form
To ensure that in the future the mold adheres well to the hardening solution, it is recommended to lubricate it with machine oil. Apply oil to an old toothbrush or brush and coat the inside of the mold.
Make sure that the sharp and hard-to-reach corners of the mold are greased with oil.
Preparation of cement mortar
Knowing the amount of ingredients needed, decide how it will be convenient for you to prepare the solution: the “old-fashioned method” or a drill with an attachment.
Remember that after mixing all the ingredients of the solution, they need to be given a few minutes of rest to “ripen”. Then you need to mix everything again and then pour it into the mold.
Filling the mold with cement mortar
Place the form where you want the beginning of the concrete path to be. Press it in lightly and level it, checking with a level. Pour the cement mortar into the mold compartments and, using a trowel or spatula, push the mixture into the corners of the mold, trying to get rid of possible voids in hard-to-reach places. The solution should flow into all the “cracks”.
As it fills the corners of the mold, the overall height of the solution in the mold will decrease. Therefore, you need to add the solution to the mold from time to time until you use the entire portion.
Removing the mold
Depending on how thin your solution is, you will need to wait more or less time before lifting the mold.
After about 20-40 minutes, the mold can be carefully lifted and removed from the solution. During this time, you can prepare the next portion of the concrete mixture for the path. If you have several identical shapes, the task will be much easier.
Move the mold to a new place, next to the first plate, check the position with a level. Prepare the next portion and pour into the mold.
You must not step on the prepared path for at least a day. As it dries out, you can water it several times on hot days.
Finishing details
Once the path dries, fill the seams between the “stones” with sand. Sprinkle the sand on top of the path and spread it out by rubbing it in with a stiff brush or squeegee.
All you have to do is sweep the sand and... you're done!
Don’t worry if the concrete mix path turns out to be a little uneven in some places - this way its “stones” will seem more natural.
How to make it inexpensively and beautifully?
Nowadays it’s not difficult to find everything you need to engage in individual creativity. In stores you can buy convenient plastic stencil molds for making tiles. You prepare a cement mortar, pour it into a mold, and after a few days you get tiles of the specified color, imitating the factory equivalent for the sidewalk.
Plain, colored, variegated paths look great in the garden, between flowering trees and flower beds, and on a green, neatly trimmed lawn, and among vegetable beds
Paths made from strong concrete slabs can last for decades - in terms of strength, they are not inferior to the foundation of a building or the ceiling of a small bridge. They are convenient and functional - and all thanks to properly prepared cement mortar.
A solid solid form costs about 1,200 rubles, and a lightweight version - a stencil with cells of various shapes - is much cheaper. Depending on the material, its price ranges from 50 to 250 rubles
Many craftsmen prefer their own creations to the purchased version, so they make their own molds using wooden blocks or a metal profile.
From short planed bars you can make a rectangle, square, lattice or small hexagon, which will serve as a mold for pouring cement mortar
Concrete in paving garden areas
Concrete is one of the popular materials for paving garden paths, patios, creating driveways and other elements for both practical and decorative purposes.
The advantages of concrete pavement are high strength, durability, and the ability to give it any geometric shape. But concrete also has its drawbacks: firstly, the process of making concrete is quite labor-intensive and takes a lot of time, and secondly, the concrete coating can only be used 2-3 days after laying, which causes some inconvenience to the owners of the site. However, many owners prefer to use concrete elements. Among the many arguments in their favor is the low cost of the material.
Order concrete from the manufacturer
We supply ready-mix concrete optimized for pouring sidewalks, park paths and parking garages. The production of the mixture in industrial conditions ensures careful adherence to the proportional ratio of binder and filling components. The physical and technical characteristics of the concrete composition are strictly regulated. Prompt transportation of the finished mixture using standard concrete mixer trucks eliminates the risk of moisture loss.
We are ready to deliver the required volume of concrete mixture to the site any day of the week at a convenient time of day. Personnel from an accredited laboratory monitor the accuracy of component dosages and thorough mixing of ingredients. When ordering a ready-mix, the required grade and volume of concrete is specified, and the need for additional equipment and the convenience of access roads to the site are determined.
Message sent, thank you! We will contact you shortly!