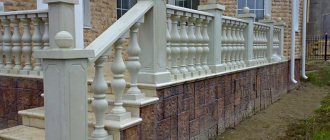
The overall design of a large house is difficult to imagine without some small architectural forms. Concrete balusters, inscribed in elegant flights of stairs, are striking representatives of design creativity. They provide a certain charm and style to the entire structure.
Balusters are shaped posts that are designed to support railings.
Concrete balusters are offered ready-made in a very wide range. You can choose designs to suit every taste and for a variety of purposes, or you can do it yourself. Their appearance attracts the eye and provides the first impression.
Features of balusters
In general, balusters are vertical column-type structures used as supports for railings of fencing systems. They are mainly installed for fencing stairs, balconies, terraces, roofs and other structures. In addition to the fact that they must provide a reliable basis for the railing, their task is to prevent a person from falling from a height (safety functions) and decorative functions. Based on the purpose of balusters, we can distinguish the following properties:
Arrangement of balusters.
- sufficient stability;
- mechanical strength;
- resistance to external factors (precipitation, temperature, etc.);
- decorative appeal (shape, color, surface quality).
In the design of a baluster, three elements can be distinguished: the base, the central (decorative) section and the railing support. The base, or lower part of the column, is intended for attachment to the main structure (steps, platform, etc.), usually through an intermediate element - sub-balusters. This element should ensure the stability of the post and the reliability of the fastening. The central section is the largest element, providing decoration and security functions. The railing (handrail) support, or upper part, is intended for fastening the railing of the fence.
The size of the balusters depends on the purpose of the fence. As a rule, handrails are installed on them, and their height should be comfortable for the placement of hands, about 80-100 cm. The distance between the posts is normalized based on safety requirements, no more than 15 cm. The shape and thickness of the central part is determined mainly by the design project. The most widespread is the round cross-section of the pillar, and along its length it can have the most bizarre shape.
How to attach balusters to the floor and steps
Balusters or railing posts can be intermediate or main. The latter are also called support pillars. They usually have a larger cross-section and may look different (square instead of rounded posts), although the style remains the same. Main balusters are located at the beginning and end of the stairs, on flights, and at turning points. On long spans they install even more ones - every three to five steps. It all depends on the design of the stairs.
The structure of the stairs and the method of fastening with overlays
Main balusters carry a greater load, so they are secured with more powerful fasteners. At the same time, more fixation points are made and additional clamps are used.
How to attach balusters to steps and railings: through fastening of a baluster through a step
One of the simplest ways is to attach the baluster to the step using a pin through it. You can use regular or plumbing studs. A plumbing stud may be called a screw. Sometimes they add “combined”. This is all because this fastener has two types of threads: at one end it is metric (for a nut), at the other end it is self-tapping with a sharp peak (similar to a self-tapping screw).
How the balusters are attached: through the step all the way through
A through hole is drilled into the steps and the selected type of fastener is inserted into it. If a plumbing stud is chosen, the self-tapping thread is turned upward. At the bottom of the step, a hole of a larger diameter is drilled under the washer so that the washer and nut can fit in. The holes can be covered with covers, but they must be easy to remove. After a while you will have to tighten the nuts, as the wood gets crushed. The baluster is screwed onto the installed screw. To prevent the wood from cracking, pre-drill holes in the center of the balusters.
To make the balusters wobble less, their connection with the step is coated with glue.
The diameter of the studs for fastening balusters is 6-8 mm, for posts - 10-12 mm. Length - the longer the better. In some options, a continuous embedded pin is made that goes right through the entire rack.
The sleeve is glued into the hole in the baluster or in the steps (two different types of fastening)
When using a regular pin, a hole is made in the baluster and a threaded sleeve is glued into it. In the photo above, the opposite is done - the bushing is glued into the baluster. This is also possible, but this is a different type of fastening, although the principle is the same. When installing, the baluster is screwed on; the thread of the pin must match the internal thread of the bushing. This connection is more reliable, since the lateral load falls not on the thread, but on the more massive and smooth walls of the sleeve. As a result, less wood is crushed. Don't know how to attach balusters to steps and railings so that they don't wobble too much? Try this connection. But don’t forget to glue the joint between the baluster and the handrails and the string/step with good glue.
Features of concrete balusters
Balusters can be made from a variety of materials (marble, granite, gypsum, wood, etc.), but quite often they are made of concrete. Despite the apparent lack of solidity of concrete balusters, their appearance can acquire a very rich, sophisticated look. This is due to the use of decorated concrete, in particular concrete marble or granite.
Concrete balusters are highly durable and durable.
In general, a concrete baluster has a number of advantages:
- high strength;
- manufacturability;
- frost resistance;
- waterproof;
- weather resistance;
- low cost;
- possibility of making it yourself.
An important property is the ability to produce identical figures of a sufficient degree of complexity in the manufacture of the desired mold. The main disadvantages are low impact strength, insufficient smoothness (lack of gloss) of the surface, lower durability compared to marble or granite.
Structurally, a concrete baluster contains a reinforcing element around which a hardened concrete mass is located. The fittings have exits at the top and bottom for mounting to the base and fastening the railings. All 3 parts of the pillar are usually made simultaneously by pouring concrete mortar into the mold.
How to attach balusters to steps and railings
There are many staircase designs and methods for installing balusters, but when attaching railing posts and support posts, only two types of fasteners are used:
- Wooden dowels or dowels.
- Metal studs or pins and bushings.
Neither option is ideal. Some people choose wooden dowels or dowels. But over time, the wood dries out and cracks, which leads to the fact that the railings begin to wobble. The option with a metal fastener is no better: the wood is crushed, so the connection also becomes loose. With some fastening methods, it is possible to tighten the studs/screws little by little, restoring stability to the railing.
Installing railings and balusters with your own hands is possible. You need to know how to assemble knots
Self-tapping screws can only be used for fastening balusters as additional fasteners. The head of self-tapping screws often breaks off, so this is not an option for stairs. Such fasteners are used only for “baiting” or in addition to those listed above.
In any case, for greater stability, additional glue is used. Before attaching the balusters to the steps and railings, coat the joint with glue. Place the pin and lubricate it. Fix the baluster to the step or floor and coat it. Attach the posts to the railings - also use additional glue.
Attaching balusters to the floor can be done in different ways. You need to choose the one that is most suitable for you
Wood glue is suitable for installing balusters if you are gluing wood to wood. Traditional option, but there is a more modern one. Tiebond II glue. This is a universal composition that sets in 20 minutes. The wait is not too long, at the same time, you have time to get everything done. It holds up perfectly - the wood nearby may crack, but the joint remains intact. Before attaching balusters to steps and railings, lubricate the end of the part and the fastener itself with this composition.
Joiner's moisture-resistant adhesive Titebond II Premium is a one-component PVA adhesive for working with wood. Great for wooden stairs
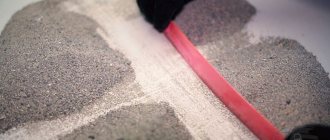
Concrete for balusters
Scheme for preparing a concrete mixture.
The simplest concrete balusters can be made from cement-sand mortar filled with pebbles of various sizes. Such elements are coated with a primer and painted with paint of the desired color. This is the cheapest option for concrete balusters.
Colored concrete involves the introduction of special coloring pigments for concrete mixtures. Currently, more than 20 different color shades of such dyes are sold, which makes it possible to prepare a solution of the desired color. Standard pigments are supplied with a special hardener that provides the protective properties of colored concrete. These ingredients are made from metal oxides. For example, malachite color is provided by chromium oxide, reddish shades are provided by iron oxide, and manganese oxide is responsible for indigo color. Sufficiently durable concrete marble is obtained by introducing the oxide in a concentration of up to 1% by weight.
Decorative concrete can be obtained by grinding the surface onto which large grains of multi-colored aggregate emerge. For these purposes, crushed particles of marble, granite, limestone, basalt and other natural stones and minerals are used. Such surface manifestations of the aggregate can be made corrugated or ground into a smooth surface. Particularly impressive concrete surfaces are created when using aggregates in red, pink and gray colors.
Popular materials
To create elements, standard or light concrete, gravel and sand can be used. Dyes are added to the mixture (the surface acquires a lasting shade that does not require tinting), various stone chips and polymers to imitate natural rocks. If necessary, the surface can be sanded.
Support materials:
- Reinforced concrete . To strengthen the structure and increase its strength, metal reinforcement or wire is used. This technology is often used when making parts yourself.
- Glass fiber reinforced concrete . The solution is reinforced with fiberglass threads, which are distributed throughout the entire mold. A modern method used on an industrial scale.
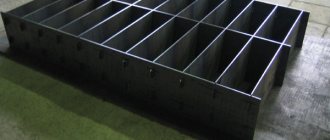
Making a mold for pouring
Scheme of the form for filling balusters.
A concrete baluster is made by pouring concrete mortar into a mold that completely replicates the appearance of the future baluster. This form can be made of wood, clay, gypsum, foam plastic and other material in which the desired cavity can be easily formed. The most widely used form is a plaster mold, which is made by hand in the following order.
First of all, you need one exact copy of the posts that are scheduled for installation. You can purchase it in a store in one copy or make it yourself from wood, polystyrene foam, plastic, carving it in full accordance with the baluster drawing. A body is then formed around this sample in the form of two identical plaster halves. For casting, prepare the following solution: gypsum (4 parts), slaked lime (1 part), a little citric acid. To strengthen, the gypsum blanks are covered on top with a reinforcing mesh, which is also filled with gypsum.
Advantages and disadvantages
Balusters can come in different shapes, styles and sizes. They can be solid (a reliable option), hollow or composite (assembled from two symmetrical parts, which are held together with an adhesive). Advantages of the material:
- Strength, durability, reliability, availability. All the necessary components for the solution can be purchased on the construction market.
- Withstands frost, changes in humidity and temperature, does not absorb water.
- Resistant to adverse weather conditions.
- It's inexpensive.
- Eco-friendly, waste-free production.
- No additional processing of parts is required.
- Forms of any complexity are created from concrete.
- You can make balusters yourself.
- The railings can be painted or left in their original form. Chips of natural or artificial stone are sometimes added to the solution.
The material has several disadvantages. It is inferior in strength to natural stone and metal.
Its parts are heavy and difficult to transport. Installation will take longer and may require assistance. The surface of the concrete is not perfectly smooth.
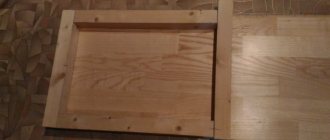
Making balusters
Scheme for filling balusters.
To make concrete balusters, plaster molds are joined and secured. The inner surface of the cavity is first thoroughly lubricated with oil. A reinforcing steel wire with a diameter of 4-6 mm is passed through the internal cavity so that its extension on both sides of the mold is at least 10 cm. The bottom of the cavity must be plugged. The concrete solution is poured from above into a vertically positioned gypsum mold with constant compaction of the mass. The consistency of the solution should be sufficiently liquid to fill the mold cavity more completely and densely.
The second method of making a baluster post involves molding it from a semi-dry concrete mixture. In this case, a thick concrete mass is fed into the mold in parts, so that at one time the height of the concrete column is about 5-10 cm. After each portion of the mass fed into the mold, the solution is carefully compacted with rods; then the next portion is poured in. In this way, the entire form is gradually filled, after which it is lowered horizontally several times and raised again. The mold is removed after drying the mass for two hours. The simplest and most reliable way to manufacture elements is to purchase a standard form, which are sold in a wide range.
Marking space for posts and balusters
In any case, all pillars and balusters on the span must be on the same straight line. Moreover, if the radius/size of the balusters/support pillars is different, their centers are aligned on the same line. After installing all the balusters and posts, if you look along the line, they should all be in the same plane.
The first stage of installation of railings is marking the installation locations of pillars and balusters
At what distance from the edge of the step should the balusters be placed?
On average, the center of the baluster is installed at a distance of 6-10 cm from the edge, but it is possible at the very edge. Choose as you like. But you need to choose this distance in order to decide on the place where you will need to make holes for installing balusters.
There is an algorithm to determine the distance. It is usually assumed that the stair post or baluster should be located at a distance of 2-5 cm from the side edge of the step. Divide the size of the post or baluster by two, add the selected distance to the edge and get the required value.
The distance from the edge of the step is chosen arbitrarily
Let's give an example of calculating the installation location of a baluster. Let them have a square section at the bottom, 80*80 mm. They should be spaced 3 cm from the edge of the step. Total we get: 8 cm/2 + 3 cm = 7 cm. That is, when marking the place where the balusters are to be attached on the stairs, you will need to set aside 7 cm from the edge of the step. We also do this if the balusters are round: diameter 7 cm, from the edge - 3 cm. 7 cm/2 + 3 cm = 6.5 cm. That is, in this case, the hole for installing stair balusters is made at a distance of 6.5 cm from the edge of the step.
Algorithm for installing balusters
The process of marking balusters can be described step by step as follows:
- At the top and bottom steps of the flight, a certain distance is set aside from the edge of the step, which depends on the size of the pillars/balusters.
- A straight line is drawn between the found points. This can be done by: driving/screwing nails/screws into the designated points, pulling a thread between them;
- setting the line on the laser level;
- by setting a level bar/guide along the marks. Balusters can be installed one or two per step. There is also an option - two on one, one on the next, on the third step two again and so on, alternating and placing first one, then two
The main task of this stage is to transfer the straight line to the steps as accurately as possible. The second is to choose such a distance between the pillars and balusters that there are no visible differences. If you can’t do everything the same way, you can do it symmetrically - leave larger or smaller distances along the edges or alternate them after one or two. There are no universal solutions, since each staircase is unique, with its own parameters and features.
Installation of balusters
Baluster installation diagram.
Balusters are supplied for installation in the form of a hardened concrete shaped column, with the ends of steel reinforcement coming out from below and above. Installation begins by drilling a hole in the base of the railing (staircase) for the reinforcement. The ends of the reinforcement extending from the base of the baluster are placed in the drilled hole and filled with concrete. The pillar is positioned strictly vertically along a plumb line. After the concrete has hardened, a similar operation is carried out with the railings, which are placed on the reinforcement extending from the top of the column. The horizontality of the structure is controlled by a level.
Installation of elements with equal heights is carried out using a pre-tensioned control cord.
Number of balusters and support posts
First of all, you need to decide whether there will be one baluster on the step or two. Both options are acceptable. The second point: you need to decide where and with what frequency the support pillars will be placed. There are several options:
- At the beginning and at the end of the flight.
- Through the step. Most often, support pillars are located at the beginning and end of a flight of stairs.
- In two steps.
- Three steps later.
A large number of pillars on the stairs is necessary if the balusters are thin or the filling is not vertical, but longitudinal “threads” that do not carry the load, but perform protective and/or decorative functions.
Necessary tool
When manufacturing and installing concrete balusters, you will need the following tools:
- perforator;
- electric drill;
- construction mixer;
- pallet type container;
- scales;
- measuring bucket;
- putty knife;
- Master OK;
- paint brush;
- metal ruler;
- roulette;
- level;
- plumb line;
- Bulgarian;
- chisel;
- hammer;
- knife;
- hacksaw for metal and wood;
- Grinder;
- file;
- construction cord;
- sandpaper.
Concrete balusters can be a wonderful addition to the interior of any home. They can provide the desired aesthetic appearance and the required quality, while they can be made with your own hands. Modern additives to concrete mixtures make it possible to imitate natural stones, which significantly increases the competitive ability of such elements.
Attachment to string
To connect balusters with a bowstring, all the described methods are suitable, from cutting to fastening with modern zip bolts. The only difference is that the lower ends of the enclosing elements are sawed off at the same angle that the bowstring forms with the horizontal floor line. Only in this case will they be able to be installed vertically.
The support posts are sawn off to length at a right angle, and the intermediate posts for installation on the string are cut at an angle
Helpful advice! When fastening with wood grouse, zip bolts or dowels in the trimmed base of the baluster, it is difficult to determine the center and drill a longitudinal hole. Therefore, they are made before trimming, and after the stand is adjusted to the bowstring, they are drilled to the required depth.
Another way to secure balusters and railings to a wooden staircase with a bowstring is based on the use of an auxiliary element - a baluster. A groove is carved into its lower edge, exactly corresponding to the shape of the upper cut of the bowstring. A similar groove with a width equal to the cross-section of the supporting part of the balusters is also on the upper edge.
Balance
First, all the balusters are fixed with a through fastening on the baluster, and then it is mounted on the bowstring. Glue is used for connection, and nails or screws are used for additional fixation. The gaps between the balusters in the upper groove are closed with a strip that hides the fastener heads.
After installing all the balusters in one row, they are clamped between even slats in a strictly vertical position. On each of them, cutting lines are marked along the guide. After trimming, a railing strip is screwed onto the balusters, and a handrail is installed on it.
Pros and cons of the product
The main advantage of concrete balusters is their reliability and bio-resistance to the destructive factors of an aggressive external environment. In addition, concrete products are resistant to temperature changes, moisture-proof, do not corrode like metal elements, and also have resistance to mechanical loads and various configurations at a low cost of consumables.
The polished glossy surface of this concrete resembles natural stone.
A specialist will help you install the structure efficiently, and the work requires the participation of at least two people.
The disadvantages include significant weight and the impossibility of installing concrete balusters without additional help from workers and equipment. For high-quality and quick installation, it is recommended to involve at least two people in the work. In addition, it is noted that unpolished pillars lack gloss and, in comparison with natural stone, the impact resistance of concrete products is much lower.