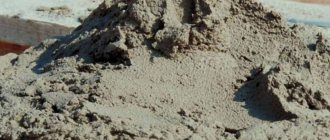
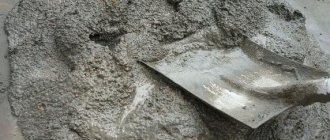
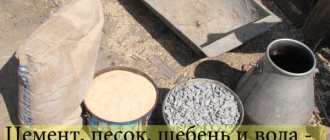
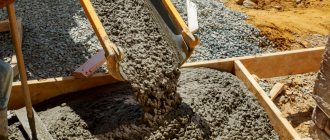
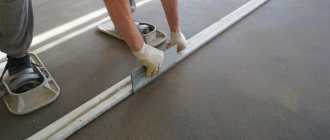
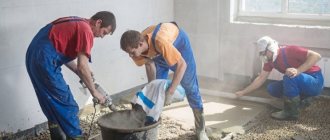
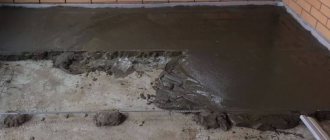
Sand concrete is one of the most popular building materials due to its excellent performance properties. Strong and durable, it is successfully used in virtually all areas of construction. Sand concrete is especially suitable for floor screed, because... it produces a high-quality solution - self-leveling and quick-hardening.
To make a ready-to-pour mixture, you need to know exactly how much of this material you need to buy. After all, any deviations from the norms for the consumption of sand concrete on the screed will negatively affect the level of reliability of the frozen monolith.
Necessary materials:
- dry mix M300 (buy from us!);
- mixing container (more than 50 l);
- shovel;
- mixer or drill;
Floor screed calculator
One of the mandatory stages of building construction or major renovation is the installation of floors. This procedure is not limited to installing a decorative coating on the base. A screed is also required, which is necessary to transfer loads, level the surface and provide additional heat and sound insulation qualities.
There are three floor screed technologies:
- Wet (or traditional) - an inexpensive option using sand concrete;
- Dry – using dry material, which eliminates the need for “ripening” the layer;
- Semi-dry (mechanized) - an analogue of wet screed, which is produced using special equipment, speeds up and simplifies the procedure.
Next, let's talk about calculating floor screed using a calculator.
If we are talking about the wet method of pouring the floor, it is important to calculate the required height of this layer, taking into account the area of the room and differences in the surface on the base. The differences are calculated by the level, with the help of which at the first stage you need to set the zero limit in each room. The next step is the distance from the zero level to the floor. The resulting value is an indicator of the height difference. If the indicator is less than 20 mm, then a layer of material of the same 20 mm will be enough to complete the job.
The next step is purchasing materials for the screed. Conventionally, there are two ways to obtain the mixture – “manual” and “automatic”. That is, you can use a recipe for preparing a screed by mixing the required components in the required proportion, or you can simply buy a ready-made dry mixture. It is sold in bags in construction stores, and if you do not have experience in such tasks, it is better to use ready-made material, which you simply need to dilute with water. This is a guarantee that the screed will be reliable and durable - any miscalculation in consistency will lead to immediate problems.
But there is one tool that significantly simplifies the mechanics of measurement (it is relevant both for manual preparation of the mixture and for calculating the volume of the finished material). This is a floor screed calculator. We are talking about a simple calculation program that calculates the required amount of raw materials (taking into account the “correct” ratio of components).
All you need to know to calculate the screed consumption is the width and length of the room, as well as the height difference described above.
To calculate the floor screed with a calculator, use the formula: Length * Width * Height = Volume of material.
Similar formulas are used in the Knauf dry screed calculator, which can be immediately ordered with unloading, delivery and installation.
That is, you enter the required values into the online floor screed calculator and press the “calculate” button. The floor screed calculator then provides information about the required volumes to complete the job: cement, sand and water, or a dry mixture from a bag and water.
When working with a mixture calculator for floor screed, it is important to consider that the volume of the finished solution is always less than the value of the individual dry components and water. In practice, it is about 70% of the original total value.
What kind of concrete is used for screed?
The choice of brand depends on the specifics of the task at hand. For example, in utility rooms and garages, concrete grade M150 will be sufficient. For residential premises of any type, M200 is most often used. When it comes to large regular loads on the floor, concrete grade M300 and higher is used.
To improve the quality of the screed, crushed stone of small fractions is added to the dry mixture. The strength of the material is increased due to special plasticizers, which are introduced into the solution during mixing. To prepare a high-quality solution, it is important to scrupulously adhere to the proportions of the components. The dry ingredients are mixed with water until the lumps disappear. Plasticizers must be thoroughly mixed in water.
Successfully calculate the floor screed with the calculator and complete the task in the best possible way!
Formula for calculating the mixture for screeding
In order to calculate how much sand concrete is needed for a particular room, you can use a special formula: V = (18 × S × h): P, where V means the required amount of material, 18 is a constant number, S is the area of the room, h is layer thickness, P - bag weight.
This fairly capacious formula is equally suitable for use both in the construction of a modest country house and in large-scale construction.
Calculation example for 5cm
Let us calculate, for example, the consumption of M300 sand concrete per 1 m² with the following initial data: the thickness of the layer on a flat floor is 5 cm, S of the room is 100 m², and the weight of 1 bag of dry mixture is 50 kg.
Standard recommendations are to use 18 kg of dry mixture/1 m² for a screed thickness of 1 cm. We make the following calculations: multiply 18 (kg) by 100 (m²), multiply the resulting number by 5 (cm) and divide by 50 (kg). The result is 180 (bags), which is equal to 9 tons of sand concrete.
When making a solution, you will need ≈1.5 liters of cold water for every 10 kg of dry mixture - this must be kept in mind when calculating the purchase volume of sand concrete. You also need to take into account that during the work, part of the material will be spent on all sorts of small cracks and depressions, so it is better to order 25-30% more dry mixture.
Mixture labeling
Ready-made cement-sand mixtures are marked from M150 to M600 and carry information about the proportions of mixed materials. For example, a DSP marked M150 indicates that the composition includes M600 cement and sand in proportions 1:3.
When choosing cement, the marking indicates the maximum load that the structure can withstand. For example: the M200 cement grade can withstand loads of up to 200 kg per m³. It is especially important to pay attention to the labeling if the solution is prepared independently.
Cement may also have additional markings that inform about the presence of additives:
- SS - sulfate-resistant cement, which is used at high temperature differences;
- ShPC - Portland slag cement is not pure cement and contains many impurities;
- PL is cement that contains plasticizers and hardeners;
- VRC is a waterproof cement that hardens even in high humidity;
- hydrophobic cement - resistant to frost and excess moisture.
Brand of cement-sand mortar for screed: choice of strength
The brand of solution that is sold always has a designation of the degree of strength, it is indicated on the label. When the proportions of concrete for a screed or other mortar are selected independently, different elements are used to create an option with the desired characteristics.
What type of brand should you choose today to make a floor screed in an apartment? Previously, the use of M50 or M75 was considered acceptable, but recently higher demands have been placed on flooring. For this reason, the requirements for the screed have increased, and the use of a minimum of M150 has become the norm.
Nowadays, floors with uneven surfaces are not considered the norm, and manufacturers of floor finishes also require that parquet and other materials be installed on a flat, defect-free base.
Other reasons for using a higher quality brand:
- It is currently difficult to predict how high quality the cement will be in the solution. Therefore, they usually try to choose a higher level so that they do not have to carry out the work again;
- Finishing floor coverings must be laid on a solid and level base; accordingly, the solution must be durable;
- Tiles, taking into account the characteristics of the adhesive for them, and self-leveling mortars cannot be laid on a low-level grade. So, if an adhesive with a strength index of M250 is selected, then the solution for the screed should be at least M200.
The norm has become the use of at least M150.
Features of cement mortar screed
Using cement mortar to level the floor and other horizontal surfaces is not only convenient in terms of work, but also economical.
The composition of the screed - its consistency and components, as well as the expected consumption of materials must be calculated in advance even before the preparation of the solution begins.
Correctly carried out calculations will give the floor high strength and durability, while any error in proportions will cause chips and cracks to appear on the surface of the screed after it has completely dried.
Types of solutions
The calculation of the screed is done after selecting the components; for this you need to understand the types of options that are suitable for the job. One of the popular options is sand-cement. The following type properties can be distinguished:
- Heavy weight;
- High level of strength properties;
- Moisture-resistant, vapor-permeable;
- Recommended thickness 4 cm;
- Suitable for rooms with different purposes, you can introduce modifying elements.
PCB in a garage, barn, bathhouse and other ancillary buildings can be used without a finishing coating; sand can be replaced with granite screenings. A long-drying mortar, initial setting occurs after two days, but full strength is achieved after 28.
Lightweight PCB with expanded clay is a screed with insulation, expanded clay does not release heat, and its presence also helps reduce the weight of the solution. There are different types of expanded clay granules:
- Crushed stone, fraction size varies between 5 and 40 mm, intended for thick coating;
- Expanded clay gravel, there are different sizes: 5-10 mm, 10-20, 20-50. It is distinguished by its high heat-insulating properties and resistance to cold;
- Sand, fraction sizes no more than 5 mm, suitable for thin screed or pouring a layer.
Suitable for rooms with different purposes, you can introduce modifying elements.
Gypsum mortar is applied between the wet and dry layers of coating, or a floating version is made over the insulation layers. Peculiarities:
- Low price;
- You can cover communication parts and electrical wiring;
- Can be used between layers of insulation of different thicknesses;
- You can apply loads to the coating 12-15 hours after grinding the base.
Suitable for laying laminate, parquet, linoleum, ceramic tiles, carpet.
You don’t have to calculate the proportions of concrete for outdoor screed for a long time if you purchase ready-made mixtures. There are different options for different purposes, so choosing the right type is easy. Advantages:
- Easy to use, you only need to mix with water, the ratio of components is precisely calculated by the manufacturer;
- Variety of types;
- High level of strength properties.
The disadvantage is that the cost of the solution will be higher compared to the option of independently selecting the elements.
Gypsum mortar is applied between the wet and dry layers of coating, or a floating version is made over the layers of insulation.
What you need to know about expanded clay
Expanded clay is made from clay that is fired. The more porous the structure of this material, the better it conducts heat. Expanded clay looks like balls of different sizes. To make the material more porous, it is heated sharply. Strength is achieved due to the shell that forms during cooling. Expanded clay itself is quite strong and durable, but high quality is achieved with full compliance with the correct technology. If the density is lower, then the thermal insulation is higher and the material is more durable. At high density, on the contrary, the material is very brittle and holds heat very poorly.
By size, expanded clay is divided into:
- Gravel, it is very resistant to high and low temperatures, does not contain harmful chemicals
- Crushed stone, often of different shapes, which has sharp corners, is made by crushing
- Sand, it is obtained by simultaneous firing and rotation. Sand is a very good means for insulating buildings; it not only helps retain heat, but is also very durable, which is also a big advantage.
What else is worth knowing about floor screed
Why is a floor screed needed?
- To level the surface if there are problems with evenness and smoothness
- To hide pipes laid on the floor
- To make the floor warmer
- When there are many slopes
When is it recommended to use expanded clay for screeding?
If the floor level needs to be raised by more than fifteen centimeters If the foundation of the house is very unstable and cannot withstand heavier material Wooden floors are also very rarely designed for a heavy wet screed For installing heated floors To increase sound insulation If there are communications in the floor, expanded clay will help retain heat , which is also not unimportant. Due to expanded clay, you can reduce the cost of materials and labor
How to install dry and semi-dry expanded clay screed
- We need to prepare the surface. Clear away debris and even vacuum away dust and small crumbs
- Cracks, chips and other irregularities are rubbed over with cement
- Wires and cables are insulated with polyethylene
- Wrap polyethylene with tape, this will help prevent water and dirt from getting in
- Laying waterproofing
- Mark the height of the screed on the wall with a special tape
- Markings are made and beacons are placed around the perimeter, the distance between which is no more than one meter
- If you use cement, then speed in work is very important, as it sets very quickly
- Scatter expanded clay around the entire perimeter and check the evenness
- Make a solution that looks like milk from sand and cement and pour it over the expanded clay
- The layer should dry within a day
- Then the final layer is applied
- The remaining expanded clay is poured out and leveled
- Everything is filled with a solution of cement and sand, 1 to 3
- The last layer is leveled and left to dry for three days.
For dry screed everything is a little simpler and faster
- Also prepare the surface
- Waterproofing is done, tape is applied, beacons are installed
- Expanded clay is distributed between the lighthouses
- Sheet material is laid on top
- The sheet material can be chipboard or plasterboard.
Expanded clay screed is considered very strong and durable, and the floor becomes warm and smooth.
