Alexander Alexandrov is in touch with you and today we will meet technology for laying paving slabs on concrete. Many of the readers will ask the question: “Why bother with concrete, because it’s easier to lay paving slabs using a cement-sand mixture.” And in some ways they will be right, since laying paving slabs on a sand-cement base is much easier than on a concrete base; there is also no need to install a drainage system, since sand freely absorbs water. All these arguments have their place, but there are situations when it is impossible to do without a concrete foundation. For example, when you are dealing with heavy equipment. So my parents’ housemate works as a truck driver and when he is at home, he drives his MAN into the yard, covered with paving slabs laid on a concrete base. With such a weight of sand, the mixture will not cope.
Another argument in favor of concreting the base is the location of your yard or house on any dips. For example: the corner of my house is located on the site of an old basement (remodeled last year) and the use of a cement-sand base did not suit me, since water that freely passes through all the preparatory layers can play a bad joke. So only concrete, and only with drainage!
How to dilute sand concrete?
- Sand concrete proportions
- How to dilute with water?
- How and how much to add crushed stone?
- Preparation of expanded clay concrete
In the construction industry, a material such as sand concrete is very often used. Its peculiarity is its high resistance to various types of influence. The range of its application is huge - it includes paving slabs, side stones, piles, and concrete pipes. This article will discuss how to dilute this mixture, which is very useful in construction.
Sand concrete proportions
To save time, as well as to obtain a better-quality solution, you can purchase a ready-made dry mixture in the store. The ratio of sand and cement in them is approximately the same: 1/3 goes to cement, and 2/3 to sand. If you do it yourself, then you need to focus on this proportion.
Unfortunately, most companies no longer sell regular formula. In addition to the basic components, various chemical impurities began to be added to it.
Many parameters of the final product depend on their quantity and quality, namely resistance to temperature changes, ductility, strength.
How to dilute with water?
If the dry mixture can be purchased ready-made, then in any case you will have to add water to its composition yourself. Depending on the ratio of the amount of water to the rest of the mass, such a solution is divided into 3 types.
- Fat – there is too little water in the mixture. This proportion is very unfavorable, and if there is too much liquid, the solution will crack after hardening due to its low flexibility and ductility.
- Skinny – There is too much water in the mixture. Its excess will lead to the mixture not hardening at all. Another scenario is that too much moisture will evaporate from the solution, and it will shrink much more than planned.
- Normal - a solution with an adequate amount of liquid. The correct proportion will allow sand concrete to be not only strong, but also plastic, which will save it from cracking. Such a mixture will be optimal not only in its qualities, but also in price.
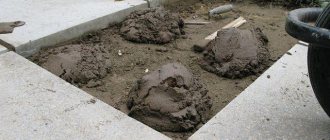
In order to dilute sand concrete, you need to follow the following instructions:
- the first step is to pour some of the water into the mixing container;
- then, if you have a concrete mixer, you need to pour out all the dry mixture and gradually add the remaining water;
- If such a device is not available, you should add the dry mixture little by little and stir gradually.
Another option is to initially add all the dry sand concrete to the container, then make a funnel shape out of it in the center. You need to gradually pour water into it and mix. The method using a funnel is much more convenient and, most importantly, more effective than pouring water over the entire area of the mixture. Thanks to this, it is possible to mix the solution with water slowly, so that it is clear at what point it is time to stop.
In general, regardless of the type of sand concrete, water is added to the mixture in the following proportion: one 40 kg bag requires 6-7 liters of water.
For types of sand concrete such as M100 and M250, which are used as a gluing element , you can add a little more or less water at your discretion. But for more important purposes, for example, for laying paving slabs or pouring a foundation, it is better to adhere to strict standards - in this case, maximum strength and durability of concrete will be ensured.
How and how much to add crushed stone?
After creating the sand concrete mixture, you can proceed to the next stage - adding one more component - crushed stone. It is needed to increase the rigidity of the material. There are 3 main types of crushed stone, namely:
- limestone is a soft but frost-resistant rock;
- gravel is the most popular type, used in most construction tasks;
- granite is a more expensive, but strongest stone, needed to create the strongest sand concrete.
To correctly determine how much crushed stone to add, it is better to choose a ratio of 2: 1, that is, approximately half the mass of dry sand concrete. However, this indicator may vary depending on the purpose of the finished mixture. So, for simple tasks, such as gluing, you don’t need to add crushed stone at all. On the other hand, when making concrete from sand concrete for the foundation of a house, it is better to use granite and add it in a larger proportion - 2.3-2.5 to 1.
Once the water has been added and mixed well, crushed stone can be added to the solution. Stones must be manually added to the sand-concrete mixture and stirred gradually. This is a very important point: if the crushed stone is unevenly distributed in the solution, this will ultimately lead to poor distribution of the characteristics of the concrete itself.
Preparation of expanded clay concrete
Expanded clay is a very light material, which is a special baked clay in the form of balls. The properties of expanded clay concrete also depend on its properties - it is also lightweight. Other qualities of this solution include:
- low cost - indeed, the production of expanded clay concrete does not require large expenses, due to which this solution is very popular among people who are constantly engaged in construction;
- poor thermal conductivity - this allows the use of this mixture in places where it is necessary to retain heat and not allow cold to pass through.
There are also negative features, for example, expanded clay concrete has a high moisture absorption rate. Because of this, there are some restrictions on its use in places where it can get exposed to large amounts of water.
Expanded clay concrete is almost no different from sand concrete or ordinary concrete. The only difference between them is the type of filler: expanded clay instead of crushed stone. This solution is mixed like sand concrete. The components should be added in the following proportion: C1: P3: K4: B1.5 or C1: P4: K5: B2, where, respectively, C is cement, P is sand, K is expanded clay, W is water.
The order of addition is the same.
- For a concrete mixer. Some water is added, then the dry mixture. After which the rest of the water is poured out and expanded clay is added.
- In the absence of a concrete mixer. You must first pour out the dry mixture, add water to it and gradually mix them into a homogeneous mass. After this, filler in the form of expanded clay is added.
It is important to remember that expanded clay concrete is very sensitive to water. If there is too much of it in the mixture, then the expanded clay may simply float due to its low density.
Sand concrete is a very popular material for various construction projects.
Moreover, anyone can make it - you just need to add all the ingredients in the right order and in the right proportions.
Selection of materials
To create paving slabs with high strength, frost resistance and water resistance, it is important to select materials of appropriate quality
Cement
The main element of any concrete is cement. For the manufacture of paving elements, you should choose medium-aluminate cements with a mineral additive content of no more than 5%, as well as with a strength class of 42.5. The packaging of such a binder indicates the grade CEM I 42.5 N or B. Medium aluminate cements include binders with a C3A content of 5 to 8%. You can find out the aluminate content from the seller by asking for the cement passport.
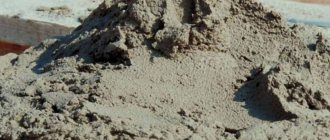
Fine aggregate
As a fine aggregate, it is best to use washed quarry sand with a particle size modulus of 2 - 2.5.
This material belongs to construction sands of the first class; when used, the concrete composition is characterized by lower consumption of binder and low cost with higher quality indicators.
Coarse aggregate
When using coarse aggregate, it is best to purchase granite crushed stone with a grain size of 3 – 10 mm. Such material will provide increased strength and durability with high mobility of the mixture. But its cost is high, so you can purchase a standard mixture of grains with a diameter of 5 - 20 mm and adjust the recipe, reducing the content of coarse aggregate.
This approach will ensure high mobility and uniformity during the formation of the stone frame in the body of the composite.
Sand-cement mixture for laying paving slabs: composition and proportions per 1m2
Modern technologies and high-quality materials used in the production of paving slabs make it possible to obtain a product with unique properties. Having the opportunity to purchase high-quality material, you need to know how to work with it in order to create a truly wonderful sidewalk. This could be garden paths, platforms and squares, the space in front of the porch or the front door to a country house or cottage. The most attractive qualities for the consumer are the guarantee of a sufficiently long service life, which largely depends directly on compliance with the technological standards of the device and the level of installation on a dry mixture.
Technological nuances of arranging paving stones
Paving tiles on sand concrete is a fairly simple and accessible procedure, but it requires certain skills, abilities and knowledge of some technological subtleties. Beginner DIY tilers should be especially concerned about studying these issues.
If you lack experience and skills, it is recommended to seek advice from qualified specialists. At a minimum, it will be enough to ask the manager for advice when purchasing building materials. As a maximum, order turnkey work from a company that deals with this professionally.
In any case, experts recommend not to save money when purchasing tiles and cement-sand mixture. The reliability and durability of the final object will depend on every seemingly small nuance.
The process of laying paving stones is carried out in three main options:
- on a dry mixture;
- on the sand;
- on cement mortar or sand concrete.
There is no best among these methods. They're all pretty common. The choice of each of them is determined by the specifics of the site, soil characteristics, expert advice and the amount of finances the owner has.
Regardless of the chosen method, it is necessary to carry out preparatory work and take care of creating a special “cushion” of sand and crushed stone.
The subsequent steps for paving paving slabs are elementary, but they will require the worker to maintain endurance, perseverance and self-organization.
Technology of laying and installation of polymer-sand paving and garden slabs Ecogum.
The basis for high-quality laying of paving slabs is a carefully prepared base.
In most cases, the base is a gravel-sand (crushed stone-sand) pillow. In any case, the site must be well planned and compacted (compacted). Using polymer sand tiles, you can lay out many patterns and color compositions, depending on your taste and chosen style. So, Ecogum polymer-sand paving and garden slabs using cement mortar or cement-sand dry mixture (sand concrete) can be laid on:
- Sand base;
- Crushed stone base;
- Concrete screed.
To equip exposed roofs, supports for exposed roofs are used.
The type of base and its thickness depend on the operating conditions of the coating (garden path, pedestrian zone, entry of cars, trucks and traffic intensity), the thickness of the tiles and is determined by the construction project.
How to lay polymer-sand paving and garden slabs Ecogum?
In general, the following technology for laying polymer-sand paving and garden slabs is recommended:
1. Site plan. Draw the layout of the area to be paved. Measure the area, put the dimensions on the plan, then calculate the required number of tiles for laying, as well as the required amount of raw materials for the base (crushed stone or gravel, sand, cement).
2. Marking. Using pegs and twine, mark the area for laying the tiles, according to the previously developed plan.
3. Excavation of turf and soil. The turf and soil are excavated to a depth of about 150 mm in such a way that after laying the front surface of the polymer sand tiles reaches the specified level of your site.
4. Planning. Longitudinal and transverse planning of the covered surface in compliance with technological slopes for water drainage.
5. Compaction of the subgrade. Tamping, rolling or vibrating compaction of the subgrade surface.
6. Installation of a curb. Opening grooves for bead stone. Compacting the bottom of the grooves and pouring a 5 cm layer of sand onto the bottom of the grooves. Installation of a side stone (curb) into a groove on a concrete pad.
7. Geotextiles. Covering the subgrade with geotextiles to prevent deformation of the road surface and grass growth.
8. Preparing the base. A very important stage. It should be treated with special attention. Depending on the operating conditions of the coating (garden path, pedestrian zone, entry of cars, trucks and traffic intensity), select a base.
- Filling the covered surface with crushed stone (gravel) of a fraction of 5-40 mm, a layer thickness of 5 cm - for a pedestrian zone, 7-20 cm, subject to the entry of passenger vehicles (the heavier the car, the thicker the layer), followed by watering the surface with water and careful compaction.
- In non-heaving soils for operation without the entry of trucks, it is permissible to fill with coarse sand with a layer thickness of 10-15 cm, followed by watering the surface with water and careful compaction.
- After this, the surface of the base is checked. If there are holes in it, they are filled in and further compacted.
- Pour a layer of slightly moistened sand over compacted crushed stone in a layer of 5-7 cm, followed by pouring with water, compacting, and leveling with a lath.
- Laying on the surface of a leveled, moistened and rolled layer of sand a reinforcing mesh of 50x50 mm without a binder.
*As a base, you can pour a reinforced concrete slab, which is often easier and cheaper to do. In this case, it is possible to achieve the possibility of vehicles of any carrying capacity entering the paved area.
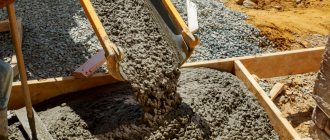
9. Laying cement-sand mixture. When the base is ready, you can begin preparing the cement-sand mixture. The mixture is prepared at a ratio of 1:5 (1 part cement to 5 parts sand), you can improve the adhesive properties of the mixture by introducing one part of tile adhesive into the mixture, i.e. 1:1:4 (1 part cement, 1 part tile adhesive, 4 parts sand). The mixture is laid on the base in a layer 30-40 mm thick, after which it is leveled and vibrated, followed by weak moistening using a watering can.
10. Laying polymer sand tiles. When laying tiles, you need to ensure that the base is as even and dense as possible. Having laid the tile, you should press it to the surface of the base with your hands and if it does not “walk”, lightly tap it with a rubber mallet. If displacement occurs, you need to lift the tile and further level the base. Be sure to leave a gap of 6-8 mm between the tiles for possible thermal expansion; crosses can be used for this. When laying the next tile, horizontal alignment relative to the previous tile is done using a level. Polymer sand tiles are laid on the underlying layer and compacted using vibrating plates and massive wooden mallets (“bulls”).
11. Cutting. If the tiles, when approaching “difficult” parts of the house (porch, veranda, etc.), do not fit with them, the tiles are cut with a machine (“grinder”) with a cutting wheel for stone.
12. Seam filling and sanding. After all the tiles have been laid, you need to fill the finished area with fine sand (fineness modulus 0.5 mm) of natural humidity, and distribute it over the cracks with an outdoor mop with hard bristles. Sand poured onto the surface and into joints must be clean and free of salts and organic materials that can cause efflorescence and growth.
You can fill the seams with a special sealant, but, which is very important, only after moistening the base, step 13. and drying it. Filling the seams with a special sealant prevents moisture from getting under the tiles. This option is very good for a blind area. You can purchase special sealant from our company.
13. Hydration. The surface laid with concrete slabs is thoroughly cleaned of any remaining dry mixture and watered along the cracks with a small amount of water from a watering can. At this stage, be sure to remove any remaining sand-cement mixture, otherwise, after drying, streaks will remain on the tile. However, there is no need to panic - these stains will remove themselves after a while.
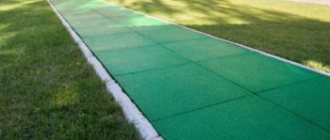
Paving polymer-sand slabs laid on a dry mixture on a crushed stone cushion can withstand the load from the entry of a passenger car.
Polymer sand slabs laid on a concrete base can withstand the load from the arrival of a truck.
Attention!
- Do not lay tiles in rainy weather without a special canopy;
- Do not sprinkle sawdust on the tiles.
- To create garden paths without a truck driving in, you can lay the tiles directly on the grass or on dug up soil or on moistened excavated soil. The tiles have lugs on the back side and during use they settle firmly into the ground and are ideal for use as a garden path or path.
- If your site has “difficult” soil, you need to take into account that its displacement can deform the tiles. In this case, a more complex installation is proposed, which guarantees durability. The soil is covered with a layer of reinforced concrete 80-100 mm thick, then with a cement-sand mixture 40 mm thick, which is vibrated and tiles are laid on top (items 10-13.).
- Laying on mortar is also possible. The basis is a reinforced concrete screed, onto which a layer of mortar 30-40 mm thick is applied, and tiles are laid on it, which are immediately sprinkled with sand (clause 12).
Can it be placed on earthen soil?
The debate about whether paving stones are laid on open ground has been going on for a long time.
In fact, this practice is not too rare. But the lack of sufficient drainage can lead to the accumulation of water on the coating, and the tile itself will deform, crack, and lose strength. This is especially true for concrete products - molded or pressed, but paving stones made of natural stone do not face such dangers. In the absence of other options, laying tiles on a ground base is quite possible, but subject to a certain installation technology, which contains several stages.
Creating a project. It will include a plan diagram with calculation of the amount of material and coverage area.
Marking. It is carried out using wooden pegs and helps to accurately mark the boundaries of the paving. A linen or nylon cord is stretched along the perimeter between the marks
It is important to position it so that the resulting line indicates the slope of the base and its height. You will have to rely on this level when installing the material.
Site preparation
The soil is removed over its entire surface to a depth slightly less than the thickness of the tile. The bottom is compacted with a special device for rolling soil and spilled with water. The base is leveled with a slope to ensure the natural outflow of water.
Covering installation. It is conducted in a direction away from you, moving forward along already paved areas. The density of the installation is ensured with a mallet. The outer row is leveled, the gap is filled with previously removed soil.
Backfill. All gaps between tiles must be filled. The optimal material for this would be sand, which compensates for possible deformations.
If this rule is violated, the likelihood of subsidence of the laid paving stones will increase noticeably. The lack of a drainage system when installing tiles directly on the ground will not be a problem in regions with low rainfall. In all other cases, it is better to provide for a slope and lay gutters.
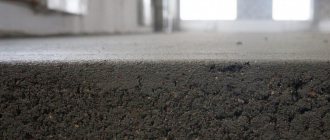
Sand concrete - an alternative to heavy concrete
To the frequently asked question: “Sand concrete, what is it?” the answer should be given in accordance with regulatory documents. According to GOST 7473-94 - fine-grained structural concrete.
All sand concrete mixtures include pre-dried Portland cement, river or quartz sand of fractions up to 3 mm. The composition also includes various modifiers that increase adhesion, plasticity, moisture resistance and lifetime of the finished solution.
Manufacturing technology
The production of sand concrete is not particularly difficult. The main requirements are careful preparation of raw materials. At this stage, all ingredients are filtered to remove foreign impurities and dried until moisture is completely removed.
The second step is to place a precisely measured amount of each substance into the mixer. A special feature is layer-by-layer loading, in which all components are added several times with alternating layers.
From the mixer, the finished product is sent to packaging or to a cement truck.
Specifications
The digital index of the brand indicates the compressive strength of the completely hardened solution. So for M100 and M150 this figure will be 100 and 150 kgf/cm 2, respectively.
| Parameter | GOST 7473-94 |
| Fraction, mm | 0,1 — 3 |
| Maturation, days | 28 |
| Strength of mature sand concrete | 100-500 kgf/cm 2 |
| Specific gravity of sand concrete | Determined by brand |
| Lifetime of liquid solution, minutes | 120 |
| Consumption rate for a layer thickness of 1 mm | 1.9kg/m2 |
| Sand concrete hardening time before moving, hours | 48 |
| Possibility of laying covering materials, 24 hours | 5 |
| Water consumption, l/kg | 0,2-0,25 |
| Strength grades | M100-M500 |
| Setting, minutes | 180 |
| Density of sand concrete kg/m 3 | 2000-2200 |
| Color | Grey |
One of the main indicators is the specific gravity of sand concrete, which depends on the percentage of sand. The higher this parameter, the less sand in the dry mixture. The strict ratio of sand and cement is set depending on the brand. Accordingly, M100 will have more sand, and M500 will have more cement.
Advantages and disadvantages compared to heavy concrete
The main differences between sand concrete and concrete:
- The components do not include crushed stone or gravel, which would necessitate a thick layer of material.
- Only Portland cement, which has high strength indicators, is used as a binder.
- Due to the absence of stone fillers, the density, and therefore the total weight of the structure, is much less.
- High levels of water resistance make it possible to level walls with sand concrete in sanitary facilities.
- Good adhesion to almost all surfaces.
- Ease of use significantly reduces time costs.
The disadvantages include the rather high price of the material and inconvenient packaging, 40-50 kg, when purchased in bags.
Weather conditions for maximum efficiency
When paving tiles using dry mixtures, the weather should be without precipitation and high humidity. You need to roughly calculate the time it will take to carry out the work and adjust your plans with the weather forecast. If the sand-cement mixture gets wet, even before the tiles are completely laid and compacted, this will not only disrupt the technology, but also ruin the final stage of paving.
You cannot work at sub-zero temperatures, since in such conditions the materials have different properties when compacted. If there is moisture in them, they will become compacted under the action of the vibrating plate, and with the arrival of heat they will soften and the coating will begin to go deeper.
If liquid solutions are used to fix the tiles, and the base is a concrete screed, then weather conditions do not play a special role. Of course, working in cold weather is unacceptable, but low humidity in the air will not harm.
Quantity calculation
In order to correctly calculate the amount of materials for the upcoming work, you need to mark and estimate the perimeter of sidewalks and platforms. Based on the information obtained, further calculations should be made:
- Number of tiles. It is measured by the total area of the future surface with the addition of 8-10% of the reserve. The additional number will not greatly increase the cost of the work, but will save you from the problem of lack of material during the paving process.
- Foundation components. They are calculated taking into account the thickness of the layer by multiplying the area in square meters by the thickness of the required layer in meters. The final value will indicate the optimal number of cubic meters of building material.
- Curbstone. The amount of this material is measured according to the following principle: the length of the perimeters minus the length of the junctions with the base of the house and other objects on the site.
Proportions
In addition to the need to use a certain set of components when preparing a solution for paving slabs, you must also observe the necessary proportions and ratios of sand, cement and all other elements.
Helpful advice: Despite the fact that there are universal rules regarding the proportions of the components of the composition for paving slabs, individual nuances must also be taken into account. For example, the compositions for paving stones and for filling joints can differ significantly from each other.
It should be noted that independent calculation of the required ratio of components is a rather complex and complex task. At the same time, ideal proportions can only be achieved experimentally and taking into account all previously made mistakes. Therefore, if you are not a competent builder and do not have sufficient knowledge, skills and abilities, then you should strictly follow the advice and recommendations of specialists.
Remember that even small errors can result in a mixture that is ultimately unusable. In addition, it should be borne in mind that the quantity of components also depends on their quality. If we talk about traditional proportions, they look like this:
- 23 parts of cement in buckets;
- 20 parts of sand from screenings;
- 57 pieces of crushed stone;
- plasticizer, which should be 0.5 parts of the cement used;
- 40 parts of warm water (calculation is based on the amount of dry ingredients);
- additives strengthening the mixture in the amount of 90 g per 1 m2
- pigment in the amount of 700 ml per 1 m2.
In addition, there are several universal rules:
- sand and cement in the solution should be present in a ratio of 3 to 1;
- you need to add water until a stretchy and viscous consistency is formed;
- If you want to make a two-layer type tile, all components should be used in a 1 to 1 ratio.
It should be remembered that compliance with proportions is as important as compliance with the composition. Only if all technological standards are met, you will receive the desired material, which will be of high quality and long service life.
Types of styling
Any work on the design of a personal territory begins with drawing up a plan, choosing materials and paving methods. To implement such tasks, it is necessary to take into account a number of points.
First of all, you should determine:
- The type of soil that will serve as the foundation.
- Anticipated surface loads.
- Relief of the area allocated for paving slabs.
- Coverage area.
- Material consumption.
- Method of paving tile products.
Experts use the following methods of laying tiles:
- On a pillow of sand.
- For cement-sand mixture.
- For cement-sand mortar.
- On a concrete screed.
Maintenance of paved surfaces
After completion of the installation work, the paving slabs are protected and maintained. Paints and clear varnishes are used for restoration.
Damaged tiles must be replaced with new elements. When cleaning the coating in autumn and winter, do not use sharp tools that deform the base.
To get rid of ice, you cannot use salt, as this leads to damage to the paving stones.
Which one to choose: review of ready-made mixtures with prices
The best choice is usually a standard commercially prepared dry mix. After all, the main difference between a high-quality concrete mixture is a clear balance of the number of components, ensuring the necessary grade of all components and the environmental safety of the material, since today all building materials produced industrially are subject to the strictest control. Almost all large manufacturing companies have international certificates.
How to lay paving slabs on a concrete base is described here.
The best ready-made dry mixes consist of the following components:
- Crushed granite fraction from 5 mm to 10 mm.
- Sand, fineness modulus not less than coefficient 2.
- Portland cement, preferably grade M-500.
It is possible that you will be interested in material about preparing plasticizer for paving slabs with your own hands.
These are the main components that determine the quality and quality of the dry mix, and therefore the reliability of the tile path. Today, experts prefer universal dry mixes, which are used not only for laying tiles, but also in other construction and finishing works.
The most popular mixtures are:
- Kreisel mixtures for $32. USA per pack of 20 kg.
- Series of mixtures BIRSS, Russia, $1.0 each. USA packaging 25 kg.
- "Vetonit M" 100/600, Finland. Price from 1.0 to 1.75 dollars. USA, package 25 kg.
- PETROLITE price category from 0.85 to 1.55 dollars. USA, 25 kg per bag.
Having a plan for creating a unique path design or decorating a local area, you need to accurately study all the details of the technological methods for laying tiles. Having decided on creating a base from dry mixtures, you need to find out all the positive and negative aspects of this composite material, the features of the composition of industrial mixtures and the price of the quantity you need.
Preparing the bed for the sidewalk
The process of preparing a bed for future paving with paving slabs consists of several stages. First of all, you need to choose the material and place where the coating will be installed.
Selection of location and material
When choosing a location for installing a tile covering, it is necessary to give preference to flat areas where there are no depressions and close groundwater.
There are two types of paving slabs available for sale, which differ in their production method:
- Manufactured using vibration casting.
- Manufactured using vibrocompression.
When choosing the appropriate option, it is necessary to take into account the operating environment and expected loads. Vibropressed tiles are suitable for paths on which vehicles will travel. If you need to arrange a landscape design in the garden, it is better to choose a vibro-cast type.
Such paving stones are not able to withstand heavy loads, but have a wide variety of textures, shades and decorative solutions. So, the owner of the site can purchase tiles with an imitation of the texture of wood or stone.
But while additives help improve the strength properties of a structure, water worsens them. To assess the quality of the tiles, try hitting one against the other: when a ringing sound appears, you can be sure that the product is of high quality. A dull sound indicates excess water content.
When purchasing materials from different manufacturers and batches, check to see if they differ in shade. You also need to make sure that the sizes match, since sometimes it can be problematic to find similar products from different brands.
To prevent the problem of shortage of tiles, buy them with a margin of 7-10%, because... One batch may contain defective elements.
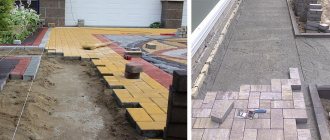
Preparing the base for installation
Starting the preparatory work, you should dig a 28 cm deepening (the layer consists of 15 cm of crushed stone, 10 cm of sand and 3 cm of dry mixture). If a lawn is being built near the path, then the calculation is performed using a different formula: 28 cm + height of the tile covering + thickness of fertile soil.
If the soil is soft, it must be moistened with water and then compacted. Then at the bottom of the recess a 15 cm layer of crushed stone is placed. The surface is leveled and compacted.
To prevent mixing of crushed stone with sand, the layer can be covered with geotextiles. A 10-centimeter layer of sand is poured on top of this material. After 2-3 days in sunny weather or the next day in cloudy weather conditions, the surface should be leveled.
The sand-cement mixture for laying paving slabs, the composition of which is selected in a ratio of 8:1, is poured over the sand and leveled. The screed should be level and have a height of 3-4 cm.
Mixture proportions
When choosing cement grade 300-400, the proportions of sand will be 5:1. The use of products under the 500-600 brand requires a different calculation: 1 part cement for 6 parts sand. Often the solution is diluted with PVA glue, which improves the bonding strength. The cement composition with sand and glue is mixed extremely carefully, and then used for its intended purpose.
Step-by-step production of the mixture consists of the following steps:
- 1 part of the cement mixture is combined with 3 parts of sand.
- Next, water is added to the composition - this will give it a creamy consistency.
- After 15 minutes, the components are mixed again.
The surface of the tile that comes into contact with the mortar should be moistened with water.
If the consistency is dry, the paving stones should be laid only after complete leveling. The rows should fit snugly together.
Troubleshooting Possible Problems
To prevent errors in the process of laying paving slabs, the following rules must be taken into account:
- The dimensions of the walkway or platform must be selected so that solid tiles can fit between its edges. This will reduce material costs and labor costs, since there will be no need to cut the tiles.
- It is better to cut paving stones with a grinder and a diamond-coated disk. It must first be cut and then chipped off evenly. For an even cut, markings must be applied to it.
- If you do not have experience working with mortars, then you do not need to mix a lot of mortar at once. They dry quickly and lose their properties when mixed again. This rule is especially true for glue, since it hardens the fastest.
- Compliance with foundation laying technology is a key factor on which the quality of the work performed depends. If the technology is not followed, the concrete will sag and the laid coating will deform.
- The tiles will look monolithic if they are laid on the same level and all the seams are properly sewn.
- You cannot use expired mixtures in your work, as they lose their characteristics over time. In this case, you should not count on the long service life of the sidewalk.
- Laying paving stones without a slope will lead to stagnation of rain or melt water on it. At the same time, if the seams are not sealed tightly, then water will flow through them and accumulate between the tiles and concrete. As a result, the coating will begin to peel off from the base and after some time it will need to be re-laid or replaced.
- Typically, the seams are sealed with hydrophobic compounds that prevent water from flowing to the base and plant growth.
When installing tiles, you must not forget about their decorative effect. You can use some randomness. If paving slabs are laid of the same color, but with different shades, then the formation of stains must be avoided. Against the general background it will look ugly.
To ensure that the material is of the same tone, it is advisable to buy it in one store from one batch. The coating made from it will look monolithic and very attractive. If paving stones of different sizes and colors are laid, then stones of different colors will be very noticeable. As for the drawing, it all depends on your experience and the complexity of the pattern.
Work with paving slabs is carried out on a flat surface. To prevent injury, splitting elements while hanging is prohibited.