The impact of negative external factors on the concrete surface leads to a deterioration in the technical characteristics of the coating. The use of liquid glass in concrete will help increase the resistance of the constructed or finished structure to the negative effects of precipitation, sudden temperature changes and other factors, under the influence of which the properties of concrete surfaces significantly deteriorate. Before you start using such a protective mixture, it is recommended to study its technical characteristics, preparation rules, as well as the pros and cons of use.
What does it represent?
In classic concrete mixtures, the main components are:
- sand;
- cement;
- crushed stone
Adding liquid glass to the mortar will help increase the service life of the structure.
By adding water to the dry composition, it will be possible to obtain a durable building material for pouring a foundation, concrete floor, as well as erecting structures for various purposes. However, sometimes the physical and technical properties of such concrete are not enough for the structure to reliably perform its functions. To improve the technical characteristics of the solution, a special concrete additive based on liquid glass is used. The result is a reliable coating that is resistant to negative external factors, thanks to which the structure will last much longer than the stated period.
Material properties
Using liquid glass in concrete allows you to achieve the following results:
- Increase moisture resistance. Such protection is necessary for structures that are constantly in contact with water. This could be a swimming pool, a damp basement, tanks, well rings, etc.
- Accelerate hardening. If you prepare a classic concrete solution using impregnation, the time for hardening of the finished composition will be much reduced. 24 hours will be enough for the surface to become ready for further construction work, while a regular mortar takes 3-5 days to dry.
- Increase waterproofing properties. Liquid glass for waterproofing concrete is added to prevent the appearance of mold and fungi on the surface. The fact is that the special composition of the product has a bactericidal effect, due to which microorganisms have no chance of developing and multiplying.
- Increase heat resistance. The surface on which ordinary concrete mortar is applied can withstand temperatures up to 200 °C; if it is higher, the plaster layer will collapse. But when you add liquid glass to the solution and treat the structure with it, it will be able to withstand temperatures of 1400 degrees or more. Therefore, when building a fireplace or stove, it is advisable to prepare a cement mortar with liquid glass.
Hydraulic seal for a well: the best ways to seal the joints of reinforced concrete rings
A leak in a well can seriously affect the quality of drinking water. Through a seemingly small hole in the concrete shaft, household wastewater and technical fluids spilled on the ground will begin to penetrate. Sand will fall off from the horizons lying above the aquifer, which will negatively affect transparency. It's unpleasant, isn't it?
To restore the integrity of the well shaft, a quickly hardening composition will be required, which will allow you to quickly eliminate the defect in the concrete structure. A hydraulic seal for a well will eliminate leaks, large and small cracks forever. We will tell you how to choose it correctly.
We describe in detail the process of applying the repair composition. A valuable option from the author are recipes for making fillings yourself. The information is supplemented by useful diagrams, photos and video tutorials.
Types of seals for hydraulic structures
Previously, before the invention of hydraulic seals, wooden boards, hemp and jute materials were used as plugs for wells. A significant drawback of outdated types was rapid delamination and decay, which led to a deterioration in the quality composition and taste of well water.
With the invention of the hydraulic seal, it became much easier to eliminate leaks and operate wells. Modern manufacturers of building materials offer ready-made waterproofing compositions based on polymer materials.
The use of a hydraulic seal allows you to quickly eliminate defects in the underground part of a structure, including not only wells, but also foundations and bridge supports
However, many well owners and professional repair teams prefer to use self-made seals, rightly believing that this will lead to cheaper repair work without loss of quality.
Hydroseals are divided into two types:
- Pressure, quick-hardening mixtures. It takes 10 to 60 seconds for them to harden. A special repair compound that has waterproofing properties is applied over such a seal.
- Non-pressure, hardening within 5-7 minutes. Such mixtures are used not for emergency work, but for preventive work, for example, planned insulation of seams.
We'll look at each option in more detail below.
If the leak is not repaired in a timely manner and the seams are not sealed, groundwater will penetrate into the well, changing the quality of the water in it.
Waterproofing grouting materials (water seals) are often used in emergency cases, when the time of hardening determines how much water will run out or seep in, thus the amount and severity of damage that can be prevented depends on the quality and correct use of the water seal.
High-quality hydraulic seals can eliminate leaks in 30 seconds, stopping the flow up to 7 atmospheres!
Waterproofing seals are used in the following cases:
- to protect drinking water in a well from groundwater penetration
- plugging water breakthroughs in basements, adits, wells
- isolation of a breakthrough in places of contact of the floor, walls, between foundation blocks
- hermetic sealing of seams and cracks in wells
- express pipeline repair.
In concrete wells, a hydraulic seal serves not only for emergency repairs and elimination of leaks, but also to prevent changes in water quality in places of thinning and increased filtration.
Waterproofing seals for wells must meet the following requirements:
- reliably seal seams and cracks, creating a monolithic connection;
- be resistant to cracking and exposure to low and high temperatures;
- do not change water quality;
- set quickly;
- not be subject to deformation or corrosion;
- be easy to use.
Almost all hydraulic seals offered on today’s construction market meet the requirements described above.
Self-made seals, subject to certain rules, which we will discuss below, will also be effective and will allow you to eliminate a leak or carry out preventive work in a well.
If you decide to use a ready-made industrial hydraulic seal, be sure to read the manufacturer’s instructions and pay attention to the expiration date.
Ready-made waterproofing seals
Ready-made hydraulic seals for concrete wells are very convenient: to use such a seal, it is enough to dilute the solution with water according to the manufacturer’s instructions. Let's look at the most popular waterproofing sealing mixtures.
The use of ready-made seals allows you to quickly eliminate emergency leaks. They contain active components responsible for the setting speed (+)
Option #1: water plug. This mixture contains fine-grained quartz sand, aluminum cement, and active chemical additives that give the composition plasticity and allow it to quickly harden. Using this seal, you can quickly eliminate a leak within 2 minutes. Work with the filling
The waterplug can be used at temperatures from +5 to +35 degrees. Among the disadvantages of this hydroseal is the need for dilution with warm water +20-25 degrees, which in some cases is not entirely convenient.
Option #2: peneplug. Available in the form of a dry powder that must be diluted in water. This mixture is intended for waterproofing concrete wells, as well as wells paved with brick, natural or artificial stone. The hydroseal is based on high-quality cement, quartz sand and polymer additives.
This mixture is capable of stopping a leak with a pressure of more than 5 atmospheres. Hardening time 40 seconds.
Option #3: powder ex
A fast-acting waterproofing seal that sets within 10 seconds after application.
This filling has excellent characteristics: frost resistance, resistance to aggressive environments, ease of use.
The disadvantages of this mixture include high cost and the inability to work at temperatures below +5 degrees.
The composition produced for quickly eliminating leaks in the basement, well, roof, wall, is made on a cement base. Supplied in powder form, easy to mix and apply
Technology of using ready-made compounds
Ready-made waterproofing seals are most often used to seal leaks when the water that leaks or leaks can cause serious damage. When using ready-made hydraulic seals, it is necessary to strictly follow the work technology:
- Surface preparation. At this stage, using a perforator or hammer, it is necessary to clean the surface of the well from exfoliated concrete. However, first the surface must be cleaned of dust, dirt, and mold.
- Expansion of the repaired area. It is necessary to widen the hole by 20-30 mm and deepen the hole by 30-50 mm. This is done in order to “refresh” the edges of the hole. In this case, you should try to give the sealed crack the shape of a funnel. When sealing a seam, it is necessary to strip it and deepen it by 5-10 mm. To expand, it is best to use a wide spatula, working the damaged area from top to bottom. Small cracks and holes can be expanded in any direction as convenient for the repairman.
- Preparation of the solution. The solution is prepared no later than 2 minutes before use. Recommendations for preparation, proportions, optimal water temperature - all this must be studied before preparing the waterproofing mixture. To dilute the mixture, use a clean metal (not aluminum!) container.
- Filling the crack. We fill no more than 50-70%. This is necessary so that the waterproofing solution, which expands during the hardening process, does not damage the walls of the well.
- Stabilization of the filling. Press the finished filling with your hands for 3-5 seconds to several minutes (indicated in the instructions for use).
- Care. Depending on the mixture used, it may be necessary to periodically wet the seal over a period of 12-24 hours. If the instructions do not provide for this, then there is no need to do this.
- Treating the seal with a waterproofing compound. At this stage, a penetrating waterproofing material is used, which will protect the concrete wall of the well and the installed hydraulic seal from further destruction. From ready-made waterproofing mixtures you can choose: “Osmosil”, “Hydrotex”. Waterproofing can be applied only after the filling has completely hardened, unless otherwise provided by the manufacturer.
When diluting the solution, strictly follow the proportions specified by the manufacturer. You should not skimp and try to dilute the mixture thinner or, in an effort to increase its effectiveness, make it too thick. In both cases, the waterproofing properties of the seal will be impaired.
Installation of the hydraulic seal should be carried out quickly; it is advisable to do this with an assistant who will dilute the mixture while you prepare the hole for sealing
Making a filling yourself
Self-made hydraulic seals have some features. They are somewhat inferior in quality to ready-made fillings produced by the industrial method. These disadvantages include:
- there is no guarantee of inertia, i.e. a “homemade product” can come into contact with the environment, thereby changing its properties;
- a homemade filling hardens much slower than an industrially produced one;
- there is a possibility of the seal disintegrating and its components getting into the water.
Based on the last point, we do not recommend using toxic compounds to create “homemade” hydroseals!
The advantages of homemade seals include low cost and availability, which is especially important in emergency cases when there is no industrial seal at hand.
#1: Homemade pressure-free seal
To prepare a waterproofing seal, the following materials are needed: fine-grained, preferably sifted sand, cement of a grade not lower than M300. Proportions - 2 parts sand + 1 part cement. Immediately before use, water is added to the composition.
Water must be added gradually, stirring constantly. The consistency should be thick so that the mixture can be easily formed into a ball that will not spread.
The filling is applied to a large crack by hand, and rubbed into a small crack with a spatula. After the repair is completed, the well section must be covered with an iron plate. After 2-3 days, the iron is removed, and the filling is treated with cement mortar and covered with waterproofing.
This method can only be used to eliminate non-pressure and low-pressure leaks. Under high pressure (over 3 atmospheres), such a homemade composition is quickly washed out.
To seal a deep crack, it is recommended to fill in two layers, and the first filling (bottom layer) should be thicker, almost dry, than the second
#2: Seal for seams and small cracks
Despite all their shortcomings, homemade hydraulic seals are excellent for sealing seams in concrete wells. They cope with this task “excellently”, while allowing them to save a significant amount on industrially produced products.
Being environmentally friendly and safe, homemade hydraulic seals made of sand and high-quality cement reliably protect well water from the ingress of groundwater, impurities, and soil.
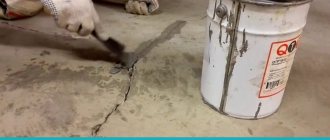
To increase the efficiency of waterproofing the seams of a well, a “liquid glass” composition can be added to the solution of sand and cement. This mixture will make the sealing better and more durable. Proportions 1:1:1 (sand:cement:liquid glass). It is necessary to add “liquid glass” 1 minute before sealing, because The composition hardens very quickly!
The technology for sealing the seams of a concrete well is as follows:
- Surface preparation, which consists of removing exfoliated concrete and remnants of old sealing.
- If necessary, treat the walls of the well with an antibacterial compound to remove/prevent mold.
- Cleaning seams from dust, dirt, and old waterproofing. Expanding the seam by 5-10 mm by gating. The tools used are a hammer drill, a hammer, and a wall chaser.
- Preparation of waterproofing mixture.
- Pre-wetting the seams. The seam should not be wet, but moistened. It is optimal to use a fabric that absorbs water for this procedure.
- Applying the waterproofing mixture using a spatula. Filling cracks and caulking joints.
- Application of a penetrating waterproofing solution.
How often are seam waterproofing works carried out? Waterproofing the seams of a concrete well is carried out on average once every 5 years, provided that the well is operated correctly.
Emergency waterproofing is carried out in the event of a leak, deterioration in the quality of well water, or after sudden drainage.
It is best to carry out waterproofing work in the spring, after the snow has completely melted, when the average daily temperature is no lower than +5 degrees.
It is necessary to carry out sealing, moving from bottom to top, simultaneously inspecting the walls of the well, eliminating chips and sealing existing cracks and crevices
Safety precautions for working in a well
Work to eliminate a leak or seal a well is a high-risk activity, so it is necessary to strictly follow safety requirements.
At the preparatory stage, you should carefully handle a jackhammer or hammer drill, which is used to clean the surface from peeling concrete and chips.
When mixing the hydroseal, you must protect your hands with thick rubber gloves. The tool used to apply the hydraulic seal must be cleaned immediately after completion of the work of any remaining waterproofing mixture.
When using ready-made hydroseals, make sure that the composition does not get on exposed skin. When diluting the powder, try not to inhale the resulting vapors, as they can harm the mucous membrane.
Selection of the optimal hydraulic seal
Industrial or home-made waterproofing seals are a simple way to eliminate pressure or non-pressure leaks in a well. The technology for using hydroseals is very simple; even a non-specialist can waterproof a concrete well.
When choosing a method for eliminating a leak, pay attention to its characteristics: we recommend eliminating pressure leaks using ready-made, quick-hardening hydraulic seals.
You can eliminate non-pressure leaks, as well as waterproof the seams inside the well, using self-made hydraulic seals. The use of homemade hydraulic seals is only possible in a dry well, because... the available water will wash the solution before it hardens.
Conclusions and useful video on the topic
The video will introduce you to the procedure and technological stages of sealing joints in a concrete well:
Detailed video instructions on eliminating pressure leaks using a Peneplag hydraulic seal:
Proper production of handmade seals and the use of industrial compounds guarantees an excellent result and will eliminate leaks and cracks in a reinforced concrete well shaft.
sovet-ingenera.com
Application
The water-repellent properties of the material allow it to be used in the construction of pool bowls or for waterproofing foundations.
The scope of application of this high-quality material is extensive. The product is intended for the following purposes:
- Production of concrete with special characteristics, such as frost resistance, fire resistance, acid resistance.
- Waterproofing the foundation, if it is built in a place where groundwater is shallow.
- Waterproofing of walls, basements, floor screeds.
- Arrangement of pool bowls and well walls.
- Production of plaster with water-repellent properties.
- Production of fireproof mortar for plastering and sealing joints when installing fireplaces, stoves, and barbecues.
Waterproofing
Creating a water-repellent coating is a priority when choosing a material for pouring the base. Depending on the area of application of the cement solution and silicate glue, not only the recipe for preparing the mixture and the method of its application changes.
Waterproofing during foundation construction
Protecting the foundation from the negative effects of groundwater is the primary task of builders. When installing the foundation, a silicate solution is applied to the surface twice. This is a coating method of application, which is reliable and durable. After covering the foundation with a silicate solution, a waterproof rolled material is laid on top.
In this case, the waterproofing composition is prepared according to the following proportions:
- For 1 kg of cement add 50 grams of liquid glass.
- For 10 grams of silicate, 150 grams of purified water is required.
Waterproofing for swimming pool
The solution can be applied both from the outside and from the inside of the structure. Before using the silicate mixture, recesses and joints should be locally treated over the entire area of the pool. This will improve the sealing properties.
High-quality treatment with a silicate compound on the outside of the pool will protect the structure from being washed out by groundwater. Internal silicate coating is important due to constant contact with water Source kazan.blizko.ru
Waterproofing well walls
For such a coating, the simplest composition is prepared. All components are mixed in equal parts and diluted with water. By analogy with treating a swimming pool, before applying the solution to the walls of the well, coating defects and joints are first covered with it. Only after detailed processing is the entire working area coated.
Advantages and disadvantages
Liquid glass for concrete has a number of advantages, among which the main ones are:
- multifunctionality;
- increased adhesion;
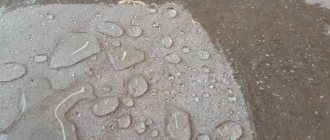
- the formation of a shell on the surface that reliably protects the surface from ground and atmospheric moisture;
- reliable protection and strengthening of the treated structure;
- fast hardening times;
- easy preparation and application;
- affordable price.
The concrete mixture with the additive hardens quickly, so you need to work with it quickly.
However, before fermenting concrete with liquid glass, it is necessary to weigh the pros and cons, because in addition to the advantages, this method of protection also has disadvantages. The main ones are:
- It hardens quickly, which can make the pouring process more difficult because you have to work quickly.
- Narrow focus. It is advisable to apply the material for moisture protection purposes only on concrete and wooden surfaces. It is not suitable for other types of mortars.
- The need for strict adherence to proportions. If the instructions for preparing the mixture are not followed, the finished solution will be ineffective.
Impregnation
Impregnation of concrete with potassium/sodium silicate has recently become an increasingly common practice in the construction industry:
- silicate emulsion is used to treat various hard surfaces: stone (natural and natural), concrete, and plaster;
- Applying a light layer of silicate increases the antiseptic properties of the coated material several times.
The solution is made from the silicate itself and water, which are diluted in a ratio of one to five. If potassium fluoride is used as a glass base, it should be diluted with the same volume of water as the volume of glass.
The surface must be cleaned before application. Sometimes it needs to be leveled. The resulting mixture is applied with a regular brush or spray gun. After approximately 30 minutes, the procedure should be repeated. Costs will depend on how much the treatment surface can absorb the substance.
It must be remembered that this method of impregnation cannot be used if after this you plan to coat or treat the concrete with something else. And all because after applying soluble glass, a light film is formed, which will not allow the concrete to be properly treated with another substance on top of this layer.
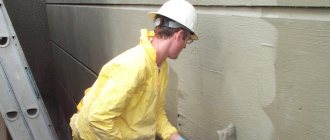
When applying silicate, you must not forget that it contains various chemicals that are dangerous to human skin, so all work should be performed only with gloves.
Preparation of the solution
Tools and materials
The technology for producing a concrete mixture with the addition of liquid glass is simple. You can make the solution yourself, but first you should prepare the equipment:
- container for mixing the solution;
- a special attachment for the drill, thanks to which you can quickly mix the components;
- brush, roller or spray;
- a level with which the horizontal or vertical of the surface being treated is controlled.
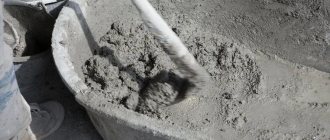
A solution with liquid glass is not made in a concrete mixer, because the solidification process occurs before the end of preparation.
A concrete mixer is not suitable for mixing the components of the solution, because the solution will begin to harden even before the end of preparation. Using a mechanical stirrer you can only combine all the materials, but without adding liquid glass. Then the required amount of impregnation is added and mixed manually. Materials you will need:
- cement;
- sifted sand;
- pure water.
General recommendations for treating concrete bases with liquid glass
The work of processing the concrete base is done quickly - the ready-made liquid silicate adhesive can simply be mixed using a construction mixer. Work should be carried out at temperatures above plus 5 degrees. After collecting the glue, the container is tightly closed. And :
- there is no need to treat external surfaces if frost is expected;
- if there is ice or frost on the base, no work is carried out;
- When processing horizontal areas, puddles are unacceptable.
Any surface must be properly prepared - silicate glue is applied only to dry and clean surfaces. The top loose layer (ironization and cement laitance) is removed using various tools and units. For large areas - this is a grinding machine, sandblasting and shot blasting machine. For hard-to-reach places and in junction areas - hand tools. The resulting sludge and debris are cleaned out with stiff brushes and a construction vacuum cleaner.
Cleaning up garbage with a construction vacuum cleaner Source kwitka.com.ua
Calculations and proportions
In order to correctly calculate the proportions of liquid glass in the total mass of the solution, it is important to determine over what period of time the composition should harden. Based on this criterion, it is recommended to study the table:
| Liquid glass consumption, % | Initial setting, min. | Final hardening, hour. |
| 2 | 40—45 | 20—24 |
| 5 | 25—30 | 14—17 |
| 8 | 10—15 | 6—8 |
| 10 | 5—10 | 2—4 |
The common ratio of cement, sand and liquid glass impregnation is:
A waterproofing coating with a special additive must be prepared by diluting it in one liter of water.
- To make a reliable waterproofing coating, you need to dilute liquid glass in 1 liter of water.
- To obtain a universal-purpose plasticizer, you need to mix cement and sand (proportion 1:3), then add silicate material to them with a volume of 1/5 of the total mass.
- If you need to cover and impregnate a finished plastered surface, water and liquid glass impregnation are mixed in a ratio of 5:1, respectively. Then the prepared solution must be applied to the concrete.
- To prepare a fire-resistant mortar, up to 5% silicate impregnation is added to the standard cement-concrete mixture.
Cooking: basic rules
Processing concrete with liquid glass will proceed quickly and efficiently if the mass is prepared correctly. The procedure is as follows:
- Prepare 10 liters of clean, filtered water. Process water is not suitable because the salts and other impurities contained in it negatively affect the reaction.
- Take liquid glass into a glass and carefully pour it into the water, carefully stirring the composition until a homogeneous consistency is obtained.
- Pour the prepared solution into a basin, and then, carefully mixing everything, add the cement-sand mixture in the calculated proportions. Adding liquid glass to concrete without first diluting it in water is prohibited, because the finished product will not meet the declared characteristics.
- Beat the mixture with a construction mixer or a drill with a special attachment.
- The finished product is poured onto a horizontal surface, for example, formwork, or it can be used to cover walls.
After treatment with liquid glass, the vertical surface will become absolutely smooth. If additional decorative finishing is planned, then in order to create roughness and reliable adhesion to the material used, it is recommended to additionally coat the wall with the construction product “Betonokontakt”.
Features of its storage
Storage should take place in a warehouse or other place inaccessible to children. Be sure to close the packaging tightly. If the composition freezes, the glass will not lose its properties after thawing. Also, after long-term storage, you can notice a white coating on the bottom of the container; it is not a sign of deterioration of the composition. According to the manufacturers' instructions, the product can be stored for 1 year after production. Do not use an expired product.
Storage should take place in a warehouse or other place inaccessible to children.
Safety precautions
Liquid glass is not a substance with a high level of toxicity. But if the material gets on the skin or mucous membranes, it causes irritation. To avoid injury, special equipment should be used during work. clothes, wear special gloves on your hands, and protect your eyes with safety glasses. Premises where construction work is carried out using liquid glass must be constantly ventilated. If it happens that the prepared solution gets on the skin, it is necessary to treat the damaged area with a weak solution of vinegar diluted in clean water.
Advantages
There are a huge number of ways to use liquid glass; it is chosen for different solutions and surfaces, the reason for this is the advantages of this product:
- It has a high plastic property, therefore it covers surfaces well, filling pores;
- The dried layer has high strength properties and a high level of adhesion;
- Wear resistance, layer service life is 5 years;
- The film-like layer created by the product does not allow water to pass through;
- Reasonable cost and low consumption;
- Safe for human health, you can even use it in children's rooms.
The dried layer has high strength properties and a high level of adhesion.