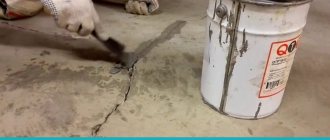
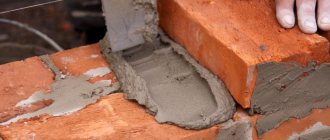
Any coverings and surfaces can be finished with tiles. Reliability, practicality, beauty are ensured by the skill and skill of a specialist and the strength of the material.
Floor finishing in the kitchen, hallway, and bathroom is made with this material. It is not afraid of moisture, is durable and resistant to damage and impact. The originality of the drawings adds perfection to the interior.
Preparatory part before laying tiles
Before starting work, it is necessary to prime the floor itself and prepare materials for mixing the cement mortar: you can buy both inexpensive cement and cement with some additives (most often used for pouring concrete and screeds).
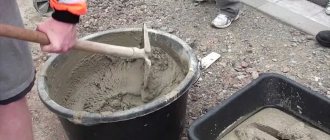
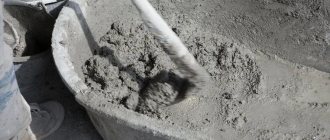
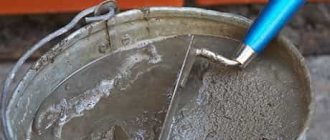
Also, to prepare a cement-sand mortar, purchase construction adhesive to make the mortar more elastic. Sand and cement must be mixed in proportions of one to three (that is, for one bucket of cement there will be three buckets of sand). Add water together with glue until a viscous mass is formed (not thick and not liquid) and mix. Thanks to construction adhesive, the cement mortar is very elastic, even somewhat reminiscent of tile adhesive. The next step is to mark the tile layout on the floor.
Unlike using tile adhesive, you don't need a comb. Instead of crosses, it is better to use a floor leveling system (clamps and wedges). It is recommended to buy a rubber hammer (mallet) rather than use your own hands to avoid pain in your hand after two or three slabs.
Tile adhesive
In principle, this is still the same cement mortar, but with certain additives that increase the adhesion properties of this composition to other materials.
________________ __
This is the advice - if you can prepare a high-quality cement mortar yourself at home and add PVA to it (as has been recommended since the times of the USSR), then this mortar will be fundamentally no different from tile adhesive.
I looked at the store two roads away, they only offer Master cement.
Look not at the name of the cement, but at its brand, 500 or 400 is best.
No, you can’t use cement only.
Cement is a part of the whole (the whole, in this case, is a cement-sand mortar), that is, a binder (astringent).
Cement needs sand and this is the minimum.
Cement in its pure form was not used when laying tiles even during the Soviet Union (there was no tile adhesive then).
The Soviet version of “glue” is cement + sifted sand + PVA glue.
The option is quite workable, but you need to remember the following points:
When working with such a solution, the tiles must be pre-soaked
No matter how you sift the sand, you will not reach the tile adhesive fraction, that is, you need to be prepared for a larger layer under the tile.
The quality of cladding with such a solution and with tile adhesive is different; with adhesive it is much higher.
If you completely switch to the “ancient” technology, then on some walls (for example, plaster) during the laying process you also need to constantly wet the walls.
All this technology is in the past, the savings are not significant, but there is a lot of “fuss”, and the quality is poor.
Tiles laid on cement diluted with water will definitely not last long for a simple reason:
The process of laying tiles on cement mortar
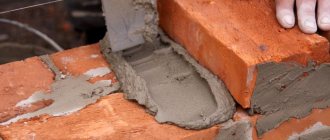
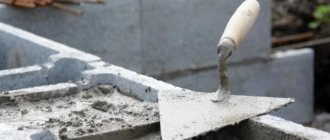
The work itself of laying tile material on a cement-sand mortar is not difficult. Lay out the first tile using a level (laser or manual) in the middle of the room in accordance with the marking scheme made earlier. All other tiles will lie exactly from the central tile in level. Do not press the clamps too hard to prevent the tile from bursting.
It is necessary to rub (smear) the solution at the place where the tiles are installed so that the solution adheres better to both the floor and the tiles. Please note that the batch number, direction and grade are always written on the back of the tile. Therefore, it is strongly recommended that you go through the tiles so that the lot numbers match, so that in the future there will be no problems with the tiles swelling. It is best to remove the remaining cement-sand mortar after laying the tiles. It is recommended to nail the tiles on the side closest to the tiles you have already laid, so that all the mortar does not fit into the seams of the laid tile material. Next, we nail the tile, holding the edge. Do not forget to constantly check the width, length and height with a level so that the tiles lie level.
Cement mortar tiles must be laid so that there are no voids left under the tile material itself and there is not too much mortar itself, as this can lead to excess mortar coming out through the seams between the laid tiles, or even lifting the already laid tiles. tiles This will lead to unnecessary work on leveling already laid tiles, and consequently to the expenditure of considerable time.
When laying tiles, it is recommended to wet the back side with water using a spray bottle. Thanks to this, excess cement mortar will easily come out and not linger under the tile material.
It is best to clean seams using a floor leveling system. And it is better to do this right away, before the cement hardens, otherwise in the future it will be very problematic to remove the mortar from the seams. If you use a floor leveling system and plan to lay tiles for more than one day, then be sure to install clamps along all edges of the tiles so that the next day, when the cement hardens, you do not have to worry about installing the clamps in the already hardened mortar.
Why do this?
If tiles on wood floors have so many problems, why use this solution? Indeed, this combination is forced and in most cases it is better to lay the tiles on a prepared base made of mineral or polymer materials.
- A wooden house with wooden floors - in this situation, in any case, you will have to lay tiles on a wooden base, unless you completely abandon the tile finishing. However, tiles are still preferable in rooms with wet areas.
- An apartment with a wooden subfloor - such foundations are found in old houses, often this becomes an obstacle to laying tiles in the hallways and in the kitchen. In this case, you need to calculate according to the estimate what is more rational to do: completely remove the old wooden structure or put tiles on it.
Summing up
When choosing a cement-sand or adhesive mortar, be guided by your own abilities and experience in working with mortars of one type or another. If you have difficulty using cement mortar, then it is better to opt for an adhesive mortar. You should also focus on the financial side, since the adhesive mortar itself is more expensive than cement-sand mortar, not including the cost of purchasing related materials for laying tiles. But, if you are not confident in your abilities, then it is better to entrust the work of laying tile material to specialized organizations directly involved in this activity. As can be seen from all of the above, tile material can be laid not only on adhesive mortar, but also on cement mortar. It all depends on your money
Compositions used to attach tiles to the floor
- Solutions with synthetic resins, latex resins;
- Dry mixes;
- Adding PVA glue.
1) Porcelain tiles have a smooth surface and poor adhesion ability. Synthetic resins are added to the adhesive mixture, which increase plasticity and increase the adhesion properties of materials. Latex resin will ensure reliable operation.
It is added to the prepared solution. There should be savings, but if the quality of installation suffers, it is better to use the necessary means.
If the base is made of cement, then you need to use a larger volume of solution than with a concrete field. Unglazed tiles are more expensive, the adhesion is worse, and more adhesive mixture is required. The glazed composition is more economical.
2) Dry mixtures are made from a special composition using the necessary substances. Great variety for species, surfaces and conditions.
Basic products for smooth surfaces, reinforced for larger tiles. Specific compositions for non-traditional floor bases: metal, glass.
3) The solution will be very strong if you add PVA glue to it. For 10 liters of mixture, use 200 grams of glue. Instead of glue, liquid soap and washing powder diluted in water are added. Slaked lime increases water resistance and elasticity. Primer EC-30 will enhance hardening in cold weather.
Adhesive mixtures Toiler
The greatest variety is found in adhesive mixtures for laying ceramic and stone tiles. This group includes:
- mixtures for wall and floor cladding;
- For interior and exterior use;
- adhesives for porcelain tiles;
- mixtures for large-format slabs, for lining swimming pools and heated floors.
The most popular adhesives are Toiler TL25 and TL15 . These mixtures are designed for attaching ceramic tiles with normal water absorption to any hard substrate. TL25 glue is more universal: it can be used both inside and outside buildings. At the same time, its price is 176 rubles per bag, and the cost of TL15 is even less.
For porcelain tiles, TL35 adhesive . It has high adhesion to surfaces with very low water absorption (water absorption of porcelain stoneware, as a rule, does not exceed 0.5%, which is less than that of natural stone). Its price is 234 rubles, and this is significantly less than the prices for similar adhesives from other companies.
Greater adhesion strength of the cladding to the base in a wide range of conditions is provided by adhesive for large format slabs and massive slabs - TL50 . It is used for gluing cladding made of ordinary ceramics, porcelain stoneware and natural stone. This glue does not lose its strength when in contact with water and when temperature fluctuates over a wide range. It is used for lining heated floors and for swimming pools.
TL65 adhesive was created specifically for gluing marble slabs, glass blocks, and mosaics. Its peculiarity is its white color, thanks to which it creates an even light background under the cladding.
This group also includes a mixture for fixing heat-insulating boards in a facade insulation system. They can be used to glue slabs of both expanded polystyrene and mineral wool.
Additional nuances that affect the drying speed of the screed
It must be said that, in addition to the type of screed, the rate of strength gain of the laid mixture can be influenced by various external factors and environmental conditions. In order to fully understand how long it takes to lay tiles on the screed, the following conditions must be taken into account:
- The thickness of the cake - the larger the layer, the longer it will take to gain strength. If 4–5 days are enough for a 5 cm thick screed, then a 10 cm structure will harden in at least 8–9 days.
Rice. 10. Floor screed 10 cm over uneven floors
- Considering that setting, hardening and strength gain occur in the subfloor structure during the evaporation of moisture, the rate of all reactions will depend on the initial water-cement ratio of the mortar when it is laid in the structure.
- The same applies to the level of humidity in the room; if the content of water vapor in the air exceeds 70%, then the screed can be used no earlier than after 2 weeks. At the same time, it should be taken into account that cement is a hydraulic binder, and, ultimately, its structure will fully correspond to the declared brand in terms of strength.
- If the floor contains any additives that increase the rate of hardening of the screed, then the tiles can be installed much earlier, and the exact time will be determined by assessing the finished coating. Typically, such additives are widespread on the market, they have low prices and are in high demand among homeowners carrying out renovation work in their apartments.
- The last factor is temperature. All chemical reactions that occur when cement comes into contact with water accelerate as the temperature rises. Thus, the ideal conditions for hardening the screed are steam treatment under pressure. But, of course, in the conditions of an ordinary city apartment such manipulations are not possible, and the room temperature above +25 degrees Celsius will lead to an acceleration of the hardening process of the material.
Rice. 11. Floor screed that has gained strength
It is important to note that property owners who believe that periodic ventilation of the room will speed up the process of strengthening the screed are deeply mistaken. If the surface of a subfloor, within which a chemical reaction is still occurring, is exposed to outside air without additional humidification, this will affect the quality of the surface. So, the structure will begin to gather dust, and small cracks will appear over the entire area.
Technology
Marking
The width of paths and their geometry can vary widely. Steps and retaining walls are used when there is a significant difference in height or in landscape design. The classic technology of laying FEM assumes the presence of borders. When paving with mortar on top of the concrete base, the need for these elements disappears. However, they give a finished look to sidewalks, so they are usually included in a site improvement project.
Removing the fertile layer
The top layer of soil on a site, be it black soil, gray soil or turf, always has a high saturation of organic matter, so subsidence is inevitable. Organic matter rots, the soil self-compacts under the weight of the slab or FEM.
Therefore, the fertile layer in cultivated areas or the turf in newly fenced off areas for construction is always completely removed. The thickness of the layer is 20 - 40 cm, it does not need to be removed, it can be used in other areas.
Pillow filling
To make the bottom layer of the path, non-metallic inert bulk materials are used - sand, crushed stone, gravel. A pillow made from them solves several problems at once:
- rise to the required level after removing the fertile layer;
- absence of frost heaving forces;
- creating a pillow with high load-bearing capacity.
Capillary absorption of moisture from soil supersaturated with water is present only in sand. Crushed stone and gravel are a fairly reliable cutoff of ground moisture from the concrete slab located above them. However, these materials are more expensive.
Bulk materials must be laid in layers 10–15 cm thick, with each of them compacted with a vibrating plate until no traces of shoes remain on the surface when a worker walks.
Installation of curbs
- digging trenches wider than the width of the curb;
- making a pillow using the above method;
- laying on concrete mortar along a cord.
Concrete with fine crushed stone is used for installation. An angle grinder with a diamond blade is used to trim whole stones.
At the same stage, storm sewer installation is carried out:
- trays are installed along the lower curb;
- Storm water inlets are installed at the lowest points of paths, platforms or between trays.
Attention: It is prohibited to discharge storm water into the centralized sewerage systems of populated areas. To collect them, an underground reservoir or drainage well is installed on the site.
Manufacturing of concrete footings
The thickness of the concrete slab and the proportions of concrete depend on the purpose of the site or path. In areas where heavy transport (trucks) are planned to enter, a reinforced monolithic slab of concrete 15-20 cm thick is cast. Here it would be correct to lay tiles 8-10 cm thick.
In parking lots where passenger vehicles will travel, they usually pave with FEM 6 cm thick. For lining blind areas and paths in the garden, paving stones 4–5 cm thick are sufficient. The concrete footing here is standard, made of “lean” concrete 5 cm thick without reinforcement. The formwork consists of curbs on both sides; the surface is leveled, but not smoothed to give it greater roughness.
FEM installation
- higher binder content in the cement-sand mortar, 1:3 rather than 1:4;
- work with a notched trowel rather than a trowel;
- preparing a bed of mortar for one tile, rather than several bricks at once.
Preparation of the solution
First, the dry components of the mixture - sand, cement - are mixed in a gravity-type concrete mixer. Then a liquid solution of plasticizer in water is added there. The mixing time is 1 - 2 minutes, the life of the solution is limited to 2 hours.
Layout of paving slabs
Regardless of the configuration and size of the FEM, paving is carried out, first with whole tiles according to the selected laying pattern. Lastly, trimming is carried out in places where the coating adjoins the curbs, at intersections.
On radius sections of roads the following method is used:
- the layout of the coating elements begins from the side of the smaller radius;
- each next row is paved with a slightly larger divergence of seams compared to the previous one;
- For FEMs of complex shapes or large sizes, a standard layout with trimming is used.
The width of the blind area near the house is usually selected taking into account the dimensions of the FEM, so that a whole number of tiles are obtained in rows.
Seam design
The classical paving technology uses the following principles:
- during rainfall, most of the water flows into storm water inlets due to the slope of the covering;
- a smaller part of the drainage penetrates into the seams due to the ribs on the side faces of the FEM, and seeps through the sand and the surface into the ground.
In the technology under consideration, natural drainage through the bottom layer is impossible, since it is made of concrete. Moisture has free entry into the seams and accumulates there without the possibility of removal. When the air temperature is positive, water has time to evaporate from the seams. In winter, the liquid will inevitably freeze, increase in size, and move adjacent tiles relative to each other.
