Any builder strives to acquire this equipment, but without knowing the operating principle of a concrete mixer, he faces a number of problems. It doesn’t want to start, it starts to buzz, and other similar troubles can await an inexperienced worker. In this article we will look at how to overcome all the difficulties and learn how to make repairs so that the concrete mixer can continue to work for a long time and reliably.
Design and principle of operation
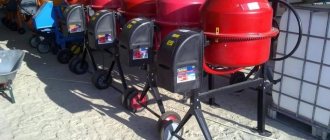
Regardless of the manufacturer and operating principle, all concrete mixers have one goal - to prepare mixtures and solutions that are necessary for various construction works:
- pouring the foundation;
- bricklaying;
- laying tiles, etc.
Such a construction machine increases work productivity, reduces time, and also provides higher quality of the finished mortar. Like any mechanism, a concrete mixer requires attention and timely maintenance.
Any concrete mixer consists of such basic structural elements as:
- drum in which the solution is mixed. It comes in various shapes (cylindrical, barrel-shaped, pear-shaped);
- frame – support for all equipment (left and right support, traverse, mechanism for fixing the tipping of the drum). All parts are attached to it;
- blades - they are the ones who mix the concrete. Another function of the blades is to prevent solutions from sticking to the drum wall;
- drive unit. It is responsible for the operation of the stirrer. Includes a transmission mechanism and its control system.
According to the type of mixing process, concrete mixers are:
- manual, in which the rotation of the barrel occurs due to the twisting of a special handle by the employee;
- driven - the mechanism starts after turning on the desired button and is powered by electricity or fuel (diesel or gasoline).
According to the principle of operation, concrete mixers are divided into:
- gravitational: in a rotating drum the mixture rises and falls under its own weight, while simultaneously rotating in it. Fixed blades located inside the drum ensure faster formation of a homogeneous mass;
- forced: in them the solution is obtained similar to the work of a home mixer, since inside the drum there is a shaft on which the blades are located. The mixture is mixed as the blades rotate.
To come in
Already registered? Sign in here.
Related publications
The front bearing needs to be replaced. in this case it is the Ametek motor from a Philips vacuum cleaner.
We drill two through holes in the impeller washer and for the puller pin, the center is on the shaft.
We cut two threads in the washer.
Now you need a piece of iron for the stripper strip. in this case it is a stub from a chisel.
and a pair of M4 studs that came to hand.
We drill three 5mm holes in the plank. in the central one we cut the M6 thread. the outer ones are just holes for hairpins.
we connect the structure. The studs passing through the bar are screwed into the threaded holes in the impeller washer until they stop. The pin is screwed into the central hole until it touches the center of the shaft.
Causes of malfunctions
Before you start repairing a concrete mixer, you need to determine what exactly is broken in it. Among the most common problems are:
- The concrete mixer does not start (it turns off after starting). Such a nuisance can happen for several reasons: the start button is faulty; the power cable is damaged; the most dangerous is that the electric motor burns out.
- Loud motor noise and no drum rotation. Most likely, the cause of such a breakdown is in the unit that transmits rotation; the belt may have stretched or it may fly off because the pulley teeth are dirty. The breakdown is quite common and can occur due to too frequent overloads.
- The device hums, but the drum does not spin. Most likely the capacitor, which is located in the wall of the electric drive, under its box, has failed. After replacing it with a similar one, the problem should be eliminated.
- Engine overheating. A very common problem with electric stirrers. It can be triggered by the following negative factors: overload; impacts, falls or sudden shocks of the device; improper storage; during operation, the air temperature did not correspond to that required for the concrete mixer (indicated in the passport); the winding or its insulation is damaged; the bearing has collapsed.
- Rotate the drum in the opposite direction. Most likely there was an electrical failure.
Lost engine thrust: why does this happen and what should the driver do?
As a rule, during the long-term operation of a vehicle, almost every driver sooner or later notices that the engine does not pull well. In other words, the power unit has difficulty coping with the loads, there is a loss of power, the unit needs to be cranked up to high speeds to maintain the usual pace, the car accelerates worse from a standstill, picks up speed slowly, etc.
At the same time, in many cases the engine runs smoothly, does not tremble, there are no increased vibrations, extraneous sounds, knocking or noise during operation of the internal combustion engine. Let us note right away that there is a fairly wide list of possible reasons why a warm engine does not run, and there is a loss of engine power when cold and/or when hot.
In this article we will talk about why the engine does not pull, and also consider the most common malfunctions that manifest themselves in the form of loss of traction of the power unit.
Tools and materials required for repairs
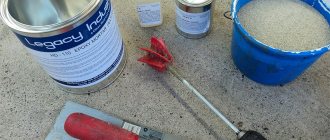
Before disassembling the concrete mixer, it is recommended to prepare the tools that will be needed for this task. Nothing special is required here, but having everything at hand, you won’t have to be distracted and waste time searching. So, it’s better to put in advance:
- a set of wrenches of different sizes;
- a solution in which the bolts will acidify;
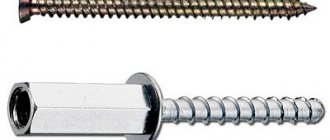
- pullers (for bearings and retaining rings);
- hammer;
- screwdrivers (preferably also of different configurations);
- pliers (it is recommended to use a tool with sharp ends, this will make it easier to remove and reinsert the locking rings);
- Bulgarian;
- tweezers;
- sledgehammer;
- multimeter
This list includes what is necessary, but depending on the breakdown, it may change slightly.
DIY repairs
The electrical part of the concrete mixer is an electric motor, a magnetic starter, as well as a start button and a starting capacitor. Most often, the engine does not start after pressing the button due to problems either with the starter or with the button itself.
To check whether the starter is working properly, use a multimeter. In this case, it is necessary to determine the integrity of the coil and adjacent contacts. If the coil burns out, then it should be replaced, preferably together with the starter, since the contacts also wear out significantly.
The functionality of the start button can also be checked with a multimeter. And if, as a result of the check, it turns out that the button is faulty, then it should also be replaced.
To repair your concrete mixer, you may have to remove the drum. To do this, you will need a wrench, the size of which depends on the size of the drum and the model of the concrete mixer. Most often, a 13 mm wrench is used, but it is possible that you will need some other one. The key is needed to unscrew the fastening nut, locknut and fixing bolt, which is located on the side.
If a bearing needs to be replaced, the following steps must be followed:
- Purchase a new bearing to use as a replacement for the old one. Most often, 6203 bearings are installed in concrete mixers, so before starting repair work, you should prepare just this one.
- To remove the old bearing, you must first remove the engine box. After this, the drum, the main gear and the key on which it is held are removed. A puller specially designed for this purpose will help you carefully remove the bearing.
- Before installing a new bearing in the vacated area, it should be well lubricated with lithol. It is also installed using the same puller.
If the farm does not have a puller and it is not possible to purchase one, then you can use a pipe of the appropriate diameter to remove the old bearing and install a new one.
What bearings are on a concrete mixer?
Each model, depending on the manufacturer, may have its own types of bearings. The most popular bearings found on modern mixers are those made of polyamide (another name is coprolon). Their material can also be:
- bronze;
- steel.
The highest quality parts of this type are those that have a washer that protects other parts of the concrete mixer from various abrasive small particles or dirt getting on them. Such bearings can withstand heavy loads and extend the life of the entire installation.
Also, when choosing a bearing, you need to take into account its markings and it is advisable not to skimp on this part, but to choose high-quality ones from well-known manufacturers.
Belt
The motor works, tries, buzzes cheerfully (obviously without signs of tearing or biting), but the stirrer does not turn. Let's fix it!
A belt is a consumable item, just like in a car. The SBR-132A is equipped with a 5РJ 610 (five-ribbed belt 610 mm long). Replacing it is simple. We remove the protective cover and disconnect the contacts from the starter so that it does not interfere. Slightly loosen the two bolts that are on the back side and secure the motor. Using your hands, lift the motor up a little and remove the belt. This is if it is still standing there))) Usually, if it buzzes and does not turn, then the stirrer has removed or broken the belt for you, and there is no need to remove anything. It puts on without much effort, first it clings to the small pulley that is on the motor. Then it is pulled onto the top one. Then you need to tighten the belt. It's better to do this with a friend. A friend presses on the box, and you tighten the two bolts that you loosened before removing the belt.
Repair
Having familiarized yourself with all the important factors and prepared for work, you can begin to repair the concrete mixer yourself. If you approach this process correctly, everything will definitely work out. Let's look at each point in more detail.
How to disassemble
Elimination of many breakdowns requires complete disassembly of the concrete mixer. In this case, you need to be extremely careful, make sure that all unscrewed parts do not get lost and follow this sequence:
- disconnect the drum from the traverse;
- remove the ring gear (if there is a need to replace it with a new one);
- remove the retaining ring that secures the working gear to the shaft;
- remove the drive gear.
This way the structure will be disassembled. If any parts are worn out, it is recommended to replace them with new ones. After completing the repair, in order to return it to its previous appearance, all steps should be repeated in the reverse order.
How to remove a pear from a concrete mixer
This will also require increased attention and following the necessary sequence:
- turn the drum over so that the traverse is at the top;
- use a wrench to tighten the bolt that secures the bulb;
- remove the washer, engraver;
- return the bolt to its place;
- knock the shaft out of the traverse and remove the drum;
- After this, you need to remove all the mounting bolts and fill them with acid to clean them.
How to remove a pulley
This part of the concrete mixer is quite capricious; it is made of plastic and is very tightly secured with a locking ring on the inside.
That is why, to remove it, you need to remove the engine box. You can do this manipulation, you must follow the following sequence:
- unscrew the bolts securing the box to the frame;
- after this, the box can be easily removed along with the pulley, you can see the bare shaft;
- All that remains is to remove the locking ring by first unclamping it.
How to replace bearings
The need to replace this unit arises when noise, crackling, or rumble is felt during operation. Before changing the bearings on a concrete mixer with your own hands, you need to stock up on a small arsenal of spare parts:
- new bearings, 2 pcs;
- bolts and nuts, washers;
- a small piece of pipe, the diameter of which must be identical to the diameter in the inner race of the bearing;
- metal stand.
First you need to remove the drum bowl, and when it is removed, do the following manipulations:
- separate the drum from the support, separate them into two parts. It is in them that there are recesses where the bearings are installed. To make the procedure easier, you can help yourself with a stand prepared in advance; you need to knock out the shaft; thanks to the matching diameters, this should happen quite simply;
- All that remains is to remove the worn bearings from the concrete mixer.
When the preparation is complete, you can begin assembly. To do this you will need:
- Clean the shaft from any dirt or rust on it. It is best to do this with solvent or gasoline;
- insert new parts onto it using a puller.
Note! If a puller is not found, you can replace it by carefully tapping the inner races of the bearings around the entire circumference using a piece of pipe or a piece of wood.
- when the bearings are pressed in, the shaft must be driven into the lower part of the support;
- put its upper part on top and screw all the bolts back;
- The last step is just to put the pear in place.
Warranty service?
And another important point: do not rush to undertake repairs if the solution mixing machine is under warranty. As soon as you violate its integrity, the manufacturer will refuse to repair it at your own expense or replace it with a new one.
Self-repair of concrete mixers is justified only when the unit’s warranty has expired. When purchasing, you must be provided with a warranty card with a specified period along with the receipt. All this time, the manufacturer is ready to bear all the costs of repairing your equipment.
How to prevent malfunctions
To avoid frequent breakdowns in the future, it is enough to follow basic operating rules:
- after each use, clean the concrete mixer from any remaining solution, both inside and outside;
- never overload the installation, produce only the amount of concrete indicated in the technical data sheet;
- prevent water from entering the control unit;
- monitor the network voltage. The excess established by the manufacturer is not allowed;
- Periodically lubricate the gear shaft.
By following the rules and recommendations, the service life of the tool will increase significantly, and malfunctions will appear much less frequently.
To carry out proper operation and repair, you should be properly prepared. Need to know:
- device of a household concrete mixer, its main elements;
- reasons that may cause malfunctions;
- correct preparation and sequence of each step.
And following the rules for the safe use of such an important construction tool will extend its service life, make work more comfortable and efficient.
Frequent breakdowns
A concrete mixer is a device whose repair is very simple . Mostly they fail due to wear of overloaded elements or simply due to improper use. The busiest parts, as a rule, are the drive elements. Often, repairing a concrete mixer requires spare parts such as gears or bearings. They take on a large load, especially if the loading mode and speed limit are violated.
Gears usually become unusable due to improper use of the device. Unfortunately, many owners of concrete mixers are convinced that the mechanism of this equipment does not need frequent lubrication, but this is a big misconception. Indeed, during operation, the load on the engine constantly increases, since the main components of the concrete mixture, which are cement and sand, tend to stick to the gear teeth, harden on them and remain for a long time. As a result, friction increases and the metal begins to wear out quickly. Lubrication is designed to reduce friction and stress on the engine.
The cause of breakdown of the concrete mixer can also be improper cooling, excessive load or incorrect operation of the gearbox.
Equipment operation
The task of the concrete mixer is to ensure that the mixture loaded into the drum is in continuous motion all the time until it is completely mixed. The device works in this order. The required inclination angle is set and fixed to the drum. Water is poured into the chamber, and then sand, cement and aggregate (crushed stone) are poured in proportions corresponding to the selected concrete recipe. The electric motor is turned on and the concrete mass is mixed. At the end of the process, the drum is released from the retainer and overturns, and the mass spontaneously flows out. The most common equipment is the two-shaft type.
In this design, the solution is mixed using two types of blades - central and outer - and corresponding scrapers. The blade has a system of a bracket and a spring shock absorber, which allows the blade to move when crushed stone gets under it. The blades and scrapers are in constant motion, which ensures uniform mixing of the solution ingredients. The design of a concrete mixer is not very complicated. You can repair the installation yourself if you have the appropriate spare parts.