Often, to create a fence, materials that are left over from the construction of a house are used, so the overall appearance from the outside will be more harmonious.
Aerated concrete blocks are a wall building material that can be used for fencing; let’s figure out how and how to create such a structure yourself.
Is it possible to build a fence for a private house from aerated concrete?
The low weight and hygroscopicity of cellular concrete often give rise to doubts: whether it is possible to build a fence from aerated concrete blocks, and whether there will be problems with it during operation. Therefore, we will answer right away - yes, it is possible to build. And why not, if they build houses from it?
The main thing is to use for this purpose not thermal insulating blocks, but thermal insulating structural ones. For example, if the density of the block is D500 or less, it must be autoclaved. In this case, aerated concrete definitely has the required strength class B1.5, because non-autoclaved blocks with such a density have half the strength. Yes, the fence does not bear loads from the weight of other structures, like the walls of a house, but is subject to lateral pressure in strong winds. Therefore, it is still better to take a more durable material.
Place for wicket and gates
After the foundation is installed and ready for further work with the fence, you can begin planning the location of the wicket and gate. This can be done with the help of pillars, which will serve as landmarks in the future. To do this, a recess is made in the places where the support pillars will stand, a thick-walled pipe is inserted and fixed with concrete.
A strictly vertical position will ensure trouble-free installation of the wicket and gate. This stage is very important for further work with the fence. Therefore, it is worth paying special attention to it.
Selection of tools and material
Vitaly Kudryashov
There are even blocks on sale, and there are tongue-and-groove blocks. For a fence, it is better to buy even ones, since the masonry made from them is more airtight, and if desired, it can be left without finishing. In this case, the blocks must have good geometry and be mounted not with mortar, but with glue.
Ask a Question
If your blocks are white (gas silicate), it is better to use polyurethane glue, not cement, as it contrasts too much with the base material. Then the masonry will look neat, without smeared seams. It is enough to treat it with a water repellent, and the surface will look quite aesthetically pleasing.
For gray blocks (they contain more cement, or it is replaced by fly ash), for masonry that is used without finishing, you can use cement glue. If the fence will be plastered or tiled, it is quite possible to use a regular solution of cement and sand to install the blocks.
Tools you will need:
- Mixing and applying the solution:
- Distribution of the solution on the bed of blocks. Instead of a ladle, you can use a notched trowel. In any case, the width of the tool must correspond to the thickness of the masonry:
- Used for initial leveling of cut surfaces and to eliminate differences between blocks in masonry:
- Refinement of the leveled surface is carried out with a trowel:
- This hacksaw is convenient for cutting the block into pieces if you need an additional element:
- If you decide to build a fence from aerated concrete with your own hands and reinforce it with rods, you will need the following tool to cut grooves:
In addition to special tools, you also need general construction tools: a ruler, a square, a level, a plumb line, a mixer, a brush for sweeping away debris, a mallet, a brush for wetting or priming. The rest will depend on what type of finish you choose for the fence.
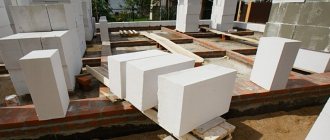
The use of aerated concrete for load-bearing walls
One of the areas of construction in which the use of aerated concrete is increasingly being used is the construction of load-bearing walls. Aerated concrete blocks are good for the construction of 2-3-story houses, although in each particular case the technical characteristics of the materials must be taken into account.
Aerated concrete blocks D400 with a thickness of at least 375 mm are suitable for the construction of buildings with 1-2 floors, and in such cases you can do without insulation. For houses with a large number of floors, D500-D600 blocks and mineral wool insulation, the vapor permeability parameter of which is closest to the corresponding characteristic of aerated concrete, will already be required.
Construction of non-load-bearing external walls
In the construction of monolithic high-rise buildings, aerated concrete blocks are also actively used to fill non-load-bearing walls. The frame of multi-story buildings is made of the usual durable reinforced concrete, but for the construction of external walls and partitions, aerated concrete is used.
Aerated concrete blocks of grades D300-D600 have less weight, and therefore the load on the overall structure will be lower. In addition, external walls made of aerated concrete retain heat well.
The D500-D600 block type is used more often in the structure of curtain wall facades. They are characterized by increased strength and are able to normally withstand heavy physical load, but insulation with mineral wool is required.
The use of aerated concrete for partitions
Aerated concrete will also be a suitable basis for the construction of partitions in buildings of various types, because this material is not only strong and retains heat well, but also has fairly good sound insulation.
Aerated concrete is also supported by the fact that the blocks have different thicknesses (50-200 mm), and therefore can be successfully used in various construction projects, be it a private house, high-rise building, office or commercial premises.
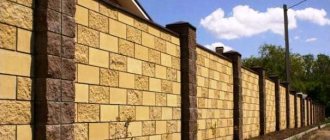
Aerated concrete fences
Today, the building materials market offers a lot of different options for the construction of fences, but despite this, aerated concrete is able to provide solid competition in this area. The advantages of aerated concrete blocks in this case include their durability, affordable cost and easy installation. However, it is worth noting that the construction of aerated concrete fences requires preliminary laying of a concrete foundation and waterproofing.
Construction of baths from aerated concrete
Due to its characteristics, aerated concrete is an almost perfect material for the construction of baths, because it provides high thermal insulation and is inexpensive. As in the situation with fences, a concrete foundation and high-quality waterproofing are required, and at the final stage - finishing inside and out, for which, for example, siding or laying ceramic tiles are suitable.
conclusions
Ultimately, we can conclude that the use of aerated concrete blocks is beneficial and effective in several types of construction.
Excellent heat and sound insulation characteristics, light weight, ease of installation, a wide range of sizes and shapes, reasonable price - all this makes aerated concrete an appropriate and virtually universal material, which is why the demand for it is growing rapidly. But for all the benefits of aerated concrete to really work, construction must be strictly according to technology.
Fence installation steps
Much depends on the design of the fence, but in general terms, the step-by-step work looks like this:
- Location determination and marking.
- Digging holes for the foundation.
- Formation of formwork, can be permanent.
- Installation of fittings and mortgages.
- Production of concrete mix.
- Pouring and compacting the monolith.
- Leveling the horizontal surface of the foundation beam.
- Waiting to gain strength.
- Making masonry mortar, or mixing a dry mixture with water.
- Laying blocks.
- Finishing.
- Installing covers.
Blocks for fence posts: general characteristics
A vertical structure assembled in the form of a column with a tubular core inside is called a support and is installed on the foundation to ensure the stability of the entire fence. Outside, the load-bearing part of the pillar is lined with decorative blocks made of concrete. Facing elements are characterized by the following indicators:
- dimensions: 25x25x25, 30x30x15, 40x40x20 cm;
- shape in plan - circle, square, rectangle, letter G (when two parts of the element are combined, a cavity is formed);
- the weight of one section is 14-25 kg.
Concrete blocks for fence posts are always made hollow in order to fill the interior space with concrete during installation. The outer surface of the edges imitates the texture and colors of natural stone or brick. The upper part of the inlaid support is covered with a head 130-350 mm high in the shape of a pyramid, ball, or cap to protect it from the destructive effects of rain and snow. Umbrella material: concrete, metal, fiberglass (can be illuminated from the inside).
Concrete foundation
Even if the stone fence is solid, it is still divided into sections. They are delimited by supporting pillars, the distance between which is usually 3 meters. The pillar must rest on a point foundation, buried at least 1 meter into the ground. More often it is a concrete pillar with a round cross-section, poured into a pre-drilled hole. A rod reinforcement or square pipe is inserted into it, which serves as the base of a ground pole.
Depending on the material used, the upper part of the column can have either a square or rectangular cross-section. If in the case of brick the core of the pillar is simply wrapped around the masonry, then with the use of aerated concrete blocks the technology is slightly different. An ordinary wall block will not be suitable for laying out pillars, since the products themselves are large-format, 600 or 625 mm long. Therefore, you need to take hollow products and use them as permanent formwork.
Note: For this purpose, you can use O-blocks (ventilation) or U-blocks, put together so that their cavities form a channel for pouring concrete. They are carefully placed on the metal core of the post, and then the solution is poured into the cavities.
For rigidity, the columnar supports are tied together with a reinforced concrete beam. This is something like a strip foundation, only buried only half its height. This structure is very similar to the grillage of a pile foundation, and is arranged according to the same principle. Under the beam there must be an anti-heaving sand cushion 15-20 cm thick.
The height of the beam is 55-60 cm, and it is buried at least 35 cm. It will also serve as the basis for the masonry if you want to make a solid fence - or, for example, lay part of it out of aerated concrete, and fill part with forged elements.
Step-by-step instructions for DIY construction
The construction of the fence consists of several stages. If you follow the instructions, the fence will be strong and will last for more than 50 years.
Creating a foundation
Aerated blocks are a material that does not tolerate soil movement and moisture. The foundation for this structure is necessary, first of all, to protect the material from bending, which causes cracks to appear.
The fence is long, there are differences in height, you need to protect the material from them and raise it above the ground level. Then the accumulation of water after precipitation will not be able to damage it. The foundation for aerated concrete blocks consists of two parts: piles and concrete foundation .
Piles - made of reinforced concrete or wood, are needed for a fence, where pillars are created from aerated concrete and as a support for a solid option. If other material is installed between the piles, there is no point in digging the foundation.
How to build:
- Mark the area and mark the locations of the pillars.
- Dig post holes using a garden auger.
- Bury wood piles and check reliability. Concrete pillars should be filled with concrete (M200-250).
- Check the uniformity of the height of the piles and waterproof them.
- Remove the formwork and install waterproofing.
Wood is used for dry soils, and concrete for wet soils. When it is not possible to wait for the concrete to dry, you can install iron poles (the participation of equipment will be required for installation).
A reinforced concrete slab is a structure that is located in a trench 20-40 cm deep and rises above the ground level. In essence, this is a strip foundation, only smaller in size. It is suitable for blind fences made of aerated blocks and those in the construction of which heavy materials are involved (brick, stone, etc.).
Work order:
- Dig a trench. The depth depends on the type of soil, usually 20 cm is sufficient.
- Compact the bottom with purified clay and level it. Next, lay a layer of sand, overlapping geotextiles on the edge of the trench and the final layer of crushed stone.
- Place a reinforced mesh on top of the crushed stone.
- Install the formwork to the height of the foundation. It should rise 20-30 cm above the ground level.
- Pour the concrete, wait for it to dry completely, and periodically moisten it with water (period of 1 month).
- If the fence is small, it is not necessary to install posts.
The hollow pillars are covered at the top to prevent water and debris from getting inside. This must be done immediately after installation.
Masonry
Stages of work:
Prepare the blocks, check the dimensions, clean them from dust and unevenness.- Check the geometry of the foundation. Place the mooring beacons, pull the cord, measure the matching height for each section of the fence.
- The first row is placed on a cement-sand mortar; it will help align the blocks in height if discrepancies are found.
Adjust the elements with a mallet, place them along the mooring line, and check the horizontal and vertical lines with a building level. If necessary, cut down the row with a plane. The blocks are connected vertically with an adhesive solution. Wait 2-4 hours for the solution to gain hardness. The first row is the basis of the masonry; its geometry must be ideal so that all subsequent rows stand level. - The second and subsequent rows are laid on glue. The geometry of the masonry is checked each time; there should be no discrepancies. An ordering is performed, a shift of ½, ⅓ or ¼ of each element in the new row relative to the previous row. It looks like brickwork.
- Every 4th row is reinforced. A reinforced rod is laid inside the block and filled with mortar.
- The last row is reinforced with a belt; for this, U-shaped blocks are used. The belt is filled with solution.
If the fence is long, the pillars of aerated blocks are laid out first, then they are connected in rows to each other.
Finishing
Externally, a fence made of aerated blocks looks dreary, but some owners create the finishing only on the front side, leaving bare material inside. Because of this, the area visually deteriorates, plus the material becomes susceptible to external influences. Therefore, work must be carried out on both sides of the fence.
Stages of work:
- After the fence has completely dried, the surface is treated with a primer.
- Level the surface with plaster.
- Reinforce with reinforced mesh.
- The final layer of decorative plaster, resistant to moisture.
Finishing materials can be anything to the taste of the owners. The main thing: mandatory waterproofing of the surface and a ventilation gap of 1 cm if brick is used.
Laying aerated concrete blocks
If not only pillars, but also spans will be laid out of aerated concrete, special attention must be paid to their connection. The principle for any masonry is the same: flexible connections are laid at the junction points between the seams. This can be a steel strip or masonry mesh, which on one side is pinched in the masonry of the pillar, and on the other - in the seams of the masonry of the span. Reinforcement is carried out in every fourth row, starting from the first.
- There must be a layer of waterproofing under the first row of masonry. If the base is level, strips of roofing felt are simply glued to the concrete with mastic or laid dry. When leveling is required, first a sand-cement screed is placed at the desired mark, and a waterproofing material is laid on top of it, without waiting for it to harden.
- In order for the fence to look harmonious, the pillars must stand out in relation to the sections not only in height, but also in cross-section. Therefore, the selection of gas blocks by size can be done, for example, like this. If you take U-blocks of size 600*200*400 for the pillars, folding them as shown in the photo below, you will get a pillar with a cross section of 400*400 mm.
- In this case, to lay out a decorative base or blind section, you can take blocks measuring 600*200*300 mm. Then the thickness of the masonry in the span will be 10 cm less than in the section of the pillar, and you will get geometrically zoned masonry, which, thanks to the contrasting or decorative finishing of the pillars, will not look monotonous.
- The process of erecting a fence is no different from ordinary stone work. The only thing is that if the masonry is carried out not with mortar, but with thin-layer glue, you will have to carefully level each row with a plane so that there are no differences.
Vitaly Kudryashov
Glue (especially polyurethane) provides excellent adhesion, but cannot level out unevenness. Where they remain unresolved, the upper block begins to break - the concrete is strained and cracks form on it. It would be better then to lay the blocks on the mortar - this is not a residential building, where the thermal conductivity of the masonry is important.
Ask a Question
- Again, it is easier to install rod reinforcement in the solution. For a wall 30 cm thick, two parallel grooves 20 mm wide are usually made. From the groove to the edge of the block there must be at least 60 mm. The depth of the groove should be such that the reinforcing bar is completely recessed and does not thicken the seam.
For good adhesion of the solution, it is very important that there is no dust or debris on the masonry surfaces. They also need to be wetted so that the water remains in the solution for as long as possible, and does not immediately absorb into the aerated concrete.
What blocks are suitable for construction?
It is convenient to use a hollow gas block for the fence. It is lighter in weight; lighting or security system wires can be pulled through the holes. To create a decorative fence, you can use special facing aerated blocks. They have an important advantage: they do not require finishing material and do not allow moisture to pass through. The price for such material is higher.
How to choose blocks for fencing:
- pay attention to the shape, all elements must be the same size, with clear geometry;
- the color is uniform, without inclusions or streaks;
- The edges are smooth, without chips.
Experts recommend purchasing blocks in one batch so that the elements look harmonious together. Preference is given to domestic manufacturers; their products take into account the harsh weather conditions in which aerated concrete will be exposed.
Often, leftovers from the construction of structures on a site are used for work; this is the right decision; you will only need to purchase the required quantity.
Standard sizes of blocks suitable for fencing: 62.5*25*15 cm, 62.5*25*20 cm. A thickness of 20 cm is sufficient for a fence. The quantity is calculated based on the area of the structure.
Finishing work
Vitaly Kudryashov
If you purchased autoclaved aerated concrete specifically for building a fence, you need to remember its initial humidity, which can be up to 40%. In addition, the material is also wetted during the laying process, so it is impossible to immediately begin finishing.
Ask a Question
If aerated concrete is not autoclaved, it does not have initial moisture, but it still absorbs moisture from the solution, albeit in smaller quantities. Therefore, in the summer, you need to let the fence dry for 3-4 weeks, and if it was built in the off-season, then it is better to wait for the warmth.
We have already mentioned that aerated concrete can be used without finishing - or, more precisely, without a decorative coating. However, there must still be a protective coating. This can be considered a water-repellent composition, which will give the masonry water-repellent properties. This is cheaper than plastering, but the coating will have to be renewed every 2-3 years. Most developers, since they have allocated funds for a permanent fence, prefer to decorate it beautifully.
The options could be:
- Simple plaster with paint coating.
- Decorative plaster. This is an option for those who like “expensive and rich”.
- Cladding made of flexible stone (acrylic tiles).
- Cladding made of natural stone tiles.
- Artificial stone based on fiber-reinforced concrete.
- Combined finishing
All of these types of finishes, except for flexible acrylic tiles, are adhesive - that is, the material is held on the base due to the adhesion of hardening layers (plaster or glue). The surface of aerated concrete is smooth, and it tends to absorb moisture - therefore, it is impossible to carry out such types of finishing without preliminary priming.
Vitaly Kudryashov
To avoid cracking of plaster coatings, fiberglass mesh is embedded in the first (base) layer. The tile covering, of course, will not crack, but it may peel off from the base.
Ask a Question
Therefore, tiles cannot be glued directly to aerated concrete, but a reinforcing layer must first be made, as is the case with plaster.
Upon completion of finishing, the masonry is closed with specially shaped caps.
Lightweight concrete products
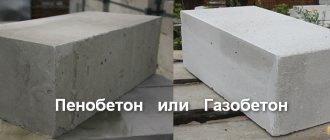
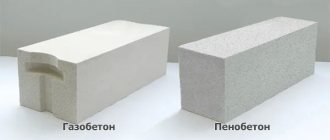
For the construction of fences, the buyer can choose from 2 types of cellular blocks: foam concrete and aerated concrete; we can talk for a long time about their advantages and remarkable characteristics. The best option for fencing is gas silicate products; they will make a fence more durable than foam products. Aerated concrete is more susceptible to the destructive effects of moisture than its cellular relative, however, with high-quality waterproofing, this problem is completely solvable.
As for durability, having purchased high-quality aerated concrete, you can fully count on its service for more than a decade. The costs of such blocks will be reduced significantly not only due to their low cost, but also to their impressive size, with the help of which a beautiful and reliable fence will literally grow before your eyes.
Pros and cons of the design
Let's look in general terms at what is so good about a fence made of aerated concrete blocks - the pros and cons of such a solution are presented in the table:
1. High mechanical strength.
2. Excellent wind protection, lack of vibrations typical of metal fences.
3. Low price compared to other masonry materials.
4. Light weight.
5. The material is non-flammable.
6. Thanks to the large format of the blocks, the masonry is quickly erected.
7. The gas block is cut and processed with hand tools.
1. The foundation must be designed for weight loads.
2. Poor aesthetics of the masonry, especially if the blocks are not autoclaved.
3. Tray blocks used for pillars are much more expensive than ordinary ordinary products.
Features of the technology
The option of constructing a foundation using concrete blocks has certain advantages:
- One of the cheapest options, since the cost of one block is on average 50 rubles. for a unit. With the simplest calculations, laying ten supports will cost the material no more than 3,000 rubles.
- The time frame for completing the work is quite short. Under favorable circumstances, work can be completed in 1 – 2 days.
- Significant advantages in laying technology. It is similar to the method of laying bricks. The only critical point is the correct geometry and level of supports in the horizontal direction.
Project of a columnar foundation made of blocks Source pesthouse.ru
Finding a simpler version of the foundation for light buildings is quite difficult.
Technological process for manufacturing fence blocks
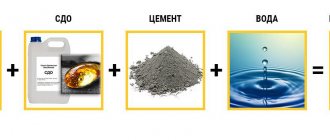
The raw materials for the production of decorative sections are crushed natural stones. Mixed in the right proportions and placed in molds, they are subjected to vibration and pressure on machines. The components of the mixture for the manufacture of sections are loose aggregates (expanded clay, sand, crushed stone), binding material - cement, dyes, and other additives that improve the properties of concrete.
Vibrocasting
When making blocks for fence posts, the mixture is molded with the addition of water in an amount sufficient to ensure the plasticity and workability of concrete. The forms with the solution are placed on a vibrating table and are not closed; pressing is not performed.
The compaction of the mass occurs due to vibration for several minutes. The block dries in the mold itself, after which the finished product is removed.
READ ALSO: How to Make Sliding Gates for a Fence Yourself at Home
Vibration pressing
This method involves preparing a mixture using semi-dry concrete technology: an insufficient amount of water is added to the bulk components to achieve plasticity. The mass is compacted due to two forces: horizontal vibrations of the machine platform and vertical pressure on the mixture from above.
The optimal ratio of components is selected by trial. Finished products are laid out on pallets for natural or forced drying.