Regardless of where your dacha or private house is located, you must carefully prepare the area. This issue is especially relevant in hilly areas. In this case, special reinforcements are used. Thanks to retaining walls, you can protect yourself from sliding and collapse of the soil in your garden plot and yard. In this article you will learn how to make a retaining wall with your own hands. You will also learn about what materials and methods for construction should be used, which will be discussed in this article.
Retaining walls in modern landscape design
At the very beginning, it is worth noting that any piece of land has its own individual shapes, relief and size, which should be taken into account. In addition, it is necessary to take into account personal preferences, the style of the house and other buildings. Even the types of garden paths can affect the choice of material and shape of the retaining wall. If the garden area is small, the maximum height of the retaining wall should not exceed 60 cm.
Large walls will create a feeling of heaviness when viewing the entire area. Experts recommend adding various architectural elements to these:
- niches;
- steps;
- benches;
- tables.
In addition, the chosen material will also affect the overall appearance of the landscape design. When considering options, it is necessary to take into account all design ideas that will be implemented on the territory. Thus, textured and relief materials, dimensional stones of various shapes or powerful logs are used for monumental supports. To create a sophisticated landscape design, plaster and small stones (gravel or crushed stones) are suitable.
A properly constructed retaining wall will simultaneously perform several functions:
- zoning of the site;
- transformation of landscape design;
- strengthening;
- protection;
- solving the problem of uneven landscape.
If your site is too pronounced, then it is worth considering options with a vertical layout. It consists in the fact that the entire site is divided into several sections, each of which has its own horizontal level and is secured with support.
Installation nuances
Reinforcement
The walls are reinforced with spatial reinforcement frames assembled from flat reinforcing meshes, the longitudinal rods of which have a diameter of 8-10 mm, and the transverse rods have a diameter of 8-14 mm. At intersections, the rods are welded together by resistance spot welding in all places or knitted with wire. The reinforcement diagram is shown in the photo.
Scheme of reinforcement of thin-walled retaining walls.
Substrate preparation and expansion joints
If the base contains heaving soils and the depth of soil freezing is below the foundation level on the downstream side, then the weak soil is completely removed and replaced with a cushion of crushed stone or sand. However, there are differences in the structure of the bases and seams, depending on the design solution and the chosen material:
When assembled:
- The prefabricated foundation slab is mounted exclusively on a crushed stone base compacted into the ground. Its minimum thickness is taken to be 100 mm, and the width of the base must be such that it protrudes beyond the edges of the foundation slab by at least 150 mm on each side;
- Expansion joints (a structural cut in the elements of a structure that divides the structure into separate compartments) must be made along the entire length of the wall every 30 m. If the slabs are prefabricated and monolithic, then the spacing of the joints is 25 m.
For monolithic design:
- The foundation slab must be installed on a leveling concrete preparation, which is 100 mm thick and protrudes beyond the foundation by at least 100 mm. For concrete preparation, concrete grade M50 is used;
- Expansion joints are made every 25 m when using reinforced concrete; in concrete structures that do not have structural reinforcement, every 10 m; and if there is structural reinforcement, the step will be 20 m;
Drainage device and backfill
To fulfill this nuance, it is necessary to make drainage holes with a diameter of 50 mm in increments of 3-6 m in the front elements of the retaining walls. And a drainage ditch must be organized behind the inner surface of the wall. The drainage collector is made of stone, crushed stone or gravel with a slope, the minimum value of which is 0.04, in the longitudinal direction.
The last stage of constructing a retaining wall is backfilling. But for it you need to use aquiferous soils, such as sandy or coarse soils. It is also possible to use clayey soils with low plasticity and low sand particle content, but then frost heaving will have to be prevented by laying a layer of coarse-grained non-heaving soil on the back side of the front slab to a thickness of 1000 mm. Backfilling is carried out layer by layer, compacting each layer until a compaction coefficient of 0.95 is achieved.
Components of a retaining wall
Each retaining wall that will be erected in landscape design must consist of four main parts:
- The foundation is located underground, which allows it to take on the entire load from soil pressure.
- Body – the vertical part of the structure located above the ground (main part).
- Drainage is necessary to remove water, since excess moisture will destroy the support.
- Drainage - the remaining water will be absorbed into the layer and, during drought, release moisture to nourish the plants.
What is
This structure is a structure designed to keep the mass of soil located behind the wall from sliding, washing out and other types of destruction.
Regardless of the purpose and materials and technologies used in construction, any wall includes:
- foundation (invisible underground area);
- body (visible ground area);
- drainage (drainage).
Parameters affecting the strength and stability of the structure
With proper planning, the wall will be as stable as possible. It can withstand any load and pressure. If this is not provided for, then the soil will slide and the decorative wall will be destroyed. To avoid this, it is necessary to take into account many factors that will directly affect the strength of the entire structure. First of all, physical forces will act on the retaining wall:
- weight of the structure;
- soil pressure;
- friction force;
- soil grip;
- weight of decorative elements.
Other phenomena will also affect the retaining wall:
- soil swelling in winter;
- strong wind (for walls more than 2 m high);
- vibration (in cases where there are railway tracks nearby);
- seismic phenomena (regional characteristics are taken into account);
- groundwater;
- washing away rainwater.
There are other recommendations that should be taken into account before planning and calculating future retaining walls:
- To ensure maximum traction, the back wall should be rough.
- Also, the rear part should be sloped towards the retained soil.
- To reduce the pressure on the wall, it is necessary to lay hollow elements with low weight in the ground.
- To reduce the likelihood of tipping over, it is necessary to make an indentation on the front side - a console.
In addition to the above factors, there is another one - the thickness of the retaining wall. To calculate it, it is necessary to take into account the type of soil and the height of the structure. For soft soil and high walls, choose wide protective shields.
Preparation of the solution
But, the solution should not spread during the installation process. To increase the frost resistance and strength of the structure, it is recommended to add a special plasticizer to the solution. It gives the following characteristics:
- improved adhesion;
- plastic;
- resistance to low temperatures;
- moisture resistance;
- uniformity;
- self-sealing;
- increased strength.
When preparing a solution for building a wall of cinder blocks with their own hands, novice craftsmen often use simple shampoo as a plasticizer. But it is not recommended to do this, as this can lead to a deterioration in the strength and other characteristics of the solution.
As a rule, a monolithic foundation is created under the cinder block. It should be approximately 70 cm higher than the soil. The thickness of the foundation should not be less than the blocks. Ideally it would be much thicker.
Before laying the cinder block, a waterproofing layer should be laid. Next you can do the laying. But, the base for the first row should be extremely flat. Otherwise, the structure will collapse.
Basic materials
Before making a wall, you need to select the material. Among the most common are:
- brick;
- tree;
- stone;
- concrete;
- gabion.
Tree
It is believed that the simplest and lightest material is wood. It will be much easier to build a wall from it than from stone or gabions. To create a wall, logs with a height of 1 to 1.5 m are selected. In this case, 50 cm should be in the ground, and 1 m will serve as a protective support.
The part of the logs that will sink into the ground requires special treatment in order to last longer. For this purpose, special modern means or hot bitumen are used.
The dimensions of the trench should be 10-15 cm larger than the logs. The bottom is covered with a gravel cushion and compacted. When installing lumber, wire can be used to increase the density of the wall. You can also use nails as fasteners. After installation, the trench is filled with concrete.
General rules
Let’s take as an example a foundation 40 cm wide.
Reinforcement of such a foundation will require four vertical steel rods up to 16 mm thick, interconnected into a single grid with regular squares using transverse lines created with wire up to 12 mm and secured at the intersections with special wire.
If the width of the foundation is 40 cm, then two reinforcing meshes will be placed at a distance of 30 cm from each other, leaving 5 cm at the edges, as required for reinforced concrete. If the strip foundation has a large length but a small width, then mainly longitudinal tension will occur in it. Therefore, horizontal and vertical reinforcement bars in such a foundation will be needed to create the frame and support it.
Scheme of strip foundation reinforcement in the corners.
When the corners of the foundation are reinforced, you need to remember that this is a place where various deformations often occur. They can tear apart the entire supporting wall if the two sides are not properly connected with reinforcement. The two sides are connected into a corner like this: they are reinforced with bent wire, bending so that one end goes into one part of the foundation, and the other into the other.
The rods are connected to each other by welding or using a special technique for tying the wires together. Before using the wire for welding, check whether you can handle it with a welding machine. Some types of steel cannot be welded, and some change their characteristics not for the better. The use of welding in binding reinforcing mesh is a lengthy process that has many disadvantages. It is easier to use a special technique for linking the corners of the mesh.
After creating the reinforced mesh, formwork is made to pour the foundation. The pit with reinforcement is filled with concrete. It is advisable that this process not be interrupted, because the strength of the foundation is reduced. After three days, the formwork is removed. On one side of the foundation, where it is higher, at the level of the sand cushion, a drainage ditch is made with a slope to drain water from the retaining wall.
Drainage for retaining wall
When constructing a retaining wall, it is necessary to take care not only of strength and high quality, but also of the organization of drainage. It is necessary to protect the back side of the wall from excess moisture. To organize such protection, you will need high-quality drainage - a drainage system. Today, professional landscape designers offer 3 options for organizing water drainage:
- Underground drainage. The system is presented in the form of a special perforated drainage pipe, which is installed at the base of the wall. For reliability and protection, the pipe is wrapped in geotextile. With its help, water will not accumulate, but will go down the drain along the laid route.
- Ground drainage. When building a wall, a layer of loose material (gravel or brick) is laid on the back side. It will not allow excess moisture to destroy the structure of the base of the retaining wall. Water will naturally go far into the soil.
- Filter. The drainage can be equipped with special filtration holes. They are made in a wall made of stone or concrete. To do this, when laying across a row, it is necessary to leave one vertical seam without mortar. Excess moisture will escape through these seams.
Every territory needs a high-quality drainage system, but special attention must be paid to regions with constant precipitation. A large amount of groundwater can have a detrimental effect on the structure.
Filling the space behind the supporting structure
First, fill the drainage soil or lay the drainage fabric, which was mentioned above. After this, the previously selected soil mass is laid in layers of 20–40 cm, which must be compacted as it is backfilled. The top layer is plant soil.
Filling the back wall space
After a few weeks, natural shrinkage of the soil will occur, so it will be necessary to backfill.
Important! You cannot add previously removed peat, silt, soil in which the content of organic and soluble inclusions exceeds 5% by weight, as well as frozen soil.
Decorative finishing and decoration
In order for the retaining wall to not only perform protective functions, but also decorative ones, it is necessary to consider the finishing. It's better to plan and design everything in advance. The wall should fit harmoniously into the landscape design of the site. The most common method of decorative finishing today is planting plants. The best option would be to choose among ground cover species that will successfully highlight any element of the landscape area.
Let's move on to the construction process itself
The most important thing in the initial stages is the correct calculation of the retaining wall.
Remember that it is basically IMPOSSIBLE to start construction without it. It is advisable to contact an experienced specialist who can calculate all the nuances without errors. Even for professionals, this process is not easy due to the large number of formulas used.
What factors are taken into account when calculating:
- How stable is the building in case of shifting?
- possible deformations allowed during operation
- How strong are all the components of the structure and connecting nodes?
- soil condition, its stability
- what size cracks are absolutely normal for construction
As for small decorative walls, there is no point in going to such extremes because... Due to its smaller size and the risk of collapse, serious consequences are significantly reduced.
A do-it-yourself retaining wall can function successfully with a small structure that does not require serious preparation.
Before you make a retaining wall with your own hands, familiarize yourself with all the nuances that you should definitely pay attention to:
- Check groundwater level indicators. Ideally, they should be located at a distance of one and a half meters from the proposed building. The minimum requirement is a distance of at least a meter.
- It is important that the soil freezes no more than one and a half meters from the soil.
- The soil itself must be stable and strong. Crushed stone or clay are perfect.
It is worth paying attention to the foundation. If the soil is dense in structure, the depth of the foundation should be four times less than the height of the rest of the part located on the surface.
With average looseness indicators - three times less, with very soft soil - two times less.
Use gravel, concrete, crushed stone reinforced with cement as material.
Do not forget that the foundation and the main part will not ensure the normal operation of the structure. Ensure good drainage, drainage and waterproofing. which will protect against destruction by moisture.
Photo
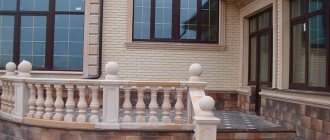
Retaining wall in the garden
Wall decor
Device diagram
Wooden retaining wall
From tires
Gabion wall
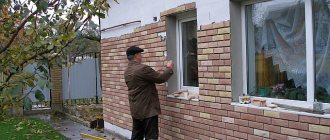
Brick construction
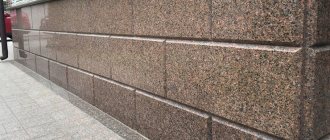
From stone
Decorating
Did this article help you?