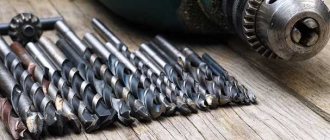
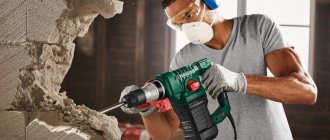
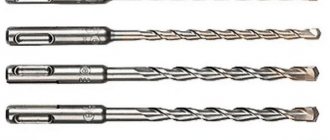
A concrete drill is a specially designed drill whose cutting part is made of alloys based on tungsten and titanium. A drill of this design is designed to drill brick, concrete, stone and marble. A properly sharpened sds drill is the key to quick drilling and savings. The drill has two functions simultaneously:
- It acts as a twist drill.
- Breaks material like a chisel.
Most often, concrete drills are a rod with a soldered tip made of carbide material.
Unlike a drill for concrete and stone, the sds plus drill is used when working with a hammer drill. The tool is affected not only by the force in the plane of rotation, but also by the impact force. The drill operates under very harsh conditions.
During operation, any cutting tool becomes dull, including drills and drills. Tools heat up and drilling time increases.
In a hammer drill, the drill also experiences shock load and the question arises of how to sharpen the drill for concrete.
A few tips during the drilling process to extend the life of the concrete drill:
- Constantly monitor the heating of the tool, preventing it from overheating.
- Do not cool a heated drill or drill by sudden immersion in water.
- When drilling ceramic tiles, do not use the hammer drill mode.
Tips for sharpening a drill bit at home
Before you learn how to sharpen a drill or drill for concrete, you need to clarify the main design features of the tool.
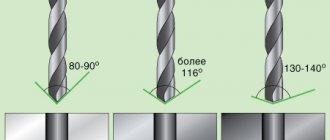
The working edge of the drill is formed by the convergence of the front and rear edges. The angle between the front edge and the axis of the drill is 30°. The angle between the rear edge and the axis of the drill has a value of 60°.
The working edges of the drill should form an angle of 120°.
This is what a sharpened drill looks like
There is an opinion that the sds+ drill for concrete does not require sharpening and is replaced with a new one after complete wear. This version is especially warmly supported by workers in construction tool stores.
But by learning how to sharpen a drill or auger correctly, you will see that the life of the drill can be significantly extended.
Sharpening a drill involves setting the cutting edge of the drill to the desired shape. Both the front and back edges of the drill are sharpened.
When inserting a drill into a material, only the cutting edges of the tool should work, and the back of the drill should not touch the surface being processed.
At any time during the drilling process, the back surface of the drill must have a gap with the surface being machined.
Otherwise, the tool not only drills poorly, but also quickly heats up, becomes dull, and collapses.
Important tips on how to sharpen a metal drill correctly.
How to remove a broken drill
Sometimes the drill in the hammer drill chuck can break, and you only have to remove a piece of it. It will not be possible to remove the tail with ordinary pliers; they cannot be moved apart inside the cartridge. You will need thin-nose pliers. They are inserted into the hammer drill, opened slightly, grabbed part of the broken drill bit and pulled out. The process will be easier if you remove the rubber band from the tool in advance.
If the shank is not jammed, the chuck is pulled back and the crushing mode is turned on. The hammer drill is placed with the head down. Thanks to vibrations, the fragment should fly out on its own. If it is not possible to remove a piece of the drill in any way, the tool is disassembled.
Work order
The wheel must be installed on the sharpening machine. Sharpening on a sharpening machine is carried out in strict compliance with safety precautions. The thrust bearing is installed with minimal clearance, work is performed without gloves, and the eyes are protected by a special shield or glasses.
Before sharpening, it is necessary to correct the peripheral surface of the wheel using a CBN insert, that is, to level the sharpening surface of the stone.
Before moving on to the answer to the question of how to sharpen a drill bit for concrete at home, let’s take a closer look at the sharpening process.
Drill bit with insert for working on concrete
We will carry out standard sharpening of drill bits for concrete.
Having secured the device, place the drill on it and bring it to the surface of the sharpening stone so that the cutting edge is parallel to the plane of the sharpening stone.
We sharpen both edges, checking their symmetry for clearance and the angle between them at 120°.
Let's move on to sharpening the leading edges
The drill rests on a fixture that provides an angle of 30°. The drill is brought to the stone plane to be sharpened at an angle of 30° and the front edge is sharpened.
Turning the drill 180°, we also sharpen the second front edge.
Now the drill must be brought to the surface of the stone to be sharpened at an angle of 60°. This is achieved by placing the drill on another part of the fixture.
Sharpening the rear edges is done in a similar way. If after sharpening you end up with cutting edges of different sizes, sharpening should be repeated in full.
To fully understand the sharpening process on a sharpening machine, watch the instructional video. Everything is clear with the sharpening machine. Or you can use a used diamond blade for an angle grinder.
But in order to sharpen a drill on a grinder, the latter must be carefully secured.
To ensure high-quality sharpening of the drill, it is necessary to equip the machine with a thrust bearing, on which the drill should rest when sharpening. A piece of corner, firmly attached to a grinder or table, can serve as a thrust bearing.
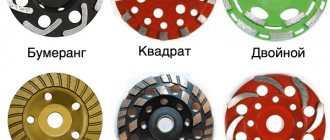
If the diamond disc is not placed on the grinder, then it can be easily secured by performing the simple manipulations shown in the video about sharpening the drill. When sharpening, it is necessary to give the back surface of the drill the required shape. The cutting edges of the drill are sharpened and the back surface is removed. Any point on the back surface of the drill should not touch the material being processed.
A few words about devices
Devices can be made not only from a wooden block, but also from a corner.
The main task is to ensure that the drill being sharpened is fed to the sharpening plane with the required angles.
Screw ice auger blade fastenings
The fastening of the auger ice auger knives to the landing pads weakens over time, which can become a real disaster for an ice fishing enthusiast.
When the fastening is loosened, water gets under the knives and freezes in the cold. As a result: the calculated angle of entry into the ice is violated at the knife blades, and the auger ice drill stops drilling holes.
Then, naturally, any fisherman may have a question: “How to avoid loosening the fastening of the knives on an auger ice drill and not constantly screw them in in the cold, resorting to a screwdriver?”
I can give some advice on this matter. If you use screws with Phillips slots on an auger ice drill, replace them with screws that fit the straight slot of a regular screwdriver or make a cut in the cross of the screw head with a hacksaw blade.
Using a straight-bladed screwdriver, you can apply more force when tightening the screw without the risk of stripping the slot on its head. Or replace the screws securing the auger ice auger blades with new ones with a longer threaded surface.
If this does not help, for fastening, use screws of such length that they protrude 6-7 mm from the back side of the mounting pads of the auger ice auger knives. On the protruding threaded ends of the screws, tighten the nuts with locking washers placed under them.
On my mounting screws, the threads are clogged with putty used in industry for sprinkling products. It can be successfully replaced with ordinary school plasticine - in the cold it tightly grips the threaded connection.
At home, unscrewing the fastening screws on a defrosted ice auger in order to remove the knives for sharpening is not a problem.
***
The difference between a pobedit drill and a regular drill
Traditional drills for metal or wood are most often made of tool steel or the so-called high-speed cutter - an alloy steel that can withstand temperatures and high cutting speeds. With materials like brick, tile, stone and concrete, this option is not suitable because:
- abrasive working environment;
- the instrument heats up quickly and intensely;
- Due to the heterogeneity of the material being processed, the working edges experience strong impact loads.
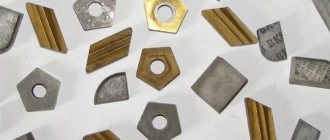
Therefore, drills and drills have a complex design. The main part of the tool, which is responsible for the removal and ejection of drilling products and fastening the tool in a hammer drill or drill, can be made of inexpensive, low-alloy steel. And as a cutting element, a pobedit plate is used - a special alloy of tungsten carbide with a small addition of cobalt and carbon. The plate is attached to a steel shank using copper soldering.
This tip resists abrasion well and can withstand high temperatures. But it is quite fragile and requires attention when sharpening. The service life of a drill or auger is most often determined by the degree of wear of this particular plate.
Drilling performance largely depends on proper sharpening of the tool.
Now about the differences between a drill and a drill. A drill for stone or concrete with a pobedit tip differs little from a drill for wood or stone in appearance, approach, and sharpening. The usual one allows for impact during drilling, but is still more suitable for drilling. Therefore, only one rear edge is sharpened. The drill was created to work with a hammer drill, where impact prevails over rotation. That is, the drill works both as a chisel and as a drill. Therefore, it sharpens from both edges - both the back and the front.
The design of the shank depends on the mounting method in the tool. The design of the spiral that removes crumbs from the cutting zone may also vary. The differences are largely due to the tool production technology and the characteristics of the material to be worked with. Although the configuration of the spiral part is only important when drilling deep holes. In small drills there is a body without a spiral at all or with a spiral made as schematically as possible, even primitively. Although there are modifications and four-way ones, in which the problem of dust removal is radically solved.
Basically, the performance characteristics of a drill or auger depend specifically on the condition of the pobedite soldering, so when sharpening for materials with different characteristics, you should pay attention to this part of the tool. Although the general principle remains unchanged. The harder the material to be drilled, the smaller the angle given to the cutting edge.
Drills are a very specialized tool - for each material there is one.
Choosing a tool base for sharpening
You don't need much to sharpen drills at home. A simple electric sharpener, better known as “emery”, is enough. At the same time, the power of a simple household model is quite enough, and there is no need to be puzzled by the search for some kind of professional device. The optimal size is one that allows you to install grinding wheels with a diameter of 200 to 300 mm.
The grinding wheel itself can be diamond or CBN - the best choice. But, if they are not available, then the more familiar silicon carbide will do. Those who are not well versed in sharpening wheels can be guided by the color of the stone. For victory, gray or greenish is suitable. Red and white are no good.
The winner itself tolerates intense heat well. But the solder, with which it is attached to the body of the drill, and the steel from which this steel is made, do not tolerate overheating during sharpening. Therefore, care should be taken to cool the drill in advance. That is, prepare a small container of water.
Pobedit does not like thermal shocks, like most solid materials. That is, when a heated pobedite drill tip is lowered into water, it can collapse and crack. To prevent this from happening, the drill being sharpened, when it heats up, is first cooled in air for some time and only then dipped into water. The duration of exposure to air depends on the intensity of heating and the size of the drill.
By the way, if you are not confident in the correctness of independently determining the critical temperature point for safe cooling with water, then it is better to do without it altogether - regularly cool only in air. True, this method will delay the sharpening process.
Safety precautions
First of all, you need to follow the rules for safe work on sanding wheels. It's simple. Be sure to use safety glasses to protect your eyes from pieces of scale and abrasive, even if the sandpaper is equipped with a transparent protective screen. It is imperative that you do not wear gloves on your hands - it is enough to catch one thread, and the whole hand will be wrapped in the mitten after it. For the same reason, we carefully fasten all the buttons (especially on the sleeves) - and no fluffy, fluttering clothes.
The sharpening stone must be carefully aligned and free from runout - ultimately, compliance with this point will also affect the quality of sharpening. The rest should also be adjusted - a large gap between it and the stone is a source of potential danger, especially when sharpening thin drills, since both the drill and your fingers can get caught there.
In general, there is one more rule for working safely with power tools: don’t be afraid of them. But showing respect is a must.
Execution of work
Let's start with the fact that when sharpening drills, we pay special attention to symmetry. Otherwise, there may be beating and uneven wear of the tool, or even breakage. Although, when compared with a drill for metal, such perfectionism is less important for a pobedite drill - slight sharpening flaws are quickly leveled out by themselves during the work process. But you should still strive for accuracy.
The second difference between sharpening a drill for concrete and one intended for metal is that the latter has a slightly rounded rear edge; it seems to change the angle behind the cutting edge. This is not required for a concrete drill - the trailing edge forms a flat plane.
For both a hammer drill and a drill designed to work with a drill, the apex angle should be about 110–130 degrees. That is, this is the angle that two cutting edges form when they converge at the tip.
Particular precision in determining angles is not required. Approximate values, “by eye”, are sufficient. If the eye is weak, which is especially true when sharpening small-diameter drills, then you can make a template from a pair of nuts, as indicated in the video.
The drill, as already mentioned, only sharpens the back edge. Its sharpening angle is approximately 60 degrees to the axis. In this case, the plane must be uniform. It’s good to evaluate this by the reflection - an uneven finish on the working plane indicates that there are several planes. Then you need to adjust until one comes out. To prevent this from happening, it is enough to fix the drill, pressing it evenly against the stone, and not try to tighten it. That is, we move the drill relative to the stone left and right to wear the stone evenly, but do not change the angle of the drill relative to the stone and the tool rest.
Important point! With pobedit drills, it happens that the leading edge is covered with solder. Then you need to sharpen it too. We simply remove excess metal along the axis of the tool, opening it up. It is important not to overdo it here, otherwise you can loosen the fastening of the plate to the steel base.
A hammer drill is, in principle, sharpened in exactly the same way. Only the leading edge is also added, it is given an angle half as small - 30 degrees relative to the axis of the drill. Usually one leading edge is sharpened, then the drill is turned 180 degrees and the second edge is adjusted. The rear edges are sharpened next - in the same way, one by one. If the drill is not sharpened from scratch, but only straightened, it is worth ensuring that all traces of wear are removed from the drill head. Only then will he begin to drill normally.
We also pay attention to the tip of the drill - the place where both leading and trailing edges meet. There should be a bridge between the working edges (where the back edges meet). The smaller it is, the more accurately and faster the drill will drill, but the faster wear occurs. By changing the sizes of the front and rear edges, you can ensure that this jumper disappears altogether - such a drill is useful for drilling ceramic tiles without hitting them. But for concrete, it is still better to leave the lintel (0.4–5 mm, depending on the diameter).
You can sharpen the drill a little differently - with a self-centering tip, the so-called. “sharp” or “step” sharpening. Its essence is that a spike is formed at the top of the drill, which centers the drill and allows you to more accurately maintain the direction when drilling without impact. The essence of the method can be seen in these videos.
While practicing the skill of sharpening drills and augers, do not hesitate to make useful simple devices on the advice of the masters. As a rule, such products do not require special expenses, but the quality of work increases significantly. They also make it easier to learn useful skills so you can do without them later. But as long as your hand is not full and your eye is not developed, such equipment will save you from a lot of unpleasant moments.
In accordance with applicable law, the Administration disclaims any representations and warranties that may otherwise be implied and disclaims liability in relation to the Site, the Content and its use. More details: https://seberemont.ru/info/otkaz.html
Was the article helpful?
Tell your friends
To make holes during construction work, it is recommended to use a drill and pobedit drills. They are characterized by precision in operation and long service life. When the drill wears out, you can sharpen it yourself
Blueprints
A self-made drill is good because its design is “tailored” to its owner. During the manufacturing process, everyone makes their own changes, then many more refine the product. But it can be difficult to do without basic drawings. This engraving contains several drawings with the sizes of various drills. As you understand, the dimensions are arbitrary; they can and should be changed, adjusting them to the size of the required wells.
Shovel drill
There is no point in making a serious structure for planting plants. In this case, you can make a garden drill from a shovel. Choose a high-quality shovel made of good steel, apply markings as shown in the drawing. According to the markings, you will need to cut out two small fragments and saw the lower part in the middle to a depth of 30 cm (pictured).
Next, the edges are bent one forward, the other back, and the petals formed in the lower part are folded towards them. The resulting seams are boiled outside and inside.
Drill for soft soils
If the ground is soft, the conventional design does not work very well. For such cases, there is a special drill with an extended cutting part. It is a kind of glass with slits on the sides. The cuts are equipped with cutting edges. They are best made from well-hardened steel.
Drill for soft soils
This drawing shows an interesting handle design - it can be rearranged as the length of the rod increases.
Basic drawings of auger and garden auger
Both of these units work well, but the garden one has to be taken out often, and the auger one is harder to rotate. Choose according to your own preferences.
Auger and garden auger for soil of different densities
Detailed projection drawing of an auger drill
Garden auger drawing
Basic rules for sharpening
Before sharpening a concrete drill at home, you need to familiarize yourself with the basic rules for this procedure:
- Sharpening a drill for concrete should be carried out in compliance with the optimal body temperature. It is strictly forbidden to overheat it, as this will lead to damage to the product. This rule must be followed if the drill is made from a titanium-based hard alloy.
- If the drill accidentally overheats, it is strictly forbidden to lower it into water. It should cool down naturally.
- The work needs to be done gradually. Initially, a small part of the drill is sharpened. After the sharpened section has cooled, we proceed to the next one.
- During the work process, it is recommended to focus on equality of angles.
- The cutting edges of the drill must be of the same length, since under high loads the tool will be pushed to the side, which causes breakage.
Sharpening of drills used in a drill or hammer drill must be carried out in strict accordance with the rules, which will ensure their excellent performance.
Concrete vibrator attachment for hammer drill
A special attachment called a vibrator is used exclusively when carrying out work involving pouring concrete mixtures. The vibrator allows you to compact concrete when pouring floors, walls or ceilings. For a long time, instead of a vibrator, pins and various sticks were used, which were used to pierce concrete and manually remove air from the poured concrete solution. It is important to use such attachments when pouring reinforced concrete structures.
The nozzle consists of a tip and an extension made of flexible materials. The extension has different lengths, which allows you to lower the vibrator head to a greater depth, which is especially important when pouring walls. The vibrator attachment is attached to the tool chuck, and in order to activate it, you must turn on the jackhammer mode on the tool. If you do not use a vibrator, then air accumulations will form in the structure of the concrete structure being poured, which, when the solution hardens, will become a weak point.
This is interesting!
If necessary, you can make a vibrator with your own hands, using a drill tip, flexible extension cords at least 50 cm long, as well as any metal clamp that is attached to the extension cord.
Features of pobedit drills
To produce products, high-strength metals are used - tungsten, cobalt, which are mixed with carbon. With the help of such tools, drilling is carried out in brick, stone and other materials of a high level of hardness. The Pobedit plate is fastened to the steel tail using copper soldering. The diameter of the drill is measured in cylindrical sections.
The drill has a conical surface and is characterized by abrasion resistance. The product is resistant to high temperatures. But, it is characterized by fragility, so sharpening work must be done carefully. In pobedit drills, only the trailing edge is most often sharpened.
How to sharpen a pobedite drill bit?
When sharpening, you need to pay attention to symmetry, since in its absence the tool will wear out. Pobedite drills require sharpening only the back edge at an angle of 60 degrees. During work, you need to ensure the uniformity of the plane. It can be identified by its reflection. Several reflections indicate that the drill is sharpened in several planes. In this case, repeated sharpening is carried out until one plane comes out.
If the leading edge of the Pobedit drill is covered with solder, then you need to sharpen it too. The work consists of removing excess metal along the axis of the tool and opening the vibrator. It is not recommended to overdo it in this case, as this can lead to loosening of the fastening of the plate to the steel axle. When sharpening, you need to ensure that there is a bridge between the front and rear edges.
Methods
When drilling into hard materials, only the edges should come into contact with them. That is why the back surface is sharpened at a certain angle. As a result of this operation, a gap appears between the edge and the bottom of the hole.
Sharpening is carried out using conical, two-plane or cone methods.
Using a conical sharpener
The drill is inserted into a special prism of the sharpening machine, which moves around its axis. The prism is positioned at a certain angle in relation to the grinding wheel. The back of the drill is shaped like a cone. It is located in the place where the working surface of the grinding wheel intersects with the swing axis.
In order to properly sharpen the drill, you need to first configure the parameters. The axis of the sharpening cone should be located at an angle of 45 degrees relative to the axis of the drill itself. Cone sharpening can be performed using two methods:
- The top of the cone that will be sharpened should be located below the top of the sharpening cone. It is first recommended to carry out the adjustment in accordance with the specified parameters: a - 45 degrees, b - from 13 to 15 degrees, n - 1.9d. the drill axis and the cone must intersect at an angle that is less than the angle of the grinding wheel and drill. If we sharpen using this method, we need to make sure that the tip of the drill is located above the top of the sharpening cone. The tip and the drill should be 1.06 in apart. The axis of the drill and the axis of the cone should intersect at an angle of 90 degrees.
- In order to ensure the rear angle for the peripheral point, it is necessary to provide indicators - a-5-7 degrees, angle 2f - from 116 to 118 degrees. the cutting transverse edge should be at an angle of 55 degrees.
The use of the conical method is recommended to create a sharper increase in the back angle of the drill. This method can be used if the drill has a large diameter - more than 3 millimeters.
Using screw sharpening
If there is a need to automate the process of sharpening drills, then the use of the screw method is recommended. It lies in the fact that translational movements are coordinated with the rotations of the grinding wheel. With its help, you can simultaneously sharpen the front and rear corners.
When screw sharpening, the rear angles of the working part increase as they approach the center. When using this method, there is a decrease in the strength of the transverse edge of the drills, which leads to their breakage when drilling excessively hard materials.
Two-plane sharpening
Using this method, it is recommended to sharpen drills that are intended for drilling non-hard materials. If the diameter of the drill is less than 3 mm, then the use of this sharpening method is recommended. Using this method, drills are sharpened at an angle of 60 degrees. Thanks to this method, products are improved rather than errors are corrected.
