For high-quality laying of tiles, a flat plane is required, without dents or bulges. The surface of aerated concrete masonry is usually quite flat, which makes it possible to perform cladding without preliminary plastering of the surface.
Laying tiles is a process that requires compliance with technological rules, otherwise the cladding will not stay on the base. The main condition for a high-quality result is the presence of a flat plane, providing a neat and attractive coating. As a rule, walls made of piece materials are pre-plastered in order to eliminate defects and obtain a high-quality base. However, the masonry of aerated blocks itself is a fairly high-quality and even surface, especially if it was carried out by qualified workers. Therefore, to seal small surface imperfections, the thickness of the adhesive layer used when laying tiles should be sufficient. But does this work in practice, will the tiles peel off from the specific material? Let's take a closer look at this issue and understand the intricacies of aerated concrete cladding.
General rules for laying tiles
Tiling surfaces is usually carried out using the same technological schemes. Laying tiles is a sequence of certain actions that give an optimal result. Regardless of the base material and other work conditions, the following requirements must be met:
- a flat surface of the base that does not have height differences (protrusions are especially undesirable);
- the wall must be thoroughly cleaned of dust and construction debris resulting from preparation or as a result of other previous procedures. This will allow you to obtain maximum adhesion of the glue to the surface;
- for better contact between the glue and the wall, it is necessary to apply a layer of primer, which ensures a better connection of materials;
- the adhesive layer must be continuous and uniform in thickness;
- all materials used must be of sufficiently high quality and correspond to each other in terms of technical indicators.
These standards must be observed in any case, since they provide the necessary conditions for high-quality installation of tiles. However, during the execution of work, difficulties often arise due to the specific nature of the foundation. For example, aerated concrete is a hygroscopic material that actively absorbs moisture from adhesive solutions. Therefore, working with it using only general rules is inappropriate. The conditions for crystallization of the glue are changed, therefore, often the lining does not stick to the base and peels off. Therefore, before laying tiles on aerated concrete blocks, it is necessary to perform a number of preparatory steps.
As a rule, before laying the cladding on masonry made of piece materials, preliminary plastering is performed. This requirement is due to two factors:
- the surface of the masonry is usually replete with small flaws, there are many seams or potholes on the edges of the blocks;
- the plaster layer has good adhesion to adhesives and provides optimal adhesion for cladding.
However, applying plaster is a labor-intensive process that changes the configuration of the walls and changes the position of its planes. If you also take into account the thickness of the tiles and the adhesive layer, the changes can be quite large. Sometimes this is unacceptable - plumbing fixtures are recessed into the wall, or pieces of furniture and household appliances do not fit into the reduced partitions. In addition, the surface of aerated concrete itself is quite smooth and does not require additional geometry adjustments. If we also take into account the work time, labor costs and cost of materials, the need to apply an underlayer comes into question.
Therefore, many craftsmen try to lay tiles on aerated concrete without plaster, with minimal preparatory treatment of the walls. This is fully permitted by technological standards, but requires taking into account the properties of the material and performing certain actions to ensure a strong connection of all materials.
Finishing a bathhouse from foam blocks inside
General finishing requirements
The main requirement for finishing is to improve the appearance of the building.
But there is also a technical goal of finishing, which is to ensure that finishing materials do not affect the performance characteristics of the wall material, or improve them. In particular, the finish should have good vapor permeability, but at the same time low water absorption values .
Useful video
Look at different finishing options in many baths, this will help you decide on your desires and see interesting ideas:
General principles of cladding foam block walls from the inside
Since this article is about a bathhouse, which refers to heated rooms where there is simultaneously high humidity and temperature, it is recommended to install a vapor barrier indoors. Suitable for this:
- foil (it is completely vapor-tight)
- rolled bitumen materials
- ceramic tiles with joints made of silicone sealants.
You can also use impregnation of the walls with drying oil, oil putty or cold bitumen mastics.
We can offer this option for simultaneous vapor and heat insulation of foam blocks in a bath:
- First, unimpregnated paper is placed on top of the walls.
- Then a layer of thermal insulation (for example, mineral insulation).
- The next layer is a vapor barrier made of foil paper, which will prevent the insulation from getting wet. By the way, the joining of pieces of such foil is always done overlapping and glued with aluminum tape.
Thanks to the listed measures, vapor permeation of the walls is prevented, which means that condensation will not form in them, which contributes to their destruction.
When everything necessary for reliable vapor barrier of the foam concrete box of the future bathhouse has been done, you can begin further finishing, which is responsible for the attractive appearance of the premises.
Finishing foam block in a bath with clapboard
Wood in a bathhouse is the most attractive finishing material, which, unfortunately, has disadvantages and limitations in use.
Thus, lining made from softwood cannot be used in rooms with elevated temperatures, as this releases sticky resins . And high humidity on wood without treatment can lead to mold .
Antiseptic eliminates this , but in general it is advisable to use the lining in the steam room and relaxation room, but not in the washing room. By the way, cheap pine lining can be used indoors for recreation. And in the steam room/sauna you need hardwood, the best of which, according to some, is oak. But most often they use aspen.
If you treat wood correctly, then you can’t think of a better finish for a bathhouse - it is fragrant, environmentally friendly, and healthy - due to the phytoncides released by some species.
The process of finishing a bathhouse with clapboard
- Bring the clapboard to the bathhouse in advance - its humidity should be equal to the humidity of the environment.
- Electrical wiring and other communications must be completed before installation.
- A wooden sheathing is made on the walls of the bathhouse (it is better to use special dowels specifically for foam blocks and self-tapping screws) and coated with an antifungal compound.
- The space between the sheathing and the wall is filled with insulation.
- The vapor barrier material is attached to the sheathing with a stapler.
- The lining itself can be attached to the sheathing either with nails or with hidden clamps. The latter are used for decorative finishing.
Finishing foam block in a bathhouse with tiles
Tile is an inexpensive, durable material that you can install yourself. In bathhouses it is used for walls and floors, more often in a washing room, where the wood will rot. To avoid injury in the future, you should choose rough rather than smooth tiles. The base is better smooth - it will not pick up water and will not give mold a chance to multiply. Of the tiles with and without enamel, the first one is better. At least parts of the walls can be finished with soapstone tiles.
Useful video
In the video below, see how you can decorate it beautifully, even inexpensively, with substandard tiles. The builder shares:
Tile laying process
- The surface must be completely cleaned of dust and debris, moistened with a cleaning agent and leveled.
- Prime with primer for foam blocks.
- Next, the surface is waterproofed.
- The solution is mixed and applied with a comb spatula.
- The tiles are laid with cross separators to ensure equal spacing between the tiles.
- The seams are sealed with grout using a special trowel.
- Once the work is completed, the tiles can be treated with an anti-mold solution.
Finishing with PVC panels
The main advantage of PVC panels is their low cost . You can also point out the ease of installation and maintenance in the future. PVC is not afraid of humidity and temperature changes. This is a good option for washing in a bathhouse.
The process of laying PVC panels
For a bathhouse, it is better to place the panels not on the wall, but on the crate. The stages of the process are similar to those described in the paragraph on finishing with clapboard, only instead of it, at the last stage, PVC panels are attached to the sheathing.
In addition to walls, plastic panels can be used for ceiling cladding. It is necessary to take into account that lamps located close to such a ceiling can damage the plastic when the lamps heat up . It is better to use low-watt point light sources.
When installing plastic on the ceiling, you will need to secure the insulation so that it does not hang between the beams. For this purpose, a cord is suitable, which is attached to the beams, forming a mesh for the insulation.
As you can see, the interior decoration of a bathhouse made of foam blocks allows for many options to make it beautiful and cozy.
Features of aerated concrete that you need to know about
Aerated concrete is a lightweight and warm building material. He received these qualities thanks to the porous structure that appears at the production stage. The composition of the material contains the usual components of dense concrete - sand, cement and water. However, there are additional components that contribute to gas formation - aluminum powder and lime. It is they that, in the presence of water, react with the release of carbon dioxide. When all the components are mixed, the mass is placed in molds and allowed to mature for a certain time. The reaction of aluminum powder with lime begins, the mass swells and rises, like dough. The volume of the material increases due to a huge number of carbon dioxide bubbles measuring 2-4 mm. After the reaction is completed, the mass is removed from the mold, cut into blocks and sent for finishing treatment with hot steam under pressure (autoclaving).
The resulting material differs significantly from conventional grades of concrete. The porous structure makes it warm and light, but there are also negative qualities - aerated concrete is quite soft and fragile, as well as a hygroscopic material. These qualities must be taken into account when performing finishing work, since in the preparation process it is necessary to use intermediate compounds. Some of them (for example, the well-known “concrete contact” primer) create a significant tightening force on the surface, often leading to rupture of the top layer. It results from excessive application of primer (2 layers is already too much for aerated concrete).
In addition, the ability to actively absorb water (hygroscopicity) makes aerated concrete unable to work with conventional tile adhesives. The adhesive layer applied to the wall rapidly loses water, which changes the crystallization conditions. The strength of the layer is lost; it is not able to fully hold the cladding. In some cases, the result is complete peeling of the tiles and a loose and crumbling adhesive layer.
Another working point that you need to know about when finishing aerated concrete is shrinkage. In the first 6-18 months after completion of construction, the material cannot be finished. It shrinks - changes linear dimensions, takes on the load and gives off excess moisture. Any work performed during this period may be spoiled, as the base changes its parameters. The connection of materials is broken, the surface is covered with a network of cracks and does not hold the adhesive layer. Therefore, tiles can be laid only after the shrinkage processes have been completed.
Features of the premises
As a rule, tiles are used to decorate the walls of bathrooms, bathrooms and kitchens. All these rooms are classified as wet, i.e. they contain an excess amount of water vapor. This means that aerated concrete walls will absorb moisture, accumulating it in the pores. Even if these rooms have one (rarely two) external walls from which steam can escape to the outside, the remaining walls are internal. There is nowhere for moisture to escape from them; it will gradually accumulate and destroy the aerated concrete.
Such processes are possible if you do not pre-treat the surfaces and cut off possible contact with water vapor. Tile itself is a good waterproofer, but the seams between individual elements can allow steam to pass through. Therefore, it is necessary to organize the cutting of aerated concrete and apply a layer of special impregnation to it, making the surface impermeable to moisture. This procedure will not only help avoid getting the walls wet, but also promote normal hardening of the adhesive composition. Water from it will not go into the wall, which will ensure normal crystallization conditions.
Since the structure of aerated concrete is porous, there is no reason to worry about poor adhesion of the adhesive to the wall. However, if there are concerns, additional primer can be used to improve adhesion.
Laying tiles in residential (dry) premises does not require special measures to cut off aerated concrete from atmospheric moisture. here only measures are needed to ensure adhesion and eliminate excess water absorption from the adhesive composition. These goals are easily achieved by applying a coat of primer. Sometimes they resort to applying a preparatory adhesive layer (without tiles). It is made thin, as experts say - “to tear off”, only to obtain a contact base. This cannot be called plastering, since no leveling or flattening is done here. However, you can simultaneously repair some defects in the masonry, eliminate waste areas and get rid of cold bridges.
Laying tiles outside
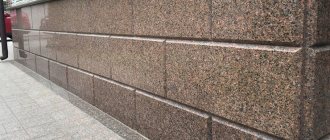
Tiling walls made of aerated blocks can be done not only from the inside, but also from the outside. This is a good option for installing a protective coating that protects aerated concrete from contact with rain or melt water. However, direct wall cladding is allowed only when finishing non-residential premises, otherwise the process of removing water vapor present in the atmosphere of residential premises from aerated concrete is disrupted.
The installation technology is practically no different from standard methods. Preliminary plastering of the surface is not necessary if the masonry is done by a qualified craftsman and does not have differences in heights or flaws. Small potholes can be sealed with an adhesive layer. The main task will be the correct choice of tiles and adhesive mixture, as well as preliminary surface preparation. For this purpose, water repellents, impregnations and primers intended for use in these conditions are used.
In addition, climatic conditions must be taken into account. They are important both for installation (usually it is carried out at air temperatures from +15° to +35° in dry, windless weather) and for the further operation of the cladding. The tile gets very hot from the sun's rays, has high thermal conductivity and contributes to the creation of sudden temperature changes. This becomes a serious test for the adhesive layer, therefore, it is recommended to choose compounds that can withstand such changes. If there is no confidence in their suitability, you can use polymeric materials - liquid nails or titanium-type polyurethane adhesive. These compositions are elastic and tolerate all temperature fluctuations well. In addition, they are reliable and connect well to almost all types of bases, including aerated concrete.
What is glue - composition and types
Adhesive for aerated concrete consists of the following components:
- Portland cement;
- Mineral fillers;
- Organic modifiers;
- Polymer additives.
As you can see, the glue is also cement-based, but thanks to modifying additives and fillers, its properties are very different from ordinary cement-sand mortar.
I note that all existing adhesives are divided into two types:
- Summer . Designed to perform work at temperatures above 5 degrees;
- Winter . Can be used at temperatures down to -15 degrees and below.
Glue selection
The choice of adhesive composition must take into account the characteristics of the room. If you plan to install it in the bathroom, you need a composition with plasticizer additives to obtain an elastic tile-block bond. There are two types of tile adhesive suitable for laying aerated concrete:
- cement-based compositions;
- polyurethane adhesives.
Cement-based adhesive is made from the same materials as aerated concrete. This means that adhesion to the material must initially be good. Many experts claim that aerated concrete can be laid on tile adhesive without any undesirable consequences. However, gas blocks are made by different manufacturers who use their own fillers and additives to the base composition of the material. Aerated concrete and adhesive mixtures may contain various additives - plasticizers, modifiers, etc. These components sometimes conflict with each other, react or, conversely, stop it. Therefore, it is recommended to carefully study the instructions on the packaging. In particular, it is necessary to check whether this composition is suitable for laying tiles on aerated concrete.
A special feature of tile adhesive for aerated concrete is the presence of moisture-retaining additives (the same ones that are present in masonry adhesive for aerated concrete blocks). Some craftsmen use building mixtures for aerated concrete to lay tiles, which are quite capable of holding the cladding.
Polymer adhesive is universal and suitable for laying tiles on any substrate - wood, metal, concrete, etc. In this regard, the material is preferable to cement mixtures. In addition, synthetic glue is sold ready-to-use, which significantly speeds up the work. However, its consistency does not allow it to compensate for differences in height or to repair surface imperfections. The glue flows, so you need to apply it in sufficient, but not excessive quantities.
There is polyurethane adhesive in the form of foam. It is sold in cans and looks like polyurethane foam. It's easy to work with, but you have to get used to it and apply enough glue so that it doesn't come out of the seams. This is an important point, since cleaning gaps is a labor-intensive and time-consuming procedure that requires accuracy and thoroughness.
Most finishers prefer to work with cement compounds. They are more familiar and have a long shelf life. During work, there is no risk of staining the floor or other surfaces with indelible drops of glue. In addition, cement compositions are much cheaper, which often becomes a key factor in the choice of material.
Main stages of work
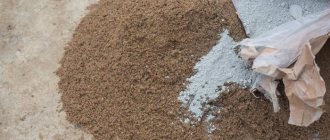
The first stage of laying tiles on a foam block or aerated block (the principle of gluing ceramics to both materials is the same) is preparing the solution. To do this, add a dry adhesive mixture and water to a pre-prepared container, mixing them using a hammer drill with a special attachment. Mixing proportions are usually indicated on the glue packaging.
Despite the instructions for preparing the adhesive mixture, it is advisable to independently control the mixing process. The finished substance should not be too liquid and without lumps, but also not very hard, so as not to impair the adhesion of the tiles and the wall.
Continuing work, you should:
- Apply the prepared adhesive mixture using a notched trowel;
- Place the first tile against the wall and press firmly;
- Check the horizontality of the material with a level and, if necessary, level the tiles. It takes no more than 10–15 minutes to level the tiles after applying the adhesive. If this time is over, the glue should be removed and reapplied;
- Repeat the same steps for the next tiles. In order to leave tile seams of equal thickness, plastic crosses are used;
- If it is necessary to cut tiles, use a tile cutter, running the cutting part of the tool along the marked surface of the tile;
- Plastic corners are placed in the corners of the room to ensure even seams. And to bypass the water, gas and heat supply pipelines, holes are cut in the tiles.
After laying all the tiles and drying the material (about 24 hours), the crosses are removed and grouting is done. The material for these works is selected to match the tone of the tiles. Excess grout is removed with a sponge. And after 2–3 hours, the lining is wiped again, removing traces of the grout mixture. This completes the tiling of the foam block.
By deciding whether it is possible to glue tiles onto foam blocks, and by giving preference to this option, you get high-quality finished walls, the repair of which may not be done for many years. At the same time, the surface of the enclosing structures is reliably protected from external influences both with the help of plaster and tiles. And such a result can be achieved only with the help of a responsible attitude to work and strict compliance with all requirements.
One of the options for cladding buildings made of foam concrete, which combines practicality and accessibility for any category of citizens, is clinker or ceramic tiles. Such tiles are laid on a foam block quickly and do not require additional reinforcement of the entire structure or foundation.
Foam concrete is considered one of the most popular materials for the construction of residential buildings; it has high thermal insulation and strength, but, unfortunately, does not tolerate moisture well, so walls made of foam concrete require mandatory protection.
Tile selection
Almost all types of wall tiles are suitable for laying on aerated concrete. There are many varieties on sale, differing both in appearance and source material. For an unprepared person, the choice may not be easy, although in this case you can be guided by the usual external data of the material. However, for a more confident choice, it is useful to know the types and features of facing tiles. The following varieties exist:
- ceramic tile;
- PVC;
- glass;
- porcelain stoneware;
- clinker;
- cotto tiles;
- cement tiles;
- mosaic, etc.
PVC or glass slabs can only be glued with polyurethane glue - cement compounds do not adhere to waterproof materials. In addition, clinker and porcelain tiles also require specialized adhesive compounds. The mosaic can be made of glass or ceramic elements on a mesh, therefore, the adhesive composition for it is selected individually. Other types of tiles can be glued to standard compounds intended for ceramic types of cladding.
The choice of color and surface type is a matter of personal preference. Some people like light colors with a glossy and smooth surface, others like dark matte elements with a slight relief. When choosing a material, you should take into account the size of the room - the smaller it is, the lighter the cladding should be. Dark walls in a cramped room put psychological pressure on a person and create the effect of lack of air. Conversely, a light coating expands the room, creating a feeling of volume and abundance of air.
As a rule, glazed tiles with a smooth surface are laid on the walls. Relief surfaces actively glare and create a ripple effect. This is sometimes dangerous, especially in the kitchen - working with hot appliances or boiling water does not allow the presence of distractions. Therefore, when choosing cladding, it is necessary to take into account the purpose and specifics of the premises being finished.
Technology of laying tiles on aerated concrete
It is necessary to make a reservation - this is only one of the acceptable options, which is optimally suited to most cases. Before you start laying tiles on gas silicate walls, you need to prepare them for applying the adhesive layer. To do this, you need to perform a number of operations, and you need to approach the procedure with maximum attention and care. The procedure for preparing walls with smooth and high-quality aerated concrete masonry:
- 2 layers of deep penetration primer are applied (for example, Ceresit or other similar material). The first layer must be completely dry, and only then apply the second.
- Tile adhesive is diluted. Its consistency should be more liquid to compensate for the loss of water due to the hygroscopicity of the base.
- Applying a thin (“scrape”) adhesive layer of tile adhesive. Completely dry.
- Checking the surface with the rule. If deviations from the plane do not exceed 1 cm/m, the cladding can be laid under the comb. Notched spatulas of different sizes are used (depending on the consistency of the adhesive and the size of the tile.
The recommended spatula teeth size is 8-10 mm for thick glue and 5-8 mm for liquid glue. The bottom row is installed using a straight strip pre-fixed to the wall. Subsequent rows are aligned with the bottom row using special plastic crosses. It is recommended to use moisture-proof compounds for grouting joints.
There is another way to install tiles, with preliminary notches for better adhesion. They are made using a grinder and provide better adhesion of the tile adhesive to the base. However, when making notches, a huge amount of dust is generated, which must be carefully removed.
Laying load-bearing walls
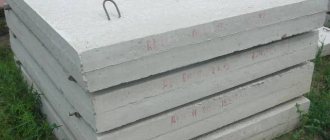
If you decide to lay foam blocks with glue , then certain skills will be required to perform these works. Only those blocks that have the correct geometric shape are suitable for this, and deviations in their sizes will be minimal.
Even if masonry is done using glue, the first row of foam blocks is laid on cement mortar . This is necessary in order to level the horizontal surface, after which the next rows can be placed on glue.
To lay walls from foam blocks yourself, you will need the following tools:
- glue container;
- drill and attachment for mixing glue;
- trowel;
- notched spatula;
- building level;
- grater or plane for leveling foam blocks;
- rubber hammer;
- wall chaser;
- grinder or circular saw;
- brush to remove dust and debris.
When installing walls made of foam blocks, the order of work will be as follows:
- first you need to check the blocks, they must be smooth, not chipped or damaged, their geometric parameters may differ by minimal values;
- the glue is applied using a notched trowel;
- in order for each element to take its place, a mallet is used to align it;
- all identified irregularities must be corrected immediately; for this, use a grater;
- using a building level, it is necessary to periodically check the horizontalness of the masonry;
- Pre-prepare the lintels that will be installed in the areas of window and door openings.
Is it necessary to reinforce
If you are building a house from foam blocks, then experts recommend reinforcing the masonry, done every 3-4 rows . This operation increases the stability of the wall and prevents cracks from appearing on it.
In this case, reinforcement is used;
to lay it in blocks, grooves are created ; they can be made using a wall chaser, grinder or circular saw.
In this case, an armored belt is made 30 cm wide, and the remaining 10 cm is filled with insulation, this allows you to increase the thermal insulation characteristics of the house.
What to do with a vertical seam?
When laying external walls, novice builders often have the question of what to do with the vertical seam, should it be filled with glue?
If blocks with tongue-and-groove type locks are used , then they already provide fastening of the blocks to each other without glue. It must be remembered that any seam, even the thinnest one, is a cold bridge; therefore, the fewer there are, the higher the thermal insulation characteristics of the building.
When resolving this issue, there may be several options:
- if the walls are to be finished with plaster, then the vertical seam may not be filled with glue;
- if there is no plaster on one side, the seam is filled halfway to prevent the wall from blowing through;
- when there is a large load on the blocks (more than 70% of the strength of the blocks) and when erecting stiffeners, the vertical seam must be completely filled with glue.