The construction of any structure is preceded by the development of a project. As soon as the necessary calculations and drawings are completed, it is allowed to begin practical activities - marking the foundation. This work stage is considered important, because the evenness of the corner sections and the geometry of the load-bearing walls will depend on the correctness of its implementation. To accurately draw the outline, the foundation is marked using a laser level.
Level device
Let's look at what a regular optical level consists of and how it works.
The main part of the device is an optical tube with a lens system capable of zooming in on observed objects with a magnification of twenty times or more. The pipe is mounted on a special rotating frame, necessary for the following functions:
- tripod mounts;
- setting the optical axis of the level to a strictly horizontal position, for which the frame has three height-adjustable “legs” and one or two (in models without automatic adjustment) bubble levels;
- precise horizontal aiming, which is carried out with paired or single handwheels.
In some models, the bed has a special dial, a scale that allows you to measure or construct horizontal angles.
On the right side of the pipe there is a handwheel designed to adjust image sharpness.
Adjustment to the operator's vision is made by rotating the adjustment ring on the eyepiece.
When looking through the eyepiece of a level telescope, we will see that in addition to bringing the object observed through the device closer, the level superimposes a system of thin lines on its image, called a reticle or reticle. It forms a cross-shaped pattern of vertical and horizontal lines (see Figure 1).
Installation of wooden cast-offs
Diagram of the level device: 1 – body; 2 – stand with leveling device 3 and level 4; 5 – laser source; 6 – eyepiece, 7 – lens of the collimating system with correction element 8, 9 – moving component for focusing radiation, 10 – housing with a power supply system and regulation of the output laser radiation intensity, 11 – sighting tube, 12 – optical attachments.
Casting is required to control the zero level, facilitate marking and more conveniently carry out excavation work to dig a pit. All cast-offs must be installed along the outer perimeter, having first retreated 1-1.5 m from the edge. This is necessary for unhindered digging of the pit.
- Decide on the heights of the corner points and choose the highest corner. This will be coordinate A, place the first cast-off on it and take it as the base one. Make a cast-off from timber and boards. The design must be reliable, not wobble and have no backlash. Hammer three posts and draw a line indicating the zero mark.
- Install a laser level and secure 3 planed boards using a screwdriver. The upper edges of the boards should determine the zero level at the corner point and lie strictly horizontal.
- We control the horizon using a laser level (Figure 2). Similarly, install all the cast-off bars around the entire perimeter of the future foundation. Using a laser level and focusing on the first scrap, determine the common zero on all the bars, secure the top strips of the board. Check the overall horizontal and level of the upper parts of the cast-offs using a laser level.
- Finally, along the marked contour, pull the twine, which is then wound onto the top of the cast-offs. Using a plumb line or using a level, align the twine with the bottom markings of the foundation. Drive in nails and securely fix the outer and inner contours. Don't forget to control the diagonals. If the diagonals coincide, continue marking the future pit with a level along the outer contour. Taking a ruler, mark the required thickness of the future walls on the cast-offs, hammer in the nails and pull the twine. For further convenience of work, you can remove the ropes that interfere with the marking of the pit. Their position and level can be restored using hammered nails.
Additional devices and equipment
In addition to the device itself, for work we will need the already mentioned tripod, as well as a special measuring rod with divisions and numbers printed on it. The divisions are stripes of alternating black or red stripes 10 mm wide.
The numbers on the rod are marked in increments of ten cm, and the value from zero to the end of the rod is in decimeters, with the numbers expressed in two digits. So, 50 cm is designated as 05, the number 09 indicates 90 cm, the number 12 indicates 120 cm, etc.
For convenience, the five centimeter marks of each decimeter are also united by a vertical strip, so that the entire strip is marked with signs in the form of the letter “E”, straight and mirrored.
Older models of instruments give an inverted image, and they require a special rack with inverted numbers.
Auxiliary devices for the level
A passport is attached to the level, which must indicate the date of its last check and adjustment, or, as surveyors say, “verification”. Levels are checked at least once every three years, in special workshops, about which another entry is made in the passport.
In addition to the passport, the level kit includes a key for maintenance and a soft flannel for wiping the lenses and, of course, a protective case where it is stored. Models with a horizontal dial - protractor - are equipped with a plumb line for installation exactly at the desired point.
Protect the level from shocks and shocks, even when it is in its case. Modern devices are equipped with a special device that performs precise horizontal adjustment; a strong push, which does not leave the slightest trace outwardly, can damage its delicate mechanism.
The operating principle of the level. Installation of the device
The principle of operation of the level is extremely simple: the optical axis of the device is located strictly horizontally and does not deviate when the device is rotated, being constantly in the same horizontal plane.
Let's take a closer look at how this quality can be used in practice.
We begin work by installing the device. We extend it and install the tripod. When working on soft soil, we press the points that end the “legs” of the tripod into it.
By adjusting the length of the “legs”, we set the tripod to a convenient height for work, trying to ensure that its upper platform, where the level is placed, is horizontal.
We remove the level from the protective case and install it on a tripod, securing it with the tripod screw.
Now you need to align the level so that its optical axis is strictly horizontal. For this purpose, the tool is equipped with a round bubble level located on the frame. By rotating the verniers on the legs of the device, we position the air bubble strictly in the center of the level (see Fig. 1).
Now, no matter how we rotate the device tube, the optical axis will be located horizontally.
Working with a level at a construction site
6.1. Permissible errors when marking foundations
Errors tend to accumulate. Therefore, you need to start with the highest possible accuracy of the initial markings. The diagonals of the foundation of an ordinary house should differ by no more than 3 - 5 cm. If you managed to get a difference of 2 cm, then this is very good.
If it is 1 - 2 cm, then you know how to make markings and work carefully. If it is 3–4 cm, then you are at the limit of what is permissible. If it is 5 cm or more, then you need to check the lengths of all segments and make adjustments right up to the last operation. Double-check every corner and all knots. After this, check the diagonals again.
Determination of excess points
We have figured out how to install the tool, now we will look at how to determine the difference in heights of two or more points using a level. To do this, we need a rail and an assistant who will hold the rail and move it to where it is needed.
We select the first measuring point (let’s denote it “a”), on which the assistant places the staff as vertically as possible. Verticality can be adjusted according to the vertical line of the reticle, giving appropriate signals to the assistant.
We aim the device at the staff, first approximately, using the “sight” on top of the pipe. We look into the eyepiece and, by rotating the handwheel, achieve a clear view of the staff.
We take readings. To do this, we look at which values of the staff the horizontal line of the reticle is located between, add to the lower value the number of centimeter divisions between the value line and the line of the device’s sight (or, if it is more convenient, subtract it from the upper value).
For example, the risk lies a little more than three divisions above the number 15. You need to write down the value 153 in a notebook, rounding up or down to the nearest centimeter.
Move a mark
Let's figure out how to move the elevation mark using a level. For example, we need to make a benchmark, based on which the excavator operator will dig a pit, two meters deep below the floor level of the building. The value of the floor height is what we need to indicate to the excavator operator.
We install the rail at the reference design point, the height of which corresponds to the design height of the building’s floor, that is, zero, and take a reference. When independently developing a project or when → linking an existing project to the area, the height of this point is set using a peg or a mark is set on some fixed surface (brick fence, tree, pole, etc.). Or such benchmarks (marks) are set by a surveyor accompanying the construction site. Let, for example, it turn out to be 162.
Directly at the site of the future pit, we drive in a peg and, placing the rail close to it, again take the value, let it be equal to 179. The difference will be 17 centimeters. We set aside 17 cm from the bottom of the batten up the peg, mark the value with a marker or pencil. By driving another peg nearby so that its top coincides with the notch, we get a clearly visible landmark, after which the peg with the notch can be removed.
How to mark the strip foundation of a house yourself
In construction, marking the foundation for a house is the transfer of the dimensions and axes of the designed structure from the drawing to the construction site.
If the foundation is incorrectly marked, its walls will not form a rectangle, but a rhombus or trapezoid. This may not be visible to the eye, but when laying the slabs of the first floor above the basement, they may fail or hang in one of the corners. This situation will be noticeable. It will turn out much worse if there is not enough support area for the slab, and instead of 150 - 200 mm there will be only 50 or 30 mm left. The slab will fall into place, and then, after loading with screed, flooring, heat and sound insulation and their structural elements, furniture and residents, it can break off part of the wall and...
Building a roof without right angles is also problematic. It will be very difficult or impossible to install rafters and install the roof correctly, for example, laying tiles or slate.
Step 3. We perform these operations two more times and get two more right angles
The last actions must take place in the zone of one point - the virtual corner of the foundation opposite the first corner. If all measurements were made carefully and the calculations were made without errors, then the last two nodes should coincide.
Step 4. Checking the squareness of the markings
From school geometry we know that both diagonals of a square or rectangle are equal. Therefore, the check is done by measuring the length of both diagonals and comparing them.
A difference of a few centimeters is acceptable. The marking of the foundation axes is completed.
Step 5. Marking the edges of the walls and pillows. We retreat the required distances from the axial mark, drive marking nails into the edge block and pull the cords along the boundaries of the walls
After checking the correctness of the virtual marking of the entire network in plan, i.e. in the horizontal plane, it is all removed and you can begin excavating the soil with an excavator.
6.1. Permissible errors when marking foundations
Errors tend to accumulate. Therefore, you need to start with the highest possible accuracy of the initial markings. The diagonals of the foundation of an ordinary house should differ by no more than 3 - 5 cm. If you managed to get a difference of 2 cm, then this is very good.
If it is 1 - 2 cm, then you know how to make markings and work carefully. If it is 3–4 cm, then you are at the limit of what is permissible. If it is 5 cm or more, then you need to check the lengths of all segments and make adjustments right up to the last operation. Double-check every corner and all knots. After this, check the diagonals again.
Marking to ensure high-altitude leveling of the foundation
Such markings are made with a laser level and applied to the cast-off stakes with a wood marker.
To do this, calculate the height of the foundation level, or rather its upper plane. For a prefabricated monolithic foundation, this will be the upper plane of the monolithic belt.
The laser level is installed and the horizontal plane is “beaten” at the required height. It will cross all the columns of all castoffs. At the point of contact, you need to put marks on the posts with a marker.
After the site for placing the foundation is ready, the network of marking cords is restored, and all significant points of this network are transferred using a plumb line down to the bottom of a ditch or pit to mark the area for laying (installing) the cushion and formwork for the walls.
You can install formwork.
Source: https://stroynedvizhka.ru/stroitelstvo-nedvighimosty/razmetka-lentochnogo-fundamenta/
Leveler, rapper and the Baltic height system
The construction of any structure is preceded by the development of a project. As soon as the necessary calculations and drawings are completed, it is allowed to begin practical activities - marking the foundation. This work stage is considered important, because the evenness of the corner sections and the geometry of the load-bearing walls will depend on the correctness of its implementation. To accurately draw the outline, the foundation is marked using a laser level.
Required Tools
In order for the marking for the foundation to be accurate and quick to complete, it is necessary to stock up on the following instruments and materials:
Tools for marking foundations
- a tape measure with a long measuring tape (ideally equal to or greater than the length of the longest wall of the house);
- wooden pegs or reinforcing bars (the choice depends on the available materials and the density of the foundation soil);
- construction square (has angles of 30,60 and 90 degrees);
- durable cord;
- wooden slats;
- clips, clothespins or nails for securing the cord to the pegs;
- construction level (you can buy an inexpensive bubble level; a laser level will make the work much easier, but is expensive).
If possible, you can also use a level, but purchasing it for the construction of one building is impractical. You also need to have scissors for cutting the cord, a hammer for driving nails, and a calculator for making the necessary calculations.
Preparatory work
Before marking the foundation with a laser level, preparations should be made so that the construction site is a flat area. For this:
- all vegetation is removed;
- the top layer of soil is removed;
- The mounds are cut off and the holes are filled.
It is best to level the area using a level. Some craftsmen use a square and a three-meter-long rod, with the help of which they check the quality of the work performed.
Marking for the foundation of the house
Marking for a columnar foundation
We make a two-tier cast-off. The lower tier is the level of the pillars.
The upper tier of cast-off is the level of the grillage.
Marking for strip foundation
Create a rectangle for the outer contour using the so-called Pythagoras. Then we retreat by an amount equal to the width of the tape and make an internal contour.
Preparing the device for work
In order to correctly mark using an optical level, you should check the readiness of the device for operation. For this:
- make sure that the battery is charged or insert batteries;
- along the beam line, obstacles are excluded, since the slightest refractions create errors;
- For accurate work, the level should be installed on a special tripod, placed level and centered. This does not apply to self-leveling devices.
In addition to the device itself, you will need a marked staff, a beam receiver to make it easier to work in sunny weather, and special glasses.
Marking using the device
Most often, marking the foundation is done using a laser level. The algorithm of actions is simple:
- beat the peg;
- We fix the device on its upper part;
- Using a laser level, the required distance is measured and the second peg is hammered in;
- a ninety-degree angle is drawn with a laser to mark the transverse axes, and now a couple more pegs can be installed;
- we pull the rope along four landmarks to mark the perimeter;
- Interior partitions are marked similarly.
The pegs can be used as guides for installing cast-offs. In this case, the level will help to verify the horizontal position of the posts, and the perimeter of the object is transferred into place using a tape measure and ropes.
How else can you mark the foundation with a laser level? We set the pegs manually, measuring the sides geometrically. We check their orientation and evenness of the corner sections using a rotary device.
The tripod is set at the distance allowed by the instructions from all control points, the laser signal is turned on, and you are sent with a staff and a beam catcher to one of the points. Having aligned the staff vertically, make a mark, repeating similar steps at the remaining points. All that remains is to check the markup data.
Many people do not know how to use a laser level when marking a foundation. It's simple - an inexpensive device has manual adjustment, and modern models are equipped with automatic self-leveling.
Marking the foundation with a level requires some skills, but anyone can master this tool on their own by studying the manual for its operation.
Please note that for the next ten meters the laser produces a three-millimeter error. If you compare it with a tape measure, then at a similar distance it deceives by two to three centimeters.
The importance of correct foundation markings
In construction, marking the foundation for a house is the transfer of the dimensions and axes of the designed structure from the drawing to the construction site.
If the foundation is incorrectly marked, its walls will not form a rectangle, but a rhombus or trapezoid. This may not be visible to the eye, but when laying the slabs of the first floor above the basement, they may fail or hang in one of the corners. This situation will be noticeable. It will turn out much worse if there is not enough support area for the slab, and instead of 150 - 200 mm there will be only 50 or 30 mm left. The slab will fall into place, and then, after loading with screed, flooring, heat and sound insulation and their structural elements, furniture and residents, it can break off part of the wall and...
Building a roof without right angles is also problematic. It will be very difficult or impossible to install rafters and install the roof correctly, for example, laying tiles or slate.
Choosing a level
When purchasing a device, study its type and functions. The final choice is made according to the following criteria:
- accuracy indicator. For domestic use, a value of 1.0 – 3.0 per ten meters of length is sufficient;
- lline length. For the construction of large objects, the beam must “shoot” a hundred meters or more; for private construction, its length of two to three dozen meters is sufficient;
- color shade of the beam signal. There are devices with red and green beams. The first option is more common, but for ease of operation it is recommended to use special glasses to distinguish the direction of the laser;
- power level;
- adjustment option. Manual adjustment devices are available, but it is better to purchase a device that can align lines automatically. It must be set at the control point, turned on, and the level itself will set up for work, giving an audible signal that it is ready. True, the cost of such a device differs significantly from the manual version;
- The battery capacity determines the operating capabilities of the device over time;
- IP protection. The level is used outdoors, so it is important that the device is protected from weather conditions;
- completeness. The kit must include special glasses, a signal catcher and other auxiliary elements that make working with the device easier. True, you will have to pay extra for their availability.
Laying out the foundation with a level
In construction, marking the foundation for a house is the transfer of the dimensions and axes of the designed structure from the drawing to the construction site.
If the foundation is incorrectly marked, its walls will not form a rectangle, but a rhombus or trapezoid. This may not be visible to the eye, but when laying the slabs of the first floor above the basement, they may fail or hang in one of the corners. This situation will be noticeable.
It will turn out much worse if there is not enough support area for the slab, and instead of 150 - 200 mm there will be only 50 or 30 mm left.
The slab will fall into place, and then, after loading with screed, flooring, heat and sound insulation and their structural elements, furniture and residents, it can break off part of the wall and...
Building a roof without right angles is also problematic. It will be very difficult or impossible to install rafters and install the roof correctly, for example, laying tiles or slate.
Site requirements. Linking to terrain taking into account geodesy data (soil types, groundwater)
The construction site should, if possible, be level and clear of trees and bushes. It will be nice if it has a slight slope.
The contours of the site must be clear, i.e., points that do not move during the entire construction period and are marked on the plan. If one of the edges of the site faces the “red line”, then it must be marked on the ground. You can drive several stakes on this line.
If possible, you need to drill several wells to determine the characteristics of the soil at the site, the level of groundwater and its chemical composition.
If the groundwater on the site is close to the surface and is located near the design level of the foundation, then it is necessary to arrange drainage, i.e. drainage. In this case, the water must be diverted 0.7 - 1 m from the bottom of the foundation.
Tools and materials for marking
Marking tools include:
- Roulette. Preferably metal, at least 10 m long, preferably 20 m. Fabric is lighter and a little more comfortable, but it sags and accuracy decreases.
- Laser level for marking the foundation, its height, horizontality, etc.
- A water level, also known as a flexible level or hydraulic level, is a long flexible tube with transparent glass or plastic sighting tubes at both ends, on which divisions are applied exactly every 1 mm and each of them is closed with a stopper. This device operates according to Pascal's law for communicating vessels. The length of the flexible tube is 12 meters or more. The tube is filled with water so that it is located approximately in the middle of the sighting tubes.
- Thin strong rope (twine), cord. You can use thin wire, but it is not very convenient to work with.
- Markers, pencil, paper, multiplication table, formulas.
- Hammer, nails.
- Material for making cast-offs – wooden stakes – at least 16 pcs. and bars - 8 pcs. Sometimes 8 pcs are used. U-shaped pieces of steel reinforcement that are driven into the ground.
Brief description of the laser level
A laser level is one of the devices that belongs to a large group of measuring instruments.
The main purpose of the level is to determine the difference in heights of one place on the surface relative to another place and to construct planes: vertical, horizontal and any intermediate ones in the form of a line - a trace of a laser beam. In addition, such a device can construct point projections - give a point on the surface.
Most often, self-leveling cross levels are used, which build two perpendicular planes - horizontal and vertical. They can be rotated and installed in any direction. The horizontal plane is constantly adjusted by auto-leveling elements.
The main characteristics of laser leveling are:
- measurement accuracy, professional devices give an error of up to 3 mm at 10 m, and household devices up to 0.5 mm at a distance of 1 meter;
- measurement range: for households up to 10 m, professional – 30 m or more;
- number of projected planes - usually two or more, etc.
But a level is, first of all, a measuring instrument.
It will only help you well if you know how to use it correctly.
If you take it for temporary use, i.e., rent, do not expect it to work on its own.
If you do not know what adjustment is, do not rent the device.
When starting to work with it, check the accuracy of the measurements and whether the settings are messed up, i.e. check all the characteristics described in its passport. All verification operations are in the description of the device.
There is no work on laying out the foundation that cannot be carried out without a level. Therefore, an ordinary water level, used correctly, can easily replace it. Although a laser level speeds up and simplifies work on a construction site.
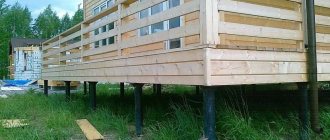
How a strip foundation works and its advantages
It is called strip because it looks like reinforced concrete strips laid in a trench dug along the contour of the building. If the soil is crumbling, the depth is large, and there are many intermediate walls inside the perimeter of the building, for which it is also necessary to build a foundation, then a foundation pit is torn off, in which all foundation work is carried out.
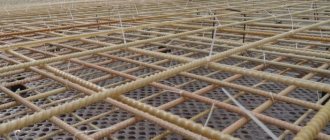
Structurally, a strip foundation can be monolithic or prefabricated monolithic. In the latter case, its upper part will have the form of a monolithic reinforced concrete belt located along all the walls of the foundation, assembled from individual blocks.
When carrying out private construction, trenches for a strip foundation, in order to save money, can be dug manually. In this case, the soil is either removed or scattered across the site, raising its level.
The depth of the strip foundation is usually determined by the level of soil freezing. For the southern regions of Russia it is a little more than a meter, in the northern regions and Siberia - 1.5 - 2 or even more.
Advantages of strip foundations:
- simple construction technology;
- it is possible to lay a ground or basement floor;
- built on strong soils - stone-sand and clay;
- they are quite economical;
- parameters - width, depth, amount of reinforcement, etc. indicators that affect strength are easily adjusted.
You can build such a foundation for a house with your own hands.
Marking axes and angles - placing benchmarks outside the perimeter of the foundation
The starting point of all markings should be a point on the ground that is precisely “tied” to the site plan.
Most often, this is a corner point, usually associated with the so-called “red line” - the border of your site and public territory, on which neither you nor anyone else is allowed to build.
The intersection of the border of your and the neighboring plot with the “red line” will give such a point. Your property's fence should be located inward from the red line.
Requirements for operation
It’s not enough to know how to mark a foundation with a laser level. You must be able to keep the device in working condition.
A new device must be checked for accuracy and proper operation of all mechanisms and optics.
To prevent the device from starting to produce distortions when marking after a certain time, it must be handled with care:
- shocks and mechanical impacts are excluded, the device is protected from accidental falls;
- the device must be used in accordance with the rules specified by the manufacturer in the instruction manual;
- A protective case is used to store the level.
After a certain time, the instrument optics are sent to a special center for verification and calibration; the frequency of such maintenance is indicated in the passport.
Application of laser device
We already know how to mark the foundation with an optical level. What other jobs can such a device be used for? Believe it or not, you can do the following using a laser beam:
- wallpaper the walls. The level is set to the required distance under the ceiling, and a reference line is taken. You don't have to do beats;
- a device that cuts the beam into two or four beams located perpendicularly will help you work with facing tiles. On the walls there is a projection of intersecting rays, their thickness indicates the seam areas, and the edges indicate the contours of the fastening material;
- In addition, the level is capable of assisting in painting and finishing stairs and other structures located at an angle. The horizon is set to the required angle, for which the device will have to be tilted and the tripod fixed in this position;
- household appliances will be placed accurately if you mark with a level;
- Some craftsmen use such a device to assemble cabinet furniture.
Marking the foundation with a laser level
When building a house, accuracy is the main assistant. Correct marking will help to avoid errors in the dimensions of structures, ensure the exact design location of the structure on the ground, and the evenness of the corners. All these tasks will be helped by a modern device - a laser level for working outdoors and indoors.
This is a high-precision geodetic apparatus that requires careful handling and proper use. However, hiring specialists to carry out work is not a cheap pleasure. In this article we will tell you how to choose the right device and how to use it without having the skills and experience of working with levels.
The essence of the device
A tool for marking and monitoring the horizon in its modern form is a laser level. Its working mechanism consists of a complex optical system, which includes:
- Focus system;
- Balance controller;
- Light emitters (lasers);
- Power and control units.
In other words, a laser level is a descendant of the usual construction level, which is used to check the evenness of lines and angles. It is installed strictly vertically at one point, from which markings and measurement (reconciliation) of heights are carried out. The device is equipped with a laser catcher, which helps you find the signal in sunny weather, and glasses with red lenses will help you see the beam with your own eyes.
Varieties
Choosing a laser level for a non-professional is not an easy task. There are many types of devices with different sets of functions, which is the determining factor in choice.
| Rangefinders | These devices are also called construction laser tape measures. In fact, they are not levels, but they are still used to level heights. Rangefinders emit a light beam over significant distances, which are difficult to measure with a tape measure, and determine the values of the measured sides with high accuracy. This device is useful in the construction of foundations. |
| Line Builders | These are devices that emit laser beams, which, when refracted, create perfectly even angles with the required parameters. For devices, the magnitude of the angle sweep can be different - from none to 1600, and sometimes more. The devices project from 1 to 8 lines simultaneously, so they have a wide range of action. They are used both for marking the foundation and for repairs, interior decoration, and facade decoration. |
| Axis builders | These are simple devices that do not emit radiation; they only project points on vertical and horizontal surfaces. Using such levels, you can determine the evenness of the foundation walls and mark the foundation pit, but only with the use of an auxiliary strip. The use of the device is limited to obtaining only control points (axes). |
| Rotational builders | This type of laser levels is universal and has a wide range of applications, but due to the wide range of functions in everyday life, it remains unclaimed - these are professional devices. The emitted laser beam creates a wide marking in the vertical and horizontal planes. Using a rotational laser level, they mark the foundation and control the vertical and horizontal of the structures being built. |
The essence and specifics of leveling
There are many ways to determine the curvature of the earth's surface: by the slightest difference in atmospheric pressure, using a theodolite or water level and other devices. However, geometric leveling is considered the most universal, fast and accurate method: even with technical levels used in construction, the measurement error is only 10 mm per km.
The essence of leveling is to determine the difference in height (excess) of each of a set of points on the ground relative to a certain reference point, called a benchmark in construction. After the virtual plane has been determined, a zero mark is measured relative to it, which in most cases lies at the floor level of the first floor of the building.
In principle, there is nothing complicated in leveling except for two specific points. On the one hand, the surveyor and his partner must be able to use a level and a staff, know the finer points of adjustment and correctly install control posts. Another nuance is that there may be objects on the ground that prevent visual contact between the level and the staff. Therefore, the installation site of the level has to be periodically moved, determining temporary reference points and establishing the height difference for them. But in the end, all calculations come down to banal arithmetic.
Determination of benchmark and key points
During a geodetic study of a construction site, the benchmark is placed at the lowest point of the plane, which is determined visually or by a cursory “shoot”. At this point, a massive pole with a straight cut is driven into the ground, on which it is convenient to install a rail.
The number and location of key points depends on the leveling tasks. If we are talking about preparing a foundation pit, the points are placed on the internal and external corners along the contour of the future structure. When placing control points, high precision is not required; it is only important that there are no local bumps or holes in the place where the stakes are installed.
Within the boundaries of a populated area there are special, measured and officially approved reference points for reference to them when measuring new construction sites.
All points should be as equidistant as possible from the level installation site and be at least 5 meters away from it. If you are leveling a small area, you can use a level to shoot all the points from the side, or use a hydrostatic level.
Marking axes and angles - placing benchmarks outside the perimeter of the foundation
The starting point of all markings should be a point on the ground that is precisely “tied” to the site plan. Most often, this is a corner point, usually associated with the so-called “red line” - the border of your site and public territory, on which neither you nor anyone else is allowed to build. The intersection of the border of your and the neighboring plot with the “red line” will give such a point. Your property's fence should be located inward from the red line.
Typically, the house is located from this fence and from the neighbor’s fence at the following distances:
- according to sanitary standards defined by SNiP 30-02-97, clause 6.7: at least 3 m;
- according to fire safety standards SP 42.13330.2011p.7.1: at least 6 m from windows to the walls of a neighbor’s house or garage, bathhouse, barn, etc., at least 3 m from a residential building to the border of the neighboring plot.
Therefore, you need to retreat to the specified distance or further and you can begin marking the foundation with your own hands.
A. A “red line” is established on the ground. If the owner is going to build a house exactly at the normalized distance from the “red line,” then it is better to invite a professional land surveyor to mark the future corners of the house. But most often they retreat by 1 - 1.5 m from these restrictions.
Accurate orientation to the cardinal points. It is possible at a great distance from the “red line”. But they usually focus on the center line of the street or road.
If you mark the corners of the foundation with pegs, driving them exactly at the points of the future corners of the house, then when digging a trench, the marking pegs will definitely fall into the trench.
Therefore, marking the area for the foundation begins with the installation of wooden support frames outside the trench or pit, or more precisely, outside the excavator operating area. They are called cast-off boards or beams, or simply cast-offs. Some "experts" call them "stools." Cords or wire are pulled over them. The places where the cords intersect will provide the necessary marking points, but not on the ground, but “hanging” in the air. These “points” are later transferred to the ground or to the formwork.
Three or five nail marks are hammered into the top bar of the cast-off:
- in the center - an axial mark for the axis of the foundation wall;
- to the right and left of the axial line are marks for the width of the foundation wall;
- even further - the width of the pillow under the foundation.
Step 1. Marking the starting side.
We start from the side that is closer to the “red line”.
We hammer two cast-offs 1 - 1.5 m outward from any corner. We tighten the axial cord. Using a water level, set the upper part of the cast-off bars at a height of “0”. Having retreated 1 - 1.5 m, we hammer the first peg into the ground - we make a starting point. From it we use a plumb line to “raise” the point onto the cord. We measure the length of the wall along the axes on the cord and make a mark on it. We lower the point to the ground and hammer in the second peg. Between the pegs is the axis of the first wall.
Step 2. Marking the side perpendicular to the starting one.
Using the Pythagorean theorem and knowing the lengths of the sides of the foundation, we calculate the length of its diagonal (along the axes). On the cast-off of the perpendicular side, on the axial nail we fasten the end of the cord and pull it over the opposite cast-off. From the intersection with the axial cord, measure the length along the axes of the second side and make a mark on the axle cord of the second side. On a free piece of cord we tie knots along the diagonal length along the axes. We fix one knot on the axis mark of the third side and pull the second knot towards the opposite cast of the second side. By aligning the second knot with the mark on the cord of the second side and pulling the cords, we get the first right angle.
Another way to construct a right angle is the “Egyptian triangle” method. On the cord of the first axis, from its intersection with the second axis, we measure 4 meters or a distance that is a multiple of this value. On the cord of the second axis we measure 3 m or an equal multiple of the distance. We make marks on the cords and measure the distance between them with a tape measure. It should be 5 m. By moving the second cord relative to the point of intersection with the first, we achieve the exact value - 5 m. The angle in this case will be straight.
Step 3. We perform these operations two more times and get two more right angles.
The last actions must take place in the zone of one point - the virtual corner of the foundation opposite the first corner. If all measurements were made carefully and the calculations were made without errors, then the last two nodes should coincide.
Step 4. Checking the squareness of the markings.
From school geometry we know that both diagonals of a square or rectangle are equal. Therefore, the check is done by measuring the length of both diagonals and comparing them.
A difference of a few centimeters is acceptable. The marking of the foundation axes is completed.
Step 5. Marking the edges of the walls and pillows. We retreat the required distances from the axial mark, drive marking nails into the surround block and stretch the cords along the boundaries of the walls.
After checking the correctness of the virtual marking of the entire network in plan, i.e. in the horizontal plane, it is all removed and you can begin excavating the soil with an excavator.
Leveling rod designations
Before you start shooting terrain, it's a good idea to figure out how to navigate the staff. Really, what are these incomprehensible letters “E”, what are these black and red marks? It's actually very simple.
The rail is divided into segments, each 10 cm long. Inside each segment there are black and white sections, each 1 cm long. The outer three black sections are united by a side line - this is to make it easier to visually determine the center of the segment. The numbers indicate in which ten centimeters the segment marks are located, that is, essentially the position on the rail is determined by the number of white and black sections added to the ten number.
But accuracy of one centimeter is clearly not enough. The fact is that on the back side of the staff there is a regular millimeter graduation, which is not very convenient to use over long distances. Therefore, the assistant holding the staff can further adjust the slider, guided by the surveyor’s commands “above” and “below”, and then show the number of millimeters on his fingers. Also, some levels are equipped with a metric grid, which makes it even easier to determine this deviation.
Finally, the most interesting question: why the top of the rail has red markings located in the reverse order. The fact is that the old levels did not have an additional lens and the surveyor saw the image upside down. But you are unlikely to have to deal with such “dinosaurs”.
Working with project documentation
Having prepared the area, do not rush to grab the cord and pegs. First, study the project carefully. The goal is to determine which size in the drawing is the main one.
Designers can be based on:
- center distances;
- external overall dimensions of the foundation;
- its internal dimensions.
When marking the foundation with their own hands, private builders often make the mistake of mistaking the distance between the axes for the overall size of the building.
As a result, the area of the house decreases or increases (if the axes in the drawing are outside the house).
Procedure for measuring point elevation
Before shooting a point, an assistant should set the staff as close as possible to the control peg, gently resting it on the adjacent ground. During measurements, the rod must be held motionless and strictly vertical, using a plumb line or a round bubble level for alignment.
The level must be turned towards the staff so that the vertical axis of the grid is located exactly in its center. After this, by rotating the optical screw, you need to adjust the sharpness of the image so that the marks on the staff are clearly visible. Then you need to adjust the sharpness of the reticle display by rotating the ring on the eyepiece.
To determine the excess, you need to note the number of the segment on which the vertical axis is located, and then count how many whole black and white spaces there are from the beginning of the segment to the axis. By adding this value after the segment number, you will get the elevation in centimeters. If higher accuracy is needed, a comma is placed after the elevation, then the assistant moves the slider so that its edge exactly coincides with the horizontal axis and transmits the number of additional millimeters, which is written after the decimal point.
You can do without the slider. If the horizontal axis is located exactly in the middle of the white or black mark, add three millimeters, if in the lower quarter - one or two, if in the upper quarter - four. This visual definition is more than enough for construction.
Logging and calculations
The leveling process involves keeping a large number of records. The surveyor should have at hand a site plan, which schematically shows the object for the construction of which leveling is being carried out, as well as the location of the control stakes. Each peg must be numbered and these designations must be placed in a separate table in which the measured excesses are noted.
Now about the excesses themselves. They can be relative and absolute, that is, from the level measurement plane and from the benchmark. For example, the excess of the reference point was 145.2 cm, and the reference point - 151 cm. Subtracting the excess of the point from the excess of the reference point, we find that the absolute excess will be -4.8 cm, while the minus sign makes it clear that the current is located below. Similar calculations should be carried out for each of the points.
The practical meaning of leveling is to apply marks on the stakes that are in the same horizontal plane. To do this, you need to find the highest point with the largest positive value of the elevation and add to it, for example, 20 cm. Following from one peg to another, using a tape measure, mark the value of the elevation of the point on them, to which the offset value is added - those same 20 cm. The resulting marks are used when excavating and determining the depth of the pit, or for pulling the mooring cord.
How a strip foundation works and its advantages
It is called strip because it looks like reinforced concrete strips laid in a trench dug along the contour of the building. If the soil is crumbling, the depth is large, and there are many intermediate walls inside the perimeter of the building, for which it is also necessary to build a foundation, then a foundation pit is torn off, in which all foundation work is carried out.
Structurally, a strip foundation can be monolithic or prefabricated monolithic. In the latter case, its upper part will have the form of a monolithic reinforced concrete belt located along all the walls of the foundation, assembled from individual blocks.
When carrying out private construction, trenches for a strip foundation, in order to save money, can be dug manually. In this case, the soil is either removed or scattered across the site, raising its level.
The depth of the strip foundation is usually determined by the level of soil freezing. For the southern regions of Russia it is a little more than a meter, in the northern regions and Siberia - 1.5 - 2 or even more.
Advantages of strip foundations:
- simple construction technology;
- it is possible to lay a ground or basement floor;
- built on strong soils - stone-sand and clay;
- they are quite economical;
- parameters - width, depth, amount of reinforcement, etc. indicators that affect strength are easily adjusted.
You can build such a foundation for a house with your own hands.