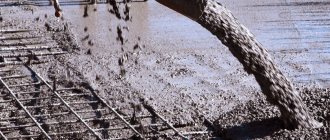
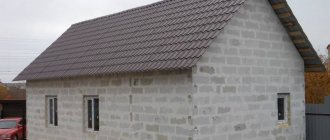
Aerated concrete is a porous and relatively lightweight material. That is why it is so warm and easy to process, and houses made from it have an excellent microclimate in winter and summer. At the same time, due to the peculiarities of the structure of this material, conventional fasteners hold in aerated concrete worse than in “classical” concrete or brick.
Therefore, people who have built houses from aerated concrete may encounter the following:
- the fastening element (screw, nail, dowel) does not hold well in the wall, wobbles, or spins. It’s scary to hang anything on it;
- over time, under the weight of the equipment or under dynamic load - vibration, jerking (curtains), slamming doors - the fastening weakens and may fall out;
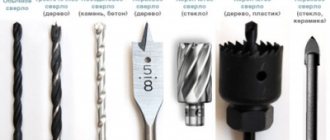
These problems are not made up. However, they can be avoided, and it is not difficult to do so. Taking into account the characteristics of this material, special fastening methods and fastening elements were developed - nails, dowels, anchors specifically for aerated concrete .
Let’s figure out how and what kind of fasteners should be used in a Twinblock house so that the curtain does not “slant” and a family portrait or, more critically, a cabinet with dishes does not fall.
How to hang a picture or other light decor on a Twinblock wall?
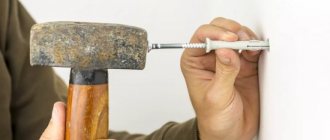
To do this, it is enough to hammer a nail into a wall made of aerated concrete or tighten a self-tapping screw, just like in ordinary wood.
What's the best way to secure a wall light, coat hooks, or a heavy picture?
For these purposes, it is better to use a “pair of nails” - a fastening method in which two nails or self-tapping screws are driven into the wall or twisted at an angle of 45° to each other. Such fasteners work like an “anchor”, securely fixing your equipment.
Using the same method, you can attach structural elements to the external walls of a house made of aerated concrete - various canopies, gutters, awnings, etc. Two holes are drilled in the wall at an angle and reinforcement is hammered into them. Next, the structural elements of the structure are welded to the reinforcement.
How to securely secure a mirror, shelf or small cabinet?
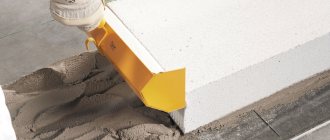
In this case, you can use a dowel for aerated concrete “Turbinka” with longitudinal ribs (it is also called a driven one). This dowel is driven into a pre-drilled hole in the wall. Scrolling, the dowel for the gas block forms a thread. The “turbine” holds weight better than a nail or self-tapping screw, and is quickly installed, but is not suitable for mounting massive equipment.
How to hang a kitchen cabinet or bookshelves?
To solve this problem, a screw dowel for aerated concrete (with transverse turns) is suitable. Unlike the “Turbinka”, it is screwed into a pre-made hole using a special key or screwdriver. Next, a self-tapping screw is screwed into the screw dowel.
Have you decided to install a water heater in a house made of aerated concrete?
Most likely, a water heater (boiler) filled with water will be the heaviest attachment in the house. Electric boiler 100 l. on average weighs 25-30 kg, gas - 35-40 kg. The weight of 100 liters of water is approximately 100 kg. Thus, the weight of the water boiler is about 140 kg. - a serious load both for the Twin Block wall and for the fasteners, no matter what the design.
To make the water heater mounting as reliable and safe as possible, anchors for aerated concrete were invented; they can be mechanical or chemical.
Mechanical anchor for aerated concrete
During installation, the mechanical anchor is wedged or cut into the wall, thereby being securely held in the wall. Sometimes it is not possible to remove such an anchor without damaging the wall.
Chemical anchor for aerated concrete
Chemical or adhesive anchors are called anchors, for the fixation of which compositions based on various resins are used. The choice of composition depends on the conditions of use - low temperature, high humidity of the wall, etc.
How is a chemical anchor installed?
A capsule with an adhesive composition is inserted into a pre-drilled and cleaned (this is important) hole, or the composition is simply squeezed out inside. Next, screw the fastener into the hole and leave it to dry (up to 48 hours). The adhesive “tightly” binds the aerated concrete to the anchor. It can only be removed together with a piece of the wall.
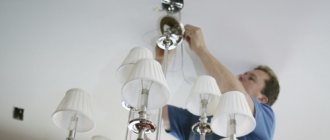
How to hang a heavy chandelier?
We also recommend using a chemical anchor, but to increase the area of interaction of the adhesive composition with the wall, a conical hole is formed in the ceiling or partition of the aerated block, which is filled with the adhesive composition.
Chemical anchor is an excellent solution for fastening in aerated block houses. But it also has disadvantages: it takes a long time, is expensive and impossible to remove without damaging the wall.
As you can see, reliable and easy-to-implement solutions have long been invented for attaching household items to aerated concrete walls. To make sure that they work, read the reviews of people who have long and happily lived in houses made of aerated concrete (Twin Block):
Vladimir, built a cottage from Twinblock in the village. Kosulino - Boiler, all kitchen furniture hang on ordinary anchors and self-tapping screws.
Vladimir, built a house from Twinblock in Nevyansk - If you need to hang a light shelf on the wall, then just screw in a self-tapping screw, like in a tree. If something is heavier, a plastic turbine with a screw is screwed in, and it won’t go anywhere. There is no reason for people to worry about this.
Want to know more about Twinblock? Read our publications and articles:
Where and at what height is it better to hang a TV on the wall?
First of all, you need to decide on the location and height of the screen on the wall. In the living room, the TV is usually placed in the seating area - opposite the sofa and armchairs. In this case, the height is determined depending on the design of the furniture. You need it to be comfortable to watch, and for this the middle part of the screen should be approximately at eye level. So the height of installation of the TV on the wall is determined experimentally, but on average it is 100-120 cm.
In the bedroom, the approach is the same, but you will mostly watch while lying down, so the height of the TV installation is slightly less - about a meter.
To properly hang the TV on the wall, determine the height
In the kitchen the approach is completely different. There is rarely time to pay attention to the picture, and there is not much space. That’s why a TV in a kitchen is usually hung closer to the ceiling and brackets are sometimes chosen to be ceiling-type rather than wall-mounted. This approach has one more advantage - high-mounted equipment is safer.
As for the placement of the screen relative to the audience, the optimal distance is determined for plasma screens - this is 3-4 diagonals of the TV. With this arrangement it will be comfortable to look at (with normal vision). For all other types of screen, select a distance that is convenient, but the minimum distances are given in the table. It’s better not to place furniture closer - it will be completely uncomfortable.
| Screen size in inches | Screen size in centimeters | Minimum distance to screen |
| 73′ | 185 cm | 3.71 m |
| 65′ | 165 cm | 3.3 m |
| 57′ | 145 cm | 2.9 m |
| 50′ | 127 cm | 2.54 m |
| 46′ | 117 cm | 2.34 m |
| 42′ | 107 cm | 2.13 m |
| 37′ | 81.3 cm | 1.88 m |
When choosing a location for the TV on the wall, it is worth considering that for normal operation it must be well ventilated. Therefore, installation in a niche is very undesirable, although this is the latest trend in design - to make a niche out of plasterboard and hang a TV in it. As a last resort, this installation method is acceptable, but the dimensions of the niche must be significantly larger than the size of the TV in order for the air to more or less circulate and cool the back surface. But even in this case, the TV can quickly fail - overheating has a bad effect on performance.
Useful tips
So, how to attach a TV bracket to a foam block wall? To do everything right, use the following tips:
- Flat models are heavy, especially those with a large diagonal size. For an 81 cm TV, the weight will be from twenty to twenty-five kilograms. This means that it will be more difficult to mount a TV to the wall than a painting or anything else.
- Take into account the amount of light entering the room through the windows.
- At what height to hang the TV on the wall is up to you. If it is placed high, your neck will quickly become tired. Placing it at a lower height may cause small children and animals to be interested in it.
- You should not hang the TV in a confined space - air should circulate freely, ventilating the TV so that it does not overheat.
- Before screwing fasteners onto a foam concrete wall, you should make sure that there is no electrical wiring in this area. During work, personal protective equipment should be used. By the way, it won’t hurt to decide how to hide the wires from the TV on the wall. There are several options - gating, installing a box or covering the wires with pieces of furniture.
- Use articulated brackets to mount the TV. Before purchasing them, it is recommended to decide on the installation location in order to buy a more suitable configuration. In addition, when choosing a bracket, do not forget to take into account the size of the TV and its weight. Otherwise, your mount may end up on the floor pretty soon.
Liquid crystal panels produce less thermal energy compared to plasma panels, so they can withstand less ventilation. In principle, it is possible to fix a TV in a niche if certain conditions are met - the niche must be empty, and there must be at least five to ten centimeters between its walls and the TV body.
How to hang a TV on a wall made of aerated concrete?
Mounting even a light TV on the wall must be reliable. The equipment is not cheap, so that if it falls, it can be immediately replaced. In addition, damage to the TV can cause a fire. Therefore, it is better not to take risks, but to secure such items correctly.
You need to proceed as follows:
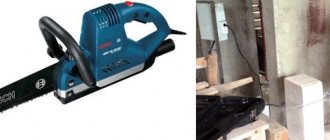
- Make a hole in the wall using a hammerless hand drill or a hammer.
- Drive a wooden bushing with a diameter of 2–3 cm into it.
- Install metal fasteners into it.
To increase adhesion, the dowel can be placed on a special glue or any sealant. The fastening will be reliable and durable. It can also be used when you need to hang a cabinet on a wall made of aerated concrete. The main thing is to choose fasteners that are proportional to the weight and dimensions of the furniture. And, of course, you should think twice before hanging something heavy not on a load-bearing wall, but on a partition made of aerated concrete.
Hanging cabinet with sink on aerated concrete blocks
Good day! Next week we are going to start renovating the bathroom. The furniture has already been chosen. Among other things, there is a hanging cabinet (according to information from the seller’s website, its weight is 40 kg). Also an overhead sink (according to information from the seller’s website, its weight is 10 kg). That is, the total is already 50 kg + all sorts of gizmos that the wife stuffs into the drawers of the cabinet. This is about 10kg more. Plus we have a child in his early teens. At least he will be aware that there is no need to hang on the cabinet when brushing your teeth. But this is a child who can simply forget.
House P30, reinforced concrete walls. To lay the water supply, the walls will be lined with 50mm aerated concrete blocks. Would you like to know in advance how to secure the cabinet with the sink as safely as possible? I haven’t seen the mounting of the cabinet yet, but I assume that it is on two support points.
Bracket installation
Since hanging a TV on drywall can be difficult due to the characteristics of the base, methods are chosen based on the specific situation. The following installation options are available:
- Fastening directly to the base. This method is suitable for TVs with small size and weight.
- Installation to the lintel of the sheathing frame, if a classic metal profile design is used.
- Construction of a niche or shelf. This method is often the only way to place equipment of impressive dimensions and weight on the wall.
If the owners of the TV decide on the latter option, then it is better for them to know in advance that such equipment will break down much faster. This applies to a greater extent to plasma panels, which generate more heat. Liquid crystal models are more tolerant of imperfect ventilation. Clearances of 200 mm on each side will save a potentially dangerous situation.
Fixing the bracket with dowels
Fasteners for ordinary walls are completely unsuitable in this case. The dowels included in the kit are intended only for concrete or brick foundations. They cannot be used for gypsum plasterboard surfaces: neither single-layer nor double-layer. To hang the brackets, buy special dowels for drywall - “butterfly” (TNF/-W), “driva” (Driva, TT-22) or “molly” (umbrella). Their difference from ordinary products is their ability to open and thereby securely fix the screws in the wall. Each “tricky” fastener has its own characteristics and weight restrictions:
- Butterfly is the most popular option. She/he requires pre-drilling the drywall. The fastener cannot be called outstanding, but the “insect” can cope quite well with medium-weight equipment. One dowel can hold 15 kg on a single-layer wall, about 28 kg on a two-layer base.
- Driva made of metal is the most convenient type of dowels, since you don’t even have to drill a plasterboard sheet. The reverse side will also remain intact and unharmed. For plastic fasteners, this operation is necessary. The permissible load on a plastic product is 25 kg, for a metal product - more than 30 kg.
- Molly is called variously: an anchor, a bolt or a dowel. This is the metal heavyweight of the trio, but requires pre-drilling into the drywall. It would also help to use special tongs or training that will help you master the skills of opening an umbrella from the back of the gypsum board. This dowel can withstand up to 40 kg and can be dismantled. Its only drawback is its relatively high price.
Reusing fasteners containing plastic elements is not recommended. Such dowels no longer guarantee reliable weight retention, so the help of anchors is often required. All presented mounting options are suitable for TVs that do not have excessive weight.
Plastic
Cheaper plastic dowels can also be used for fastening plumbing fixtures, gratings, pipelines, and consoles. This dowel is made of plastic, and the fastener itself is metal. To fasten objects to foam concrete, metric screws are used.
The dowel for foam blocks has a specific thread that allows it to be easily screwed into materials with a porous structure.
Important. A very convenient design feature for installation is that metric screws are often made in the form of an attachment for a screwdriver.
Frame
Frame plastic dowels are made of polyamide (nylon) and are used with special galvanized steel screws. They are used for fastening window and door frames, slats and bars, metal profiles to walls made of foam concrete, lightweight concrete and gas silicate.
The design consists of the following components:
- long non-spacer part;
- extended three-section spacer zone;
- retaining edge to prevent falling into the hole.
There is a through hole in the very tail part of such a dowel; it provides the screw with optimal movement. It is the double spacer zone that allows you to securely fasten the mounted parts in materials with voids.
Such fasteners are difficult to replace and you should not try to save money by using simple dowels for bricks and foam blocks. It is clear that the price of special fasteners is somewhat higher, but the reliability of the fastening also complies with the standards.
Fasteners and requirements for them
If you need to hang a small object that is light in weight, you can do this by using regular screws or nails driven into the block at an angle.
But with a TV or other item that weighs more than five kilograms, you shouldn’t take that risk. In such cases, it is recommended to use fasteners designed directly for foam concrete.
Steel dowel
It is made in the form of a galvanized tube with carrier-type blades. They have a studded structure that allows for reliable adhesion to block material. There are more modern solutions from world-class manufacturers that modify conventional types of fasteners in order to improve the properties of the latter.
Nail Nema
The design provides for a special sleeve. It is with its help that a nail driven into a wall enters at an angle, which increases the ability to stick.
Frame dowel
Used for through installation. Load-bearing capabilities are increased by wedging the outer spiral ribs.
Spiral nail
During driving, it is screwed into the foam concrete structure without creating destruction. The adhesive strength is four times greater than with simple analogues.
Nylon anchor
It features a wide thread, which creates a reliable connection. You can use different screws with anchors.
Chemical anchor
It is represented by a tube into which an adhesive composition made on the basis of organic polymers and synthetic resins is poured. This mixture penetrates deeply into the block pores, hardens, forming a monolithic structure together with the hardware.
The TV bracket on the wall will stay firmly in place.
The endurance of a fastener is determined by its length and diameter. Equally important is the material used in production. For foam concrete blocks, fasteners made of hot-dip galvanized or stainless steel are best suited. Another metal that is protected from corrosive formations is also used. Attention must be paid to this when it is intended to use a screw and nail in a room with a high level of humidity, an unheated outbuilding, or an external wall of an object. Ordinary metal will begin to rust after a while, will no longer be able to withstand the load, and your item will fall.
To minimize the likelihood of risks of fasteners breaking or bending, it is necessary to clarify its load-bearing capacity during selection.
And to eliminate the possibility of tearing out such elements, study the information about the density indicator of the aerated concrete block. The letter “D” and numbers are used to designate it. The higher the value, the stronger your wall. The ideal option is to rely on the packaging material data or a certificate that indicates the maximum permissible load on the fasteners, taking into account the density of the blocks.
Metal
Such dowels are made of galvanized steel, they are for fastening to materials with voids, including foam blocks:
- wall office cabinets and shelves;
- kitchen cabinets and rails;
- cornices and structures for drying clothes;
- chandeliers and sconces;
- paintings and mirrors.
The dowel consists of a galvanized screw, a ring or half-ring, as well as a hollow collet, which has a non-expandable part, the length of which is selected equal to the thickness of the supporting base, and four fixation segments. The screws have a spherical or countersunk head.
Another important detail in the structure of the dowel is the side, which protects it from falling into the drilled hole. And the sharp teeth located around the circumference of the locking edge create a reliable obstacle to turning it around its axis.
Important: The structure of the dowel allows it to be dismantled by unscrewing the fastening screw, and makes it possible to reuse it without reducing the reliability of the fastener.
Frame
They are used for through fastening of slats, window frames, door frames to hollow bricks, foam blocks and gas blocks. Moreover, the frames themselves, which need to be fixed, can be made of wood, metal, or plastic.
- a hollow sleeve having a conical spacer zone and a three-sided spacer part;
- screw with metric thread;
- cone-shaped bushing.
This fastener allows you to withstand very high loads, which is important when installing window and door structures.
Installation procedure
After you have chosen a place to install the TV and a bracket, mark the mounting location on the wall. Before further work, check that there are no communications in the wall - there are no wiring, pipes, etc. This can be done using a wiring detector. If everything is fine and no wires are found, apply the bracket plate to the wall and make marks for each hole. At the same time, make sure that the marks are strictly horizontal. The slightest misalignment can cause the screen to fall.
Using the marks made, holes are drilled into which dowels are inserted, then the mounting plate is installed and secured with bolts.
Choose your location carefully
Let's start attaching the counter plate. A counter plate is installed on the back wall of the TV. It attaches to the holes on the back panel. They usually have fasteners installed, we unscrew them and use them during installation. If there is no fastener, select it according to the size of the holes.
We attach strikers to the back panel
Having secured the counter panel, we hang the TV on the wall. As we have already said, it is more convenient to do this together - you need to get into the groove. To make this easier, practice without a screen before editing.
Only by hanging the TV on the wall can you deal with the wires. You can connect it to a standard outlet, but the wires should not be strained, even when turned to the maximum angle. It is important. That's all, now you know how to hang a TV on the wall with your own hands.
Step-by-step installation of a wall-hung cabinet with a sink
One of the common types of bathroom sinks is with a hanging cabinet. This design of the washbasin allows you to organize additional places for storing useful little things in an accessible place, but at the same time not overly cluttering the bathroom space. Sinks and cabinets have many designs, shapes and sizes, which allows you to choose plumbing equipment to suit any interior and bathroom dimensions.
Methods for attaching a sink and bedside table
Regardless of the shape, size and manufacturer of the washbasin, there are only two mounting options:
- The sink and bedside table are attached separately (they are hung on independent fasteners).
- Only the cabinet is mounted to the wall, and a countertop washbasin is installed on it.
Installation of a wall-hung cabinet with a sink is carried out using two types of fastenings:
- Standard studs for hanging plumbing fixtures.
Installation technology
Let's look at the features of installing washbasins for a bathroom with a hanging cabinet.
Necessary tool
To do the work yourself you will need the following tool:
- Roulette.
- Construction bubble level.
- Set of screwdrivers and keys.
- Pencil for marking.
- Drill or hammer drill with drill for walls.
You also need to study the manufacturer's instructions and check the package contents. The standard kit includes a sink, an assembled hanging cabinet, and fasteners. The mixer and siphon most often need to be purchased separately.
Dowel for lightweight concrete. Installation technology using special dowels in walls made of cellular concrete.
Molly dowel for drywall.
Attaching a wall-hung sink and cabinet
The installation procedure for a self-supporting sink with a hanging cabinet is carried out in the following sequence.
Step 1
Markings are made on the wall. The installation height of the washbasin recommended by current joint ventures is 800–850 mm, but can be changed up or down taking into account the average height of all family members. This is one of the advantages of hanging cabinets under the sink - they can be installed at any height.
Marking includes the following steps:
- The height of the upper edge of the washbasin is noted.
Important! All marks are made using a building level so that the sink is installed strictly horizontally.
When applying markings, you must use a building level.
Step 2
Then, using a drill of a suitable diameter, holes are drilled for installing dowels in the wall.
Plastic dowels are installed into the drilled holes, into which pins are screwed for hanging the bowl.
Step 3
The washbasin is hung on studs and secured with nuts through plastic eccentrics, which serve to level the bowl and protect it from excessive clamping.
When the sink is secured, its horizontal level is checked. If it is necessary to adjust the horizontal, to do this, loosen the fastening nut by 1.5–2 turns. Fine adjustment is carried out by a plastic eccentric, which is turned with a wrench. After leveling the sink, the nuts are tightened again.
Advice! While the bottom of the washbasin is not covered with a box, it is recommended to install a mixer and a siphon, as well as connect to the pipes, since this will be more difficult to do after hanging the cabinet.
Step 4: installation of the cabinet
The hanging bedside table is mounted in the following order:
- All drawers are removed to provide access to the inside of the structure.
Step 5: Adjusting the Nightstand
Fine adjustment of the position of the cabinet relative to the sink and the wall is carried out using two screws located on the front of the decorative cover of the anchors:
- The top screw moves the cabinet in a vertical plane. It adjusts the height of the cabinet and its pressure to the washbasin.
Bracket selection
To hang the TV on the wall, you need to select brackets. First of all, look at the back cover of the device. There should be four holes for installing mounting plates. You need to measure the distances between them and the post when choosing a bracket, focus on them.
There are brackets in which all four fasteners are fixed, and there are more universal ones in which the horizontal distance varies.
It is necessary to focus on the distance for fasteners
Next, select the type of bracket for the TV:
- For fixed installation. They consist of two plates - one is mounted on the wall, the second on the back wall of the TV. When installed, the screen is simply hung on a plate hung on the wall. The mounting takes up little space, the monitor is located almost close to the wall. There remains a very small gap - 10-20 mm.
You can hang a TV on the wall like a picture - at a short distance from the wall using similar brackets
These models provide up/down tilt
There are different options
The most common TV brackets are regular ones. Few cases require the ability to rotate the screen, mainly only in the kitchen. Therefore, there is no point in overpaying for unnecessary options.
In addition, the TV bracket must be selected according to weight and diagonal. This is one of the most important criteria and the safety of your equipment depends on it.
Principle of operation
The operating principle of all dowels for foam concrete is the same. When screwing screws into them, the segments of the collet are folded, thereby increasing the surface along which the dowel is adjacent to the load-bearing support itself or the thread of the dowel itself is securely screwed into the base.
- drill a hole in strict accordance with the size specified by the manufacturer for each dowel;
- clean the hole;
- insert the dowel into the hole using a special attachment;
- if it is a screw-in dowel, then twist in the direction specified by the manufacturer;
- We mount the part by tightening the screw to the required depth.
Important. When drilling the necessary holes for dowels in foam concrete, under no circumstances should hammer drills or impact drills be used. The hole must be drilled carefully using a very ordinary drill in rotation mode.
Everything is gone: there are no beams
So, you've found the perfect place for your TV in your home. You've read all our tips for finding beams in walls, and now it's time to get to work. However, imagine that you have been looking for beams in the wall for 20 minutes, but they are not there. Or, let’s say, they are there, but not where they are needed. Well, this problem can be dealt with too. There are several solutions.
Electric outlet. If the inhomogeneity detector did not help, then you can proceed as follows. On the desired wall, locate the outlet or air conditioning grille. As a rule, all sockets are attached to beams (with the exception of rare cases when an external socket is placed on a finished wall). Having selected the required socket, insert a small flat tool into the gap between the socket box and the wall panel (you must first remove the socket frame). To the right or left you should come across a wooden beam. When the beam is found, step back 40 cm from it in the direction you need. Follow this step to the intended installation location of the TV bracket. Then, using a sharp tool (nail, screwdriver), make a small hole to check if there is a beam.
We drill the bracket. If you managed to find the bars in the wall, but the finished holes in the bracket do not match them, then solving this problem is quite simple: make several additional holes. To do this you will need a good metal drill and a powerful drill. If you have a quality tool at hand, the process will take just a few minutes.
Alternative solution. What to do if not a single beam could be found in the right place? This is where a metal anchor for hollow structures (Molly bolt) comes to the rescue. Today in a specialized store you can find very reliable anchors that will easily support a 55-inch TV. Attaching the bracket to a plasterboard wall using such bolts is a pretty good solution. Professional installers often do just that, but you need to be sure of the reliability of the wall and the quality of the anchors. If you don’t have enough experience, the TV panel may fall along with the bracket, so you shouldn’t rely on chance - it’s better to invite a specialist.
Fastening the lining in a room with variable humidity - bathhouse, sauna, bathroom
As everyone knows, the lining is attached using special nails with a small head - so that it is not noticeable. This method is good in the home - but not always in rooms with high/changing humidity.
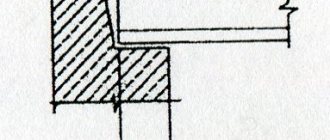
Let's look at the picture. Sounds familiar, doesn't it?
Due to changes in humidity, the lining “walks”, as a result, a beautiful bathhouse upholstered with lining from the inside often takes on this “walking” look - the lining lags behind the walls and ceiling, moves in waves... In general, it steams with us, and it feels good))
How to avoid these liberties on the side of the lining so that the walls and ceiling remain level, do not swell or warp?
The usual practice of fastening with clamps is far from ideal: the metal quickly oxidizes, rusty streaks form from the nails... And this does not prevent the wood from “ruining.”
There is a way out, and it’s simple - screw the paneling onto self-tapping screws.
BUT: only yellow galvanized wood screws, used for decorative finishing, are suitable here. If you screw them flush with the surface of the lining, they will be almost invisible.
Tip: if you pre-drill holes for screws with a thin drill (3/4 of the screw diameter), the lining will not crack. To speed up the process, such holes can be easily made... using an ordinary awl.
How long does a Ceiling Anchor last?
A hook with a rod diameter of 2 mm will hold a chandelier weighing up to 3 kg, 3 mm - 5 kg, 4 mm - 8 kg, 5 mm - 10 kg, respectively. To attach a chandelier weighing more than 10 kg, you will need an anchor.
Interesting materials:
How long does a direct flight from Moscow to Denpasar take? How long does stitching take? How long does The Vampire Diaries take? How long does it take to get from Moscow to St. Petersburg by train? How long does delivery take by Russian Post? How long does it take to learn touch typing? How long does it take to be expelled from university? How long does it take to transfer money from Poland to Ukraine? How long does it take to eat? How long does it take to cross the Crimean Bridge?