What is art concrete
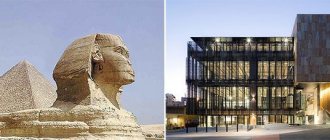
Art concrete is a plastic, durable and easy-to-work material that is used where ordinary concrete will not allow the task to be completed. Archstone resembles plasticine, so you can use it to create a variety of decorative elements, complex shapes for decorating construction sites and sites - figures, stucco molding, statues, columns, openwork latticework, park sculptures, etc.
When asking questions about whether architectural concrete is relevant when performing specific work, what it is and how to make it, you can briefly explain it this way: it is ordinary concrete with various admixtures that provide useful characteristics of the material: increase durability, add color, texture, etc. d.
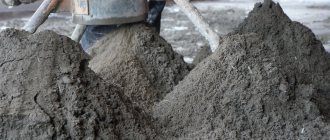
Artistic concrete is produced from a sand-cement mixture, adding various additives to regulate decorative properties and technological parameters - pigment to achieve the desired color, level of strength, ductility, resistance to temperature changes and moisture, hardening time, etc.
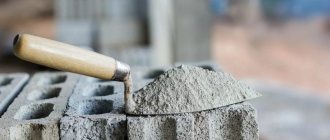
Main components of the material:
- Water
- Portland cement
- Quartz sand, marble chips (coarse or fine aggregate)
- Pigment
- Additives to obtain the desired properties (modifying, reinforcing)
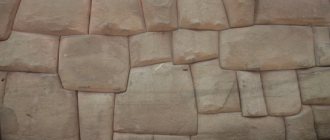
In appearance, the material is similar to natural wild stone; it allows you to beautifully design buildings and territories, significantly saving on decorative finishing. Like other types of concrete, archstone is standardized by state standards: GOST 26633-2015, GOST 25192-2012. Plastering and finishing composition can be purchased in specialized stores or made independently according to a recipe.
Characteristics and composition of the material
Any art concrete has high strength. On average, it is 39 MPa 3 days after setting and 59 MPa after 28 days. The whiteness of the finished composition varies between 68-85%, the minimum frost resistance is 100 cycles of freezing and thawing. Art concrete sets quickly and gains strength after 15 hours.
The basic composition of the material is not fundamentally different from classical solutions. Art concrete includes a binder component - Portland cement of white, light gray color M400 or M500 strictly without foreign inclusions and lumps. M600 and M700 cements are used much less frequently for the production of mixtures. The composition also includes quartz sand, which can be partially (up to 5-10%) replaced with granite, marble chips or glass powder.
In addition, art concrete may include other ingredients:
- fine-grained crushed stone, pebbles, shells of a certain shade (to add decorativeness);
- plasticizers, curing regulators, additives to enhance frost resistance, water repellents;
- fiberglass or other reinforcing fibers.
Pigments can be added to the mixture so that it immediately acquires the desired color. Also, purified water in a certain amount is used to prepare the material. In addition to the main binder (cement), art concrete may also include other components with similar properties:
- Acrylic (acrylic resin). The finished material dries quickly, has high elasticity, is easier to tint, and is suitable for rooms with unstable humidity and temperature. The service life of art concrete increases to 10-15 years.
- Minerals - clay, lime, gypsum. They make the composition more decorative, increase abrasion resistance, and provide fire safety.
- Silicates. Provide the highest resistance to damage and chemicals, and repel water. They are used if art concrete is intended for outdoor use.
- Silicone. Gives plasticity, strength, resistance to moisture and ultraviolet radiation.
How is architectural concrete different from ordinary concrete?
The basic composition of both types is the same. As already mentioned in the previous section, these are crushed stone, sand, water, plasticizers.
- To obtain architectural concrete (art concrete), colored pigments are added to the raw material to add color, ceramic chips for texture, or colored glass.
- To ensure that the color is uniform and consistent, special levelers are added.
- More plasticizers are also often included if the material will be created into complex shapes.
Decorative concrete in the interior is part of it; it looks complete and expressive, in harmony with the overall decor.
Types of art concrete
Decorative art concrete is the brainchild of modern times. The building material is made from a basic cement base and additives, dyes and other polymer compounds are added to the composition. Which give the plaster a beautiful appearance and attractive performance characteristics. Therefore, the material belongs to polymer concrete.
Art concrete goes on sale in 2 varieties:
- Microcement. The composition is a polymer-cement mixture. It completely lacks quartz inclusions. It fits perfectly on metal, wood, plastic, ceramic surfaces.
- Microconcrete. A cement-based mixture with the addition of quartz chips, various polymer dyes and additives. The composition is resistant to high temperatures, has good plasticity, does not absorb any odors at all, and is hygroscopic.
According to the type of binding material, art concrete exists in the following variants.
| Acrylic | It is based on acrylic paste. Plastic and universal. The composition dries quickly and is painted in various shades with pigmented paste. It is used in rooms where the humidity is quite high. Tolerates temperature changes well. Easy to clean. Will last at least 10 years. The disadvantages include low vapor permeability and fire hazard. |
| Silicate plaster | The presence of liquid glass at the base places this type of art concrete among high-strength materials. It has a water-repellent surface and is therefore often used for exterior decoration of buildings. Will last 20 years without repair. |
| Mineral | Art concrete is produced in powder form. Consists of: mineral particles, stone and lime chips, clay. The plaster is easy to apply, it can withstand sub-zero temperatures and humidity, has increased abrasion resistance, and is environmentally friendly. The material is breathable and completely non-flammable. Before using mineral art concrete, the surface is coated with a primer. All irregularities must be filled with putty. Will last 10 years. |
| Silicone | It is based on resin components. The durable and flexible coating is quickly applied. Obvious advantages include: durability, easy care, does not fade under the influence of ultraviolet radiation, easily tolerates humidity above normal, and adheres firmly to the base. Contains coloring pigments, antifungal additives, fillers. It is used for finishing the house, both inside and outside. The solution does not need to be mixed; it is sold ready-made. Before application, the wall is treated with a primer. |
Children's room design for a girl
Art concrete on the market is represented mainly by foreign origin. There are also domestic production options. For example, art concrete vgt. Composition including dolomite chips. When applied it gives a rich dark shade.
Decorative concrete art is often confused with architectural concrete. The second is a cement-sand mixture with the addition of plasticizers. Used for the manufacture of architectural delights: stucco molding, statues, flowerpots, and other objects of complex shape.
Pores
The structure of concrete is heterogeneous - in addition to cracks, there are many small holes scattered over the entire surface, which are formed due to the evaporation of water from inside the material.
I created the pores from the Dirt 1 texture procedural texture.
In order to make the pore depths more varied, I duplicated Dirt 1 and configured them differently using the Position parameter in the Histogram Scan nodes.
By adjusting this parameter, I control the brightness, so in the two options we get a different number of holes:
After that I apply a Slope Blur to both textures to simplify the shape of the pores and make them look like holes in stone:
Pores in the material
Application of art concrete
The material is well suited for interior decoration and cladding of exterior objects. It can be applied to walls and various structures or poured into formwork, matrices, obtaining figures of any type.
Application in the interior
Decorative plaster is used to solve the following problems:
- creating a coating without joints, seams on wall panels, columns, ceilings, friezes and other architectural elements in interior decoration;
- decoration of rooms with high humidity using additional protective coating using materials from the brands Cera Decor, Cera di Veneziano, Pastello Vernici;
- special means are used for external decoration of buildings (arches, colonnades, niches, stucco molding and other decorative elements);
- creating a simulated traventine effect.
Facade
With the help of beautiful and unusual bas-reliefs made of art concrete, you can provide building facades with an original appearance. Also, the outer walls are covered with concrete to imitate a stone coating. Columns and arches, as well as various figures for decorating buildings, are cast from this material.
Local area
To decorate a site near a house, the following are often made from arch concrete:
- flowerpots and flower beds for flowers or ornamental shrubs;
- small bridges over streams, finished with concrete;
- sculptures of animals, fairy-tale characters;
- borders, lamps, fountains;
- stones for alpine slides;
- garden tables, benches;
- cubes, pyramids, balls;
- fences, pillars.
Most often, the question of how to make architectural concrete with your own hands worries those owners who want to decorate the territory of the site. You can create unusual figures yourself, but a sculpture or a whole group can also be ordered from workshops.
Collecting references
We go to Artstation, Behance, Google and look for suitable images.
Here are three pictures that I liked
I liked the first one because of its cracks, and from the second one I took the color and pores. In the third I liked the general noise: plaster, chiaroscuro, and micro-details.
How to make an archstone with your own hands
The creation of architectural products begins with the development of the desired shape. Having decided on what you want to make with your own hands, you can begin to select materials and methods to implement your plans.
Composition and proportions of cement mortar
To make objects, different concrete solutions are prepared. More often they resort to the recipes shown in table.
Art concrete application technology
Before starting work, a ready-made or self-made building mixture is diluted, the necessary pigments and decorative elements are added to it. Then they begin to apply plaster or pour art concrete into the mold.
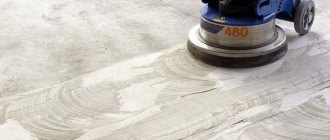
Surface preparation
The base must be fairly level, dry, and free of dirt. All poorly adhering elements, old paintwork, and falling off plaster must be removed from it. Chips, holes, and cracks are repaired with regular cement mixture. Grease stains are wiped off with a degreaser. The surface is sanded with fine-grain sandpaper, dust is removed with a vacuum cleaner, and then primed with 2 layers.
Procedure for working with art concrete
The first layer of material is applied to the base and leveled with a spatula or trowel. After it dries, a second layer is performed, on which the selected pattern is formed with light movements of any convenient tool. As it partially dries, the edges of the design are smoothed out a little with a trowel.
If necessary, add individual strokes to imitate voids and cavities, cracks in concrete. The coating must dry for at least 15-24 hours at a temperature of about +22 degrees and humidity up to 65-70%. If the art concrete has not been tinted in advance, painting is done by spraying, stamping or painting over stencils.
Shaping products
Art concrete can be poured into any shape. To ensure that there are no voids inside, the material is compacted. Further work with the product is carried out only after it has thoroughly dried (usually after 2 days). To make the surface of the object smooth, it is ground, polished, and uneven surfaces are removed by sandblasting. In addition, the product is molded using the following methods:
- embossing with a relief roller or stamp (panels, bas-reliefs);
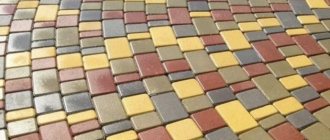
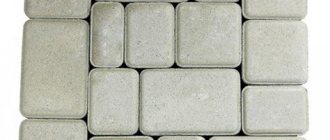
- vibration pressing (paving slabs);
- simple pressing (stucco molding, decorative elements).
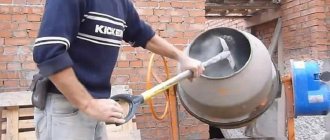
Manufacturing technology
Filling forms are filled in in the following sequence.
- The molds are lubricated with a release agent. Used motor oil is used here.
- Wipe off excess grease.
- Arch concrete is being prepared.
- Pour it into the mold.
- Place the mold on a vibrating table, where air is removed from the mass.
- Set the filling to dry.
- Release the casting from the mold.
Elastic forms are used in a similar sequence. There is no need for disassembly. The shell is simply removed from the casting.
Sputtering
This method is used to apply paint, which should “turn” concrete into brick, or imitate natural stone. In this case, the acid dye is applied in layers to the uncured solution. The pigment reacts with the mixture, and the result is uniform coloring.
Using stencils
This simple method is used for decorating walls, painting flooring, and garden paths. You can buy stencils in a store, or make your own from any suitable material. For example, many craftsmen create templates from thick paper, cardboard, plastic, thin plywood, etc.
Printing (stamping)
This is the most labor-intensive method that requires physical effort. The first dies were made of aluminum. These were massive products with handles. Such matrices made it possible to imitate stone or brickwork, but creating complex textures with their help is impossible.
Now stamps are made from several materials:
- Made of silicone, polyurethane. They are cast on original materials, so the texture is almost completely identical. Another advantage is long service life. When using these soft materials, there is no need to lubricate the molds: the dies can be easily removed without damaging the surface.
- Plastic. These forms are rigid, but they can accurately and clearly convey all geometric shapes. The most popular stamps imitate brickwork and paving stones. With the help of plastic products you can transform any surface: both horizontal and vertical.
In the “printed case”, it is better to evaluate the degree of rigidity of the forms before purchasing.
The high density of the material guarantees a clear pattern. Excessively soft material is more difficult to work with and will require more effort when printing. The concrete mold stands out. It is laid next to the area where the work is being carried out. Then the concrete is poured and waited for it to harden. The finished element is removed, then the next one is poured, moving the stencil further. This method can be used to decorate any “section of the site”: a porch, a garden path, the floor of a terrace or gazebo, a place near a pool, a car parking lot.
All these stamp products can be bought, but many craftsmen prefer not to spend money, but to make them with their own hands. To create them, some readily available materials are suitable. Since this type of work can rightfully be considered the most labor-intensive, it is necessary to dwell on it in more detail.
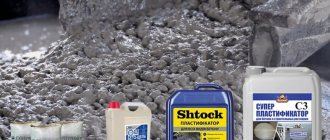
Mix
To blend, I’ll create 4 consecutive Blend nodes, connecting a different element to each one, adjusting the degree of transparency and blending type:
Cracks and damage are mixed with the rest of the material in the masks. This is an inverted version of the same mask. The mask in the cracks prevents them from crawling onto the damaged areas, as if only the top layer was cracked.
The height map is ready. It remains to create additional textures that will be needed when working with color and Roughness.
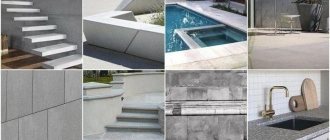
Examples of colors and textures
When choosing the color of the plaster, the style direction of the room’s design is taken into account:
- Provencal - soft pink, blue, creamy milky;
- eco - dark brown, olive, marsh;
- minimalism - black, gray, snow-white;
- high-tech - metallic gray, black, snow-white;
- baroque - pastel shades;
- pin-up - soft pink, warm yellow;
- classic - white, gray, chocolate;
- modern - beige, brown, dark blue, emerald;
- futurism - white, lemon, light green, turquoise, ultramarine;
- country - sand, soft yellow, terracotta, dark brown;
- loft - blue, orange, red, dark green.
Based on texture, materials are divided into the following types:
- Structural. The composition includes granules and fibers of different sizes that form a textured layer.
- Terrasite. The composition allows you to simulate mining rocks.
- Venetian. The composition includes marble chips, lime and polymer particles, plasticizers, and tint fillers. Venetian plaster is characterized by its structural uniformity and ensures the creation of a smooth surface. The coating allows you to create an imitation of onyx and marble.
- Marseille wax. The composition has a soft texture and becomes smooth after drying. It allows you to reproduce the imitation of stone, wood and sandstone. The filler is cellulose fibers. The material is used to create interiors in Provencal and country styles.
- Bark beetle The pattern is optimal for all types of decorative plaster with the addition of different sizes of granules. Fine-grained compounds are used for interior finishing. Depending on the application method, the furrows are placed horizontally and vertically.
- Sgraffito. Includes multiple layers of different colors with a design engraved on the outer layer. The ornament is engraved 5-6 hours after the mass is distributed.
- Craquelure. The product presents the effect of an aged surface. The composition is used for different types of bases. First, painting is done with acrylic dye. To achieve the aging effect, the paint is distributed in chaotic strokes. A translucent varnish is applied on top and left for 3-4 hours until dry.
- Latex plastic. The product allows you to reproduce a glossy surface simulating marble or other stone. The composition is characterized by moisture-resistant characteristics and increased elasticity.
- Wet silk. The composition is distinguished by mother-of-pearl particles, which make it possible to reproduce the shimmer of silk fabric. The material is optimal for finishing the kitchen, living room, hallway, and bedroom.
- Sea breeze. The texture is characterized by roughness, the presence of fine-grained sand and pearlescent chips in the structure. The surface reproduces the texture with patterns of waves, sand dunes, and shading.
Roughness
The microsurface texture (Roughness) is responsible for the scattering of light by the material.
Smooth surfaces reflect light rays without scattering them at the angles of their incidence on the surface. As a result, reflections on the material become clear and highlights are sharp.
Rough surfaces scatter light, causing reflections to wash out and highlights to become dull and broad.
In my Roughness chart it's done like this
A common way to start working with Roughness is to use a Curvature texture as a base. In the original Curvature, the recesses, pores and cracks are darker than the corners and planes.
However, in the Roughness texture, the darker the surface, the more glossy it is. Therefore, the first step is to invert Curvature - cracks and depressions will become matte. To do this, we use the Grayscale Invert node.
I mixed the resulting result with the grunge texture I made earlier to add more detail and depth to the Roughness.
The last node is Histogram Range. In it, using the Position parameter, I adjust the overall level of smoothness:
Reliable manufacturers of arch concrete
Since the demand for a new type of concrete is constantly growing, more and more companies are deciding to start producing it. This situation makes the choice somewhat more difficult for buyers. However, there are several companies that are trustworthy.
- Arbet is a Moscow company that offers customers a wide range of architectural concrete products. She carefully monitors the quality of materials, uses the latest technologies and equipment, and guarantees competitive prices.
- Dekostroy is the second metropolitan company, which is famous for its powerful production base. new certified equipment, in the manufacture of products strictly complies with GOST standards.
- This plant is located in the south of Russia - in Crimea. They produce architectural concrete intended for landscape design. The assortment includes piece products, delivery to any region of the country is possible.
Do-it-yourself architectural concrete is an operation that is practically no different from making regular mortar yourself. However, its use gives a chance to transform the walls of a house at minimal cost, create unique sculptural decorative elements, and then decorate the landscape of the site with them.
Grunge
In a separate graph I will mix several grunge concrete textures taken from the Substance Painter library.
To add them to the chart, find them, right-click, and select Show in Explorer from the context menu.
Substance Painter Library
The textures are located in the library folder in .sbsar format; they can be imported into the material graph by dragging the file from the folder into the Graph View window.
Texture will be needed to add details that do not affect the relief, but will be visible in the color and texture of the Roughness.
Possible mistakes
Quality work guarantees the strength of the structure. Annoying omissions, on the contrary, will sooner or later lead to a disastrous result - the destruction of concrete. Therefore, we need to stop at some points.
- Polyethylene waterproofing of the solution is mandatory. Without it, concrete will begin to take moisture from the soil, and in winter, when it freezes, it will simply collapse.
- Work must be carried out only at positive temperatures. High humidity is also unacceptable. Dry weather, temperatures above +5° are ideal.
- Late application of the hardener will not allow it to penetrate into the thickness of the concrete, so the effect will be zero. In this case, peeling of the decorative layer is possible.
- The quality of the solution is important. A liquid mixture reduces the strength of the base; a thick mixture hardens too quickly and interferes with the penetration of the hardener.
- A reliable reinforcing mesh is required, since its absence will inevitably lead to deformation of the slab.
- The use of an inappropriate grade of cement is the reason for the fragility of stamped concrete.
Do-it-yourself decorative concrete is a simple operation if the master knows how to mix concrete and how to work with it. Some difficulties may arise when identifying and eliminating imperfections, so it is better to start getting acquainted with the technology from small areas. It's good if they are not in plain sight. When you have no experience “tinkering” with concrete, and the tools used are unfamiliar, before creating stamped concrete, it is better to first thoroughly study all the stages.
Advantages and disadvantages of the material
Plaster for concrete in the interior has a number of its own characteristics - both advantages and disadvantages.
The most significant “advantages” of this material are the following:
- Ease of operation. To apply such plaster, you will not need to involve specialists with specialized skills - you can easily do without outside help. Having familiarized yourself with the basic recommendations for work, it is not difficult to create a suitable surface relief.
- The work can be done quickly - the raw material is flexible and dries in the shortest possible time. Do-it-yourself decorative plaster for concrete can be installed faster than many other materials, even if the room has high humidity.
- Heat resistance. The coating can be used in rooms where temperature changes are not uncommon.
- Moisture resistance (does not apply to all materials). If there is consistently high humidity in the room, then a coating of this type would not be a bad solution. Why is that? Its hygroscopicity plays a decisive role - the porous structure makes it possible to absorb excess moisture.
The statement about moisture resistance is true only for individual types of mixture; in all other cases, a protective coating must be applied.
- Versatility - the material is suitable for different styles. A beautiful texture will add exclusivity to any room - it can be not only a home, but also an office.
- The textured coating not only has an inimitable appearance, but also has significant technical characteristics - it effectively absorbs sound, which is why it often decorates audio studios.
- Non-flammable, resistant to fungi.
- It does not require special care. The finishing appeals to practical people who do not tolerate great frills.
But there are also disadvantages of such compositions as loft concrete - you need to remember them:
- High price. Loft decorative plaster (even domestically produced) looks expensive but is also worth it.
- If decorative plaster for concrete is installed with your own hands, then when working with the material you need to remember the importance of following the application technology.
Imitation of concrete texture
As we already mentioned, modern decorating styles sometimes involve unplastered concrete surfaces.
But before imitating concrete, you should take into account some general requirements for the construction of such surfaces:
- the area of the room must be significant - for the “fake” to work, the distance to such a surface must be more than 1 - 2 m;
- ceilings in the room should be higher than 3 m - in low rooms concrete walls will be oppressive;
- the reduced level of heat and noise insulation should be taken into account; if there is a need to increase these characteristics, it is better to plaster the room.
On a note! When creating concrete surfaces, keep in mind that authenticity is not always good. Play with shades of gray, or use a splash of mother-of-pearl.
Concrete plastering technology
It is very important to properly prepare the original concrete surface before carrying out decorative work.
The stages of work are as follows:
- Before creating the illusion of concrete using plaster, it is necessary to clean the surface from defects:
- traces of corrosion,
- cracks and chips,
- oil stains.
- The walls are cleaned of dust and dirt with a damp cloth.
- Next, you need to treat the surface with a deep penetration primer.
- After the primer has dried, the surface is plastered.
You can learn more about the process of plastering a concrete wall while maintaining and enhancing the effect of uneven texture by watching the video in this article.
On a note! To make it more similar to concrete, there is no need to plaster small defects. Before starting work, carefully inspect the surface and determine the places that will participate in creating the style and cannot be processed.
Recommendations
It is important to consider some features of construction work:
- If a builder is using a stamp for the first time and has little idea what kind of impression it will leave, you can leave an imprint in the sand.
- It is advisable to avoid repeating stamps, especially if they imitate wood, granite and other materials. On the contrary, randomly composed compositions look more realistic.
- To obtain the effect of an aged surface, you should apply a little release powder to the liquid cement mixture, and spray this product on top, but in liquid form. The liquid will help dissolve the powder. This will leave accents of color on the cement that resemble scuff marks.
- The component particles must be pressed into the solution. Otherwise, it will be washed off when cleaning the surface.
- When stamping is carried out, the worker’s shoes must be clean: there should be no debris left on them, as this will spoil the texture of the product.
Sources
- https://1beton.info/vidy/arhitekturnyj/sostav-arhitekturnogo-betona-tehnologiya-izgotovleniya-oblast-primeneniya-arhikamnya
- https://kraska.guru/smesi/cement-i-beton/chto-takoe-art-beton.html
- https://www.TopDom.ru/articles/interior_design/beton_kak_vyrazitelnyy_akcent_interera_kvartiry_v_stile_loft.htm
- https://kvartirnyj-remont.com/art-beton.html
- https://ArmRinok.ru/gruntovki-i-smesi/art-beton-dekorativnaya-shtukaturka.html
- https://dom-i-remont.info/posts/materialy/arhitekturnyj-beton-svoimi-rukami-plyusy-minusy-komponenty-i-proporczii/
- https://StrMaterials.com/sypuchie/beton/chto-takoe-arhitekturnyj-i-kak-prigotovit-svoimi-rukami-sostav-i-proportsii.html
- https://dom-i-remont.info/posts/materialy/dekorativnyj-beton-svoimi-rukami-harakteristiki-proporczii-instrukcziya/
- https://1beton.info/vidy/arhitekturnyj/art-beton
- https://DekorShtukaturka.ru/dekorativnaya-shtukaturka/dekorativnaya-shtukaturka-pod-beton
- https://sombuka.ru/vidy/kak-sdelat-dekorativnyy-beton-svoimi-rukami.html
Height map
Our task is to competently construct a height map (Height).
Height is a black and white texture in which the brightness of a pixel specifies the height of a point in 2D space.
The darker the pixel, the deeper it is. And the brighter, the higher, on the contrary, the point relative to the plane on which the texture is located.
Thus, when working on a height map, we create a relief of the future material, but only in one dimension.
The height map takes up 80% of the work.
It also affects all other textures of the material - color, roughness, shading (AO) and so on.