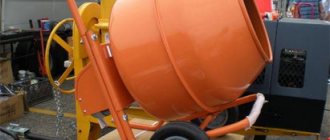
Private property always involves the need to perform a lot of work on home improvement and landscaping. Some of them require the use of concrete. Getting a large amount of solution by mixing with a shovel is a little problematic. Not every person is able to purchase a factory-made concrete mixer, since the equipment is expensive. To simultaneously solve the issue of simplifying the work and obtaining the required volume of the mixture, you can make the device yourself. One of the available options for arranging equipment is a concrete mixer, made with your own hands from a washing machine.
Manual concrete mixer
At a construction site there is not always electricity, and large volumes of mortar and concrete are not always required either. The solution is to make a small-volume concrete mixer that will rotate manually (with a manual drive). The designs of these models are simple and straightforward.
From a milk flask
The simplest manual concrete mixer can be made using an ordinary metal flask (milk used to be sold in these). You will also need pipe cuttings or other scrap metal. The design is simple, such a concrete mixer can be built with your own hands in a couple of hours. The main thing is to weld the frame. Assembling the concrete mixer itself will take a couple of tens of minutes.
Design of a manual concrete mixer made from a milk flask
You make a frame and bend a handle from a round pipe. In the upper part of the frame, weld two water couplings (for example). Their internal diameter is slightly larger than the diameter of the pipe used for the handle. The pipe is passed through the flask and welded to the body.
How to find the center of gravity
In order for the barrel to spin easily, you need to find the center of gravity. To do this, you can put it on some thin object, and move it forward/backward to find this very center. This is where you will need to pass the handle. Having passed the handle, it is attached to the walls of the case. This is where complications can arise: flasks are usually made of aluminum alloy, and the handle may be made of steel. It will not be possible to connect them by welding. The only available solution is cold welding. He is quite real. The remaining modes - with bimetallic gaskets or argon-arc welding at home - are not implemented. Another way out is to weld plates onto the handle, which are riveted to the sides of the flask.
To prevent the handle from playing too much and falling out during operation, nuts are welded to it on both sides of the coupling.
In general, this is all about making a manual concrete mixer with your own hands. For one batch in a 40 liter can you can get 2.5-3 buckets of solution. For use in a country house or on a plot near a house (without construction) it is more than enough.
If there is no can, you can adapt a barrel (thick-walled). Then the problem with welding the handle disappears, but you will have to come up with a system for fixing the lid. You can make something similar to the one that the can has.
The video shows an example of a handmade homemade concrete mixer made from a milk flask. The design is a little different, but not too different. There is an interesting idea - dividers are welded to the pipe inside the container, which speed up mixing.
From a barrel (manual and electric)
The author called this design a “drunk barrel” because of its unique trajectory. The whole point is that the axis of rotation goes obliquely through the container. Because of this, the solution rolls over from one wall to another. The design is also simple and effective. What is important is that there are no problems with welding dissimilar metals. A drawing of a manual concrete mixer from a barrel is shown below.
Drawing of a handmade homemade concrete mixer from a barrel
In the upper part of the frame, bearings are installed in the center, into which the handle is threaded. Thanks to them, a 200 liter barrel rotates easily. Just choose a container with thick walls - it will last longer. No additional blades are welded inside: they only retain the components, interfering with mixing and complicating unloading.
In the original design, the loading/unloading hatch is located in the bottom. This is a cut-off part (about 1/3), attached with hinges to the bottom, equipped with rubber sealing around the perimeter and closed with two locks. When loading the barrel, turn it so that the hatch is at the top. When unloading, turn down. The solution moves by gravity into the substituted container, and the stuck one can be removed by knocking on the body with a hammer or sledgehammer.
Improved homemade concrete mixer from a barrel
This design served the author for 10 years, although it was made for a one-time job, but it turned out to be very successful: 2.5 buckets of solution are mixed well in 20-30 revolutions. During this time, it was repeated and improved by neighbors and acquaintances. Most of the modifications concerned the hatch. Experimentally, its most successful design was identified - similar to the one used in a milk flask. This “neck” is welded to the body of the barrel on one side (look at the photo above). They also make handles on both sides so that two people can work.
Mechanization in action: a manual concrete mixer turns into an electric one
This design can easily be converted into an electric homemade concrete mixer. A not very powerful engine is installed - 1 kW is enough for a 200 liter barrel, a small sprocket is attached to the axis of which, a larger sprocket is welded to the axis-pipe (to reduce the number of revolutions), they are connected using a chain (from a scooter, for example).
Advantages and disadvantages of the design
Figure 1. Concrete mixer from a washing machine
Many users of branded equipment believe that a homemade product made from scrap materials is not always justified. However, a concrete mixer from a washing machine also has its advantages:
- Old equipment parts that are in the way in the house will disappear.
- Your own construction equipment will appear. With its help you can do a lot of things - lay a path in the garden, repair the foundation, make outdoor flower pots. The presence of such a tool will save the owner from searching for equipment to perform tasks on his site. The equipment will always be at hand.
- You can make a concrete mixer according to your own drawing. This will make it easier to repair it if it breaks, as well as calculate the dimensions for transportation in a car.
- The quality of mixing in such a unit cannot be compared with manual mixing with a shovel.
A concrete mixer from a washing machine also has some disadvantages:
- inconvenient loading of dry ingredients into a container;
- It is impossible to obtain a large volume of ready-made solution in one batch.
DIY electric concrete mixer from a barrel and a washing machine engine
This concrete mixer is gear type. To make this model you needed:
- galvanized steel barrel 180 liters (diameter 560 mm, height 720 mm);
- washing machine motor - 180 W, 1450 rpm;
- flywheel and starter gear from Moskvich 412;
- two pulleys from a washing machine with a diameter of 300 mm and 60 mm;
- wheels from a garden cart;
- scrap metal for the frame.
Gears, wheels - everything is old, everything was in the garage. This is also not new.
First of all, we clean everything from rust, treat it with a rust converter and cover it with primer.
Processing details
We make a frame from pipes and channels. We strengthen the corners of the frame by welding metal plates. Everything must be tough and reliable. We are making a serious crossbar: a barrel of solution will “hang” on it, and everything will vibrate and spin.
The frame is the basis of the structure. The pipes are almost new))
We weld the pins and the seat for the transmission gears. We remove rust, treat it with a rust converter, and prime it.
Treated frame
We fasten the wheels from the cart. They have wide treads and they have justified themselves: it is not difficult to drag a concrete mixer even just across the site.
Wheels attached
We also make structures from pipes for support and installation of all the “filling”.
Two more triangular structures
We also attach them to the frame
The second is for greater stability
We begin to assemble the drive. First we place the large gear on the previously welded pin.
We put a big gear
We install an assembly in the seat - a small gear connected to a wheel for a belt drive.
Large gear transmission
We attach the engine to the plate welded in advance.
Suspending the engine
We hang it so that the two wheels of the belt drive are at the same level. It is also necessary to ensure normal belt tension.
Motor installed
All that remains is to attach the barrel. We make a hole in the center for a large pulley and drill a hole for fasteners. Let's put it in place.
We make holes in the bottom of the barrel. When installing, do not forget about the rubber seals
This is how it looks on the frame Another angle
Pass closer
Only the electrical part remains. We connect the cable through a starter with a button.
We connect the cable through a starter with a button
Several photos of the main components. Maybe someone needs to take a closer look.
Gear and barrel mount Mounting the motor on a plate dampens most of the vibrations From a different angle
The second transfer option is from a car disk
The barrel is 200 liters, its edges were cut, bent and welded, forming the usual “pear”.
They made a “pear” from a barrel
The car disk was bolted to the bottom (with rubber gaskets). It was selected so that a recess was formed for the belt drive. A hub was pre-attached to the disk.
For belt drive
Blades were welded inside the barrel to mix the solution more efficiently.
Blades inside
All this equipment was attached to the frame.
The barrel and the disk for the belt drive were installed on the frame
Where the plate is welded is the place for the engine. We set it so that the belt runs smoothly. Power was supplied through a toggle switch, and a timer from the washing machine from which the motor was removed was turned on in series.
Back view. Motor under a sheet of metal
In general, the rotation speed turned out to be 35-40 rpm. Should be enough.
The whole show looks like this
Side view
Recommendations from experts
To create a high-quality concrete mixer from a washing machine, it is better to use large Soviet equipment to create it. These models have a cylindrical shape, which is ideal for solving the problem. The presence of a smooth surface and the absence of corners will allow you to unload concrete from the container without any problems. If there is no such equipment on the farm, then you can take a drum from modern front-type or even vertical equipment:
- Install the shaft with blades for mixing the solution. The device must be installed in place of the former engine. The shaft can be made from a metal pulley with welded parts.
- Secure metal brackets on the inside of the container with nuts.
- Ensure that the tank drain is sealed to avoid leakage of the solution during mixing.
- Place the cylindrical container on the iron frame and connect the motor. Start up and test the unit
If the concrete mixer from the washing machine successfully passes the exam, it can be safely used.
Collapsible mixer from a barrel
First page
Drawing of a concrete mixer
Description of work
Specification
Step-by-step assembly instructions
We have given 3 designs for making a concrete mixer from an old washing machine. Although each has certain features, in general the manufacturing process is the same and comes down to certain and sequential actions:
- marking;
- sawing;
- frame assembly;
- drive installation;
- connection;
- sealing;
- launch.
This scheme is universal, suitable for most concrete mixers from an old washing machine, and therefore recommended for use. The procedure is quite simple, but for additional convenience we suggest considering it in detail.
Frame
Made from durable metal pipes, U-shaped profiles or steel angles. Use materials that you are absolutely confident in their safety margin.
Assembly is recommended in two ways:
- welding - complex, costly, but the most proven option that does not cause concern during operation;
- fastening devices is a simpler and cheaper method, but during operation some fasteners may become loose and become unusable.
Make sure that the base is clearly measured, is level, does not wobble, or shift. If desired, you can coat the frame with additional products that provide protection against corrosion.
To make the frame stronger and more reliable, do not be lazy to weld additional crossbars. They will make the frame resistant to heavy loads.
Wheels
If desired, you can use wheels from an ordinary wheelbarrow. They are sold in hardware stores and at the construction market. A strong working fitting with a corrugated surface is suitable as an axis.
Capacity
If there is a drain hole in the tank (as expected in most cases), then it must be closed with a metal plug. It is recommended to weld the edges so that they are sealed and intact.
The place of the activator mechanism is taken by the shaft. It is worth welding metal blades to it, which will ensure easier mixing of the components. The blades are easily made from a metal strip.
Installing blades in the washing machine tank
Swivel mechanism
Suitable for hand drive. It can be made from two gears, to one of which a special handle is welded.
Motor and gearbox
If an electric motor is not suitable or its power is too low, a diesel engine can be used (an excellent option). The motor and gearbox are located behind the washing machine (from the bottom). If you are not sure about the safety of the motor location, then it is worth installing an additional casing.
Photo of homemade concrete mixer units (may be useful)
Each or almost every self-made concrete mixer has some original solutions. Few people repeat the design completely without making any changes - you have to adapt to the parts and components that are available. There are some interesting solutions in the photo.
If you leave the bottom of an ordinary barrel without reinforcement, the thin metal (3-4 mm) may not withstand the load and will simply twist. Therefore, it is better to weld corners or U-shaped bars. Organizing transmission using a motorcycle chain and a second belt. The shape of the blades is a complicated thing. They need to improve mixing and not stop the concrete from falling down. How to make a container movable so that you can turn it inside out
Another method of movable connection Blades again
Rollers can be made adjustable
This is how an ordinary barrel turns into a pear
Variety of options
Apparatuses for mixing concrete are divided according to the principle of operation, and from this the type of construction emerges:
- Compulsory products. They are characterized by a stationary container in which blades mounted on a shaft rotate.
- Gravity models. The concrete is mixed by rotating the container, in which the blades are attached to the walls.
- Vibration options. They do not have great productivity, but they provide a high-quality and homogeneous mixture without air bubbles.
- Periodic species. They are characterized by low power, so they require frequent stops. For private construction this is an acceptable option.
- Gear or crown type.
- Permanent action. These concrete mixers work without interruption and are used for large volumes of work.
All of the above types of concrete mixers come in both mechanical and electric models. The difference is that a forced-action mechanical stirrer has a horizontal axis, while an electric one can accommodate a vertical axis.
The design of any concrete mixer allows you to evenly mix cement with different components in the form of: gravel, sand, crushed stone, expanded clay with water. Due to this, the pace of construction is greatly increasing.
Combined mixing principle
In this case, the principle of mixing concrete components is used by pouring them into a barrel using gravity, but this is also supplemented by the breaking of lumps with strong pins or blades welded to the inner surface of the barrel. It takes a long time to prepare the mixture, but the method has a number of undeniable advantages:
- the simplicity of the gravitational method is used, the design is unpretentious in operation, and rarely fails;
- the shaft used for torsion of the concrete barrel does not receive the entire load, therefore the requirements for engine power are reduced compared to the forced method, and there is less wear of parts;
- allows you to organize the mixing of coarse-grained concrete, while crushed stone will not get stuck in the spaces between the blades.
The solution can be mixed manually; if significant force is required, an electric motor is attached.