Many people imagine concrete as a gray, shapeless mass. This opinion has existed for decades, dating back to Soviet times. However, a lot has changed in the construction industry in recent years. In this regard, even such familiar technologies and building materials can be looked at from a completely different angle. This also affected concrete. Now decorative concrete completely changes the attitude towards itself. But first, let’s look at what it is and what requirements apply to decorative concrete.
What is decorative concrete
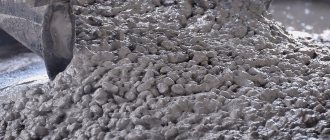
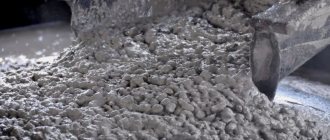
Decorative concrete is a composite material. It consists of the following main parts:
- fine aggregate,
- coarse aggregate,
- water,
- cement,
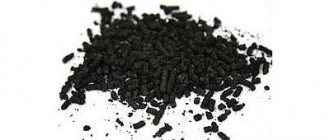
- dye,
- additives.
Dyes are used to color concrete.
It is the composition of decorative concrete that distinguishes it from its simple counterpart. Therefore, almost any shape can be made from it; thanks to this quality, it has found wide application in a variety of fields. For example, it is used to make stucco molding with embedded parts, paving slabs, paving stones of various shapes, and so on. The main advantage of such concrete is its high abrasion resistance. There are several main types of decorative concrete:
- Colored concrete.
- Concrete imitating small artistic and architectural forms, for example, figures of fountains, animals and the like.
- Stamped and printed concrete imitating natural stone.
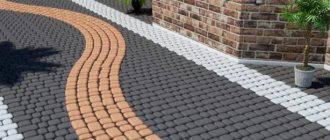
As for the use of each type of decorative concrete, their purposes are different. Colored decorative concrete is most often used to make paving slabs to make them more expressive. Artistic concrete is used for finishing buildings. Moreover, all kinds of figures are made from it for landscaping the garden area. But concrete that imitates stone is also used to make plinths, façade tiles or blind areas. If you want to make decorative concrete with your own hands, then you should familiarize yourself in detail with the technology of laying it. We will look at how you can make a garden path with your own hands, as well as the rules for laying stamped decorative concrete.
Manufacturing technology
Decorative concrete can be an excellent material for paths and an excellent solution when decorating a garden area. The material has excellent quality characteristics and is aesthetically pleasing. The coating is easy to clean and resistant to oil and grease.
Sites with such a coating do not require the installation of a curb, thanks to this you can save on construction costs. If you wish, you can make decorative concrete with your own hands. Forms and dry mixture for preparation can be purchased at a hardware store. The design will depend on the preferences of the owner. You can purchase a silicone or plastic mold, which can be made up of squares and diamonds.
A decorative concrete coating is created as follows. The first step is to prepare the surface. When making a path in a selected area, you will have to remove the soil, going 10 cm deep. Formwork is installed in the resulting space, and a layer of crushed stone is poured onto the bottom.
Process Basics
You can create the texture of a concrete surface that will imitate stone, brick or other material using the following techniques: stencil mixture, stamped mortar and sprayed mixture.
Stamped concrete
Now let’s look at the technological processes of each of the listed methods for manufacturing decorative concrete:
Spraying method.
It is used in cases where there is a need to imitate stone, brick or other images on the wall. During the application process, a special acid dye is used, which is laid on the surface in several layers. This leads to a reaction of the solution with dyes, which results in the desired color. The color shade can be complemented by a variety of effects. The dye is applied to the surface using several methods, in particular, the spraying method. To create a beautiful texture or apply a particular image, you can use stencils when spraying.
Stencil method.
This method is called “stencil mixture”. It is applied to the surface using a pre-prepared stencil made of paper or other material.
Stamping method.
This method is unique of its kind. Stamped solution, as it is also called, is applied to a wet surface, consisting of a colored fixative, a protective mixture and hydrophobic additives. All this is necessary to ensure that the stamp used does not stick to the concrete. Before stamping concrete, you need to make sure that the surface is perfectly smooth. The template or matrix must remain on the concrete until it dries completely. After removing the stamp, the surface must be thoroughly impregnated with a special impregnation, which acts as additional protection. But before applying it, the surface must be thoroughly washed to remove all kinds of substances that were used during the work process.
So, now we invite you to consider the process of making garden paths from decorative printed concrete.
Ways to create interesting textures
If we compare decorative concrete with ordinary concrete, we can highlight only aesthetics and durability. The technology comes down to pouring and applying a certain pattern to the top layer. You can use stamps and other tools to decorate the surface. These can be molds, stencils and chemical compositions for etching, with which you can create complex ornaments. By using saws with diamond blades, you can form fine lines that will give the concrete a clear and expressive design.
Garden paths know-how!
Decorative printed concrete is an excellent tool for creating garden paths and can replace conventional paving slabs. Unlike its analogues, decorative concrete is much cheaper, so you should take this method of treating garden paths seriously. It should be noted that such concrete has the ability to withstand temperature changes from -50°C to +50°C. At the same time, during the freezing process, it does not slip under the wheels and feet. Moreover, it does not fade when exposed to ultraviolet rays. On average, it can survive about three hundred cycles of thawing and, accordingly, freezing. So, let's look at how to make garden paths from decorative printed concrete step by step.
Concrete stamp
First of all, you need to assemble all the following tools and only then get started:
- roller,
- flutz (flat brush),
- protective impregnation,
- hard brush,
- texture matrix,
- disconnector,
- color fixer,
- roller,
- concrete mix,
- corner iron,
- aluminum smoother,
- vibrating screed,
- crushed stone,
- polyethylene film,
- reinforcing fiber.
Preparation
The first step is to make sure the quality of the cement. If the cement is of poor quality, it can cause cracks to appear on the surface of the path. The grade of concrete must be at least 300. Additives in the form of a plasticizer must be present. The installation process must be carried out at a temperature not lower than +5°C. If all these parameters are met, then you can start working.
The first step is marking. To do this, you can use wooden pegs and rope. If this is not possible, then you can simply draw a mark on the surface of the earth with the sharp end of a stick.
Work with soil
Preparation for the garden path
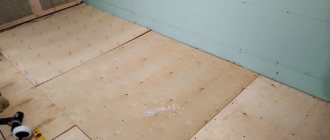
If the path is intended for walking, then it is enough to remove 150 mm of soil. If you plan to drive a car, then you need to remove 200 mm of soil. Next, the formwork is placed along the entire length of the path. A 100-150 mm layer of crushed stone and sand is evenly poured onto the bottom, which must be compacted well. Then a polyethylene film is laid. An overlap of 100 mm must be made at the joints. At the very end, reinforcement is performed using a metal mesh or reinforcing fabric.
Concrete works
As mentioned above, pouring concrete must be carried out at a certain temperature and always in dry weather. In the process of making concrete, it is possible and even necessary to use reinforcing polypropylene fiber. It will prevent cracks from appearing on the surface of the track.
Preparation of concrete mixture: To do this, you must use the following components: 1 part PC grade 400, 3 parts crushed granite stone preferably with a fraction of 5/20, 3 parts sand, without fail plasticizer C-3-0.5% (aqueous solution), and also polypropylene fiber 0.6 kg per 1m3.
Pouring concrete
When the concrete mixture is ready, it must be poured evenly into the formwork. It is compacted using a vibrating screed. Next, you need to roll the roller over the surface of the concrete. This will allow the large filler to settle down and the small filler to rise to the top. Using an aluminum trowel, the concrete surface is thoroughly smoothed. At the very end, you need to go around the entire perimeter of the formwork with a corner trowel.
Applying a decorative layer
At this stage of work, a colored fixative is applied. There should be no excess concrete on the surface. Using the manual scattering method, a fixative is applied to the surface, which is then smoothed with an aluminum trowel. This process dissipates 70% of the fixative. Only after smoothing the surface with an angle trowel is the remaining 30% of the fixer applied, which is smoothed with a steel trowel.
Note!
According to the technology, before applying the texture, the surface should be covered with a thin layer of disconnector.
Drawing
This is done using texture matrices. This process should be carried out as soon as possible, before the concrete sets. The texture matrix is laid along the entire length of the platform along the entire formwork. To ensure that all lines are accurate and do not break at the joints, each matrix should be pressed well by pressing hands, feet or a tamper. But it’s important not to overdo it here. The pressure should be applied evenly over the entire area.
Printed concrete
Washing and applying a protective layer
After two days, it is necessary to remove the remains of the disconnector from the surface. To do this, you can use a long-bristled brush. Afterwards, the entire area should be thoroughly rinsed using a stiff brush. When the concrete surface has dried, a layer of protective acrylic impregnation is applied. This can be done using a roller.
Note!
To prevent the appearance of uncontrolled shrinkage cracks, it is recommended to saw through the concrete with a seam cutter or grinder. The thickness of the cut should be 1/3 of the total thickness of the concrete. If the thickness is small, then the number of seams should be larger and closer to each other.
So, we looked at the sequence of work on how to make decorative printed concrete as a sidewalk path.
Characteristics and composition of the material
Any art concrete has high strength. On average, it is 39 MPa 3 days after setting and 59 MPa after 28 days. The whiteness of the finished composition varies between 68-85%, the minimum frost resistance is 100 cycles of freezing and thawing. Art concrete sets quickly and gains strength after 15 hours.
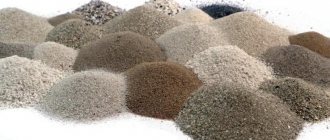
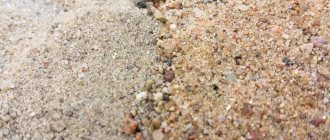
The basic composition of the material is not fundamentally different from classical solutions. Art concrete includes a binder component - Portland cement of white, light gray color M400 or M500 strictly without foreign inclusions and lumps. M600 and M700 cements are used much less frequently for the production of mixtures. The composition also includes quartz sand, which can be partially (up to 5-10%) replaced with granite, marble chips or glass powder.
In addition, art concrete may include other ingredients:
- fine-grained crushed stone, pebbles, shells of a certain shade (to add decorativeness);
- plasticizers, curing regulators, additives to enhance frost resistance, water repellents;
- fiberglass or other reinforcing fibers.
Pigments can be added to the mixture so that it immediately acquires the desired color. Also, purified water in a certain amount is used to prepare the material. In addition to the main binder (cement), art concrete may also include other components with similar properties:
- Acrylic (acrylic resin). The finished material dries quickly, has high elasticity, is easier to tint, and is suitable for rooms with unstable humidity and temperature. The service life of art concrete increases to 10-15 years.
- Minerals - clay, lime, gypsum. They make the composition more decorative, increase abrasion resistance, and provide fire safety.
- Silicates. Provide the highest resistance to damage and chemicals, and repel water. They are used if art concrete is intended for outdoor use.
- Silicone. Gives plasticity, strength, resistance to moisture and ultraviolet radiation.
Stamped concrete. A breakthrough in art!
Stamped decorative concrete is no less unique of its kind. In order to do the work with your own hands to make it, you will need the following tools and building material:
- spray,
- color mixture,
- stamp with shapes,
- delimiter,
- concrete hardener,
- knocker,
- putty knife,
- strip for leveling the surface,
- brush.
This concrete must be manufactured in accordance with all existing requirements. The most important requirement applies to the concrete mass - it must be monolithic. This is what will ensure a durable, airtight and high-quality structure. Also, the surface should not have any cracks or chips. Moreover, to achieve the best result when producing stamped decorative concrete, it is best to use dry adhesive mixtures based on white cement.
Note!
The cement must contain a plasticizer. It will give the structure strength and also prevent cracks.
Stamped concrete installation
There is one more requirement regarding the mixture used. If it is applied to a vertical surface, it cannot be prepared manually. This may affect the quality of the stamping. Immediately before starting work, the surface must be degreased and cleaned. As for the work itself, it can be divided into several stages:
Preparation
As mentioned above, the surface must be thoroughly cleaned. If this stage is treated carelessly, then it will be difficult to put stamps. If the wall surface has cracks or dents, they should be puttied. Afterwards it must be carefully treated with a primer. After drying, make sure that the primer does not leave a slippery film. Ideally, you should use a primer that contains adhesive. If the surface is not very smooth, then you will need a primer for problem surfaces. If there is a large crack, it is recommended to use a plaster mesh, which will hold the surface together and prevent the occurrence of new cracks.
Application of adhesive mass
The adhesive mass is applied to the surface after priming. Its thickness can be 10-50 mm. The adhesive mass should be well mixed and have excellent consistency. If there is too much water in it, the stamp will simply stick. This mixture must be laid in several layers, and then given time to dry thoroughly. But don't let it dry out. You can determine its readiness very simply using your fingers. When touching it, the glue should not stretch behind your finger.
Applying concrete
Punching process
It is necessary to start the stamping process after some time. On average, after mixing the concrete, 40 - 70 minutes should pass. The mold must be moistened with water, otherwise it will stick. Next, the stamp is pressed into the concrete. You shouldn't pick it up right away. You must be extremely careful when removing it. To ensure that the stamp is printed well, you can use a hammer, which is shaped like a hammer.
Stamping
This is the sequence in which the process of making stamped decorative concrete is performed. To make you happy with the result, it is extremely important to follow the technology. A variety of shapes can be used as a stamp. They can be made from different materials, such as polyurethane, plastic or silicone. As for its shape, there is a wide choice. For example, sea wave, diamond, square, basket weaving, imitation animal skin and the like.
Working on the drawing
So, we have looked at the basic requirements and advantages of decorative concrete. Now you can take a fresh look at concrete, not just as a shapeless gray mass, but as an excellent means of decorating a particular surface. If you have any questions, then you can contact our experts for guidance. Moreover, you can leave your comments on this article if you already have experience in creating decorative concrete with your own hands.
Work methodology
It is necessary to lay out cement mortar on the leveled surface and smooth its surface. Next, you can start applying the hardener. It usually has a certain color. This will give the surface a tint. You will need to use dry dye. You can choose a material that, in addition to coloring pigments, includes a filler of quartz sand or granite.
Decorative concrete, photos of which are presented in the article, is pressed into molds at the next stage. On a slightly set, but not yet completely hardened surface, it is necessary to lay out forms that press well against each other. In order to form a clear imprint, the form must be compacted.
The readiness of the concrete mixture for stamping can be determined by touching the material with your finger. The mixture is considered ready if the material does not stretch by hand. After letting the material sit for several days, you need to wash the coating with a brush. It is wetted in a solution of hydrochloric acid. As soon as the top layer has dried, you can begin applying a protective composition, which will prevent the evaporation of moisture from fresh concrete.
The production of decorative concrete involves the formation of expansion joints, which will be located in places where the material is likely to break. The distance between the seams will be 6 m. The voids are filled with colorless sealant. In order to extend the life of concrete and improve its aesthetic characteristics, it is recommended to treat the surface with an impregnating composition that forms a protective film.
Advantages
Decorative concrete has good resistance to freezing and thawing cycles and is resistant to temperature changes.
Concrete for decoration has the following main advantages:
- Withstands high power loads and mechanical stress.
- Resistant to temperature changes.
- It is not destroyed under the influence of ultraviolet rays and various meteorological conditions.
- Has maximum endurance to freezing and thawing cycles.
- Does not react to the effects of fats and other products from oil refining.
- Has no tendency to bend, shrink, crumble or fray.
Despite its positive qualities, flex concrete also has some disadvantages. It is quite heavy, not every structure can withstand its weight, it is easy to work only with large-scale products, it is difficult to make small parts from it, and it is quite difficult to dismantle.
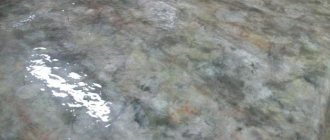
Features of using microcement
Decorative concrete plaster is a relatively new coating, also called microcement. As a result, it is possible to obtain a surface that imitates concrete. Before starting work, it is necessary to prepare the base, which should be cleaned, dried and free from obvious defects. Next, the reinforcing mesh is laid and epoxy resin is applied. A mesh is laid on the surface with a distance of 2 cm from the walls and corners.
The reinforcement must be allowed to rest and straighten for 10 hours. Afterwards, a solution of resin and hardener is applied to it with a roller or spray. In this case, it is necessary to use a proportion of 2 to 1. It is necessary to scatter quartz sand, the fraction of which varies from 0.8 to 1.2 mm, onto the freshly applied resin. Recommended drying time is 24 hours.
As soon as the epoxy resin has dried, you need to try to eliminate the unevenness using sandpaper, the grain of which is 40 or 60. Next, you can begin to apply the Concrete Contact primer. To do this, you need to use a roller, with which the mixture is conveniently distributed over the surface. The base is left in this state for 24 hours, then you can begin applying the base. But before that, you need to mix the materials in a separate container. The resulting composition is mixed with the polymer, only then can you proceed to applying the first layer.
Microcement is spread with a wide stainless steel spatula. Floors almost always require 2 coats of the mixture. Before each new layer, you must wait until the previous one has completely dried. After this, you can apply a second layer, which will be the finishing layer. Microcement is applied in thin layers. After the material has set, which will happen after about 15 minutes, the dark marks left by the spatula must be smoothed out. The thickness of each layer should not be more than 1 mm. The total thickness is 3 mm maximum. Each layer dries completely within 24 hours.
How to choose the right cement?
The basis for the solution can be any white cement mixture without calcium chloride, but with moisture-absorbing additives in the composition. If you use gray concrete, you will not get bright, saturated colors after painting. White cement comes in the following grades: M300, M400, M500 and Portland cement M600. Based on the degree of whiteness, it is divided into three grades:
- I grade whiteness above 80%;
- II grade – above 75%;
- III grade – above 70%.
Large companies produce ultra-white cement, its whiteness exceeds 90%.
For reliability, some use cement, cement stone, which is close in shade to the color of the dye used. In any case, first it is better to make a test batch and look at the result. The process of cement hydration may be disrupted due to dyes, which take all the moisture to themselves. Then use special plasticizers or additives that retain moisture.
Manufacturing plants
The demand for products made from decorative materials is rapidly gaining popularity, however, not all manufacturers produce such products. Among the trustworthy companies are the following:
- PLACHINTA . The plant is located in Crimea and produces high-strength architectural concrete for landscape design of recreation areas. In addition, the company's product range includes piece products of all shapes and sizes. Delivery is carried out throughout Russia.
- "Arbet" . The company is located in Moscow and offers customers any design options using the subject of our conversation. The manufacturer strictly monitors product quality, uses high-tech equipment, and attracts the attention of customers with competitive prices.
- "Decorstroy" . A Moscow company with one of the most powerful production bases in Russia. The technological process is carried out on certified equipment, GOST standards are strictly observed.
Making panels yourself
You can make decorative concrete panels yourself. They look quite impressive, and they can be used when decorating not only the external, but also the internal walls of a building. The basis can be the same concrete, the composition of which was described above. However, you must acquire interesting shapes that will make up the surface pattern.
After mixing the mixture, it is poured into molds, and after hardening, the formwork is removed. Products must be left to rest before they can be used for installation. Installation is carried out using the same cement mortar. However, you can also use special glue. It must be reliable enough to withstand the load of products that have an impressive weight.