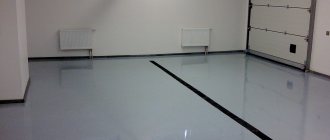
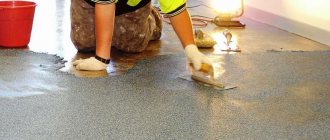
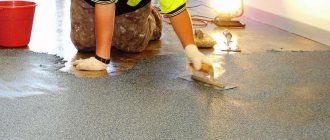
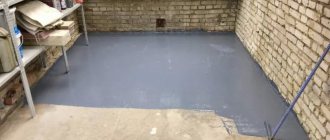
Leveling a concrete floor under linoleum is one of the pressing tasks in modern construction and renovation, since this floor covering is still popular and its high-quality installation requires certain requirements for the surface. It is necessary to level the floor in cases where there are areas with differences in level in height, or damage to the base (chips, cracks, depressions and other deformations).
The life and quality of use of the floor covering, practicality, and aesthetics depend on the correct leveling. Provided the base is carefully prepared and the technology is strictly followed after installation, linoleum will last at least 25 years while maintaining all its positive properties.
Types of screeds
Leveling the floor under linoleum is a mandatory procedure. This coating does not tolerate irregularities, differences and protrusions, which can cause deformation and damage to the material.
A screed is the most suitable option for leveling the base under linoleum.
There are several types of ties, differing in device technology and material of manufacture:
- dry;
- semi-dry;
- wet cement-sand;
- self-leveling, self-leveling.
What is it for
Many people prefer to do the repairs themselves so as not to overpay the repair team for the work. This is not surprising, because now you can find many useful step-by-step instructions for leveling the floor. But even if all the recommendations are followed, a novice master can make serious mistakes, for example, skip several steps of the work process or incorrectly mix the building composition. The end result when making such mistakes is sad - the floor surface turns out to be uneven, which is why it is impossible to install laminate or ceramic tiles.
Uneven floors threaten poor-quality installation
Methods for determining floor unevenness
It's no secret that additional leveling may also be required for wooden floors, especially if there are gaps or gaps between the boards. Even if the subfloor is strong enough to hold together, leveling may still be necessary. The procedure is also necessary when installing the floor on an old layer of screed, the surface of which becomes rough over time. Leveling the floor will help eliminate any unevenness.
Why do you need to level the floor?
Preparing the base for the screed
The base for the screed must be perfectly clean, hard and durable.
We remove all unnecessary things from the room, remove old coverings and remove the old, destroyed screed.
We examine the slab for the presence of defects, delaminations, cracks.
Foundation repair
We repair cracks and seams between the slabs.
We remove dust using industrial vacuum cleaners with water filters that retain small particles.
We repair irregularities, damage and cracks with repair compounds or screed mortar.
It is better to seal the seams between the slabs with mortar using reinforcing mesh.
Important! I recommend treating the repaired and cleaned base with penetrating primers for better adhesion of the screed to the base.
Screed level marking
Using a laser or hydraulic level, mark a horizontal line at a level of 0.5-1 meters from the floor. This will be level zero.
From this line we take measurements to the floor and determine the highest point of the base.
Subtracting the thickness of the screed, about three centimeters, we mark the mark for the top of the screed. We transfer the top line of the screed to the wall, along the perimeter of the room, using a tapping cord.
Figure 2. Waterproofing the base under a polyethylene screed.
Base waterproofing
To prevent moisture from entering the reinforced concrete floors and to prevent flooding of the underlying premises, we waterproof the base.
Usually used:
- plastic film with a thickness of at least 100 microns;
- roofing felt;
- roofing membrane.
It is better to seal the passages through the ceilings of pipes and risers with silicone sealants.
We carry out waterproofing by going onto the walls 5-10 centimeters above the level of the screed.
We lay the strips of roofing felt overlapping and fasten them with construction tape.
We lay the membrane or film in one piece.
Apply liquid bitumen mastic evenly to the surface of the slab and along the entire perimeter of the wall to a height of 10 - 15 centimeters
Important! Attach damper tape around the perimeter of the room. You can take a ready-made one or cut it out of foamed polyethylene. It should be three to five centimeters wider than the thickness of the screed.
How much does it cost to put 1 sq. m of linoleum: consumption and cost
It is logical that linoleum is the most important component in the installation process; it is where the main costs fall. In addition, it is necessary to take into account the financial resources required to purchase other materials. For example, without backing and glue, installation of linoleum is impossible.
In order to calculate how much it costs to lay linoleum per square meter, as well as the total cost of laying the covering on a concrete floor, you need to add up the cost of the following materials:
- linoleum;
- cement, putty or self-leveling mixture for the base;
- insulating boards, films and elements for their fixation;
- glue or mounting tape for fixing linoleum;
- skirting boards and materials for their fastening.
To calculate the cost of laying 1 sq. m of linoleum you need to add up the cost of all materials necessary for the work
Nowadays it is not a problem to buy cheap linoleum. Where to buy a quality one is a more difficult task, and in this matter it is better to trust prestigious stores and professionals.
The price of linoleum per square meter depends on the above qualities of the coating: material, wear resistance, decorative features. The class and series of coverage are of determining importance. The price per m² of commercial linoleum, as a rule, does not always exceed the price of semi-commercial. Sometimes a household coating from an elite series from a branded manufacturer costs more.
Related article:
Linoleum: photos of coatings in various rooms and tips on choosing material
Advantages, disadvantages, characteristics and properties of various classes and types. Recommendations for choosing material.
The total cost of floor leveling materials depends on its condition. Calculation of consumption for cement screed and primer is made based on the area of the room. The thickness of the leveling layer must be at least 3 cm.
Helpful advice! The solution for pouring the concrete base must be made quite thick. It is leveled with a special spatula. To orient the level, special marks are made on the walls and slats are installed.
Price of linoleum per 1 sq. m depends on the quality and class of coating
For primer, it is enough to apply one finishing coat. The need for insulating materials is also calculated based on the square footage of the room. They need to be laid with a minimum number of joints.
Adhesive for linoleum on concrete floors: types of fasteners and price calculation
When calculating the amount of fixative for linoleum covering, the length of the joints and the total perimeter of the room for gluing the covering under the walls are taken into account. The price of the material depends on its type. For example, the cost of mounting or masking tape is cheaper and more economical compared to glue, in addition, it is easy to dismantle if necessary. At the same time, fixation with its help will be less strong and reliable.
Linoleum glue or mastic is applied to the entire floor area, which is then covered with linoleum. Therefore, the consumption and price of linoleum glue is calculated based on the total square footage. Working with such fasteners requires special care and step-by-step steps with careful leveling of the surface to avoid the appearance of wrinkles.
Before you buy glue for linoleum, you need to decide on one of its types:
The adhesive must be applied to the entire floor surface before laying linoleum.
- polyurethane;
- one- or two-component;
- water-dispersed;
- adhesive composition with solvent.
For different types of linoleum, special adhesive bases are selected so as not to spoil the substrate and the coating itself. For example, adhesive for commercial linoleum is characterized by increased adhesive ability. It is better to take Tarkett linoleum adhesive from this manufacturer, since it is intended for a specific series of coatings. Manufacturers, as a rule, indicate the average consumption of linoleum glue per 1 m² on the packaging.
Materials for joining seams: linoleum glue cold welding
In spacious rooms or in rooms with a complex layout, when laying linoleum, it is often impossible to do without joints of the material. To connect linoleum seams, different materials are used: slats, planks, construction tape. The most popular and reliable method in this regard is the modern method - cold welding. To do this, use a special adhesive that forms a colorless seam. Finding the place of bonding after the procedure is visually difficult; it can only be determined by touch.
Using linoleum glue, cold welding will make the seams monolithic, reliable and neat, while hot welding makes the seams rough and changes the natural color of the coating. The method does not require special skills or effort. You also won't need any special tools or equipment.
To connect linoleum seams, it is best to use cold welding glue
Correct calculation of materials will help you allocate the costs of laying the floor as rationally as possible and plan your budget. Having purchased everything you need, you won’t have to throw away any excess or run to the shops to buy more materials. All costs are based on floor area calculations and material manufacturers' instructions.
Helpful advice! It is necessary to approach with special care the process of calculating linoleum, when laying it, it is assumed that the patterns at the joints will be combined. The section of covering in this case should be approximately 1.5 m longer than the area of intended installation. It is also important to take into account that linoleum with ornaments should be laid in the longitudinal direction.
An example of calculating the amount of required materials
Below are approximate calculations of material consumption for a room with an area of 4x5 m, taking into account the fact that the concrete floor requires leveling.
You can calculate the amount of necessary materials yourself or use a special program
- Calculation of materials for screed. Taking into account the area of the room of 20 m², multiplied by the height of the cement screed of 0.03 m, we get 0.6 m³, which when converted to liters is equal to the value of 600 (4 * 5 * 0.03 = 0.6 m³ = 600 l) . If a self-leveling mixture is used, then its consumption will be slightly less due to the pouring height of 0.02 m. In general, you will need 0.4 m³ or 400 l (4 * 5 * 0.04 = 0.4 m³ = 400 l).
- Consumption of insulating materials. Sheet will need approximately 22 m², where 20 m² is the area of the room + 10% of the reserve. The same consumption applies to roll materials. The waterproofing film will require a little more, taking into account the allowances for laying an overlap on the sides of 20 cm, that is, approximately 28 m².
- The required amount of linoleum. If the coating does not require joining the pattern, then taking into account the 10 cm gap around the perimeter, approximately 21 m² will be needed (5.1 * 4.1 = 20.91 m²). If it is necessary to join the patterns, you need to add approximately 5m2 more. As a result, you will need 26 m².
- Retainers. Approximately 12-15 kg of glue or mastic base will be needed (more accurate calculations can be made based on the characteristics indicated on the packaging). If you use mounting tape, you will need 25-30 m of it.
- Consumables. Their quantity mainly depends on the condition of the base, so we give an average quantity. The consumption of putty will be 400-500 g, epoxy resin or cement mortar - up to 1.5 liters. Also, don’t forget about rags and the necessary tools.
Dry screed
It is a covering made of sheets of gypsum plasterboard, gypsum fiber board, plywood or special double-layer panels for Knauf floors, over dry expanded clay, quartz sand or polystyrene.
First of all, we arrange beacons for uniform dry backfilling. Wooden blocks or metal U-shaped profiles are suitable for these purposes. The height of the profile should be equal to the thickness of the backfill.
The profiles are laid on the base with the sharp edges up.
Figure 3. Installation of beacons for dry screed.
We lay the first row of profiles along the long wall, at a distance of 10-15 centimeters from it. The next rows are laid in increments of approximately 100 centimeters.
Important! I recommend laying the mayaki in increments 15-20 centimeters shorter than the length of the rule that will be used to level the dry mixture.
For dry screed, it is better to use expanded clay of different fractions, which creates a more durable and dense layer.
We pour the expanded clay mixture evenly over the entire surface of the floor, tamp it and level it along the beacons.
A day later, we lay the sheets of drywall, carefully adjusting and coating the edges with construction adhesive. We lay the second layer of coating at intervals, fastening them together with self-tapping screws, in increments of no more than 50 centimeters, embedding them into the slab.
We seal the fastener caps, seams and joints between the sheets with putty. After drying, remove the remaining mixture and sand the surfaces with sandpaper, a special mesh or a grinder.
Figure 4. Dry screed device.
Advantages
- excellent noise and heat insulation;
- fast construction speed: no need to wait for the solution to dry.
The main disadvantage of dry screed is that in case of flooding it is impossible to remove moisture from it. The only way out is to dismantle the coating and remove the wet expanded clay.
I do not advise! Use dry screed in apartments with low ceilings and install it in bathrooms.
Dry screed is ideal for installing floors in a private house on the ground, or for covering cold basements and unheated rooms.
Leveling mixtures used
Before purchasing a leveling mixture, you need to understand their varieties. There are several self-leveling mixtures, differing in type. They are intended for:
- Rough alignment.
- Finish coating.
- Local elimination of defects.
Coarse leveling mixtures provide for the correction of serious unevenness. Such solutions can be applied in a layer of up to 5 cm, so they are suitable for medium differences in floor unevenness.
For final leveling, more liquid mixtures are used, which smoothly spread over the entire surface. Used to correct minor differences. The maximum layer thickness is 10 mm.
For local elimination of defects, the third type of mixture is used. They involve eliminating cracks and holes in a certain area of the floor.
Also, mixtures differ in composition, in which the main substance can be:
- Gypsum.
- Cement (Information about the composition of cement, its properties and brands can be found here)
- Epoxy resins.
- Polymers.
Cement ones can be applied in a layer of no more than 5 cm. Such mixtures also serve as a primer. But this alignment option is short-lived.
Gypsum can eliminate unevenness up to 10 cm. This mixture dries quickly, has good thermal conductivity, strength and minimal shrinkage.
Solutions with epoxy resins wear off very quickly and have low strength. The surface slips from spilled liquid, so such options are rarely chosen for the home, more often for laboratories.
Compositions that contain polymers are characterized by good strength, resistance to temperature changes, water resistance, and durability. But this type is quite expensive.
Sequence of semi-dry screed installation
A distinctive feature of semi-dry screed is that for its production a minimum amount of water is used, which is necessary only for hydration of the cement, as well as reinforcing fiber, which significantly increases the technical properties of the solution.
Beacon device
Beacons for installing such a screed can be made from any metal profile.
The profiles can be fastened with self-tapping screws, cement or gypsum mortar.
It is possible to construct beacons from screed mortar, laid in the form of a continuous strip and leveled.
Leave the beacons from the solution to dry for one or two days, then you can pour the screed.
Preparation of the solution
The mixture for installing a semi-dry screed is prepared in a special device
— a pneumatic supercharger installed at the construction site.
The components of the solution are loaded into the hopper of the device, where they are mixed until homogeneous and the finished solution is supplied under compressed air pressure through a hose to the installation site.
When leveling a small area, the mortar mixture can be prepared on site.
For this purpose, it is better to take ready-made dry construction mixtures, in which all proportions are precisely met. The solution must be prepared in accordance with the instructions on the package.
Important! You can check the correct consistency of the solution by squeezing a small amount of the semi-dry mixture in your fist. A dense lump that does not crumble should form, without releasing moisture.
Laying the mortar
We distribute the solution, supplied through a hose or prepared at the installation site, between the beacons, starting from the far corner of the room, using the rule.
After two hours, the laid screed must be sanded with a disc grinder. To prevent pushing when moving on a freshly laid base, you need to wear special concrete shoes on your feet.
If necessary, remove the beacons and seal the resulting seams with a semi-dry solution.
Cover the surface of the screed with plastic film to protect it from drafts and ensure uniform drying.
After a day you can move on the floor, after 3-4 days you can lay tiles, and after three weeks you can lay linoleum.
Advantages of semi-dry screed
- a perfectly flat base, does not shrink and does not form cracks;
- the possibility of the solution getting onto the underlying floors is excluded due to the minimal amount of moisture in the solution;
- performing any slope;
- possibility of mechanization of work;
- short drying time.
Semi-dry screed is ideal for underfloor heating systems.
Figure 6. Semi-dry screed using a heated floor system.
Multilayer insulation
Warm floor is a universal heating system.
It will allow you to comfortably move around the room barefoot and will complement the heating. comparison of heated floors
The following types are used for laying under linoleum:
- Infrared. It is produced in the form of an elastic coating film. It features low electricity consumption, ease of installation and efficiency. To control the heating temperature, the system has a thermostat.
- Electric. Another option for underfloor heating, which is powered from the mains. It works effectively, but is not entirely suitable for laying under linoleum; its design consists of wire and fixing slats, and such a base cannot be called flat.
- Water. It is a system of tubes through which water heated in the boiler moves. A good option, but suitable only for individual heating systems.
Please also note there is an article on the topic "How to choose an electric heated floor for linoleum" read more at the link.
It is recommended to install a heated floor on a concrete base only 3 weeks after applying the screed.
Wet screed device
The cheapest traditional type of screed, made from sand and cement.
A wet screed is susceptible to cracking and shrinkage, so it is recommended to reinforce it with metal or plastic mesh.
For such a screed, beacons arranged for semi-dry screed are suitable.
The main thing is to check the evenness and horizontality of their installation along and across, according to the level.
It is better to prepare the solution for wet screed in a concrete mixer or using a construction mixer. A small amount of the mixture can be kneaded by hand, in a large container or bath.
Pour sand and cement into a container with water in a ratio of 3:1 and mix until uniform.
We lay the cement-sand mixture along the installed beacons and level it. After a day, the beacons can be removed, and the remaining cavities can be sealed with the same solution and rubbed.
Figure 7. Wet screed device.
We cover the finished screed with polyethylene or regularly moisten it to prevent the formation of cracks.
A wet screed gains strength and dries for at least a month.
Before laying linoleum, such a screed must be primed with penetrating primers and then dried thoroughly.
The advantage of wet screed is its low cost.
In other respects, it is noticeably inferior to other types of alignment.
Preparation of floor surfaces made of ceramic and PVC tiles
If the old floor covering is PVC tiles, then it is necessary to clean the floor from polish. Ceramics, if they covered the floor, are usually left, but are also carefully processed.
After inspection, chipped and cracked parts are revealed. Such tiles are removed from the surface. The remaining ones must be washed well, and the resulting voids after removing the cracked tiles are filled with a solution that helps level the surface.
Dismantling ceramic tiles
Dismantling ceramic tiles
If the cracks do not pose a particular threat to the linoleum, they are smoothed using epoxy resin. Then the surface should be dried and sanded.
Self-leveling self-leveling floor
Self-leveling flooring is much more expensive than traditional screeds, but this is compensated by the speed and ease of manufacture.
For self-leveling floors, special polymer compounds are used, which are diluted in strict accordance with the recommendations.
When making a solution, it is better to use a construction mixer designed for heavy loads, and pour the dry mixture into water, and not vice versa.
The thickness of the solution may depend on the required thickness of the screed. When installing a leveling layer 2-3 millimeters thick, we make a liquid solution; if it is necessary to install a thick layer, we make a thicker leveling mixture.
Important! It is imperative to attach a damper tape around the perimeter of the room, which will serve as a shock absorber during shrinkage of the polymer compositions.
When pouring a self-leveling floor, it is recommended to use special landmarks made in the form of a metal tripod with a moving central element, which sets the required level, as beacons.
Pour the prepared mixture onto the floor surface and level it using a wide metal spatula. To prevent the formation of bubbles in the screed mass, we roll the floor surface with a special spiked roller.
Figure 8. Self-leveling screed device.
After installing the floor, we dismantle the beacons.
You can move on this floor already on the second day.
Lay linoleum after the self-leveling floor has completely dried.
Drying time directly depends on the thickness of the layer.
Self-leveling floors are installed in a thin layer, up to two centimeters, and serve as a finishing leveling layer.
Substrate
Other types of substrates are also laid between the concrete screed and linoleum; their main functions are:
- Floor insulation;
- softening the structure;
- sound insulation.
Conventionally, substrates can be divided into two types:
- Based on natural materials. This category includes linen, jute, coniferous, cork, and combined. All of them resist heat loss, the appearance of fungus, and provide excellent protection from noise.
Natural linings
- Synthetic. Materials in this category are quite thin, so they are not able to provide maximum shock absorption and sound insulation, but they protect well from the penetration of cold. The advantages of synthetic substrates are low price.
Roll of synthetic film
Which options are best to use depends on the design of the floor. Between concrete and single-layer linoleum you will need a lining made of natural materials. If plywood is laid on top of the screed and the linoleum is two-layer, you can improve the properties of the floor with a thin synthetic fabric.
Read more at the link “substrate for a concrete floor under linoleum”.
Installation of a base for linoleum on wooden floors
The best option for leveling the base of a wooden floor is to lay plywood.
First, we arrange logs from wooden blocks or strips of plywood, three to four centimeters wide. We fasten them to the wooden floor with nails or self-tapping screws.
We lay the plywood sheets offset so that the joints of the sheets are on the joists. We secure the laid squares with countersunk self-tapping screws.
I recommend!
Leave gaps of 1-2 millimeters between the sheets of plywood to prevent deformation.
On top of the plywood, you can lay a second layer of wood fiber sheets or hardboard.
Figure 9. Laying plywood on a wooden floor.
The seams between the sheets, as well as the holes in the screws, are sealed with putty and sanded.
We apply an adhesive solution to sheets of plywood or fiberboard or hardboard and glue the linoleum.
The advantage of this method is that immediately after installation the base is ready for laying linoleum.
Leveling with plywood
If you need to level quickly, then this is just the case. You won't find a faster way. In a room with a small area, this operation can be completed in 3-4 hours and immediately after that you can begin laying linoleum.
If the floor is wooden and relatively smooth, with only minor flaws - for example, where the boards meet (chips of a thick layer of old paint, small potholes), then leveling with plywood will be the best of all methods.
A sheet of plywood is simply laid on a wooden floor and screwed with self-tapping screws. The method is also suitable for cement floors with minor damage and no obvious bumps. In order to achieve an even more impressive result - a high-quality, flat surface, the plywood is covered with fiberboard sheets on top - it costs very little, but will make your floor perfect.
Plywood or chipboard is essentially a universal material for leveling with your own hands; it can hide both small differences and large flaws. If, after checking the floor level, you find a large difference, you will need a method of fastening to joists.
The logs are laid as follows. Boards 30–40 mm wide are cut to the desired length of the room. Then, along the line of the future placement of the board, special PVA-based wood glue is laid out. It is not recommended to use cement, as it is too brittle and will quickly collapse.
Logs are set according to levels in the same way as beacons. The voids between the glue bridges are filled with wedges from boards or strips of wood with glue. The logs are laid out at a distance of 50 cm from each other. If a large load will be concentrated on the floor, this distance should be reduced.
To save material, simplify installation and prevent incorrect sawing, solid sheets of plywood are laid overlapping on the floor, marked at intersections and cut according to marks.
Remember two important points. First, do not allow the cut lines of four sheets to converge at one point, lay them so that only two points converge. And second, leave allowances of about 7 mm between the wall and the chipboard sheets - the gap will compensate for thermal expansion and eliminate unnecessary noise from friction during deflection.
After the glue has dried, screw on the plywood sheets, pre-treating the edges with sandpaper or a rasp. They are screwed on with the same wood screws. Not to be confused with metal screws! For those made on wood, the thread pitch is twice as large as those made on metal.
