- BR - privates;
BU - with widening;
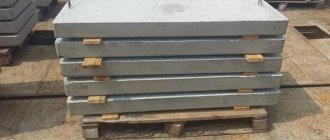
Types of side stones according to the standard and their drawings (profiles)
According to the standard, curbs that separate the sidewalk from the roadway must be made of concrete with a strength class of at least B30. If it is necessary to separate pedestrian paths from lawns, the strength can be B22.5.
Legend
The markings include the name of the stone in the form of letters, and then indicate the length, height and width. In this order, separated by dots. Dimensions are indicated in centimeters. Then the class of reinforcement, if any, is indicated.
Dimensions and requirements for curbs and curbs are described in GOST 6665-91
An example of marking and its explanation:
- BR 100.30.18. This reads as an ordinary border (straight) without reinforcement, 100 cm long, 30 cm high and 18 wide.
- BK 80.30.15 - AV. The meaning of this marking is a curved border (actually a side stone) 80 cm long, 30 cm high, 15 cm wide. The reinforcement class is AV (A5).
Dimensions of borders according to GOST
The standard length of the side stone is available in three versions: 100 cm, 300 cm and 600 cm. The height of the ordinary ones is 15 cm and 18 cm, 1 meter and 3 meters long, six-meter ones can have another 20 cm.
Standard border sizes are not small
Please note that the bevels, their shape and size are also specified. Possible options are also described. So, the marking indicates the width along the widest part. This is usually the sole.
| Marking | Length, mm | Width, mm | Height, mm | |
| BR 100 | 1000 | 300 | 150 and 180 | There is also BR 100.20.80 - with a width of 20 cm and a height of 80 cm, it is usually called garden |
| BR 300 | 3000 | 300 and 450 and 600 | 150 and 180 and 200 | |
| BR 600 | 6000 | 300 and 450 and 600 | 150 and 180 and 200 | |
| BU 300 | 3000 | 290 and 320 | 300 | The width in the marking is indicated according to the “sole” |
| BUP 300 | 3000 | 290 and 320 | 300 | Width is measured at the widest part |
| BUP 600.30.32 | 6000 | 320 | 300 | |
| BL 300 | 3000 | 680 and 930 and 1180 | 320 | Width is measured at the widest |
| BV 100 | 1000 | 150 and 180 | 300 | |
| BC 100 | 1000 | 180 and 200 | 300 | Rounding radius for BC 5 – 5000mm for BC 8 – 8000mm for BC 12 – 12000mm for BC 15 – 15000 mm |
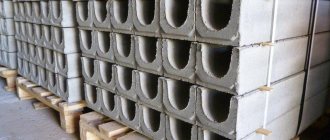
There may also be questions about curved curb blocks. GOST allows the production of curves with a radius of 5, 8, 12 and 15 meters. The standard contains a note that it is allowed to produce copies of other sizes by agreement with customers. Since almost all of the listed options are too massive for a private courtyard, factories often produce smaller borders. For example, BR 50.20.80. Its weight is about 18-20 kg, so it is quite possible to install it yourself.
Curb weight
Since curbs and curbs can be made from concrete with different aggregates, its weight may vary. The standard specifies a reference weight, but the exact weight must be obtained from the manufacturer.
The weight of the curb depends on its size
Curbs one meter long can be made of sand concrete or heavy concrete, longer ones - 3 and 6 meters - only made of heavy concrete. Sand concrete must be vibrated in order for it to be strong enough. It is allowed to use additives that increase strength and frost resistance.
| Curb brand | Weight, kg | Curb brand | Weight, kg | Curb brand | Weight, kg |
| BR 100.30.15 | 100 | BR 600.20.-A-IV (AV) | 760 | BL300.32.118 | 1690 |
| BR 300.30.15 | 320 | BR 100.20.8 | 40 | BV 100.30.15 | 100 |
| BR 600.30.15-A-IV | 640 | BU 300.30.29 | 400 | BV 100.30.18 | 120 |
| BR 100.30.18 | 120 | BUP 300.30.29 | 340 | BC 100.30.18.5 BC 100.30.18.8 BC 100.30.18.12 BC 100.30.18.15 | 120 |
| BR 300.30.18 | 380 | BU300.30.32 | 470 | BK 100.30.21.5 BK 100.30.21.8 BK 100.321.12 | 140 |
| BR 600.30.18-A-IV | 770 | BUP300.30.32 | 410 | Ramp stone | according to the project |
| BR 300.45.18 | 580 | BUP300.30.32-A-IV | 790 | ||
| BR 600 45.18-A-IV (AV) | 1170 | BL300.32.68 | 1050 | ||
| BR 300.60.20 | 880 | BL300.32.93 | 1370 |
Vertical and horizontal edges must be perpendicular. Maximum permissible deviations have been established - they do not exceed 3-4 mm.
Non-standard border sizes
Agree, such large and massive borders are not needed to arrange a personal plot. Or rather, they are very rarely needed. Perhaps the smallest ones are used to separate the car path from the lawn/vegetable garden. Here their strength will be required so that all the beauty does not disperse. And the rest are applicable in the construction of roads.
For garden and driveway paths, such options are more acceptable. They not only look better, but also weigh and cost less
Therefore, manufacturers of the same paving slabs make curbs according to their own dimensions. Such products are called lawn or garden borders. By the way, the standard does not prohibit the production of curb stones of other sizes. Only they must have a strength of at least B22.5 and frost resistance of at least F200. You can come across such a name as a standard size border. This means that this size is common. But not about the fact that it is spelled out in the standard. Here are the sizes of borders for paths in the garden or yard:
- 500*200*80, weight of one piece is about 20 kg;
- 390*190-90 and weighing about 15 kg;
- 500*240*35, weight 9 kg.
There are even some with some kind of pattern. But this is not for everybody, of course.
In general, there are different sizes of borders. Length from 80 cm to 40 cm, height - about 200 mm, width - from 3.5 cm to 10 cm. They can be “standard” gray. Colored ones are a little more expensive. The colors are usually the same as the paving slabs. Most often it is red, brown, green, sometimes yellow. Please note that the colors are not “pure”, but with a hint of cement gray.
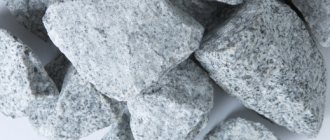
Granite curbs are laid with granite tiles
There are also granite curbs. They also come in several sizes:
- length from 70 cm to 2 meters,
- width - from 80 mm to 200 mm,
- height - from 150 mm to 600 mm (150, 200, 300, 400 and 600 mm).
Granite curbs, of course, are beautiful and very durable, but they are very heavy and very expensive.
Making paving slabs using the molding method: step-by-step instructions
Making tiles for paths in your country house with your own hands is a fascinating and creative process. Some DIYers find it a lot of fun. And the result (a high-quality, durable and beautiful path in the yard) will please all household members.
Making molds
The tile molds themselves can be bought in a store or made with your own hands from scrap materials. Among purchased forms, silicone, plastic, and polyurethane products are in great demand. If we are talking about making molds ourselves, then for this we use: timber, boards, and various plastic containers. You can also make a base for the tiles from cut plastic strips. Here it is quite possible to achieve complex ornaments and polygonal shapes. The main thing is to make forms so that they are easy to work with.
Attention: when making wooden forms, it will not be possible to give them complex geometric bends. The easiest way is to make them in the form of: square, rectangle, rhombus, triangle.
In addition to making the molds, they should also be prepared for pouring. Each individual element is carefully lubricated with special compounds, which are applied to all internal sides to make concrete products easier to remove from it. After lubricating all sides, remove excess grease with a dry and clean cloth (otherwise, stains may remain on the finish coat).
Composition of the solution
To make your own tiles for your dacha wear-resistant, durable and practical, you need to properly prepare the concrete mortar. All materials included in it must be of high quality. This is especially true for cement, because the strength of paving stones directly depends on it. Therefore, experts recommend using cement brand M500, which is characterized by moisture, frost resistance and other high technical characteristics.
Installation instructions
We are talking about installing not those large and massive curbs that are used to separate the road, but lawn or garden curbs that are needed to separate the garden path. It doesn’t matter what you plan to pave the path with - tiles, stones or other coating, so that it does not blur, you need limiters. Most often they make a low curb. That is, the top of the path fence is several centimeters higher than the surface of the path and the garden/vegetable garden/flower bed on the other side. In this case, when watering or raining, the soil will not wash onto the path.
These are the recommended installation schemes for curbs with paving slabs
Work order
So, here is the procedure for installing the curb:
- Draw a path on the ground. To do this, you can use a thick plastic bag into which we pour sand. We cut off one corner, we get a thin stream of sand, which is convenient for applying markings. If you need to fix something, that's also not a problem. They erased it and painted it over again.
- We dig a trench. Width - 30-40 centimeters, depth - about 20-30 cm. In general, the depth of the groove for installing a curb depends on the height of the curb. Or rather, the part that you were planning to bury. Under it there should be crushed stone bedding and a layer of concrete.
- We level the bottom of the trench and compact the soil. You probably have a rough idea of how to level it. What to tamp with? If you know how to cook and have a welding machine, take a piece of thick metal, weld a piece of rod or pipe to the middle, and a crossbar-holder on top. Get a normal tamper. It will also be needed when leveling the surface for the path. Don't have a welding machine? Do the same with wood. Not bad either, although the mass is less.
How to install a border/curb for a path with your own hands
That's all. Then we continue in the same spirit: we laid out cement, installed/leveled a piece of curb. We coat the joints of two fragments of the curb with a layer of cement. We remove its remains immediately after installation and alignment. If it dries, there will be ugly marks that are very difficult to get rid of. If installing one border takes a little time, you can spread the solution on several “borders” at once. It will be faster this way.
Features and subtleties
The most questions usually arise about crushed stone. Not everyone fits it. You can do without crushed stone if the soil is sandy. Then just level the bottom of the trench and you can continue working. But if the soil is clay or loam, black soil, then without gravel backfill in the spring the borders are simply pushed out in different directions. So here gravel gives an increase in durability. Can I use gravel or construction waste rather than crushed stone? It's better than nothing, but not the best option. Especially the brick break. Over time, it will collapse and turn into crumbs, and the curbs will sag. So, it’s better not to, but see for yourself.
We select the dimensions of the borders (height) taking into account the fact that some of them need to be buried
One more thing. Clay, black soil and loams “eat up” gravel amazingly quickly. He drowns in them. If you want a “long-lasting” path, lay geotextiles at the bottom of the trench. Its edges should extend beyond the trench. You just straighten them along the edges. When the curb was installed on the cement, the edges of the geotextile were rolled up and the concrete was covered with film. After a week, you can remove the film and fill the trench with soil. The edges of the geotextile do not need to be unfolded. Then the crushed stone will not wash away.
A few words about how much solution to mix. Depends on how fast you work. If you have little experience in such work, it is better to make a very small batch for the first time - two or three stones. The fact is that if the concrete starts to set, it will have to be thrown away. It will not recover if water is added. No, you can and will get the desired consistency. But the concrete itself will be from the word “nowhere”. It may not gain any strength at all or be very tiny. In some cases, so much so that you can just pick it out with your finger.
Advantages
Paving slabs are manufactured in accordance with the requirements of the standard (GOST 17608 91) . This is one of the most popular types of reinforced concrete products, which, due to their universal shape, can be used for landscaping any area.
The main advantages of the material are as follows:
- the possibility of finishing entrance lobbies, recreation areas, patios and porches;
- the surface structure allows precipitation to be removed freely and quickly;
- long-term operation of paving elements, which is due to the resistance of the base material to the sun, wind, rain, temperature changes, and mechanical loads;
- impeccable external characteristics;
- the slab can be used as an edging or a component element for patterns and ornaments made from figured tiles;
- strength;
- ease of installation;
- high aesthetic characteristics due to the use of a wide range of pigments;
- convenience of re-laying communications;
- the ability to imitate natural materials such as granite, marble.
As a rule, paving slabs are not reinforced if the thickness of the product allows it. If it exceeds 75 mm, structural reinforcement with wire of class BP1 is applicable. For lifting and moving, wire mounting loops with a diameter of 6.0 mm .
Where is it used?
Large paving slabs are used for arranging pedestrian roads, bicycle tracks, sidewalks, entrance areas and adjacent areas, park areas, bus stops and parking lots. Let's look at each of the options in more detail (see photo below).
For paths and paths
For sidewalks and paths, square street tiles are mainly used, since the width of the path (as well as the width of the product) is most often a multiple of 300 or 600 mm.
For paving open and closed areas
On large areas of urban or private property, both square and rectangular large-sized tiles are used. The length of one product can reach up to 2 m, and the width – up to 0.5 m or more.
For finishing entrance groups
To decorate entrance areas, they prefer to use square wide-format concrete panels. They are laid much faster than ordinary paving stones due to their dimensions.
Marking
According to the requirements of the current standard, the symbol of paving slabs is formed on the basis of alphanumeric combinations delimited by dots:
- number – standard size of the product;
- letter – product type;
- number is the thickness of the stone in cm.
For example, concrete paving slabs 6K7, belong to the sixth standard size (50*50 cm), a square-shaped product, 7 cm thick.
On slabs manufactured in professional production conditions, the marking value is applied to the end face.
Non-standard
1. 30.60.6
- 300 Width, mm.
- 600 Length, mm
- 60 Thickness, mm
- 23.8 Weight, kg
2. 60.60.6
- 600 Width, mm.
- 600 Length, mm
- 60 Thickness, mm
- 47.6 Weight, kg
3. 80.80.6
- 800 Width, mm.
- 800 Length, mm
- 60 Thickness, mm
- 84.5 Weight, kg
4. 30.90.6
- 300 Width, mm.
- 900 Length, mm
- 60 Thickness, mm
- 35.7 Weight, kg
5. 90.90.6
- 900 Width, mm.
- 900 Length, mm
- 60 Thickness, mm
- 107 Weight, kg
6. 50.100.6
- 500 Width, mm.
- 1000 Length, mm
- 60 Thickness, mm
- 66 Weight, kg
7. 100.100.6
- 1000 Width, mm.
- 1000 Length, mm
- 60 Thickness, mm
- 132 Weight, kg
8. 60.120.6
- 600 Width, mm.
- 1200 Length, mm
- 60 Thickness, mm
- 95.5 Weight, kg
Laying technology
A carefully prepared base and a properly laid slab are the key to successful operation.
The basic principles are as follows:
- the product is installed on leveled crushed stone, concrete, sand and stabilized foundations, laid taking into account the difference in the thickness of the slabs;
- sand-crushed stone cushion is most often used when laying slabs in private courtyards and plots. Such preparation will allow the finished coating to withstand the load of a passenger car;
- a concrete base is necessary only if more difficult operating conditions are implied.
Regardless of what type of foundation will be used, the site where the installation will take place must be well planned. The master should strictly maintain all levels and slopes for water drainage . The easiest way is to install paving slabs directly on the ground, which is important for small garden paths.
Laying paving stones yourself
Paving stone patio
If you are one of those who like to improve the area on their own, and have decided to pave the patio with paving stones without outside help, then this section is for you.
Schemes for laying concrete paving stones
Pattern from ordinary paving stones
Where do you think laying concrete paving stones begins? From marking the territory, preparing the foundation - you will answer. And this is partly true. But in reality, it all starts with the project.
If you want the area to be decorated with colored concrete paving stones, the laying must accordingly be carried out according to a certain pattern. Depending on the position of the tiles, the amount required for paving often changes. In order to correctly calculate the square footage for colored masonry, you need to draw up a diagram of the future coating in advance.
You can do this armed with colored pencils and paper. Or you can make everything simpler and use a special program, for example, “Paving Slab Designer 2.2”.
The photo shows a screenshot of a program for creating patterns from paving stones
It will help not only choose a pattern, but also correctly divide the territory, taking into account the existing objects on it and those planned. To somehow warm up your imagination, we present a small selection of the most interesting and simple ideas for paving stone patterns.
Concrete paving stones 1pb are the most common type of paving. It looks like an ordinary brick, but how many fantasies can be realized with its help!
For those who love the color gray and each of its shades, there is a separate selection of combinations of such tones. Have you decided on a pattern and calculated the required amount of paving stones? Then you can safely start styling it! If vibro-cast tiles need to be strictly laid on a concrete base and mortar, then paving stones can also be laid on a sand base.Laying paving stones on a concrete base is considered a more reliable and durable option. In addition, if the path has already been monolithic, then consider that half the work for laying the tiles has already been done.
Laying on a sand cushion
Vibro-pressed concrete paving stones laid on a sandy base
Concrete paving stones are most often laid on a well-compacted sand base. This is a cheaper and faster installation method. This is probably why city services and many homeowners loved it so much.
A brief instruction will enlighten you on how such work is carried out:
- Step 1. Preparation
We mark the future territory and prepare the foundation. It all depends on the project. If necessary, we remove the top layer of earth to a depth that will be equal to the thickness of the paving stones and the height of the compacted base - 10-15 cm. At the same time, we do everything precisely so that the resulting paved surface is on the same level as the rest of the area.
Removing topsoil
- Step 2. Setting up borders
To properly install curbs, a trench is dug underneath them to a depth that will correspond to the height of the product + a gravel cushion 8-15 cm thick. A cord is stretched around the entire perimeter at the height that the curb should correspond to.
The trench is filled with crushed stone and a working solution of 1:3 is prepared. A curb is installed on a five-centimeter layer of mortar and reliably tapped with a mallet for better admixture and adjustment to a single level. Only after the curbs have been completely laid out and the cement has hardened can you begin laying paving stones.
- Step 3. Sand cushion
A geo-textile is rolled out onto the prepared site and sand is laid on it. The whole thing is carefully compacted with a natural slope of 5% to drain melt and rainwater.
Preparing the base
- Step 4. Laying tiles
Before laying the tiles, thoroughly wet the sand. And now the fun part begins - laying the paving stones. Don't forget the diagram of the pattern according to which you will lay out the path. When installing, be sure to tap the paving stones with a mallet.
Laying tiles according to the cord level
Attention! The laying starts from the center and goes evenly to the borders. If you get cut on both sides, play with the tile so that it remains on only one edge. This will not only make it easier to work with, but the path will also look more aesthetically pleasing. Only after laying the solid products can you begin to adjust the trimmed parts.
- Step 5. Seal
Compaction of concrete pavement
When the laying is completed, thoroughly fill the entire path with sand, mark it with a broom and walk with a tamper. After all these steps, you can enjoy using the new track.
Production of paving slabs on formwork
The easiest way is to make a simple smooth slab, 50*50 cm in size, 7 cm thick , which corresponds to type 6K7. The work must be carried out on a separate site where the working solution can be prepared, filled and all forms can be placed.
Preparation
Initially, you should mark the area according to how the future path will be located. The pegs are driven in and the cord is pulled.
Further sequence of actions:
- the top soil layer located over the entire area of the future tiled covering should be removed;
- depending on the structure and nature of the soil, the excavation depth may vary;
- if the area is represented mainly by sands that are not inclined to retain moisture, it is enough to remove 20.0 cm;
- if work is carried out on clay soil prone to heaving, the excavation depth increases to 30 cm.
When the excavation work is completed, you should begin preparing the sand and gravel bed:
- The bottom of the excavation is filled with a layer of gravel and crushed stone. It is acceptable to use small fragments of old concrete structures and broken bricks;
- thickness of the finished layer for clays and loams – 20.0 cm, for sands – 10.0 cm;
- geotextiles are placed on the crushed stone to prevent the appearance of weeds and mixing of layers;
- then a sand layer of 5.0 -7.0 cm is laid and the entire cushion is abundantly moistened with water;
- sand will fill all the voids, so in some places it will have to be added;
- when the liquid is absorbed, the layer is compacted with a manual or electric tamper.
Formwork assembly
If you need to carry out work as quickly as possible, you can purchase a plastic mold. With your own efforts, you can assemble a wooden formwork form, for which you use a 2*50*7.5 cm board.
Accommodation option:
- the board is installed on the edge along the edges of the future path and the width of the slab;
- the side planks are reinforced with pegs about 10 cm long driven into the ground;
- the corners are fixed with self-tapping screws;
- the correctness of installation is checked by the building level;
- The bottom and walls of the structure are lined with polyethylene film so that the cement laitance does not absorb into the sand and gravel bed.
Instead of wood, you can use sheet metal or plywood. Pegs for fixing the sides can be steel or wood. If you plan to manufacture a dimensional slab with a length of more than 1.0 m, expansion joints should be provided . They are installed every 0.5 m using hard plastic.
Laying reinforcement
For the work, a conventional construction mesh is used, made of rolled wire (10 mm) with cells of 10*10 cm. It is laid in such a way as to cover the entire area of the formwork, but indented from the edges.
If you have small nets in your arsenal, they can also be placed in the structure, with an overlap of 5-7 cm, tied with wire. Special chairs or stones of the required size are placed under the reinforcement. The mesh can be welded or stranded wire. It should be taken into account that welding is carried out only if the wire diameter exceeds 6 mm.
Concreting
Concreting is no less important stage, requiring maximum care.
To carry out the work you will need the following materials:
- Portland cement M400/M500 – 1 hour;
- fine aggregate – quartz sand – 1 part (fraction 2.0 mm);
- coarse aggregate – fractionated granite crushed stone – 2 hours (5-10 mm);
- plasticizer S-3 – 5% of the volume of cement.
If you want to get the purest color when using pigments, white cement is used for mixing. To ensure the durability of the finished product, glass, polypropylene or other types of synthetic fibers 5-50 microns, 5-20 mm long can be added to the mixture . One cube of working solution will require 1 kg of these additives.
Preparation of concrete:
- the plasticizer is mixed with water;
- Cement is carefully introduced into the liquid. The mass is mixed until cement laitance is obtained;
- then the remaining components are added sequentially - sand, crushed stone.
The finished mixture should be homogeneous, moderately thick and should not slide off the trowel.
The formwork is evenly filled with concrete mortar and leveled with a spatula. You can tap the sides with a hammer to remove any remaining air bubbles. The top edge is aligned using the rule. It is recommended to strengthen the concrete surface with dry cement , for which the material is sifted through a sieve onto a slab and carefully smoothed with a trowel.
After several days, the formwork is removed. The stove requires care - it is watered with water, covered with film and protected from sunlight. The final maturation of the material will be achieved after 28 days. To form a smooth, shiny surface, concrete is polished or treated with special impregnations.
To optimize the progress of work, you can make several boxes of formwork and immediately pour all the slabs for the path.
Final stage
When the material gains strength, the edges of the slab are cleared of debris, the sides are covered with soil remaining after excavation, and compaction is carried out. If there are areas with deformation from the pegs, they are treated with a cement-sand mortar with a waterproofing additive.
Characteristics of concrete tiles
The properties of concrete paving slabs directly depend on the raw material base and the production cycle - the denser the structure, the stronger and more durable the material.
| Characteristics | Indicators | |
| Vibration pressing | Vibrocasting | |
| Strength of concrete (compression) | B30 | Up to B22.5 |
| Abrasion | 0.5-0.7 g/cm² | From 0.8 g/cm² |
| Water absorption | Until 6% | From 7% |
| Frost resistance | F200 | Up to F100 |
However, it is worth clarifying that the specific parameters of vibrocast tiles may differ from the average ones due to the characteristics of production.
Roman ChizhovChief technologist
It is important that there is no GOST for vibrocast tiles, and therefore the raw materials for its production are not regulated. Therefore, it is a priori unclear what quality should be, but in fact, it varies greatly for each manufacturer. And the characteristics of the tile may be worse than in the table.
Price
For factory-made concrete paving slabs, the price starts from RUR 150/piece . Self-production will allow you to reduce excess to a minimum. For example, for homemade smooth concrete paving slabs, the price (cost) does not exceed 58 rubles/piece .
Do-it-yourself paving slabs will help you organize the landscaping of your own site with minimal costs for the work.
The production of smooth concrete paving slabs and their prices are shown in the video:
For used roof
1. 300x300x32 mm.
- 6.34 Weight, kg
- 69.7 Weight m2, kg.
- 11 Qty. PC. m2
- Price
- RUB 1,300.00 on gray cement
- RUB 1,500.00 with stone chips
- RUB 200.00 reinforcement
2. 400x400x32 mm.
- 11.3 Weight, kg
- 70.4 Weight m2, kg.
- 6.25 Qty. PC. m2
- Price
- RUB 1,350.00 on gray cement
- RUB 1,750.00 with stone chips
- RUB 300.00 reinforcement
3. 400x400x40 mm.
- 14.08 Weight, kg
- 88 Weight m2, kg.
- 6.25 Qty. PC. m2
- Price
- RUB 1,380.00 on gray cement
- RUB 1,875.00 with stone chips
- RUB 300.00 reinforcement
4. 500x500x32 mm.
- 17.6 Weight, kg
- 70.4 Weight m2, kg.
- 4 Qty. PC. m2
- Price
- RUB 1,400.00 on gray cement
- RUB 2,000.00 with stone chips
- RUB 350.00 reinforcement
5. 500x500x40 mm.
- 22 Weight, kg
- 88 Weight m2, kg.
- 4 Qty. PC. m2
- Price
- RUB 1,450.00 on gray cement
- RUB 2,125.00 with stone chips
- RUB 350.00 reinforcement
6. 600x600x40 mm.
- 31.68 Weight, kg
- 87.8 Weight m2, kg.
- 2.77 Qty. PC. m2
- Price
- RUB 1,550.00 on gray cement
- RUB 2,250.00 with stone chips
- RUB 400.00 reinforcement
How are concrete paving slabs made?
Today, there are several types of road surfaces. One of them is concrete paving slabs. Unlike asphalt, which can heat up and soften when exposed to sunlight, slabs are made of fine-grained concrete and have a high safety margin.
Shapes and sizes of paving slabs.
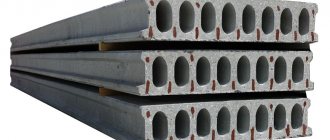
Modern paving slabs are suitable for arranging urban or suburban courtyards, squares, sidewalks, park paths, and children's playgrounds. For the construction of highways, it is necessary to use reinforced concrete slabs, the strength of which is given by special reinforcement. The high degree of reliability of such products makes it possible to construct structures that remain intact even under the influence of heavy and large equipment.
Tactile
Tactile tiles Square transition
- 9 Weight, kg
- 300x300x50 Size, mm
- Price
- RUB 700.00 gray
- RUB 1,100.00 yellow
Tactile tiles Diagonal reefs
- 300x300x50 Size, mm
- 9 Weight, kg
- Price
- RUB 700.00 gray
- RUB 1,100.00 yellow
Tactile tiles Cone reefs
- 300x300x50 Size, mm
- 9 Weight, kg
- Price
- RUB 700.00 gray
- RUB 1,100.00 yellow
Advantages and characteristics of paving slabs
The many advantages inherent in concrete paving slabs have led to their high popularity both in the national economy and in private construction. The main advantages of the material should be considered:
- attractive appearance, creating a high level of aesthetics of the structures being constructed;
- wide variety of shapes, colors and sizes;
- ease of installation and variety of installation methods;
- ease of repair or replacement;
- relative budget;
- possibility of use as both permanent and temporary coating;
- durability and wear resistance.
Scheme for the production of paving slabs using the vibration pressing method.
In addition, increased water resistance and frost resistance should be considered a significant advantage of the material. This product can be successfully used in many climatic zones. While asphalt pavement requires repairs on average once every 5-7 years, concrete tiles will last a much longer time.
Each paving slab is a concrete block made in one of two ways: vibrocasting or vibrocompression. The characteristics of manufactured products depend entirely on the production method. Thus, elements made by vibration casting have a smooth surface, which significantly limits their use. This method is characterized by the use of a large amount of liquid and a small amount of cement, which reduces the strength and frost resistance of the products.
Elements made by vibration pressing have higher performance characteristics and can serve without replacement for at least 25 years. In addition, this type of blocks has excellent geometry, which eliminates the appearance of wide gaps between elements during installation.
Choosing garden tiles
Types of garden tiles
The types of building materials used to produce tiles depend on the method of their manufacture. Conventionally, these materials can be divided into three groups:
- Concrete vibrocast tiles. It is made of concrete, light in structure. Concrete is poured into molds and made to a dense consistency on a vibrating table. Then dry in the open air.
- Concrete vibropressed tiles. In this case, as in the previous one, concrete is used, but the manufacturing process itself is slightly different. The molds are compacted under the action of a press, obtaining significantly higher strength. Drying takes place in closed chambers.
- Polymer sand tiles. This tile consists of a mixture of fine sand and materials of polymer origin. It is also compacted under the action of a press, but after giving the desired shape.
Garden tiles also vary in shape. There are a large number of both simple and unusual forms. Now I will tell you about some of them.
- Paving stones. Quite durable. Therefore, it can be used several times in a situation where the track location is changed. Resistant to frost. Does not pose any environmental hazard.
- Polymer sand. Features a wide range of colors. These tiles are not very durable and are only suitable for walking and cycling.
- With rubber filling. Ideal for areas where children play most often. It has a soft surface, which is less traumatic if it falls on the tile.
- Reinforced. In the production of such a plate, a metal mesh made in the form of wire is used. This is necessary to increase strength.
Criteria for choosing garden tiles
If you decide to pave the sidewalk in the courtyard of your dacha with garden tiles, then you need to decide on the choice of material and, directly, the shape of the tile itself.
Types of paving slabs
Numerous shapes and sizes of products required the creation of a special classification. Thus, GOST provides for the following types of tiles depending on the shape: rectangular, square, figured, hexagonal, decorative and bordering.
Scheme for laying paving slabs made of decorative concrete.
When creating pedestrian paths for the movement of people with disabilities (visually impaired or blind), tactile paving slabs were created. Such products are characterized by the presence of a rough convex surface and excellent anti-slip properties.
Additionally, concrete paving slabs can be designed to create permanent or temporary structures. The difference between the products lies in the composition of the raw materials and the types of connections during installation. All differences are reflected in the product labeling. When purchasing material, you first need to pay attention to indicators such as the type of elements and the permissible level of load that can be placed on them.
So which tile should you choose?
As with everything, there is no definite answer to this question; everything depends not only and not so much on the type of tile, but on its quality. There are quite a few conscientious manufacturers of vibro-cast tiles on the market, using high-quality raw materials and observing the water-cement ratio. And the characteristics of their products are quite capable of satisfying all the requirements for paving with low loads. Another thing is that there are plenty of outright handicrafts that will fall apart after the first season, but playing Russian roulette with your own money is a thankless task. Vibropress is, in principle, produced only by large factories that provide a guarantee for their products, and there is much less chance of getting caught with it. And most importantly, the tiles must be selected according to the operating conditions. According to GOST, the thickness of sidewalk tiles is at least 50 mm; in practice, tiles from 40 mm are used, but manufacturers recommend a thickness of 60 mm. If not only pedestrian traffic is expected, but also vehicular traffic (parking, entry), according to GOST the minimum is 80 mm, in practice – 60-80 mm. Regardless of what tile will be used, how long the paving will last depends on compliance with the base preparation and installation technology.
Making paving slabs with your own hands
Despite the fact that this building material is a budget product, not everyone can purchase it to create a platform or garden paths on a private country plot.
But you shouldn’t despair, because you can make concrete paving slabs with your own hands. The costs will be minimal, because you only need to purchase the components for making concrete.
It is no secret that the quality of the resulting products will depend entirely on the quality of the concrete solution. In factories where concrete tiles are produced, GOST provides for the use of the following raw materials:
- Portland cement grade 500;
- construction sand with a fraction size of at least 2 mm;
- granite or any other crushed stone from igneous rocks with fractions from 5 to 10 mm.
Molds for making paving slabs can be found at any hardware store.
When choosing crushed stone, it should be taken into account that its grade in compressive strength must be at least 1000, in frost resistance - at least 200, and the number of needle-shaped or lamellar grains should not exceed 25% of the total volume. To give products the proper strength, it is recommended to use a complex additive with plasticizer S-3 or LST.
Preparing concrete for paving slabs is no different from creating a regular concrete mixture. The following recipe must be used:
- 1 part sand;
- 1 part Portland cement;
- 2 parts crushed stone;
- 5% by weight of cement additive with plasticizer.
Water is added in such an amount that the mixture acquires a medium-thick consistency, comparable to the consistency of thick sour cream. First of all, all the main ingredients are placed in a container for making the solution or a concrete mixer; after mixing, a dry or plasticizer diluted with liquid is added.
Experts recommend preparing such an amount of concrete for paving slabs that it can be used at a time, since the mixture, left for some time, may lose its characteristics.
The amount of solution depends on the number of forms in which future paving blocks will harden.
Preparing and filling molds
To make molds, you will need the following materials and tools:
- plywood lined with plastic;
- metal corners;
- roulette;
- jigsaw;
- trowel or trowel;
- building level;
- fasteners for corners;
- cardboard and plastic film;
- reinforcing mesh with cells 4.8 x 4.8 cm;
- grease or machine oil for lubricating molds (if necessary).
Metal molds are the most durable, but they are also the most difficult to clean.
The size of the molds depends on the size of the paving slabs to be made. As an example, we can consider an option in which the dimensions of each element will be 50 x 50 cm and the thickness will be 4 cm. First of all, you need to mark a sheet of plywood into squares with sides of 50 cm and cut them out using a jigsaw. Then the strips from which the side parts of the molds will be made are cut out. For tiles 4 cm thick, strips 5 cm wide will be required.
The next stage is assembling the frame. First, the side square of the frame is assembled using metal corners, then the bottom is attached to it. It should be taken into account that the bottom should be removable for more convenient removal of finished elements from the molds. The plastic part of the plywood should be located on the inside of the form. You can make 3, 4 or 5 molds. Accordingly, the simultaneous amount of concrete mixture produced must be calculated to fill this volume.
To ensure that the paving slabs are level and have the same thickness, the forms should be placed on a strictly horizontal surface. Uniformity can be pre-verified using a building level.
Then each mold is oiled and the concrete mixture is poured.
In this case, you must adhere to the following filling technology:
- half of the prepared solution is poured onto the bottom of the mold;
- the mixture is carefully leveled into shape with a trowel (special attention must be paid to filling the corners);
- a reinforcing mesh cut according to size is placed on the solution;
- the rest of the concrete is poured out;
- the surface is leveled and lightly compacted using a trowel.
The mold should be filled to the top with the mixture; as it dries, its width will decrease. Then the mold is covered with plastic wrap and left for 2 days. When the concrete dries, the form must be laid on a soft base and the frame removed. The tiles are left to dry for another 3-4 days. To ensure strength gains occur gradually, it is advisable to cover the products with sheets of cardboard. When the molds are free, you can make the next portion of the mixture and continue the process of creating tiles for as long as necessary.
Finished products must be prepared in a place protected from sunlight. It is better if they stay here for at least 20 days before use. This way the concrete can gain the highest strength index. To make multi-colored tiles, you can use special pigments that are added to the mixture simultaneously with the plasticizer. Such paving slabs will be an excellent decoration for a suburban area, not inferior in quality or appearance to the best factory samples.
How to do it manually
When making structures yourself, you will need to prepare a concrete mixture of cement, sand and crushed stone, taken in a ratio of 1:1:2. To prevent the appearance of air pockets, it is recommended to add a plasticizer, which is 5% of the weight of cement.
A mineral dye is introduced along with the additives. Water is used in the amount necessary to prepare a solution of medium consistency. It is recommended to use a concrete mixer to prepare the mixture. The volume of solution is calculated based on the number of molds to be filled.
In the absence of a vibrating table, reinforcement is used to further strengthen the product. The manufacturing technology involves filling ½ of the mold, laying the mesh, and pouring the rest of the mixture. After this, compaction is carried out using a trowel.
To control the uniformity of filling, use a building level. Self-production allows you to save money and produce styling elements of different configurations and colors.
You can simplify the task by using ready-made rubber molds. In their absence, pouring is carried out in self-made forms from a wooden panel with removable formwork. To ensure that finished products are easily removed, the inside is impregnated with hot drying oil.
Concrete paving slabs - production methods and use for landscaping
For the arrangement and equipment of urban or suburban courtyards, plots, playgrounds for children, alleys and paths in parks, paving concrete slabs are widely used. The designs are endowed with good performance, reliability and have an attractive appearance. Reinforced reinforced concrete slabs are also used in the construction of urban highways.
Types of coatings
According to GOST 17608-2017, there are several types, sizes and shapes of concrete tiles:
- standard - 10 cm thick;
- sidewalk (standard thickness from 25 to 30 mm);
- reinforced concrete.
Paving slabs are classified according to configuration into the following types:
- square;
- rectangular;
- curly;
- hexagonal;
- bordering;
- decorative
There are also plates for visually impaired people. They have embossed rough elements, thanks to which the foot does not slip. Based on the thickness of the slabs, there are those described in the table:
| Thickness, cm | Purpose |
| 3 | Blind areas, garden paths, areas with minimal load |
| 4—4,5 | Sidewalks, pedestrian roads |
| 6 | Parking, car entry |
| 8 | Low traffic roads |
What types of large format tiles are there?
There are two main types of large-sized tiles - square and rectangular. This geometry (compared to other forms) is simple and makes it easy to calculate the exact number of required paving elements for any area.
Square
Square paving slabs are made with a side of 600 mm, 650 mm, 700 mm, 750 mm and more. The thickness of the products ranges from 40 to 100 mm. To increase anti-slip properties and aesthetic appeal, square-shaped slabs have a relief texture or pattern from which a pattern is formed.
Rectangular
Rectangular wide-format tiles have dimensions from 600 to 1800 mm or more along the long side, and 110 to 600 mm along the short side, respectively. It is made in various variations of textures and colors using standard vibratory casting technology, as well as using the method of Marble from concrete, Kevlar concrete, Ultra concrete, Granilite, etc.
Basic production methods
Making concrete tiles is possible in 2 ways:
- Vibration casting - the casting of the slab is carried out into a prepared mold.
- Vibration pressing using a press.
The first manufacturing method provides the material with a smooth surface. The density of water contained in cement reduces strength and frost resistance, which leads to a short service life of 10 years. By obtaining products using the vibration pressing method, the elements become more resistant to temperature changes and wear. Service life - 25 years. For the manufacture of slabs, the concrete composition is selected in accordance with the requirements of GOST 27006 according to production technology in accordance with GOST 7473. Classic composition:
- 1 share of cement M500, 2 shares of water and 1 share of fine sand and heavy granulate;
- variably - color additives to obtain the desired shade - 4-5%;
- 2% plasticizer.
To produce at home you will need:
- M400 cement, C7 pastifier and gravel screening.
- Vibrating table
- Several types of tile molds.
Production methods
Compliance with the manufacturing technology of this type of product ensures high-quality performance characteristics of the material. Requirements for slabs are regulated by the State Standard.
Structural elements can be purchased in Moscow and the Moscow region. Contacting companies involved in the production and sale of products allows you to purchase products that meet established standards. The production of structures on an industrial scale is organized in compliance with established standards and requirements.
Conveyor technology involves the use of vibration casting and pressing. Smooth concrete paving products are produced using the casting method, which involves pouring the mixture into prepared forms. When pressing, vibration equipment is used.
This method ensures the resistance of elements to temperature changes and mechanical loads. The service life of the products is 25 years.
Forming products using vibration pressing involves the use of such materials and equipment as:
- concrete mixture;
- molds for filling;
- special additives that improve performance characteristics;
- mineral pigment;
- vibrating table.
The prepared mixture is poured into molds, pre-greased with oil and placed on the table. After formation, the polymerization process of the composition takes place within 2-3 days. It takes a week for final hardening. This fact must be taken into account when making paving elements in artisanal conditions.
Laying the product
The key to maintenance-free and long-term operation is the correct laying of paving slabs. For a pedestrian area or garden alley, a sand cushion is used, and for a roadway area, it is reinforced with a concrete mortar base. Masonry techniques:
The material can be laid out in a herringbone pattern.
Laying out such stones in the form of brickwork is no less popular.
- Christmas tree patterns;
- semicircles;
- bricks;
- columns.
Basic layout tips
- Mark the area and remove approximately 15 cm of soil.
- Compact the soil layer.
- Form drainage holes and fill with sand 5 cm thick.
- Make a cushion of damp sand, crushed stone or concrete approximately 10 cm thick and compact it with a vibrating plate or wooden pick.
- Proceed with laying the tiles, sealing each element.
- Sprinkle fine sand on the finished surface and fill it with silicone to strengthen it.
There should be a small gap between the elements.
You should not lay the tiles close to each other, but it is better to leave a gap of 5 mm. The gaps formed between the slabs should be sealed with sand or the material that was used to make the pillow. The purchase of paving slabs is recommended with a reserve, since a certain amount of the product will be spent on trimming to align the laying.
How to make large concrete tiles with your own hands?
Instructions for casting large format concrete tiles.
Equipment used:
- mortar mixer for mixing concrete mortar;
- vibrating table or other vibrating mechanism for compacting the concrete consistency;
- drum separator or sieve for sifting fine and coarse aggregates;
- plastic molds for casting concrete products.
Necessary materials:
- ingredients for mixing the working solution: M500D0 cement, purified sand, fine granite, plasticizers, coloring pigments, VSM-12 (VSM-18) fiber fiber and water;
- reinforcing mesh;
- putty knife.
Production of large-sized paving slabs using standard vibratory casting technology.
- Mix the dry ingredients in a concrete mixer until smooth, add water and mix everything thoroughly.
- We unload the resulting concrete solution into plastic molds for large-format tiles, then compact it on a vibrating table or other vibrating equipment.
- Inside the homogeneous consistency we pour a reinforcing mesh of metal rods to increase the strength of the future tile (if necessary).
- Level the back layer of the product with a spatula or trowel.
- We send the poured ABS mold to a prepared rack for hardening and gradual strength gain for stripping.
- After 18 hours, we extract the finished large-format products. Installation can be carried out already on the 6th day after casting.
There is also a method for manufacturing large-format paving slabs using Granite from concrete, Marble from concrete, Kevlar concrete, Ultra concrete, etc. technologies.
Video on creating outdoor paving slabs using the pellet vibratory casting method.