Beton-House.com
Website about concrete: construction, characteristics, design. We combine the experience of professionals and private craftsmen in one place
Concrete trays for water drainage
To prevent the streets from being flooded by melt and rainwater, it is necessary to install such irreplaceable products as concrete drainage trays. With their help, you can properly arrange storm drainage, thereby ensuring cleanliness and order around you. Today we’ll talk about what types of drainage trays there are, the criteria for their selection and the intricacies of installation.
Scope of application of reinforced concrete drainage trays
Concrete drainage trays
Precast concrete trays are mainly used for constructing storm sewer channels on hard surfaces. Special drainage pipes are used to drain groundwater. Reinforced concrete gutters are used for the following purposes:
- storm drainage at city facilities: parks, highways, paths;
- wastewater disposal inside industrial workshops;
- laying a cable line;
- installation of hydraulic structures;
- pipeline laying.
As a rule, concrete trays are rarely used in private construction, since the soil tends to heave during the snowmelt season. This may cause the product to shift and even break.
Design Features
According to the shape and geometric characteristics of the section, the trays are divided into:
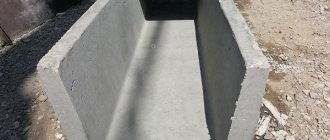
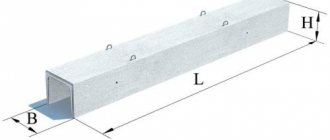
1. Box-shaped ( K ) - concrete body and top, covered with a storm grate. The most popular in construction.
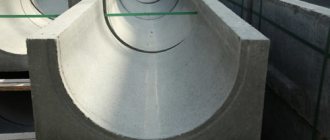
If you look at a cross-section of such a concrete drainage tray, then most often the structure has a U-shaped section. You can also find a U shape in the description.
Rounding radii and slight wall slopes are acceptable.
2. Slotted ( Shch ) - closed trays with narrow slotted openings for the passage of water.
2. Curb-slot ( BShch) - a closed type profile with one strip for rainwater drainage.
3. Open Trays ( O ) – Open Trays are an open top body only design.
The material for the drainage tray is selected from waterproof and durable grades of concrete. For reinforcement, reinforcing steel is selected in accordance with the requirements of construction standards and regulations.
⇒ Open trays require additional components: special sand traps and protective grilles.
GOST 32955-2014
The concrete drainage tray is subject to a standard state document - GOST 32955-2014, which contains basic information on the product. It defines design schemes, requirements for materials and operating conditions.
Full name GOST 32955-2014. Public roads. Road drainage trays. Technical requirements
GOST is the main document for the design and selection of trays for storm drains.
Concrete trays with gratings
The reinforced concrete drainage tray is equipped with gratings. Cast iron, steel or plastic gratings are installed on top of the sides. In a number of ranges, special stops are provided for better fastening of the grille.
The main purpose of the grille is to protect the storm drainage system from large debris. Plastic bags are the scourge of modern storm sewers. They tightly clog both the tray itself and the sand trap. Thus, the drainage system in the area is disabled.
It is difficult to imagine a pedestrian or automobile road without a concrete tray with a grid. Open structures cause injuries to pedestrians and cyclists and are also unsafe for cars. A stuck wheel in an open tray can cause a lot of trouble.
Grids, as well as trays, are selected according to load classes. Concrete trays of a high strength class are equipped mainly with cast iron “strong” gratings. For classes A - C, plastic grilles are also acceptable.
Typically, manufacturers offer concrete trays complete with gratings at a reduced price. It is cheaper to buy a concrete drainage tray assembled in a grid.
Sand traps for drainage trays
Storm drainage trays must be equipped with sand traps. In general, a sand trap is a specially designed unit that purifies rain, waste and melt water from dirt and sand.
In road construction, a form of sand traps is called wells. Usually this is an independent element of the drainage system.
Types of reinforced concrete trays
Reinforced concrete elements are classified according to the method of their installation: horizontal and vertical.
Types by purpose:
- C250. Designed for light loads. Used on small road surfaces, walking paths in the park.
- D400. They have a greater load than their predecessors. These are designed to drain storm water from busy roads and gas stations.
- E600. Used for large volumes of rainwater. More often they are installed in production and on highways.
- F900. The most powerful. Designed for storm drainage on the runway.
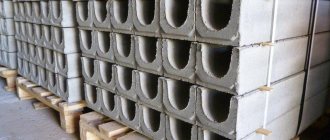
As for the sizes of reinforced concrete trays for storm drainage, their length is often 1 m. The internal diameter varies between 100-500 mm depending on the class of the product. The shape of reinforced concrete products is rectangular or round.
Installation Methods
There are 3 main methods for installing concrete drainage trays: overlapping, butt-to-joint and grooved. Overlapping trays are placed overlapping each other when a spillway from a railway embankment, bridge or overpass is organized. In this case, trapezoidal reinforced concrete products are used: the narrow part of the upper tray extends into the wide part of the lower one.
The joint-to-joint method is used to install horizontal structures that are not designed to withstand heavy loads. The gaps between the trays are sealed with bitumen, cement or other suitable compounds. The groove method is used for horizontal laying or when laying at a slight slope. Moreover, each tray has a protrusion on one side and a groove on the other. When installing two or more elements, they “click” together.
The installation algorithm is generally as follows:
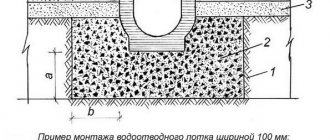
Installation of a concrete tray in an asphalt concrete surface
- A trench or buried bed is dug (depending on the design of the trays). The trench is given the required slope so that water has the opportunity to drain. The bottom is sprinkled with sand and compacted thoroughly.
- A layer of concrete is poured into the bottom of the trench to hold the trays in place.
- Drainage trays are laid in a trench on an unhardened concrete pad - end-to-end, overlapping or in a groove. Installation starts from the highest point. The joints are sealed with a special compound. To avoid spreading, the trays are tied together with wire or plastic clamps.
- After laying a certain section of the route, the trays are filled on the sides with crushed stone or gravel, which is carefully compacted.
- The final stage is the installation of upper plastic and metal grilles. Apply when necessary.
When installing a drainage system where large loads are not expected (at a summer cottage), a simplified method is used - laying trays directly into a trench without a concrete pad.
Installation of a concrete tray in a paving stone covering
Specifications
All reinforced concrete trays are produced in accordance with GOST, since high expectations are placed on them regarding strength and durability. For the manufacture of gutters, special reinforced concrete with a density of 2400 kg/m3 and cement grade M 250 are used. As a result, the finished product has the following characteristics:
- high strength to any mechanical stress, both static and dynamic;
- inertness to temperature changes;
- weight, which varies between 25-3000 kg;
- height of the gutter walls - 6-160 cm;
- waterproof;
- resistance to aggressive environments.
Due to the high mass of the product unit, it is necessary to use special equipment for installation.
Additional components
Drainage channels can be additionally equipped with the following accessories: fasteners, plugs, adapters, pipes or fasteners for grates.
Together with the gutters of the Basic BetoMax series, it is recommended to use sand traps, which connect the surface drainage system and sewage system, and also collect accumulated debris in a special basket.
Standardpark offers to buy high quality goods at the best price.
You can find out more information by contacting our managers. We are always happy to help you. Contact us! ← Back to section
Installation features
Laying of reinforced concrete trays is carried out in the following sequence:
- Dig a trench of the required size. The channel parameters must exceed the dimensions of the tray by 30 cm on each side and the height. In the future, this space will be filled with a concrete pad.
- The soil at the bottom of the trench is carefully compacted and a layer of sand 10-15 cm thick is poured onto it. It is also well compacted.
- A layer of concrete mortar 15 cm thick is poured onto the bedding. It is allowed to dry completely.
- Reinforced concrete gutters are laid on the dried base using special equipment. They are joined together, all joints are treated with bitumen sealant.
- The outer sides of the trays are filled with concrete mortar.
- The drainage channel is connected to the central storm drain; the top of the gutters is covered with protective cast iron or steel gratings.
When laying reinforced concrete trays, a slight slope towards the main receiver should be maintained. Then the water will be transported by gravity.
Installation and installation
If installed correctly, the risk of failure of a storm drainage system based on concrete trays is almost impossible. Briefly, the installation of drainage trays is carried out in the following steps:
- Development of soil in trenches.
- Fastening the walls of trenches with wooden boards and removing the fastenings.
- Device for crushed stone preparation for laying trays.
- Coating waterproofing of trays
- Laying reinforced concrete tray blocks using a trolley crane.
- Sealing the joints of trays with tow.
- Filling joints with cement mortar.
- Filling the sinuses of the trenches with sand.
Examples of supply of EnergoMonolit trays
Catalog of drainage trays. Video.
Advantages and disadvantages
Reinforced concrete gutters have the following positive aspects:
- High resistance of the material to aggressive environments.
- Anti-corrosion properties.
- Long service life - 50 years or more.
- Resistance of concrete to temperature changes, including the effects of sub-zero temperatures. When subjected to repeated freezing and unfreezing, the material does not lose its performance properties.
- Inertness of concrete to mechanical stress. The exception is high-power targeted strikes.
- Environmental friendliness of products. Concrete does not emit fumes harmful to the environment.
- Ideal smoothness of the inner walls due to the addition of polymers to the solution during the manufacture of trays.
The relative disadvantages of reinforced concrete gutters include their weight. However, it can also be considered a plus. Because even heaving soil will not be able to move them from their place.
Advantages of reinforced concrete trays
The practical application of standardized designs of reinforced concrete modules for drainage structures has a number of undeniable advantages, including:
- ease of maintenance and reliability throughout the entire service life;
- elimination of displacements of structural elements with large mass;
- products have a high safety margin and, as a result, a long service life;
- high degree of resistance to seasonal temperature changes without any destruction;
- the minimum service life of standardized units is 30 years if installed correctly;
- reinforced concrete products are impervious to moisture and are also capable of working in aggressive environments;
- high load-bearing capacity and mechanical strength to external influences;
- possibility of installation and operation in areas with seismic activity.
The production and use of standardized blocks of drainage trays is justified from an economic point of view. Compared to the construction of canals on site, the modular design is 2–2.5 times cheaper.
Cost of reinforced concrete trays
Prices for reinforced concrete drainage trays depend on the size and brand. Table of approximate prices:
| Tray brand | Length of the product | Product width | Product height | Tray weight | Price, rub.) |
| L-10-5 | 1000 mm | 500 mm | 230 mm | 200 kg | 950 rub. |
| L-1-7 | 1100 mm | 390 mm | 370 mm | 150 kg | 1100 rub. |
| LV-68-30 | 680 mm | 300 mm | 340 mm | 90 kg | 1780 rub. |
| L-300 | 2950 mm | 540 mm | 430 mm | 660 mm | 3200 rub. |
The cost of reinforced concrete trays may vary slightly depending on the region and the manufacturing company.
Production methods of reinforced concrete fibers
According to the method of production of trays, they are divided into:
- Vibrocast. To produce trays using this method, a vibrating table is used (that is, a platform equipped with a vibrator at the bottom), on which forms filled with a concrete mixture are placed. The technology is quite simple and does not require expensive equipment. But products made by vibration casting are not of very high quality. This happens due to the fact that during the technological process the outer part of the tray turns out to be well pressed, which cannot be said about its inner part. As a result, the operation of vibratory cast trays does not last long: they collapse very quickly.
- Vibropressed. It is this method that is used for the manufacture of trays, which will subsequently experience significant vibration and mechanical loads (for example, during the construction of busy highways or bridges). The vibration compaction process is as follows: special forms are filled with concrete mixture and then air bubbles and excess moisture are removed from it using powerful presses. The products are dense throughout the entire volume, that is, there are no empty cavities in them. Trays produced by vibration pressing are more expensive (compared to products made by vibration casting), but their quality is higher.
Varieties
Concrete trays for storm drainage are usually divided into several design options:
- low tides Shallow products, no more than 1 meter in length. Used to drain rainwater from supporting structures of private houses;
- U-shaped concrete gutters. These are large castings capable of holding extreme volumes of water during prolonged rainfall. Used in city or town drainage systems;
- telescopic structures. These structures are used on slopes or folds of terrain. They are laid in “steps”, allowing wastewater to flow freely in a given direction.
The storm drain gutter is an important and most loaded element. It receives wastewater and delivers it to the collector or discharge points. Existing types of products are used in networks that have their own specifics and sizes.
The material for production is not always concrete. Modern gutter designs are made of plastic, which gives them many advantages:
- light weight, laying networks is greatly simplified and does not require lifting equipment;
- plastic parts are not afraid of corrosion, do not absorb water and are easy to clean;
- The maximum filling of plastic products is not inferior to traditional parts, and often exceeds their performance.
However, plastic storm drainage has significant disadvantages. It does not tolerate low temperatures well and becomes fragile. In addition, plastic does not withstand exposure to ultraviolet radiation, which makes installation in open areas undesirable. Because of these features, it is customary to use plastic trays for laying internal sewage systems. They are found in the territory of private houses, small areas near cafes, shops and other small and medium-sized areas.
Installation technology
It makes no sense to consider installation technology in public buildings or commercial facilities, since for such work, as a rule, a team of professionals is hired. Installation on your own personal plot is a completely different matter. Then it’s really worth studying the work better so that, if necessary, you can carry out the installation yourself or immediately see if your workers are violating the technology.
Once the tray is selected and the tools are prepared, some preparatory work needs to be done. These include markings on the ground. This is done in order to clearly understand where exactly the drainage system will be located and how wide it can be made. Keep in mind that it is best to locate such objects in the lowlands, on the slopes of hills, if they are on your site. Then the water will collect there, and not accumulate somewhere on the site, leading to the leaching of useful substances from the soil.
Subsequence
To install a drainage tray yourself, use the following step-by-step instructions.
Dig trenches for installing trays. There should be as many of them as the number of drainage systems planned to be installed
Pay attention to the size of the recesses, their depth and width: the drainage channel must fit completely there. For complete installation and subsequent work, the storm drains must be positioned at an angle. If you make them on a plane, then the water will stagnate in them and not flow where it should.
The slope fluctuates greatly: it can be a meter high, or it can be only 1 cm. Trenches dug in compliance with the above conditions must be well compacted. To do this, you can use ordinary sand, which has a drainage effect.
Pay special attention to the next point if your plans include installing plastic products. Sand compaction alone is not enough here.
It is imperative to create a concrete base, since without it the strength of the polymer drain will drop significantly. The concrete box is made in the shape of a tray. It also serves to compensate temperatures. In it, the plastic gutter will not deform, being compressed by the surrounding earth. The presence of a grille is optional, but desirable as it provides additional protection. Debris, leaves and other large objects will not fall into the storm drain, clogging it. Pay attention to the rules for installing sewerage. It must be placed half a centimeter below the ground level, otherwise it will protrude and get in the way. To connect the trays, you need to insert one into the other at the locations of the grooves. In the future, you need to seal the joints well. High strength silicone sealant is suitable for this.
Connection types
This refers to the direction in which water should flow through the tray. Depending on this, the grooves are calculated. The channel must not be positioned in any other way than as indicated in the diagram. By the way, the layout diagram of the tray itself, as well as its individual elements, is attached to each individual set, so it will not be possible to consider any general sequence.
Installation
The assembly of rainwater drainage lines is carried out in stages:
- preparation of trenches;
- backfilling with a sand cushion providing a given slope;
- laying gutters, axial alignment and joining into a single line.
If large products are used, slabs are laid on top. They make the system airtight and prevent foreign objects from entering the cavity. For small gutters, cast iron decorative gratings are used. Ebb tides and drainage grooves of private houses are sometimes used openly, since their size is small. This makes it easier to monitor the condition of the system, remove debris in a timely manner, and remove blockages.
