How to cover the seams in a well is a pressing question for its owner
If a well is built from reinforced concrete rings, sooner or later water begins to leak through the seams between them and cracks appear in the walls.
This can happen very quickly if workers did not pay enough attention to sealing joints during construction or if the soil on your site is very mobile. How to cover the seams in the well in this case and how to do it correctly?
Making a filling yourself
Self-made hydraulic seals have some features.
They are somewhat inferior in quality to ready-made fillings produced by the industrial method. These disadvantages include:
- there is no guarantee of inertia, i.e. a “homemade product” can come into contact with the environment, thereby changing its properties;
- a homemade filling hardens much slower than an industrially produced one;
- there is a possibility of the seal disintegrating and its components getting into the water.
Based on the last point, we do not recommend using toxic compounds to create “homemade” hydroseals!
The advantages of homemade seals include low cost and availability, which is especially important in emergency cases when there is no industrial seal at hand
#1: Homemade pressure-free seal
To prepare a waterproofing seal, the following materials are needed: fine-grained, preferably sifted sand, cement of a grade not lower than M300. Proportions – 2 parts sand + 1 part cement. Immediately before use, water is added to the composition.
Water must be added gradually, stirring constantly. The consistency should be thick so that the mixture can be easily formed into a ball that will not spread.
The filling is applied to a large crack by hand, and rubbed into a small crack with a spatula. After the repair is completed, the well section must be covered with an iron plate. After 2-3 days, the iron is removed, and the filling is treated with cement mortar and covered with waterproofing.
This method can only be used to eliminate non-pressure and low-pressure leaks. Under high pressure (over 3 atmospheres), such a homemade composition is quickly washed out.
To seal a deep crack, it is recommended to fill in two layers, and the first filling (bottom layer) should be thicker, almost dry, than the second
#2: Seal for seams and small cracks
Despite all their shortcomings, homemade hydraulic seals are excellent for sealing seams in concrete wells. They cope with this task “excellently”, while allowing you to save a significant amount on industrially produced products.
Being environmentally friendly and safe, homemade hydraulic seals made of sand and high-quality cement reliably protect well water from the ingress of groundwater, impurities, and soil.
To increase the efficiency of waterproofing the seams of a well, a “liquid glass” composition can be added to the solution of sand and cement. This mixture will make the sealing better and more durable. Proportions 1:1:1 (sand:cement:liquid glass). It is necessary to add “liquid glass” 1 minute before sealing, because The composition hardens very quickly!
The technology for sealing the seams of a concrete well is as follows:
- Surface preparation, which consists of removing exfoliated concrete and remnants of old sealing.
- If necessary, treat the walls of the well with an antibacterial compound to remove/prevent mold.
- Cleaning seams from dust, dirt, and old waterproofing. Expanding the seam by 5-10 mm by gating. The tools used are a perforator, a hammer, a wall chaser.
- Preparation of waterproofing mixture.
- Pre-wetting the seams. The seam should not be wet, but moistened. It is optimal to use a fabric that absorbs water for this procedure.
- Applying the waterproofing mixture using a spatula. Filling cracks and caulking joints.
- Application of a penetrating waterproofing solution.
How often are seam waterproofing works carried out? Waterproofing the seams of a concrete well is carried out on average once every 5 years, provided that the well is operated correctly. Emergency waterproofing is carried out in the event of a leak, deterioration in the quality of well water, or after sudden drainage.
It is best to carry out waterproofing work in the spring, after the snow has completely melted, when the average daily temperature is no lower than +5 degrees.
It is necessary to carry out sealing, moving from bottom to top, simultaneously inspecting the walls of the well, eliminating chips and sealing existing cracks and crevices
Step-by-step instructions for sealing joints and sealing a well shaft
Before you begin sealing the well, you should prepare the following tools:
- containers for mixing working solutions;
- metal brush;
- surface scrapers or high pressure washer;
- spatulas;
- hammer drill or impact drill;
- wide paint brush with stiff bristles;
- hammer;
- thin chisel.
To repair a well you will need the simplest tools that any owner has.
The work should be done sequentially - this way you will not miss a single detail. In each specific case, individual decisions must be made, so there is no general algorithm. However, we present to your attention the most complete instructions for sealing well seams. We tried to consider the most important points in it so that you have a complete understanding of the nature and procedure for carrying out repair activities.
- Preparatory stage. All functional and decorative elements are removed from the existing well, completely exposing the head. If necessary, the well trunk is dug up to the third or fourth ring, and the water is pumped out using an electric pump. After this, the lifting equipment and working platform are installed.
- With the help of friends or relatives, they lower themselves into the well. Using brushes, scrapers and a high-pressure washer, clean the surface of the barrel. This is best done from top to bottom. At the same time, each ring is carefully inspected, assessing the scope of the upcoming work and the possible costs of material (do not forget that the “lifetime” of factory hydraulic seals is measured in minutes).
- Having sunk to the bottom, do not rush to clear it of silt. Firstly, during repair work, the bottom part will one way or another become contaminated with debris and falling solution, and secondly, this will provide an additional influx of water.
- Having cleaned the surface, they begin to seal the joint, which is located above the water surface. There is no point in sealing the rings that are installed below - this part of the well is located in the aquifer. The sealing is carried out in sections of 10-20 cm, and vertical cracks should be plastered from bottom to top.
Sealing dry cracks, as well as those from which water flows in small portions, does not cause difficulties. Difficulties arise with damage from which the jet comes out under pressure - the sealing compound is immediately washed out. In this case, at a distance of 25 cm below the leak, 1-2 drillings with a diameter of 20-25 mm are performed - they will serve to redirect the flow. After the main crack has been sealed, the holes are plugged with wooden pegs or rubberized tow and sealed with a thick layer of sealing solution.
- To protect the inner surface of the rings from fungi and mold, the concrete surface is completely coated with an antiseptic. Offhand, you can name some pretty good products: Nortex, Capatox or Ceresit CT-99.
- After the last crack is sealed, they go down to the bottom and clean the bottom filter. If necessary, the filter layer is restored. More information about how to clean a well can be found in this article: https://aqua-rmnt.com/vodosnab/kolod-skvaj/chistka-kolodca-svoimi-rukami.html
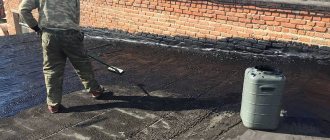
- Having gone upstairs, they begin to seal the outer surface of the well shaft. To do this, the walls are covered with two or three layers of bitumen mastic (tar) or roll waterproofing is glued (fused) onto them.
- The dug trench is filled with soil and compacted, creating a hydraulic lock made of rich clay at the very surface. The thickness of its layer should reach the point of maximum freezing - this will be the key to a dry well shaft during spring floods.
- Return to place and, if necessary, repair the outer part of the well and finishing.
The operation of the well does not begin immediately. You must wait until it is filled to the normal level and completely pump out all the water. Only after this can the source be considered suitable for use.
Clay fill must be arranged according to the rules, otherwise such a hydraulic lock will be of no use
Weaknesses of a well made of concrete rings
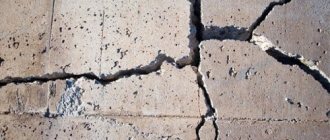
If well rings are not waterproofed in time, the heaviest load goes to the butt joints.
That is why they should also be given special attention. When the joints are treated improperly, they gradually collapse, this also happens as a result of certain processes: - Increased humidity, both outside and inside, affects the ends of the concrete rings, gradually destroying them. - If the concrete collapses and cracks appear, the moisture gradually seeps in and negatively affects the steel reinforcement in reinforced concrete. - If the reinforcement itself is destroyed and the corrosion process begins, the rings may begin to move under the pressure of the soil, thereby compromising the integrity of the well shaft. Thus, connections that have defects can let water into the well with sand and clay
In this case, the process of flow of clay and sand will continue continuously, gradually increasing the speed. Under the influence of such an abrasive solution, over time, the connecting seams expand and become large holes. At the same time, the water becomes polluted, and its quality decreases accordingly. Before consumption, such water must be additionally filtered. Once cracks form in the seams, the reinforcement is exposed and begins to rust and gradually collapse. In such a situation, the well, as a source of drinking water, urgently needs to be saved. Therefore, you need to know what and how to seal the seams between the rings in the well, so that such negative phenomena do not occur, and the structure maintains its integrity for a long time, despite the changing climate and influence of various external factors.
Popular materials used for sealing wells
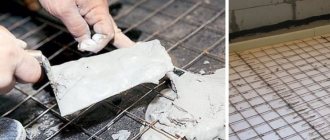
Photo of the finished mixture for waterproofing well joints.
Now there are many materials for sealing seams in a well. Each of them has varying degrees of effectiveness and features, so let's look at the most popular options in more detail.
So, sealing the seams in the well is carried out mainly using the following list of materials:
- Ready-made dry mixes. These new generation materials are created on the basis of cement with the addition of chemically active additives, due to which they acquire improved waterproof properties. Their advantage is also that such mixtures are able to adhere well to concrete surfaces, so this option is preferable for sealing wells made of this material. For example, high-tech mixtures “Penetron” or “Waterplug”, which have proven themselves in waterproofing work, make it possible to create an almost monolithic surface that is indestructible for many years. Ready-made dry mixtures are sold in specialized stores.
Schematic representation of waterproofing a concrete structure using Penetron and Penecrit.
- Bitumen-gasoline solution. Such a mixture can be prepared with your own hands from gasoline and bitumen, the grade of which should be chosen at least 3. Sealing of well joints with this material should be carried out in 3 layers, the first of which will be a primer. For the first application of the primer, the solution is prepared in a ratio of 1 to 3, and for subsequent layers - 1 to 1. This mixture is applied using special equipment that supplies liquid building material under high pressure, for example a cement gun. This solution is flammable, so sealing seams in the well with its help must be carried out in strict compliance with fire safety standards.
The process of sealing joints with a bitumen mixture.
A mixture of cement (not lower than grade 400) and PVA. Sealing well joints using this thick mortar is done by plastering using a regular spatula. Often, to enhance the sealing effect, liquid glass is applied over the cement and PVA mixture. Insulating tapes (rubber, jute or linen, impregnated with fiber rubber). These building materials are used in cases where there are no other means at hand to eliminate a well leak. This process occurs using the caulking method. Caulking with such tapes allows you to seal the seams of the well if they do not exceed 7 mm. However, it should be noted that this is not the most reliable way to achieve excellent results for a long time
Therefore, when the question arises of what is the best way to seal the seams in a well, it is first advisable to turn your attention to other materials.
Bitumen-gasoline mastic
You can prepare waterproof mastic from bitumen and gasoline yourself. Both components must be purchased of high quality without additional impurities and/or additives. The required bitumen parameter is 3 or more.
The required amount of ingredients is calculated taking into account the fact that the finished mixture is applied three times. For the initial primer, you need to mix gasoline and mastic in a ratio of 1:3.
Next, the main and protective layers are applied alternately. To prepare them, gasoline and bitumen are mixed in equal quantities.
To facilitate the application and uniform distribution of mastic, you can use a special device. For example, a cement gun. Spraying will be done carefully, evenly and under high pressure.
To increase the strength of such treatment of seams, roll-type waterproofing material can be used on top of bitumen and gasoline mastic. For example, roofing felt. It is glued in 2 layers and overlapped by 10-15 cm. Additionally, the joining seams must be treated with mastic, applying it in an even layer with a thickness of at least 2 mm.
The main disadvantage of bitumen-gasoline mastic is the risk of easy combustion of the ingredients and/or the finished composition. Therefore, during work it is necessary to carefully observe fire safety rules.
Hydroseal - modern technology for sealing holes
A quickly hardening substance is called a hydroseal. A hydraulic seal is used for wells mainly in emergency cases when urgent and effective intervention is required. Where to get a hydraulic seal and how to prepare it? To seal concrete joints, it is recommended to use “Waterplug” and “Peneplug” together with “Penekrit” and “Penetron”, respectively. The mixture allows you to cover up fairly large holes, up to a hole with a diameter of 10–13 cm.
Hydraulic seal for well treatment
How to prepare a hydraulic seal for use (using the example of “Waterplag” and “Peneplag”)? Take 1 kg of hydroseal and mix it with 150 grams of water. If it is not possible to measure grams, then you can follow the proportions: 1 part water to 5 parts mixture. Kneading is done quickly and only in warm water (17–23 degrees).
Tip: Do not try to fill all the holes at once by mixing a large amount of mixture. The hydroseal sets so quickly that upon returning to the container with the mixture, you will find one frozen lump.
Sealing seams between rings - detailed instructions:
Well treated with Hydroseal
- Preparation of the working surface. We knock down the exfoliated concrete with a hammer drill or jackhammer, slightly expanding the damaged area;
- Mix the hydroseal in a metal or plastic container in a small amount. Form a lump with your hands and press with a sharp movement into the seam between the rings. Hold the filling for 2-3 minutes.
Sealing concrete joints with a hydraulic seal allows you to instantly get rid of leaks. The only drawback of this mixture is its cost - 3 kg will cost 800–1000 rubles.
The second method is a clay castle
Clay castle is well-compacted clay or loam. Note that this method will allow you to cover only the upper joints (no more than 2-3 meters deep). To create a high-quality seal between the ground and the well, you will need clay that contains no more than 15% sand.
Scheme of a clay well castle
Work order. Dig up the well, then get rid of most of the soil (you won't need it). You can dilute the clay yourself or order it. How to dilute it yourself? You will need a large metal or plastic container. Pour half a bucket of water into it and add clay. The solution is mixed until the consistency of the clay begins to resemble melted butter.
Fill a bucket with clay and go down to the bottom of the trench. First, the concrete joints are sealed, then the space between the well and the ground is completely filled with clay. Practice has shown that it is better to fill the clay within one day, since hardened clay practically does not adhere to diluted clay.
Completion of work. Fill the top of the clay castle with soil and wait 10 days until it hardens completely. Sealing with clay does not guarantee 100% protection of the well from tectonic movements, as a result of which the rings can move, compromising the integrity of the structure.
Features of sealing wooden wells
The photo shows what water should be like in a working wooden well.
How and with what to coat the seams in the well if it is made of wood? As mentioned above, wooden structures of wells can rot in some places, so first of all you will need to determine in which area this happened, and then restore the tightness by replacing the damaged material with a new one.
To do this, you will need to build a working platform using thick boards. Its size should be such that it can comfortably accommodate one person who will carry out repair work.
In order for the platform to move freely up and down inside the well, it should be secured with cables to a beam, which is placed on the head so that it is convenient to lift it with your own hands or using a gate.
In this case, waterproofing the seams in the well should occur in the following sequence:
- First you need to hang the part of the frame located above the damaged area. To do this, “goats” are installed on both sides of the tank head. After this, 4 logs should be placed on them on all sides of the structure, to which, in turn, you will need to nail 2 strong boards. Then the crowns of the log house are secured to them using long nails. This will prevent the collapse of the structure when removing rotten boards.
- Next, the directly damaged areas on the log house are removed.
- After this, you can begin installing new logs. There is no need to throw away the old material right away, since it is convenient to use it as a template for making blanks. New boards are installed by wedging with a wooden hammer.
Video description
For a clear overview of the work on repairing and waterproofing wells made of reinforced concrete rings, watch the video:
To achieve long-lasting protection of seams from moisture, do the following:
- Perform alignment . The cause of leakage at the joints may be misalignment of the rings. To avoid this, a ridge plate is placed at the bottom of the well to ensure centering of the prefabricated shaft.
- The connecting sections are laid between the individual rings with a spacer cord . The sealants “Gidroizol M” and “Barrier” have proven themselves well in this regard.
- Carry out internal and external coating of seams . For interior work, it is recommended to use special compounds, such as AQUAMAT-ELASTIC (manufactured by ISOMAT). From the outside, joints may be sealed with coating materials based on bitumen and rubber.
Wells completely covered with waterproofing on the outside will last longer Source beton-house.com
Precautions during operation
The technology for using a hydraulic seal for a well is not particularly complicated, and therefore can be performed by a novice master without the involvement of specialists. When working with the solution, protect your hands with gloves. After use, the tool must be immediately washed from any remaining mixture, otherwise, after final hardening, it will be difficult to clean it only mechanically.
Waterproofing wells has never been easy. Many, trying to carry out the necessary work, encountered serious problems. For clarity, we will give a few examples - problems that arise in cases where the waterproofing in the well is done improperly or, even worse, it is missing altogether. This includes leakage into the well during the appearance of melt water, a violation of filtration in those places where the seams of the well are located, and much, much more.
To avoid such troubles, the seams between the well rings must be sealed with a mixture of PVA glue and cement. Mix PVA glue and cement to obtain a thick mixture. Next, carefully coat the seams with a spatula (you can do this several times to even out the seam). All! Water and dirt will never get into the well again.
Note
: using a similar scheme, you can first make a liquid primer from PVA and cement and coat the first layer with it to increase the impregnation of concrete in reinforced concrete rings. And after drying, coat it with a mixture of PVA and cement.
After hardening and complete drying, you can coat these places with liquid glass. Just don’t mix liquid glass with cement. Instant hardening will occur.
The second way to solve the problem is a clay castle or simply “waterproofing” around the well. To do this, the well is dug from the outside (the first 3 rings are enough, i.e. 3-4 m) and sealed either with clay, but always without sand and soil, or with a cement solution.
And finally, the third option is special solutions for sealing wells, which today are presented in a large assortment on the construction products market. For example, Penetron https://www.penetron-kursk.ru/penetron.htm or Hydrolast https://www.gydrolast.ru/gydrolast.html. They are a thin-layer (1.5-2mm) waterproofing coating based on cement and special polymers of the latest generation. They have vapor permeability (breathe) and sufficient elasticity for use on low-deformation substrates. The coatings have a high degree of adhesion to any surface, are weather-resistant, environmentally friendly, and can prevent the penetration of water through the concrete body even in the presence of high hydrostatic pressure.
Carrying out work with materials is quite simple. Hydrolast is easily applied to a pre-moistened surface and forms a common crystal lattice with mineral bases, which eliminates the possibility of its peeling. Moreover, the coating allows you to carry out any finishing work in the future: applying plaster, painting, laying ceramic tiles, etc.
The process of applying Penetron resembles “painting”: the prepared solution is applied to the concrete surface with a regular synthetic bristle brush. More detailed information about each of them can be obtained on the company’s websites...
Method one – cement + PVA glue
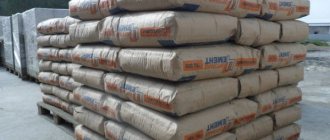
Buy a bag of M 300 cement and a bucket of PVA M “Universal” glue. The ingredients are mixed in a ratio of 4:1 (4 buckets of cement to 1 bucket of glue). Cement and glue are mixed to a very thick consistency, such that it does not slip off the spatula.
Work order. First of all, we drain the well, clean out the dirt from the concrete seams and soak out the remaining water. Let the empty well sit for a few days and air out. Then we go down inside and begin to cover the seams with the prepared solution. Try to drive each hole as tightly as possible, smoothing the cement evenly along the sides.
Before using the mixture for treatment, clean the well and leave it to air
Completion of work. We collect the remains of the working mixture and get out of the well. The cement mixture dries within 4–7 days. It is recommended to pump water after a week only after checking the quality of sealing.
How to prevent well rings from moving in the future
You will have to come to terms with the displacement of the lower rings - digging out a trunk to such a depth is an extremely time-consuming and expensive task. Since most often the shift occurs due to weak soil or quicksand, there is no guarantee that after repair the problem will not recur. As for the upper 2-3 rings, they should be returned to their place without fail - this will allow for high-quality waterproofing and thereby avoid flooding of the mine with perched water.
The use of well rings with rebated locks prevents their horizontal displacement
The simplest thing that can be done to prevent horizontal movement of well rings is to replace them with hollow reinforced concrete modules with interlocking connections. For those who are embarrassed by the additional costs, we can recommend connecting adjacent rings using durable metal brackets or thick steel plates. To do this, holes are drilled at a distance of at least 25 cm from the joint, into which the bracket is driven from the outside. The edges sticking out inside are folded and carefully sealed. If plates are used, they are installed on both sides and secured with bolts with a diameter of at least 12-14 mm.
Concrete rings can be connected together with metal clamps and straight or curved plates made of thick steel strip
On heaving soils, cracks in the joints appear due to the fact that the soil tries to push the upper rings upward, lifting them above other parts of the well shaft. In this case, the trunk is dismantled to a depth below the calculated freezing point and the cylindrical modules are replaced with conical ones.
Factory or hand-cast cone rings will remain in place even on the most heaving soil
Prefabricated cone rings are almost impossible to find, so you will have to cast them yourself. The slope of the latter should be directed inside the structure and range from 10 to 15 degrees. Due to this, the buoyant forces reverse their direction, pressing the upper concrete module against the well shaft.
What to do with a bathtub of a non-standard shape
To make doors for a bathtub with a non-standard configuration, you need to accurately replicate its shape. A galvanized metal profile can be used as a material for the frame structure. As for the cladding, dense extruded polystyrene foam, which has suitable characteristics, is well suited for its manufacture.
Operating procedure:
- Measure the parameters of the bath using a construction tape. The resulting dimensions are used when cutting the profile. To make the finished elements pliable for bending, they are equipped with cuts in increments of 3 cm.
- The finished strip is applied to the edge of the bathtub, fixing one end with electrical tape. With a little effort, you need to repeat all the curves of the bathtub with the profile. To ensure that the plank retains its shape, it is secured to the walls with tape. After completing the procedure, the tape is glued to the entire length of the profile.
- The formed strip is removed from the side and laid on the floor, using dowels for this. It must be shifted inward by the thickness of the finishing material. If you plan to lay tiles, then in addition to the thickness of the tiles, you need to take into account the layer of glue and putty (this is approximately 4-6 mm).
- Two vertical racks are made from the profile, focusing on the height of the bathtub. They need to be fixed to the walls.
- The expanded polystyrene sheet is cut into lamellas 15-20 cm wide. The exact parameters of the panels are determined locally, based on the configuration of the bathtub.
- During the installation of the casing, each lamella is immersed with its lower cut into the profile, and its upper cut under the side of the bathtub. It is most convenient to fill the internal void with construction foam immediately, as work progresses. Opposite the sewer pipes, a window is cut out for a hatch. It is best to install it after the foam has dried.
- To finish the resulting base, waterproof putty is used. The dried surface must be sanded with sandpaper and impregnated with primer.
Ceramic tiles or other facing material are laid on the finished base.
Violation of the integrity of the plastic well
There are much fewer problems with plastic wells due to the fact that the structure does not have seams. However, violation of recommendations for operation or installation work can cause cracks and other problems to appear. The problem with the degree of waterproofing in this case can be solved by using a special sealant
On sale you can find sealant versions on a wide variety of bases; it is important to choose the most suitable version
Each sealant has its own instructions for use, which should be read before insulating the surface. As practice shows, if the sealant is used correctly, the structure will have the necessary insulating qualities.
Improper installation and violation of operating conditions can lead to thinning of the walls of the plastic well, the appearance of cracks that lead to leakage into the external environment.
Under what circumstances do seams leak?
At the time of repair work, the well is a ready-made structure, which has some of its own structural features.
Based on this, there are many circumstances that could cause leaks in cracks:
- Rings, which are made by various manufacturers, can be with or without locks. Accordingly, the seams of the latter are less airtight.
- During the construction of the well, the builders did not seal the seams with tarred rope. The client must monitor this process during the work; otherwise, troubles associated with depressurization of joints will invariably appear in the well.
- The location chosen for the well was not entirely suitable. When planning, it is necessary to take into account the peculiarities of the hydrological and geological conditions of the area. In unstable soils, soil movement is likely, and as a result, the seams may separate, especially if the well was constructed incorrectly.
- If the upper seams are located above the soil freezing level, the cracks will be able to diverge due to demi-season freezing and freezing of the soil.
In any case, the problem can and must be solved by repair work, the quality of which will determine the level of water quality in the well.
Safe waterproofing materials
Now let's talk about how you can seal the seams in the well, depending on one or another sealing method. The construction market offers many waterproofing materials for creating watertightness in large containers.
In sealing work using safe materials, the following types are used:
- Dry composition, which is prepared at the factory. They are created from very effective new substances based on cement, to which moisture-proof additives are mixed. Thanks to them, the finished mixture has the best ability to adhere perfectly to the surface of the rings. The use of ready-made mixtures will be the most effective and preferred option. The following options for dry mixtures for joining joints are often offered for sale: “Penetron”, “Waterplug”. Tested repeatedly in use, they have proven themselves to be excellent in creating a moisture-proof connection in the space between the concrete rings of wells. It has been established that as a result of their application into the gaps, a strong, monolithic well structure is created. Moreover, it is not susceptible to the destructive effects of temperature and moisture for many years. You can purchase ready-made dry moisture-proof compounds in specialized stores.
- Bitumen-gasoline mastic. This version of a moisture-resistant solution is suitable for those who want to mix all the components with their own hands. When choosing bitumen, the brand must be used with a parameter of at least 3. Sealing of joint gaps from this composition should be carried out in at least 3 layers. The first layer is a primer. For it, mastic is diluted in the proportion of 1 part gasoline to 3 parts bitumen, and further coatings are 1 to 1. A special device that sprays a rare composition under high pressure, for example, a cement gun, will help make the work easier and more efficient. You should not forget about safety precautions when sealing seams, since the solution is flammable.
- Plaster mixture of cement (high grades from 400) and PVA glue. Clogging of the gaps between concrete rings using such a thick solution is carried out by plastering using a conventional spatula. To improve the efficiency and waterproofness of the layer, liquid glass is additionally applied over the cement joint.
- Sealing strips, which come in different structures: rubber, linen, jute or impregnated with a special fiber-rubber coating. This type of building materials is used in cases where there are no other suitable means that could protect against the penetration of external liquids into the well. The gaps are sealed using the caulking method. Sealing joints with water-repellent tapes allows you to seal the space between the rings, not exceeding a distance of 7 mm. This method is the least reliable compared to previous methods. Solving the sealing problem with caulking will not work for a long time. This method is best used in the most extreme cases, but then it is better to seal the joints of concrete rings using more durable and effective materials.
Not knowing about its dangers, some well owners quite often include it in the solution to create sealed joints due to its excellent water-repellent properties.
Internal waterproofing
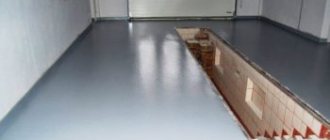
The process of waterproofing a well from groundwater leakage from the inside is in many ways similar to exterior finishing. In the case of a working well, preliminary pumping of water and drying of concrete walls will also be required. Next, contaminants and unstable areas are searched for and removed. All detected chips, cracks and depressions are embroidered and repaired. The seams between the rings deserve special attention: they must be deepened, completely removing the old mortar. When the leveled areas and joints are dry, the inner surface is completely covered with waterproofing material. Reliable protection from moisture is achieved by laying the mixture in two layers.
Interior finishing of wells is permitted using the following materials:
- Cement putties.
- Molten bitumen.
- Cement-polymer mortar.
- Polymer compositions.
Internal waterproofing must be durable and, in the case of a drinking well, environmentally friendly Source padovasport.tv
The first and second methods are the most inexpensive, but they can only be used for waterproofing sewer wells. Drinking hydraulic structures are usually treated with polymer compounds.
Fixing rainwater leaks in the upper seams
If the source is contaminated by overhead water, there will be little help in eliminating gaps using cement mortar. The seam will quickly be washed away by rain streams and it will not even have time to set properly. What can help in such a situation?
These are special building mixtures: HydroStop, Waterplug, Peneplug and others. The main properties of these compositions are rapid hardening and penetration into all small cracks, which makes it possible to reliably eliminate leaks.
Their advantages over other solutions:
- resistant to temperature changes
- absolutely waterproof
- do not react with salts and other aggressive substances
But the mixtures are not very accessible, because they have a high price.
Dry powder is diluted with warm water at a ratio of 5:1. This ratio may vary depending on the size of the gap. The mixture is prepared in small portions, as it hardens quickly.
In this case, the ingredients are quickly mixed and applied to a previously prepared area with your hands. You need to manually press firmly on the composition and then hold it in this position for 2-3 minutes.
In this case, the flows in the gap between the parts should weaken or disappear, which will facilitate the work of applying a layer of waterproofing composition. When it hardens, pegs are driven into the holes and also coated.
Using plaster under compressed air pressure
Materials for work:
Cement gun is necessary to seal the well.
- cement gun;
- high-quality pozzolanic (not lower than 400);
- waterproof expansion cements;
- waterproof non-shrinking cements.
The entire process is carried out using a cement gun. The cement is laid in 2 layers with a thickness of 5-7 cm. Each subsequent layer is applied only after the previous one has set. This may take 10 days or more. The solution can only be applied at an ambient temperature of at least +5 °C. If sealing occurs in the summer, the coating must be watered with cold water every 2-4 hours. In the cool season - every 12 hours.
Mixtures based on mineral binder
The technology for supplying the mixture requires a special installation that creates excess pressure. Thanks to this method of application, the material is evenly distributed over the entire surface of the concrete rings, filling the seams between them and various surface defects.
This method of waterproofing and sealing can be used both inside and outside. With the correct selection of the mixture composition and professional application, the protective layer does not require additional processing.
When installing a coating inside a drinking water well, it is best to further insulate it with any suitable paint or membrane. Such a system will completely protect water from the penetration of various substances.
How to seal seams in a well: types of hydraulic seals
Hydroseal is a special composition that is used to eliminate leaks in wells. It tends to harden quickly and is not washed out by water pressure. If the crack in the well is not repaired in a timely manner, groundwater can enter the well water and change its taste and quality.
An ordinary solution of cement and sand was washed out with water, so over time a hydraulic seal developed specifically for such purposes appeared.
Types of hydraulic seals:
- Pressure - harden within a couple of tens of seconds, a special layer of waterproofing is applied over the seal.
- Non-pressure - it takes 5-8 minutes to completely harden. Used during scheduled preventative maintenance.
Hydrocement is also used to repair pipelines and small breaks in basements.
Requirements for waterproofing seals:
- Fast hardening;
- Reliability;
- Easy to use;
It is also important that the seal does not corrode or deform due to temperature changes. The hydroseal should not change the taste of water and not affect its composition
Plastic and reinforced concrete wells: which ones cause more problems and why?
The most common types of wells are plastic and reinforced concrete. The modern version is plastic, which has recently been installed everywhere. Their high popularity is primarily due to the fact that the structure lasts for several decades and does not require repair work. There are many more problems with reinforced concrete structures, which is associated with the prefabrication of the structure, the presence of seams and individual structural elements.
Plastic and reinforced concrete wells are part of the sewer system, which allows you to audit, control and operate the sewer system.
Over time, the quality of concrete can change significantly, cracks and various other defects appear on the surface. Waterproofing is also affected.
What is a hydroseal
A hydraulic seal is a special composition of hydraulic mixtures that are capable of very rapid hardening, making it possible to eliminate pressure leaks. Typically, hydraulic solutions are not practical to use in such situations; they are simply washed away with water, even before they have time to harden.
Until the hydraulic seal was invented, most well builders used wooden plugs or tow, which, when swollen, prevented water from leaking into the structure. But these materials had one serious drawback - they began to rot very quickly, emitting unpleasant odors, which caused changes in the taste and quality of water.
The appearance of the hydraulic seal made it possible to significantly improve the quality of work and increase the service life of the repair area, which became important. However, even in our time, there are companies that instead use the old-fashioned method of eliminating leaks to reduce costs, without even thinking about the consequences.
In the photo there is a damaged section of the seam between the reinforced concrete rings
In addition, pay close attention to what well workers are trying to stop live leaks. Remember that the mixture of sand, cement and liquid glass, which is used by approximately 80% of craftsmen, cannot stop them efficiently and reliably.
When working with a hydraulic seal, it is necessary to take into account all recommendations related to surface preparation, and when cracks and seams are small, they should be enlarged with a hammer drill to the required size. If the instructions are followed, it can withstand even very serious water pressure.
Prepare a solution to eliminate pressure leaks
From the previous paragraph we learned what a hydraulic seal is for. This fast-hardening material is capable of returning the structure to solidity in a matter of minutes.
When purchasing material, pay attention to the presence of a certificate from the seller, which confirms the safety of the components used in the hydraulic seal for drinking water
We can recommend materials such as “Waterplug” and “Peneplug”, which are used in conjunction only with “Pinekrit” and “Pinetron”. The mixtures instantly set when exposed to strong water pressure, simultaneously expanding and forming a waterproof layer.
Materials from other manufacturing companies that also specialize in producing instant mixtures for blocking pressure leaks are used in the same way
Particular attention should be paid to correct use with the attached instructions
Prepare the solution yourself
When you decide to prepare the mixture yourself, be sure to follow the recommendations of the manufacturer. The volume of the dry mixture depends on the activity of the leak.
Most often, the proportion is 1 kg of well hydroseal per 150 g of water. Another way to calculate it is as follows: take five parts of the mixture for one part of water.
The solution should be mixed at a water temperature close to 20°C. The kneading is done as quickly as possible - no more than 30 seconds, which should resemble dry earth.
Do not knead a large volume at once, take into account its instant setting. In this regard, it is wiser to prepare the mixture in parts, and after applying one to the site of a pressure leak, immediately begin preparing the next one.
Leak sealing technology
- At the first stage it is necessary to prepare the surface for work. To do this, use a perforator or jackhammer to free the internal leak cavity from exfoliated loose concrete.
- This repaired area must be widened to a width of 25 mm and deepened to 50 mm or a little more. In this case, the shape of the hole should be similar to a funnel.
- Stir in a clean container a certain amount of the mixture, the volume of which is necessary to seal the leak. Form a lump of mortar with your hands and press it with a sharp movement into the embroidered hole. Hold the water seal in place for 2-3 minutes.
Other places of application of hydroseals
Using quick-hardening solutions you can effectively resist:
- leaks of liquids from reinforced concrete tanks;
- water breakthroughs in tunnels, basements, adits, shafts, galleries;
- defects that may appear in the bowl of swimming pools and other artificial reservoirs;
- capillary leaks, which often appear at the junctions of walls and floors, as well as between foundation blocks.