Construction products of the Volma brand have proven themselves to be of high quality combined with an adequate price. One of the popular products of the domestic manufacturer is the self-leveling floor of the Level-Express brand. This dry mixture has excellent performance characteristics, economical consumption and ease of use. The material is equally suitable for manual and machine work. Consumer reviews, the opinion of construction experts and a brief acquaintance with the pouring manual will help ensure the advisability of purchasing Volma Level Express.
Composition of self-leveling floor
The popularity of dry construction mixtures is increasing every year. With them, there is no need to buy all components separately, organize their delivery and storage. There is no need to scrupulously calculate proportions and carefully weigh each portion, determining the total consumption of raw materials. Now it is enough to purchase the ready-made mixture in a paper bag and dilute it with water according to the attached instructions.
Volma brand level mixture contains the following ingredients:
- fine quartz sand;
- cement enriched with high-molecular binders;
- modified polymer additives.
Thanks to a balanced combination of natural and synthetic materials, high mobility of the solution and ideal smoothness of the pour are achieved.
Classification methods
Polymer floors are classified according to the following factors:
- degree of fullness;
- type of solvent;
- thickness.
Based on thickness, self-leveling floors are divided into types as follows:
- Thin layer coatings. Their thickness is 0.2-0.6 mm. They don't withstand very heavy loads. Install using a roller or spray.
- Medium thickness. The applied layer can be 0.8-1.5 mm. Such self-leveling coatings can withstand medium loads.
- Highly filled coatings. Their thickness is 2 mm or more. The appearance depends on the characteristics of the filler. Used for decorative and specialized purposes.
Depending on the degree of filling, the material is characterized as follows: the more filler, the rougher the surface.
Advantages
The composition of Level Express has a number of undeniable advantages:
- using this mixture, you can achieve ideal leveling of the base, since, spreading, the plastic solution not only fills the existing cavities, but also equalizes differences in floor heights (due to the reduced viscosity of the solution);
- there is no need for further additional processing of the smooth surface;
- using the instructions, the mixture is easy to prepare and use;
- is environmentally friendly, since most of the components of Level Express are natural;
- is a good material for arranging heated floors, as it has low thermal conductivity;
- has a relatively low cost (the cost of a 20-kilogram bag of dry mixture varies from 225 to 330 rubles, depending on the region);
- hardens quickly (completely hardens after 72 hours);
- is durable;
- there are no seam joints on the finished base;
- gives minimal shrinkage: therefore, the decorative floor can be installed within 15 days after pouring;
- Can be applied by hand or by machine.
Working with solution on the surface
Pour the finished mixture first into deeper potholes and cracks with a gradual transition to hills. It is advisable to do all the work by two people. One will prepare the solution, the second will pour it. To level the composition, a needle roller on a telescopic handle and a spatula are usually used. The length of the spikes should not be less than 30 mm.
The solution poured onto the surface is leveled using a spatula so that the resulting strips overlap each other. Upon reaching the edge of a limited area or one of the sides of the room, the composition is passed several times with a needle roller. This is done to eliminate air bubbles from the mixture, forming a flat surface due to the movement of the solution and vibrations.
Before you start pouring the Volma-Nivelir Express solution, you must close the doors, windows and vents so as not to create drafts. If left unaddressed, they can cause surface cracks and reduce the strength of finished floors.
After four hours have passed since the floor was poured, you can move on it; after two days you can begin laying ceramic tiles. Laminate or linoleum is laid only after the surface has completely dried.
Preparation of the solution
Volma-Nivelir Express dry mix is supplied in 20 kg packages. In order to prepare the solution, this volume of material requires about 6 liters of clean water. It is advisable to use cold liquid. The viability of the finished Volma-Nivelir Express solution lasts about 60 minutes. The characteristics of the mixture do not deteriorate after this time, but it becomes more difficult to work with. It is advisable to distribute the prepared solution over the surface within an hour. If you plan to process a large area, then initially it needs to be divided into several technological sections.
The volume of water indicated on the packaging of the mixture is poured into a pre-prepared container. Then, gradually and in small portions, dry material is poured from the bag. The resulting mixture must be stirred after 3-5 minutes. During this time, the powder should have time to be saturated with water. Mix the components using a construction mixer or a drill with a special attachment. After the first “shuffle,” the mixture is left to brew for 5-10 minutes, after which it is stirred again. After preparing the solution, you can begin leveling the floors.
Useful tips
Before you start pouring, you need to close the doors and windows tightly. This will help prevent the appearance of drafts, which cause cracking of the drying screed. Direct sunlight should also be avoided: their influence negatively affects the quality of the top layer. Relative air humidity should not exceed 75%.
In cases of violation of the pouring technology, excess water getting into the solution or obvious defects of the main surface, the self-leveling floor may crack within a few hours after installation. If the top layer has peeled off or cracked, it is necessary to embroider, remove dust and prime the cracks. Then you need to fill them with the newly prepared Nivelir-Express mixture or repair composition. Subsequently, the repaired surface is reinforced with plaster mesh or fiberglass.
Popular brands of self-leveling floor Volma
VOLMA-Nivelir Express
"VOLMA - Level Express" is a dry mixture based on a mixed binder, mineral fillers and modifying additives.
TU 23.64.10-005-88933857-2020 corresponds to GOST 31358
For manual or mechanized work on leveling concrete and cement-sand floor subfloors indoors for subsequent decorative coatings (linoleum, laminate, tiles, parquet, etc.) with a thickness of 5 to 100 mm. Recommended for use in residential and public areas with dry and normal humidity levels.
Specifications:
| Recommended layer thickness | 5-100 mm |
| Material consumption for a thickness of 10 mm | 12-14 kg/sq.m |
| Water consumption per 1 kg of dry mixture | 0,29-0,34 |
| per bag 20 kg | 5.8-6.8 l |
| Viability of the solution in the container | 40 minutes |
| Application temperature (air, work surface, materials) | from + 5 to + 30ºС |
| Floor strength | 15 MPa |
| Strength of adhesion to the base | not less than 1.0 MPa |
| Possibility of moving on the floor | in 4-6 hours |
| Possibility to load the floor | in 72 hours |
| Coat with residual moisture | no more than 1% |
Base floor mixture Volma “Coarse leveler”
This brand is represented by a dry consistency consisting of various components. The consistency base is cement, lime with fillers from natural raw materials and chemical additives, reinforced with fiber. The advantages of the consistency are relatively low shrinkage, strength and high-quality adhesion to the base. The coating can withstand low temperatures, is simply applied, sanded and leveled due to its plastic properties. The work is carried out in a relatively short period of time, since the mixture quickly hardens and forms a strong coating layer.
The “Coarse leveler” mixture is used during the initial work as a starting finishing layer. Suitable for concrete and cement bases with a width of 10 to eighty mm, in some cases a layer of up to 100 mm is allowed. The consistency is used to carry out repair work on the surface, eliminating cracks and smoothing it.
Volma product range
Volma company product range table The company began its activities with the production of gypsum plaster mixtures, which was several decades ago. Gradually modernizing and mastering new technologies, the production association has steadily expanded the range of materials produced, while simultaneously improving their quality and optimizing its pricing policy. As a result, today the assortment of the Volma brand is represented by multifunctional dry mixes and specialized mortars in containers of 20, 15, 10 kg, which are in high demand among consumers and have mostly positive reviews. The basis of success is reasonable price and consistently high quality of materials.
Volma product range
Volma company product range table
The company began its activities with the production of gypsum plaster mixtures, which was several decades ago. Gradually modernizing and mastering new technologies, the production association has steadily expanded the range of materials produced, while simultaneously improving their quality and optimizing its pricing policy. As a result, today the assortment of the Volma brand is represented by multifunctional dry mixes and specialized mortars in containers of 20, 15, 10 kg, which are in high demand among consumers and have mostly positive reviews. The basis of success is reasonable price and consistently high quality of materials.
How to use?
Instructions for use are as follows. The work must be carried out in a dry room, the air humidity in which is no more than 75%, and the temperature is no less than 5°C. Pouring can only be done on a concrete base, the pouring period of which is longer than 3 months, or cement sand – laid at least 1 month ago, surface temperature – from 5°C, humidity – up to 6%.
Before work, the surface of the future floor is cleaned of dust, dirt, oils and other foreign substances. Large cracks and holes must be repaired in advance - more than 24 hours before the main pour. To do this, you can use Volma-Nivelir Express products with a thicker consistency, reducing the standard water consumption. The metal elements remaining in the floor (battery pipes, water and gas supply, grounding) must be protected from corrosion before pouring, for example, with silicone or sealant. The joints between walls and floors must be provided with pads made of polystyrene foam or other polymer insulating material.
The thickness of the poured layer is indicated using portable metal or plastic markers with a scale. You can also make a homemade leveling scale from available materials, which will be cheaper.
Before pouring, the floor is primed using a regular paint roller with a long handle. You can use Volma Universal primer or any other primer for deep penetration interior work. It is enough to treat smooth surfaces 2 times, porous surfaces at least 2-3 times with an interval of 4 hours. You should start pouring only after the primer has completely dried.
Self-leveling floors "Volma" can be used for manual or machine application. If an automatic station (unit) is used for filling, then after turning it on, the dry mixture is poured into the hopper and by adjusting the water supply, the required density of the solution at the outlet is set. To check the correct thickness, you can pour 1 liter of the mixture onto a non-absorbent surface - the spot should be approximately 0.5 m in diameter.
When pouring manually, the mixture is poured into a container with water and mixed with a mixer, a drill with a whisk attachment, or by hand until a homogeneous mass is formed within 5 minutes. Then the screed settles for 3 minutes and mixes again. You should avoid overfilling the water and use only the proportions indicated in the instructions. If you add a dry mixture or water to an already mixed and mature solution, it loses its beneficial properties. The prepared mass should be used within 60 minutes, otherwise it will begin to thicken.
The liquid mixture is poured onto the prepared area evenly and continuously; this should be done no more than 1 hour in advance to avoid hardening of the solution. Then air bubbles are removed from the surface using a needle roller. After this, they move on to similar work in the next section.
If the Volma-Nivelir Express mixture is poured onto a “warm floor” system, then the recommended layer thickness is 40 mm; if the heating is already built into the base on which the pour is being poured, then the layer can be from 5 to 100 mm.
Preparing the work surface
Before you start pouring, you must carefully prepare the surface. If a cement-sand composition is used as a base, then more than 28 days must pass from the moment of its installation. If the base is made of concrete, then its age must be at least 90 days. Work should be carried out at a relative air humidity of no higher than 75% and a temperature of no lower than 5 degrees.
The first stage of preparation should be to clean the base from mechanical impurities, dust, grease stains and crumbled fragments of the rough screed. Along the perimeter, as well as around the columns, it is necessary to lay damping protection, presented in the form of a tape or a thin strip of polystyrene foam. If there are large cracks and potholes in the base, it is necessary to dilute the Volma Nivelir mixture with a small amount of liquid and fill them with putty. This should be done 24 hours before the main work. The supporting reinforcement must be insulated; this will protect it from possible corrosion and will significantly increase its service life, as well as prevent the destruction of the rough screed.
On problematic floors, for example, heavily contaminated with oil or bitumen mastics, as well as on surfaces that have low strength, pouring should be carried out on a separating layer. When the diagonal of the room exceeds 10 m, an expansion joint must be present, which must be located strictly above the base seam. This will prevent cracking of the gypsum screed in the event of unexpected movement of the base.
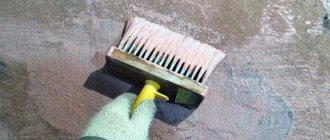
At the next stage, you need to prime the subfloor with the adjacent sections of the wall that will come into contact with the self-leveling screed. The work should be done using a roller or a stiff brush. It is recommended to use Volma-Aqua primer, intended for highly absorbent surfaces. If the base has a porous structure, then it is primed 2-3 times. The interval between treatments should be at least 4 hours.
Pouring self-leveling floor Volma "Nivelir Express"
To pour the solution onto the floor you will need a set of tools:
- Spatula - it is used to distribute the consistency.
- A needle roller with a long handle is used to remove air bubbles from the consistency. During leveling, the bubbles are punctured with a roller and the entire air space disappears from them.
The mixture begins to be poured from the corner of the room farthest relative to the entrance. The filling method looks like this:
- The mixture is poured onto the floor in a narrow strip.
- Using a spatula, the solution is moderately leveled over the surface.
- The solution is applied so that it fills all the depressions in the surface and makes a completely even layer.
- Carefully monitor the appearance of air bubbles in the consistency and remove them using a needle roller.
- Use a roller to roll over the surface of the poured consistency so that it spreads moderately across the plane. The result is a smooth surface with a glossy shine.
- Having distributed the first strip over the floor, they begin to fill the next one, which is parallel to the adjacent one.
- The function is repeated strip after strip until the entire surface is covered with the substance.
Volma self-leveling floor consumption is four kg per m2, provided that the layer thickness is 5-7 mm. For a room with a square area of 40 m2, about eight bags of dry consistency are needed. One bag contains 20 kg of product, in other words, 100 sixty kg of dry consistency for the floor is needed per room. The surface will fully set in 8-10 hours, and loading it with furniture and other elements is allowed only after 2-3 days.
How to work with Volma dry screed?
Leveling dry Volma screed along beacons.
To work, you need to prepare the surface. The process is no different from that described above. The mixture is also prepared with a construction mixer according to the same principle as self-leveling flooring. However, there are some differences. The main one is the proportions of water and dry matter. For this solution, 0.14 liters of cool water is taken per 1 kg of bulk mixture. That is, to seal the contents of the bag, you will need 3.5-3.6 liters of water.
- After preparing the base for pouring, guide beacons should be installed. To do this, prepare a thicker solution, which is laid out in slides along one line, the distance between them is about 60 cm. The plaster beacon is gradually pressed into the laid out solution until it reaches the intended level. When installing the beacon, you should carefully monitor its evenness (it may bend) and horizontality.
- After the solution has set, you can begin arranging the screed. The prepared working mixture is poured between the beacons, leveled with a trowel and pulled along the guides using a trapezoidal rule.
- When the material has partially set (after 6-8 hours), the surface, after wetting it, must be rubbed with a plaster float. Leveler consumption for a layer thickness of 5 cm is approximately 50 kg per m2. That is, for a standard balcony you need to buy only 4-5 bags of dry product.
Finally, watch the video, which clearly displays all the technological aspects associated with the use of the Volma brand products discussed above. After watching the video below, there should be no questions left about the working nuances and quality of the described building mixtures.
How to calculate the required amount of Volma dry mixture for leveling the floor
If you plan to level the floor with Volma self-leveling compound, then, one way or another, you will have to purchase the material
It doesn’t matter whether the work will be carried out independently, or a team is invited - it is necessary to know the required amount of dry mixture
For each type of liquid formulations, the manufacturer indicates the average consumption. It is usually expressed in kilograms of dry mixture, which must be spent in order to pour a 10 mm layer over an area of 1 square meter. All these values are indicated in the tables above.
Using this indicator, the known area of the room and the planned thickness of the future leveling screed, it is not at all difficult to calculate the total amount of composition.
In addition, sometimes it is necessary to take into account the difference in heights if there is a large deviation from the horizontal plane on the original surface. Even during preliminary inspections and measurements using a hydraulic or laser level, the ideal horizontal line is struck. Starting from it, they find the “extreme” points, that is, the highest and lowest. The difference between them will precisely show the amount of difference that needs to be eliminated by pouring the leveling mixture.
It is probably clear to everyone that the minimum specified thickness of the screed (leveling layer) will be exactly at the highest point of the original floor surface.
When making calculations, it is recommended to immediately include a reserve of about 10% - it’s rare that there is enough material “neck to neck”. In addition, there may be unforeseen losses, especially due to inexperience.
The calculator offered below is specially programmed to calculate the amount of Volma dry mixture for pouring floors. The cost values of the listed varieties are already included in the calculation algorithm. The result will be shown taking into account the reserve (10%), in kilograms, with subsequent conversion to the number of standard factory packaging (20 or 25 kg bags).
What it is?
The mixture is made from a gypsum base using quartz sand, a polymer modifying additive and binders. The combination of the main components gives the solution high plasticity, ensuring ideal leveling of the subfloor. The thickness of the working layer ranges from 7 to 100 mm, which allows you to level problem surfaces with large differences in height and pronounced defects. The material has increased adhesion properties to the bottom plane of 2 MPa, which make it capable of withstanding loads of up to 16 MPa.
Complete drying of the composition occurs after 7-10 days and depends on the influence of external factors and the thickness of the applied layer. The package of the mixture weighs 20 kg, which is enough to fill a centimeter layer of solution over an area of 4.5 square meters. m. The cost of the material is 230-250 rubles and makes it the most budget option among similar products from European brands.
How to calculate the required amount of Volma dry mixture for leveling the floor
If you plan to level the floor with Volma self-leveling compound, then, one way or another, you will have to purchase the material
It doesn’t matter whether the work will be carried out independently, or a team is invited - it is necessary to know the required amount of dry mixture
For each type of liquid formulations, the manufacturer indicates the average consumption. It is usually expressed in kilograms of dry mixture, which must be spent in order to pour a 10 mm layer over an area of 1 square meter. All these values are indicated in the tables above.
Using this indicator, the known area of the room and the planned thickness of the future leveling screed, it is not at all difficult to calculate the total amount of composition.
In addition, sometimes it is necessary to take into account the difference in heights if there is a large deviation from the horizontal plane on the original surface. Even during preliminary inspections and measurements using a hydraulic or laser level, the ideal horizontal line is struck. Starting from it, they find the “extreme” points, that is, the highest and lowest. The difference between them will precisely show the amount of difference that needs to be eliminated by pouring the leveling mixture.
It is probably clear to everyone that the minimum specified thickness of the screed (leveling layer) will be exactly at the highest point of the original floor surface.
When making calculations, it is recommended to immediately include a reserve of about 10% - it’s rare that there is enough material “neck to neck”. In addition, there may be unforeseen losses, especially due to inexperience.
The calculator offered below is specially programmed to calculate the amount of Volma dry mixture for pouring floors. The cost values of the listed varieties are already included in the calculation algorithm. The result will be shown taking into account the reserve (10%), in kilograms, with subsequent conversion to the number of standard factory packaging (20 or 25 kg bags).
Advantages of Volma self-leveling floors
Products manufactured by the Volgograd company have the following advantages compared to other brands:
- When the dry mixture is diluted correctly, the finished solution has a liquid consistency. The density of the composition can be controlled by adding clean water. Working with the solution is greatly facilitated due to the fact that it is independently distributed over the surface.
- Low price of dry mixture compared to imported brands. Despite this, the composition has proven itself at a fairly high level and has earned popularity among consumers.
- The composition includes polymer components that increase the service life of the coating and increase its strength. After 7-14 days - the full period of hardening of the mixture - the coating can withstand loads of 12 MPa.
- Processing of Volma mixtures is carried out both manually and automatically. Other self-leveling floors are only suitable for one treatment method.
Varieties of consistencies from the Volma company
The demand for ready-made dry mixtures is growing from year to year, as workers appreciate the convenience of dissolving ready-made components without selecting them in suitable proportions. Different types of work have different consistency requirements. Therefore, manufactured products differ in certain main indicators. There are two main types of consistencies for self-leveling floors:
- With a cement base. This type of consistency has become very widespread, as it corresponds to the traditional recipe for floor screed, which has been used for decades. The advantage of cement screed is that it smoothes even the most complex surfaces and is used as a preliminary layer for the purpose of repairs.
- With a plaster base. It is on this basis that self-leveling floors are made. Consistencies with a gypsum base are used for final finishing of the floor. Its advantage is that during the work there is no need to do difficult preliminary work and lay the coating on the base.
Consistencies from the Volma company are presented in a wide range, among them two brands stand out in particular - “Rovnitel Rough” and “Nivelir Express”.
How to properly fill a self-leveling floor
Preparing the base
If it is poorly prepared, all subsequent work may go down the drain. Therefore, this stage of the technological process should be taken very seriously.
- The concrete or cement base is carefully inspected.
- All detected defects protruding above the surface are removed. Voids and cracks are covered with mortar.
- Concrete absorbs water well, so you can’t do without a primer. All small debris is removed from the surface with a vacuum cleaner. First you need to cover the base with a special impregnating layer, and only then proceed with the primer.
- After it has dried, you should determine the level at which the floor will be poured. Its height, coupled with the footage of the room, will allow you to find out the amount of the required mixture.
Stirring the solution using a drill with a special attachment
Preparation of the solution
In order for the work to proceed, you will need a capacious container with a volume of at least 50 liters. The procedure for preparing the solution is simple.
- A certain volume of water is poured into the container, and the required amount of the mixture is poured from it.
- It is better to stir with a construction mixer or a drill with a special attachment. Fifteen minutes is enough for there to be no lumps left in the solution.
- If the solution begins to thicken during operation, do not add water to it. We need to stir it again.
The solution poured onto the surface must be leveled immediately
Fill
- The solution thickens quite quickly, so the best option is to organize the work together. One prepares the solution, the second pours it into the base and levels it out.
- Filling should begin from the wall opposite the entrance in strips.
- Each strip is immediately leveled with a spatula and rolled with a needle roller to prevent air bubbles from forming.
Drying
It is also important for the quality of the coating.
- The room should not be damp.
- There should be no drafts or sudden temperature changes during the drying process of the coating.
- It is advisable to curtain the windows so that direct sunlight does not fall on the floor until it hardens.
After final hardening, the floor can be used or covered with other decorative materials (linoleum, tiles, etc.).
Additional information on the topic can be learned from the video:
average rating
more than 0 ratings
Share link
Guide to pouring fast-curing floors
There should be no grease or oil stains on the concrete surface of the base. Residues of paint, glue and other contaminants significantly reduce the adhesion to the solution, so they must be removed. First, dry cleaning is carried out using a broom or vacuum cleaner. Then wet the floor until completely clean.
Padding.
The dried surface is covered with a primer mixture using a roller. This increases the roughness of the floor, thereby improving the adhesion of the solution.
Preparation of bulk solution.
Mixing begins 15-20 minutes before work is completed. The packaging usually indicates the characteristics of the dry material and recommendations for preparation. In accordance with them, cold water is poured into a large container and the powder is added. The mixture is intensively stirred using an electric drill with a screw attachment. The finished solution has a homogeneous structure and the consistency of sour cream. Inexperienced people are advised to make batches in small portions, gradually improving their skills.
Pouring the floor.
The first batch of screeds is unloaded into the farthest corner of the room in a narrow strip. Use a spatula to evenly distribute the mixture over the floor. Air bubbles are removed using a needle roller. It is rolled so that the mixture spreads evenly along the plane to the sides. As a result of correct actions, the self-leveling floor turns out to be even, smooth with a glossy sheen.
To maintain the specified layer thickness, beacons are placed in increments of 1-1.5 m. The next strip of mortar is placed parallel to the first. The steps are repeated until the entire area is completely covered with screed.
Volma Level floor installation
The first and most important rule for high-quality leveling of the original flooring using Volma Level self-leveling flooring is a properly prepared base.
It must be clean, sound (no flaking areas) and dry. Unstable areas on the subfloor must be removed. Dust, debris, stains from oils and other caustic liquids are removed. Potholes and removal areas are sealed with a repair compound.
The base is carefully treated with a primer. This improves the adhesion of the original decking and leveler. In addition, the primer prevents the screed from drying out while it is drying. Recommended temperature range for work: +5 to +30 degrees Celsius.
The manufacturer recommends using branded primers. This is Volma-universal, suitable for dense bases such as relatively fresh concrete, and Volma-aqua for intensely absorbent old rough concrete screeds.
If necessary, the surfaces are primed two to three times at intervals of two hours to dry each layer. If the air humidity in the room is high, the drying time will be increased.
Before bottling the finished composition, a horizontal line is marked along the entire perimeter of the room using a level. The beacons necessary to control the level of the composition are installed on the thick composition of the screed and also leveled according to the level.
The screed is prepared in the following way: clean water of the required volume and temperature from +5 to +25 degrees Celsius is poured into the container. The calculation of the dry mixture per liter of water is 0.13-0.15 l/kg.
The bulk component is gradually poured into water and stirred with a construction mixer. After a five-minute break, the solution is stirred again. During this period of time, swelling of the components occurs. That is why pausing is mandatory.
Note that the finished mixture retains its self-leveling properties for two hours after mixing it.
A common mistake when preparing the mixture is too much water. Excess moisture leads to peeling of the applied leveler, loss of strength and the formation of cracks.
Making a screed with the consistency of Volma “Coarse leveler”
The preliminary work for laying the “Rough Leveler” is no different from that for laying a self-leveling floor:
- Get rid of areas that do not adhere well to the base.
- Clean the surface from greasy stains.
- They wash.
- Primed.
- Dry it.
Apart from this, the conditions for performing the work are no different - temperature from 5 to 30°C, no drafts. A universal primer for concrete surfaces is chosen; aqua is used for bases with the highest water absorption rates. If necessary, the primer is applied in two layers with a time interval of two hours between works. The clearance between laying and priming the floor is one hour. These characteristics are in demand only for rooms with normal humidity; for rooms with high humidity, the time increases.
Leveler laying method:
- Beacons are being installed. One horizontal line is measured with a level, small piles of mortar are laid along this strip, into which the beacons are installed. Keep the evenness of the beacon strip under control. The solution used for this procedure is treated with a primer.
- Prepare a solution. Pour water at a temperature from +5 to +20°C into a large container. The proportions for consistency are 0.13-0.15 liters. water per kg of dry consistency.
- A measured amount of powder is slowly poured into the water, stirring the solution in an instant. Filling is done in small portions, each of which is given 5 minutes. For complete dissolution of all components. During these 5 min. The solution does not interfere.
- The fully prepared mixture must be used no later than two hours later. It is unacceptable to dilute the mixture with water in excess of the indicated amount, since in this case cracks and peeling will appear on the finished screed.
- The mixture is placed between the beacons using a trowel.
- Using a trapezoidal rule, the solution is leveled to the level of the beacons.
- Leave the mixture completely spread out on the floor for 7.5-8 hours, and then go over it with a plastic grater to achieve perfect evenness. In this case, the surface of the screed is not sufficiently moistened with water.
When the temperature in the room is about +20°C, the floor becomes usable for use within seven hours after installation is completed. The screed dries completely only after 3-4 weeks. Decorating the floor is allowed 3.5-5 days after the floor has been poured. Volma is a simple and very self-leveling floor leveler; reviews from consumers only confirm its practicality and level of properties.
A few simple tips
It is important not to forget that within half an hour after preparing the composition in air, polymerization processes will begin. Therefore, it is advisable to prepare the mixture in portions in order to apply the self-leveling floor before it hardens.
To get the perfect surface quickly and efficiently, it is recommended to work in a team of three people. One will do the pouring, the second will level the already poured solution, and the third will prepare the composition.
Many people think that self-leveling floors are too expensive, but this is not so. When filling according to technology, the consumption of the composition will be minimal. It's better to calculate everything in advance. Unlike other types of coatings, self-leveling floors have a very long service life - it is more than 50 years. This is a significant advantage. You can effectively reduce consumption with the help of an underlying layer, and if the screed is carefully sanded, there are no cracks or cavities in it, then consumption will be completely minimal. No other modern coatings have or will provide the efficiency inherent in self-leveling floors.
Successful examples and options
The self-leveling composition "Volma-Nivelir" will help to achieve an absolutely flat and durable base on which any decorative coating will last for a very long time without losing its original shape and appearance:
If the solution is prepared correctly and the technological features of the installation are observed, the gypsum-based self-leveling floor will have a perfectly flat surface with a glossy sheen;
- The excellent plasticity of the composition promotes uniform spreading and allows you to level out defects in the subfloor;
- Despite the method of separately pouring technological sections, which is used in large premises, there are completely no joints or seams on the frozen surface;
- The mixture is suitable for both manual and machine pouring, which is very convenient when installing it in spacious rooms and industrial premises;
- The use of needle rollers allows you to achieve the formation of a smooth surface that will serve as an excellent base for linoleum, carpet and tiles.
You can learn how to install a self-leveling floor with your own hands from the video below.
What they say about the advantages and disadvantages of Volma self-leveling floors
Pouring Volma brand self-leveling floors, by and large, does not have any significant features. Therefore, there does not seem to be much point in dwelling on this issue in detail - enough attention has been paid to such technology on our portal.
And here it’s better to pay a few minutes of attention to the reviews of consumers who have already tried Volma self-leveling floors in practice.
The liquid formulations “Nivelir Express” and “Nivelir Comfort” deserved the most comments. It is not surprising - they are the most popular and most widely used in finishing apartments and houses. It must be said right away that opinions are mixed.
Quite a lot of both amateurs and professionals praise these self-leveling floors, noting both the low cost of dry mixtures and the high-quality result obtained in the end. But, at the same time, they also point out those “flaws” that should be kept in mind when choosing and purchasing material, when working with it.
So, what claims are made against these compounds:
Most of the complaints are about the discrepancy between the dry mixture consumption indicated by the manufacturer and the actual costs. It turns out that without creating a reserve, there is a high risk that there simply will not be enough material, and you will have to buy more. Immediately - about additional purchase. Compositions of the same name, but from different batches, may differ slightly in color, consistency, and even quality. When mixed with the specified amount of water, the solution is not fluid enough. That is, the self-leveling property of the filled layer deteriorates sharply
Only experience helps to arrive at the optimal amount of water, and the result at first may not be entirely successful. The composition does not disperse well over the surface, especially at small pouring thicknesses, up to 10 mm. A fairly common opinion is that such a floor does not live up to the name “self-leveling”. Along the edges of the poured area, even with a well-primed surface, the composition begins to thicken very quickly
The result is difficulty in leveling and waves remaining after drying. In addition, marks from the needle roller remain but are not completely healed. Based on the above, it is difficult to fill even a room that is not particularly large in area (more than 10 m²). You definitely can’t do it alone - you need a large amount of one-time mixed solution (at least two bags) or its almost continuous preparation. And filling in sections to make it high quality requires a lot of experience, and for a beginner it can be an impossible task. There are claims that the flooded floor takes a very long time and dries unevenly. This sometimes causes cracks to appear. Not all dry mixes are equal in quality. There are many statements that in bags there are completely foreign fragments - pebbles, and quite large ones. For some reason, there is an opinion that you should be especially wary of the products of the Orenburg plant.
But, we repeat, the negative comments expressed cannot be called predominant. The general background is still formed by positive impressions. And these shortcomings often result from non-compliance with technological requirements during pouring.
And in order to highlight the issue of practical application to a certain extent in this publication, we will post two videos.
The first of them is the manufacturer’s animated instructions for using the Volma Level Express dry building mixture.
Video - Instructions for filling the floor with Volma Level Express
The second story is about the practice of using this composition, with comments from the craftsmen who performed the pouring.
Video: How to fill the floor yourself with the self-leveling composition “Volma Level Express”
Basic mistakes when installing self-leveling floors
- The humidity of the base should not be higher than 4%. Laying a self-leveling floor on a damp surface leads to the appearance of bubbles on the surface and reduced adhesion to the base.
- Mixing containers must be of the required volume, dry and clean. Otherwise, the material will not be mixed well. This will result in swelling, blistering, partial or prolonged uncuring of the material.
- The power of the drill must be at least 800 W. At low temperatures, 1000 W equipment is used. A low-power drill may not mix the material properly or may fail.
- To mix the material, use a conventional screw mixing attachment for a drill. The length of the nozzle is adjusted to the height of the mixing container. Improved or homemade attachments may result in poor mixing or localized unmixing.
- The squeegee must have precision in installing and maintaining the gap between the base and the working edge, and rigidity. Vibration during operation is unacceptable. Otherwise, the layer of material will be applied unevenly.
- For high-quality cleaning of small debris and dust, you need to use an industrial vacuum cleaner.
- It is recommended to wear paint shoes when walking on a flooded floor. They do not leave marks, do not deform the surface and allow you to reach the most remote parts of the room to thoroughly level the surface.
- You must enter the base prepared for pouring in clean, removable shoes. Dirt particles trapped under the layer of material form irregularities. Removing them manually is very difficult.
Working with self-leveling floors on the surface
Leveling the self-leveling floor with a needle roller
Pouring the prepared solution usually begins with more recessed areas, gradually moving to elevated areas. It is better to do the work together, so that one prepares the solution and the other works with it on the surface. The working tool used is a wide spatula and a needle roller on a telescopic handle. The length of the roller spikes should be about 30 mm.
When a portion of the solution is poured onto the base, one of the workers spreads it over the surface with a spatula, forming stripes that consistently complement each other. When the work approaches the edge of a room or a delimited technological zone, the poured solution should be quickly passed over with a continuous roller several times. This achieves two goals:
air bubbles are released from the working mixture;
Due to vibration, the self-leveling floor forms a flat plane.
Before you work on arranging a self-leveling floor, you need to close all the windows and other possible openings that could create drafts. The latter have a very adverse effect on the setting process of any mortar, including self-leveling floors. Drafts, if not eliminated, will most likely cause cracking of the material and a significant deterioration in its strength.
Step-by-step method of filling a floor with a self-leveling mixture
Particular importance when creating a self-leveling floor from leveled mass is given to the work on preparing the rough surface of the floor. This relates, first of all, to reducing the ability of the underlying surface (usually a floor slab) to absorb water and improving its adhesive properties. These goals are achieved through activities aimed at:
- — thorough cleaning of the floor from all kinds of dust and dirt;
- — sealing potholes, depressions and cracks on the floor;
- — performing two-stage floor priming.
This is the preparatory work for a self-leveling floor. After the last layer of primer has completely dried, you can begin the process of pouring the self-leveling mixture. This process consists of the following steps:
- the first portion of the diluted solution is poured onto the floor and the worker returns to make a new batch. His partner observes the spreading mass and, if necessary, corrects the self-leveling process using a regular spatula; - pour the second portion next to it and wait for it to combine with the first batch
It is important here to control the uniform connection of the solution. If any bubbles or voids form, they must be eliminated immediately; - as soon as the portions have merged, you need to take a needle roller and actively roll the flooded area of the floor several times;
In general, there are no particular difficulties. The main thing is to get used to it first and not take breaks in your work. Due to the extreme unusual nature of the work, the first experiment is 90% more likely to be unsuccessful and the floor will not be perfectly flat. But this is not critical, since the first acquaintance with the self-leveling mixture will take place and it will be an invaluable experience. Subsequent work with the mass level will be of much better quality.
How to calculate the consumption of self-leveling mixture
Dry self-leveling mixtures are not stored for a long time, and there is no point in taking them in reserve. At the same time, if the mixture is not enough to fill the entire room, there can be no question of the quality of the coating. To correctly calculate the amount of material, you must accurately assess the condition of the base and determine the thickness of the leveling layer. As a rule, the packaging of the dry mixture indicates its consumption per square meter with a layer thickness of 1 millimeter. For a coarse leveler this is approximately 2-2.5 kg, for a finishing leveler 1.5-1.7 kg.
Technical characteristics of leveling mixtures for floors
It is not difficult to calculate the thickness of the base layer: to do this, you need to find the highest point of the floor, from this height measure the depth of the largest recess and add the minimum thickness of the fill.
Calculating the thickness of the base layer is not difficult: to do this, you need to find the highest point of the floor, from this height measure the depth of the largest recess and add the minimum thickness of the fill
If the difference in unevenness is more than 80 mm, all deep recesses must first be sealed with mortar or putty and wait until the surface dries. Now multiply the minimum mixture consumption by the thickness of the layer, and then by the floor area - this way you will find out how much mixture you will need for the job. Since these calculations are approximate, you should add 10% to the resulting number. Levelers are usually packaged in 25 kg packs, so by dividing the found value by 25 and rounding to the nearest whole number, you can calculate how many bags of the mixture will be needed.
Most often, levelers are packaged in 25 kg packs.
The finishing leveler is more expensive than the coarse leveler, and in order to save money, it is recommended to fill the base with minimal differences. Very often, thin-layer mixtures are used together with coarse levelers: first, a base layer is poured, which evens out all defects, then the surface is leveled with the finishing composition. This is due to the fact that coarse levelers, after hardening, form a rough surface due to the large fillers contained in them. This surface is not suitable for laying thin floor coverings, so the floor is filled with a finishing mixture that forms a very smooth base.
Sample of self-leveling mixture
When pouring in this way, the finishing layer can be of minimal thickness, and then it is enough to just multiply the floor area by the specified mixture consumption. If the self-leveler is poured onto a concrete or wooden base, the thickness of the layer depends on the difference in unevenness on the floor. Since the maximum thickness is 5 mm, unevenness should not exceed 3 mm. Having determined the height differences, further calculations are performed using the same formula as for the base mixture.
Consumption table for self-leveling mixtures
| Name | Consumption kg/m2 at a thickness of 1 mm |
| Ceresit CN 69 | 1,8 |
| Ceresit CN 76, 178 | 2,0 |
| Isoflor 707 | 1,5 |
| Uniflor 710 | 1,6 |
| Duraflor 721 | 1,6 |
| Vetonit 3000 | 1,5 |
Features of preparing a self-leveling mixture for floors
The technology for preparing the filling solution for self-leveling floor screed does not pose any particular difficulties. To implement this you will need:
- - dry mixture for mass leveling;
- - a powerful hammer drill or drill. If possible, it is preferable to get a construction mixer for use;
- - special whisk attachment;
- - a container of suitable volume;
- - water.
Before starting the procedure for diluting a high-quality solution for self-leveling floors, it is necessary to take into account the following nuances:
- — consistency of the mass level working solution. Here the meaning of the principle is simple - the thicker the fill is required, the greater the density of the prepared self-leveling mixture for the floor. To achieve complete homogeneity, the solution will need to be thoroughly mixed;
- — speed of preparation and filling speed. It is necessary to prepare and use the solution for self-leveling floors as quickly as possible. We dilute the portion and pour it in immediately. We immediately begin diluting and filling the next volume. And so on continuously until the entire area of the self-leveling floor is completely covered.
This mode is due to the fluidity of the leveling mass, or rather, a feature associated with it - while there is a lot of moisture in the self-leveling mixture, its individual portions spread very easily, quickly, and most importantly, perfectly evenly and connect with each other, forming a smooth surface without external defects.
If any one batch takes too long, it will lose some of the moisture, which will lead to some of the mixture components settling on the floor. This will change the physical characteristics of the mass level portion and it will be incredibly difficult to unnoticeably combine it with other portions.
It is precisely these two factors that complicate working with a self-leveling screed and determine the presence of at least two people in the “pouring” team. While one is kneading, the other is pouring and helping to distribute the material evenly over the floor surface. It’s difficult to do this kind of work alone, but if you’re theoretically savvy, it’s doable.
General information
Brief description (characteristics)
| Formation thickness | 0-10 cm |
| Optimal layer thickness | 0.0.5-10 cm |
| Material consumption with a thickness of 1 cm | 12 kg/m2 |
| Water consumption per 1 kg of dry mixture | 0,30-0,35 |
| Water consumption per 20 kg bag | 5.85-6.85 liters |
| Viability of the finished solution | 1 hour |
| Temperature of use (air, surface to be treated, materials) | From +6 to +32 degrees |
| Compressive strength after 4 weeks | Not less than 16 MPa |
| Surface adhesion strength | Not less than 1.0 MPa |
| Ability to walk on the floor | After 240 minutes |
| Possibility to load the floor | After 3 days |
| Production of coating with residual moisture | No more than 1.5% |
Comparison of self-leveling floors from different manufacturers
With the advent of the product on the construction market, there was no longer a need to purchase all the components of the mixture separately, deliver and store them independently; and then calculate the total material consumption. Now you just need to buy the finished product and dilute it with water in the proportion indicated on the package. The price pleasantly surprises buyers: it is 10–15% lower than similar products from Knauf or Ceresit, although it is in no way inferior to them in quality.
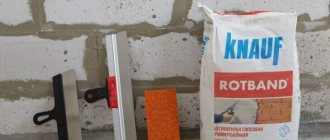
Some “craftsmen” use “Rotband” mixtures () when leveling the floor, although they were designed specifically to bring exclusively walls and ceilings to a certain level. Under any floor covering, such a self-leveling floor will crumble. The answer to the question: whether to level the floor with Volma or Rotband mixture is obvious, only with Volma, since it was specially designed for floors and ceilings (the compressive strength is very high - 15 MPa).
The cost of gypsum mixtures for pouring floors (manufacturer: Knauf; brands: Boden 15, 20 or 30) is in the range of 470÷490 rubles (per 25 kg). Which is better Volma or gypsum Knauf: depends on what material you are more comfortable working with.