For some types of construction work, cement-lime mortar is used. This building material is very plastic, in addition, it is very durable. Cement-lime is chosen very often also because it adheres well to surfaces.
Cement-lime mortar is very plastic and is used for high-strength adhesion of surfaces.
In order to make a high-quality solution, you first need to prepare a dry mixture, which is made from 1 part cement and 5 parts sand (you can take less sand, it all depends on how thick you need it). After such a mixture is obtained, you need to pour lime milk into it to achieve the desired thickness.
The preparation of lime milk is as follows: take one part of dry lime and dilute it in water until it is completely dissolved and a homogeneous liquid is obtained.
It is necessary to pay great attention to quality, since this determines how well the plastering work will be completed.
Such building material must be of the highest quality, because it largely determines how well the plastering work will be performed. In most cases, grade 400 cement is used to prepare cement-lime mortar. It is very important to take into account that before you start making cement-lime mortar, you should carefully check the material, it must be crumbly, there should not be any lumps in it, otherwise the entire construction the process may end badly. To prepare, you need to take a large container, and you will also need a sieve for sifting.
Making your own solution
First you need to slak the lime for the plaster so that it is suitable for work. This requires a metal container, since the reaction is accompanied by a large release of heat and an increase in volume by 3 times. The lime packaging indicates the slaking speed: slow (25 minutes or less), fast (8 to 10 minutes), medium, 15 to 20 minutes. It is better to mix the mixture with a shovel or oar. Slaking is carried out for at least a day, however, ideally use lime that has been standing for a month.
The note! The sand also needs to be prepared before preparing the plaster: remove impurities, clean it by passing it through a sieve.
Instructions for creating a limestone-sand mortar:
Requirements for masonry mixture
The requirements for masonry mortars are described in detail in GOST 28013-98. According to this document, the following requirements apply to mortar mixtures:
- the composition must have a high degree of adhesion to brick and other substrates;
- withstand large amounts of freezing and defrosting;
- to ensure that the masonry does not collapse under the influence of atmospheric influences and temperature changes, the masonry mixtures must have high water resistance;
- due to the plasticity of the mortar, during the laying process, it becomes possible to timely adjust the position of the masonry material, which significantly increases the quality and productivity of the work;
- water-retaining properties prevent decomposition of the mixture and precipitation of heavy fractions;
- the strength characteristics of the composition are decisive in the calculation of building structures. This parameter shows what maximum loads the material can withstand. The brand of the solution reflects its strength in kgf/cm2.
Failure to comply with these requirements leads to the formation of cracks in the brickwork, increased consumption of the mortar mixture, increased thickness of the joints and reduces work productivity.
Helpful information
Masonry methods
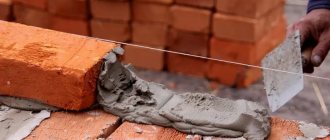
Bricks are laid according to special rules so that the building structure is monolithic and durable.
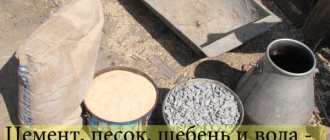
To make the solution, use cold water without any contaminants, its temperature should be 15-20 degrees.
All dosages when preparing masonry mixture must be observed exactly.
- Concrete grade 100, take 1 part cement from 1/2 to 7/10 parts water;
- Cement-sand mortar. Use 8/10 parts water for one part of cement.
- Brand M100 – 300-250 kg per m3;
- M150 - 400-330 kg per m3;
- M200 - 490-410 kg per m3;
- M300 - 600-510 kg per m3.
Solution mobility
The mobility of the solution is an important characteristic. This value depends on what ingredients are mixed into the solution
To check the mobility of the solution, a cone is used, the angle of which is 30 degrees, height 15 cm and weight 300 grams. We immerse the cone in the prepared solution. The number of centimeters the cone has sunk is a figure showing the mobility of the train.
We measure the mobility of the solution
Why is it necessary to measure the mobility of a solution?
For high-quality brickwork, it is necessary to choose high-quality bricks and select high-quality components for the mortar. The quality, strength and reliability of the future structure depends on the quality of all materials.
Nowadays, different masonry mortars are used, but their choice depends on the meteorological conditions under which the brickwork will be laid and for what purposes the building material will be used.
- For solid bricks, take a mortar with a mobility of 9-13 cm,
- for hollow bricks take a mixture with a mobility of 7-8 cm,
- in hot weather, take a solution with a mobility of up to 12-14 cm.
Before starting work with bricks and masonry mortars, carefully study all the nuances, select the correct mortar, and prepare it correctly. It’s best to entrust the work to specialists in this field; they must do everything according to the rules. We wish you good luck in your endeavors!
Component proportions
The standard composition is a proportion of 1 to 4. The first number is lime, the second is sand. In the case of gypsum, the numbers change to 3 to 1, and if you add cement, then the proportions are 2 to 1.
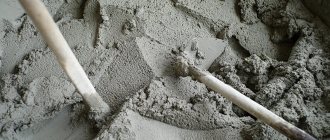
To determine if the mixture is viscous enough, dip a spatula into it. If the liquid mass drains easily from it, it is necessary to add a plasticizer to the composition, because the viscosity is insufficient.
If the spatula has difficulty getting into the mixture, the solution needs to be thinned. Good viscosity is visible in the photo below. You will get excellent adhesion to the wall.
Photo: using a spatula
Benefits of lime mixture
Preparing lime mortar
Before I started working with lime mortar, I decided to learn about all its advantages and pitfalls. Therefore, by the time I prepared it with my own hands, I was completely armed. Let's look at the advantages of this material:
- The elasticity of the material simplifies the work process, and the plaster has fire-resistant properties
- Environmentally friendly, while coated wooden surfaces and walls will be protected from rodents and insects
- No signs of mold or mildew
- If several layers are applied, they are firmly adhered to each other
- Microcracks do not appear
Lime mortar has few disadvantages, the most important of which is the long drying process, which is significantly inferior to cement and sand plaster. In addition, the material may begin to float - in order to get rid of this defect, you should wait until the first layer is completely dry and only then begin applying subsequent ones.
Important! When making lime mortar, you choose the composition based on the required goals. Also, for lime mortar, the proportions must be observed depending on the components of the future plaster.
Applying plaster. Step-by-step instruction
Let's look at the stages of applying plaster.
Preparatory work before applying plaster
Before plastering the wall, it must be dust-free and thoroughly cleaned.
Then, using a level, the beacons are set and fixed with a quickly setting solution, for example, with the addition of gypsum.
Before proceeding directly to plastering, the wall should be moistened with water until saturated, then wait about half an hour. If this is not done, the dry wall will draw water from the plaster mortar, and as a result, the strength of the coating will decrease.
Sometimes, before coating, the surfaces are treated with a primer for better adhesion. The primer must dry completely.
Splash
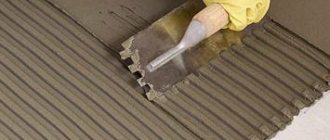
Spraying is a necessary step before plastering. This procedure is very important because it helps the plaster adhere better to the surface. To do this, prepare a solution that is more liquid than the main one, apply it with a trowel, as thin as possible and do not level it. Once the plaster has dried slightly enough to support the base coat (usually after 2-3 hours), begin applying the base coat.
Base layer
For this layer, which can be up to 50 mm thick, a thicker solution is used. It is thrown onto the walls with a trowel or trowel, starting work from the top, and leveled with wide movements from bottom to top.
The excess is cut off as a rule.
Grinding
The finishing coat is necessary for surfaces to be painted and wallpaper.
Apply a layer of liquid plaster, as for spraying, and level it with special graters until a perfectly flat and smooth surface is obtained.
We take out the beacons
Sometimes beacons can be left, for example, if work is carried out in a room with low humidity. In other cases, the beacons are removed and the surface is leveled.
Features of lime mortars
Construction mixtures are more often used in interior decoration, but facades are also leveled and whitened with lime. When calcium hydroxide hardens, it reacts with carbon dioxide in the presence of water to form calcium carbonate.
Conditions for proper hardening of lime plaster:
- the solution should not dry out;
- The water temperature should be from +5°C to +20°C.
Low temperatures mean there is a danger of freezing; high temperatures mean the concentration of carbon dioxide decreases. The lime mixture is less durable than a cement-based composition, but is quite reliable when laying low buildings.
Consumption of mortar for masonry
Today, for brickwork, you can use a variety of types of cement mortars, which differ not only in proportions, but also in components. The proportions strongly depend on what result is needed and what components will be used for this. Let's consider what ingredients are used and in what quantities to prepare a high-quality mixture for masonry:
- For mortar grade 100 you need to take: a bucket of M400 cement, sand - four buckets. The ratio of proportions is one to four. The solution should include 50 to 100 g of elasticity detergent.
- For a mortar of grade 100, take M500 cement - one bucket, sand - 5 buckets, and a cleaning solution. The proportions are one to five.
- For a mortar of grade 200 you need to take: cement M400 - one bucket, sand - two buckets, detergents - 50-100 g. The proportions are taken one to two.
A mixture containing lime is also used for masonry, but it is rarely used, since its strength is low. Most often, lime-cement mortars are mixed, diluted with lime paste. With the help of such a mixture, almost any masonry is possible; its plasticity is great. Often this option is preferable to conventional water-based cement.
How to prepare cement-lime mortar
In general terms, cement-lime plaster is prepared similarly to cement-sand plaster, but lime paste is added along with the mixing water.
Usual solution proportions:
- 1 volume part of cement;
- 4–5 parts sand;
- water until the required consistency is reached.
How to properly slak lime. Lime mortar preparation technology
Lime is used to make plaster. It is supplied in quicklime, powder, paste or granule form. Before preparing the solution, it must be extinguished.
Important!
Quicklime can irritate the skin, and when mixed with water, it produces caustic fumes, so the use of protective gloves and a respirator is necessary when slaking.
You can’t just pour water over fluffed lime: the reaction will go very violently, releasing heat.
Find a heat-resistant, non-plastic container, such as a metal bucket or trough. Pour water at the rate of 5–6 liters per 2 kg of quicklime. Gradually add lime, stirring thoroughly but gently. It is better to do the work together. To completely extinguish, it is necessary to let the solution stand for 1–2 hours, stirring occasionally so that the lime does not settle to the bottom. At the end of the process, you will get a white, opaque, milk-like solution. It is used instead of water to prepare cement-lime plaster.
The procedure for preparing plaster mortar
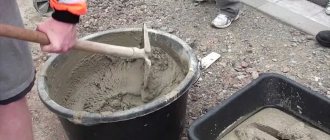
To mix the plaster mortar, use a concrete mixer or a construction mixer. Small portions of the solution can be mixed with a shovel or using a drill.
The mixing order may vary, but usually sand and cement are mixed first, then water or lime solution is gradually added.
It is necessary to mix the solution thoroughly so that it is homogeneous without lumps.
The consistency of the solution is like thick sour cream, although a thinner consistency is sometimes used for the first layer.
Important!
You can work with cement-lime mortar for 3–4 hours; this must be taken into account when mixing plaster.
Safety precautions
When working with cement-lime and cement plaster, wear long sleeves and rubber gloves to protect your hands. Safety glasses are also required, and a respirator when mixing the solution.
Is it possible to add lime to concrete?
Lime is a popular material for wall finishing that has disinfecting properties and is not susceptible to mold and mildew. Most often, this type of finishing is found in public places, where a coating that is resistant to abrasion and mechanical stress is needed.
General information about lime
Lime is a mixture of substances that are a product of calcination of limestone rocks. The most common types of lime found on store shelves are lump quicklime and slaked fluff. Lime destroys all microorganisms that come into contact with it, and therefore is the most hygienic type of finishing. In addition, it has a high level of moisture resistance and strength. When the lime coating dries completely, a film forms on it, which ensures such durability of lime whitewash. Another advantage of lime is its low price compared to other types of finishing materials.
There are also disadvantages to lime. If the craftsman performing the work does not know how to properly dilute the lime and makes the solution in the wrong proportion, then bubbles, streaks and streaks will appear on the treated surface. A solution that is too thin will not give the desired color on the wall, and a solution that is too thick will begin to bubble and fall off when dry. It’s easy to avoid this - dilute lime strictly following the instructions and in the right proportion.
Scope of application of lime
- In construction, lime is used as a plasticizer for cement mortars. It prevents cracking of the solution and binds it well. It is an indispensable ingredient in plaster mixtures. Helps the coating adhere to stone and wood surfaces. For this purpose, only slaked lime is used.
- In gardening it is used to treat trees and reduce acidity in the soil. To whitewash trees, lime is mixed with copper sulfate.
- In industry, animal skins are treated with lime, and water is softened and disinfected with it.
- In everyday life, lime is used for whitewashing various surfaces - walls, ceilings, stoves, etc.
- In medicine, bleach is used to disinfect premises, equipment and water.
Proportions of lime dilution and its consumption
The proportions of lime dilution depend on the type of material used. Quicklime and slaked fluff lime are displayed on store shelves. Read below on how to dilute the second type of lime. As for slaking lime and using chlorine solution, this information is located in a separate section of the same name.
Slaked lime is sold in two versions - powder or liquid dough. Both configurations are diluted in a ratio of 3:1, that is, 3 liters of water per 1 kg of powder or dough. The result is about 8 kg of whitewash, which is enough to treat 12 m2 of surface. Consumption will increase if you whitewash brickwork.
Another way to calculate how to dilute slaked lime correctly is to proceed from the total square footage of the surface being treated. To do this, take 500 g of lime and 750 ml of water for every 2.5 m2.
Consumption depends not only on the type of surface to be coated, but also on the materials used for whitewashing - brushes, sprayers or others. Optimal materials for whitewashing will also be discussed in a separate section. As for the cost of work, lime is not an expensive material at all, which will make finishing activities inexpensive.
How to dilute slaked lime
On the one hand, the process of diluting lime looks quite simple, but, nevertheless, it has some important nuances:
- Lime is mixed in small portions; there is no need to immediately combine a large amount of powder or dough with water. The maximum permissible value of water poured at one time is 1 liter per 2 kg of lime.
- When water and lime mix, a chemical reaction begins, the product of which is heat. Therefore, it is best to pour the powder with cold water.
- The mixture is thoroughly stirred and another liter of water is added and stirred again. This continues until the entire required amount of moisture has been added.
- The diluted and thoroughly stirred mixture is left to settle for 24 hours.
- At this time, pour 2 kg of salt into 1 liter of water in another container and stir until the salt is completely dissolved. It is best to prepare this solution after the lime has settled for a period of time, otherwise the salt will settle within a day and will have to be stirred again.
- When the lime mortar is ready, salt water is poured into it and stirred. The mixture is diluted with a small amount of water to bring it to the desired thickness.
- The salt water and lime are mixed again and left for another 24 hours.
- Salt is added to lime so that it wears off less and remains on hands and clothes when touched after drying. Whitewashing can also be done without a saline solution; for this, the lime only needs to be diluted with water and allowed to sit for 24 hours.
How to slak lime
Quicklime is used as a binder for plasters and various cement mortars. It gives the material plasticity and makes its bond to the base stronger. But quicklime is not suitable for whitewashing surfaces. It is optimal for this purpose to purchase ready-made powder or fluff dough. If you bought quicklime for whitewashing, then it is not difficult to extinguish it.
Extinguishing lime with your own hands in a residential area is simple and not dangerous. In industrial enterprises, a special pit is often used for this process, into which powder and water are poured in the required proportion. The amount of water added depends on whether the resulting material should be thick or milky.
The lime slaking period is 24 hours, but it is optimal to keep it for 36 hours. To extinguish you will need the lime itself, water and any long object for stirring. It is necessary to work in goggles, a respirator and a canvas suit. Do not allow drops of the solution to get on the skin, as it will damage them.
The extinguishing container is taken clean and without traces of corrosion. The size and depth depend on the amount of material. Lime powder is poured into a container and filled with water in a ratio of 1:1 - per 1 liter of water - 1 kg of lime. Quicklime releases a large amount of heat when interacting with water, the temperature reaches 150 C, so all work should be carried out carefully.
You should also know that when slaking lime boils and splashes, it must be stirred constantly. Active processes in the mixture take place for 5-30 minutes, and all this time the lime is mixed with a long object. That is why such careful means of protection as described above are necessary.
When the processes in the lime have stopped and it has “calmed down,” it is considered extinguished, but it is still very early to begin working with the material. Cover the container with a lid, place it in a dark, cool place and leave for 2-3 weeks; in some cases, the lime is kept for up to 4 weeks. Lime maintained for the required period will adhere perfectly to any surface.
Before use, slaked lime is diluted with water. Here the proportion is chosen arbitrarily. The signal that the lime is ready is a dense white mark on the stick that is used to stir the solution during dilution. On average, 1 kg of slaked mixture produces 10 liters of ready-to-use whitewash.
How to dilute bleach
Bleach is a well-known disinfectant called bleach. It is widely used in domestic conditions, in industry, medical institutions and in public places that require high-quality bacteriological treatment. Bleach is diluted in different ways, it all depends on the purpose of its use.
To disinfect premises during cleaning, add 30 g of bleach per 1 liter of water. This solution cleanses dirt, fungi and mold, and the surface washed with this solution will become sterile clean.
Bleach is also effectively used to remove the smell of urine from cats and dogs. But it is necessary to take into account that bleach negatively affects the health of animals; its smell irritates the sensitive receptors in the respiratory organs of four-legged pets and disrupts the sense of smell. Therefore, it is not recommended to use bleach in areas where animals live permanently. But if a pet “inherited” it in the wrong place, then safely use bleach. To do this, it is diluted with water in a ratio of 1:10 and the source of the odor is wiped with this solution. It is necessary to work with gloves to protect the skin of your hands from chemical burns. Before work, check the reaction of the coating to a chlorine solution in an inconspicuous place.
Bleach is used to bleach laundry. Bleach effectively removes yellowed items and difficult stains, but can only be used on white items. In this case, there is no need to dilute the powders, since special liquid products are sold for whitening. They are used in the proportion indicated on the package. The laundry is pre-soaked and then washed in the usual way - by hand or in a machine.
Caution: when working with bleach, all safety precautions must be observed. This substance burns the mucous membranes and skin, resulting in ulcers and swelling. If bleach gets on the skin or mucous membranes, you must thoroughly rinse the affected area with water and consult a doctor if significant wounds appear on it.
What additives are added to lime?
Before applying it to the walls, diluted lime is refined by adding various substances to it. Such additives include liquid glass, salt, soap, glue, flour, milk, egg whites and paint colors. Colors for paints go well with lime and allow you to give it any shade.
Adding linseed oil to whitewash makes it more suitable for treating very smooth surfaces that are difficult to coat with paint. Glue and salt make the whitewash viscous; after drying, it leaves no traces when touched. If you add glue or salt and color to lime, it will make an excellent material for interior work in a residential building. In terms of cost, using lime is more profitable than painting walls with water-based paint or other types of materials, and in terms of quality and disinfecting properties, it even surpasses many of them.
Preparing the surface for whitewashing
If diluted lime is available, then half the work is already done; now all that remains is to prepare the surface and select tools for whitewashing. The rules for preparing the surface and applying whitewash are simple:
- There should be no greasy or rusty stains on it. All traces must be removed before applying whitewash.
- No defects. Small irregularities in the wall are eliminated using putty.
- After applying whitewash to the surface, eliminate all drafts and protect the room from direct sunlight.
- Do not apply a chalk layer to the surface whitened with lime, otherwise stains and stains will appear.
One of the most important points in whitewashing is choosing the right tool for the process. There are several options. The most popular tool for whitewashing, which has proven itself over the years, is a special brush. A tool that should never be used is a roller. The first layer of whitewash, applied with a roller, goes on well, but when applying the second layer, problems begin, as the whitewash drags behind the roller and lags behind the wall.
For brick walls, it is best to use a brush with natural bristles. To hide the streaks that the brush leaves, apply a second layer in the direction of the light flow. Spray guns are successfully used for whitewashing. With their help, lime is laid evenly on the surface, while the consumption is much lower than when working with a brush. Hand spray guns have a long hose, which is convenient for working on high walls and ceilings. Electrical devices are less convenient in this regard, since their power button is located next to the sprayer. A regular plant spray is also used for whitewashing walls.
Lime mortar composition
There are three main components in this mixture: lime, sand and water. Slaked lime is used, most often in the form of a dough; fluff powder is used less frequently due to its high cost. Lime paste is obtained by diluting boiling water with water, and the amount of the latter should be 10 times more than needed for quenching. The result is lime milk, in which the slaking process takes place. When preparing the dough, it is important to mix it thoroughly and remove any lumps. If there is debris in the mixture, it must be removed.
It is best to prepare the dough in warm weather and in a container with strong walls. When extinguishing, the temperature can reach 90 degrees, so you should not knead it by hand. You can use a mixer or a shovel.
The final dough will be ready in 15–30 days . The period depends on both the quality of the dry material and the air temperature.
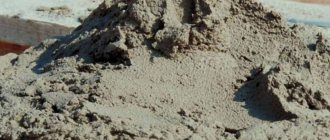
Sand suitable for plastering must have a fine fraction and not contain stones. To do this, you need to sift it through a sieve. This is especially important for the covering layer of plaster - foreign inclusions will interfere with the grouting or, as plasterers say, “draw.”
Mixture composition
The basic composition of 1 cubic meter of solution can be given in the form of a table:
| components, l | 1:2 | 1:2,5 | 1:3 |
| sand | 910 | 990 | 106 |
| lime dough | 430 | 380 | 330 |
| water | 182 | 197 | 212 |
You should not rely strictly on these numbers. After kneading, you should definitely check its quality. This is easy to do : take a little solution on a trowel and see how it interacts with it. If it slides off, it means the lime was too thin and more should be added. If it sticks too much, you can add sand.
This solution sits for several days, and if necessary, it can be diluted with water. Lime plaster is applied in three stages - spray, primer and covering. For the first and last layers, a more liquid composition is made, for the soil - a thick one. The maximum proportions of dough and sand are 1:5 and 1:6.
Lime mortars with the addition of other binders
One of the disadvantages of lime mortars is the low hardening speed and low strength . To compensate for these weaknesses, a mixture of lime with other binders is used. First of all, it is gypsum and cement. Accordingly, with the first additive it will be lime-gypsum, and with the second - lime-cement mortar. Gypsum allows the composition to set faster, so it is introduced into the solution at the work site and applied to the wall within 10 minutes.
Cement gives the plaster layer greater strength, and it can be mixed either centrally or on site. The proportions of cement-lime mortar depend on the brand of cement and the brand of the resulting plaster. The table shows the ratio of cement: lime: sand for some brands of mortar:
| brand of cement | solution 100 | solution 75 | solution 50 | solution 25 |
| 200 | 1:0,1:2,5 | 1:0,5:6 | ||
| 300 | 1:0,2:3 | 1:0,4:4,5 | 1:1,2:9 | |
| 400 | 1:0,2:5 | 1:0,3:4 | 1:0,7:6 | 1:1,7:12 |
| 500 | 1:0,3:4 | 1:0,5:5 | 1:1:8 |
For interior finishing, branded mortar may seem overkill, and to speed up setting, the amount of cement can be reduced using ratios between cement and lime of 1:1, 1:2 and even 1:3
Lime gives the solution plasticity, and cement gives it rigidity. To make applying the plaster more convenient, you can add a plasticizer to it. In everyday life, liquid soap is often used for this, but it reduces the strength of the plaster. To avoid this, you can purchase an air-entraining plasticizer in a retail chain. Such liquids can even reduce the consumption of binder, and most importantly, they help maintain shape and not sag, which is typical for cement mixtures.
Preparation of simple plaster compositions
Cement mortar is the simplest and most common.
Simple plasters include those mortars based on a single binder. These include the following plaster solutions:
- Cement.
- Lime.
- Clay.
- Plaster.
Cement
This composition is the most common type of finishing: its consistency is very similar to brick laying mortar. However, the density in this case is different, and the use of various additives and plasticizers is widely practiced.
Although this may sound unexpected, what most closely requires personal control is the quality of the sand used. That is why, before use, it is carefully sifted through a special sieve to remove all impurities and debris.
After cleaning the sand, the mixing procedure begins: the main components must first be mixed dry. The proportions of cement mortar for plastering walls outside the room are taken in a ratio of 1:5 sand to M500 cement. As for the interior finishing, in this case cement is mixed with sand 1:4, where M400 cement is used for preparation. After the dry ingredients have acquired the required homogeneity, water is added to the composition and stirred until it becomes mushy. To carry out such a procedure, both a trough and a construction mixer can be used.
Lime
In lime mortar, lime acts as a binder.
This composition differs from the previous one in the absence of cement: in this case, lime is used as a binder: it must only be slaked and have excellent qualities. The first step is to thoroughly grind it so that the particles are as small as possible. Then water and sand are added to the vessel with lime powder, constantly mixing the entire material
It is very important that the resulting lime mortar for plaster does not contain lumps, with the density of the mixture resembling dough. Then another portion of purified sand is added to the resulting mass in a ratio of 3:1
After this, the final stirring of the plaster is carried out by adding water: the finished consistency of the solution should resemble thick sour cream.
Clay
This easy-to-prepare plaster mortar is the oldest known. With the development of construction technologies, its composition has undergone some changes, because clay in its pure form is quickly washed off by rain. To strengthen the finish, it is practiced to add cement, lime and gypsum, which helps to increase its durability and reliability: while maintaining the availability of preparation. In the process of preparing clay plaster, the main component must be thoroughly cleaned of all kinds of debris and impurities. Then clean and dry clay is soaked in water for 3-5 hours until it is completely soaked: the preparation of the solution is completed by adding sand to its composition, at the rate of 2-4 parts of sand to one part of the clay mixture. Typically, clay plaster is used to decorate interior spaces.
Gypsum plaster
Most often, final operations on leveling walls are carried out using gypsum plasters, with the possibility of application not only on concrete and brick, but also on wooden bases. The first recipe for preparing such a solution involves using 3 kg of chalk and 1 kg of gypsum, while the chalk is crushed to dust, and then mixed with gypsum. In this case, water is not used, since 5% wood glue is used as a solvent. The proportions of glue in this case vary, depending on the required thickness of the final solution. This type of solvent not only makes the mass of plaster homogeneous, but also allows you to somewhat slow down the hardening process. However, the drying speed of gypsum plaster is still quite high.
Working with gypsum plaster requires skill, as the mixture dries quickly
The second method of preparing a finishing mortar from gypsum is especially suitable in cases where it is necessary to plaster painted bases or chipboard partitions. In this case, you will need to take 2 kg of gypsum, 1 kg of drying oil and 100 g of drier: after thorough mixing, the composition must be immediately prepared. The reason for this is the lightning-fast drying of the drier: when working in this case, you will need appropriate construction skills.
Cement mortar
DIY lime mortar
Masonry cement mortar is especially popular for DIY preparation. If you need to figure out the proportions, then you should pay attention to the markings - this is the ratio of sand and cement. Let's look at everything more clearly using a small table as an example:
| Strength grade | Proportions of ingredients in the composition | Compressive strength MPa | ||
| Cement | Lime | Sand | ||
| M-50 | 1 | 0,5 | 4,5-4 | 5 |
| M-75 | 1 | 0,32 | 4 | 8 |
| M-100 | 1 | 0-0,25 | 3-3,5 | 10 |
| M-150 | 1 | 1,5-2 | 12,8 | |
| M-200 | 1 | 1-1,1 | 15 |
Let's take a little closer look at each brand:
- M-50 - consists of lime and cement, used for low-rise buildings, as it does not have high strength properties. Ready-made masonry mortar is most often used for grouting uneven surfaces
- M-75 – suitable for internal masonry work, as well as for plastering leveling processes
- Mixture grade 100 is one of the most popular mixtures, as it can be used both in external work and for internal processes. If a plasticizer is added to the composition, the material can be used for plastering external walls.
- M-150 is a popular mixture that is used for complex construction, that is, for multi-story buildings. Grade 150 is used in floor screeding processes and also for foundations. M-150 is resistant to low temperatures
- M-200 - masonry with such a solution can withstand high temperatures. The material is heat resistant and does not get wet
Calculation of material requirements
There are various methods for determining the required amount of building materials. You can, for example, use standard indicators for the amount of mortar for brick walls of various thicknesses:
- with a wall thickness of one brick, 65 liters of composition will be required to build 1 sq.m of wall;
- one and a half wall thickness requires increased consumption of the binder mixture to 100 liters.
Mortar consumption per cube of masonry
The quantity increases proportionally for walls built with two or two and a half bricks.
Using the calculation method, you can independently determine the amount of cement and sand:
- Determine the volume of the masonry, multiply the perimeter of the building by the height and thickness of the walls.
- Subtract the volume of window and door openings from the resulting number.
- Calculate the number of cubes of composition by multiplying the volume of the walls by a factor of 0.2–0.3.
- Calculate the volume of cement by dividing the cubic capacity by the proportion of cement according to the proportion.
- Determine the weight of cement in kg by multiplying its cubic capacity by a density equal to 1300 kg/m3.
- Obtain the number of bags of cement by dividing the resulting weight by 50 kg.
Having calculated the need for cement, it is easy to determine the required amount of sand, knowing their ratio.
Features of complex lime mortar
As mentioned earlier, a complex lime mortar includes several fillers at once. Thus, a distinction is made between lime-sand mortar, lime-cement and lime-gypsum. The advantages of such solutions are that they have increased ductility, strength and greater adhesion. This makes it possible to carry out various construction work both inside and outside the building, in regions with different climates and humidity.
It is worth noting that lime mortars can be thin, normal or oily. Their difference lies in the fat content and the amount of individual components of the mixture. It is important to know that a thin solution, due to the low fat content of the binder, tends to crack after drying, and a fat solution is difficult to apply.
Application of lime-sand mortars
This type of solution involves mixing lime, water and sand into the mixture. The sand must be sifted and washed in advance; in addition, proportions must be taken into account. The optimal ratio of lime and sand is approximately 1:2 or 1:3. A solution with added sand is quite cheap, but very often, for better results, cement is added as an additional binder. Then it would be best to take from 3 to 6 parts of sand to one part of cement. Lime-sand and lime-sand-cement mortar are used for bricklaying and plastering work.
The spheres and areas of application of lime mortars are essentially limited only to the construction sector. But, as we all know, construction is a very complex industry with many different technological processes, and it is in them that it is necessary to use lime mortars. With their help it will be possible to build a reliable and durable house.
Fillers and binders
A plaster mixture of lime and sand is the most versatile material for interior decoration. In order for the mixture to become better, cement, clay or gypsum are added to its composition as binders.
- the cement-lime type is used in repair work both inside and outside buildings;
Photo: mixing lime in a bucket using a drill attachment - mixture with clay - to strengthen stoves or walls of wooden houses;
- if you add gypsum to the composition, you get a lime-gypsum mortar - an excellent material for plaster;
- sand is the most common and integral component.