As a rule, a qualified craftsman is invited to tiling a bathroom or kitchen work wall. Many factors speak in favor of this decision: the materials are now expensive, and the process of leveling surfaces is a labor-intensive task, requiring a keen eye and a steady hand. Special equipment used for cutting tiles costs a lot, and purchasing it just for once is not particularly cost-effective. In addition, not everyone knows how to properly prepare cement-sand mortar. Our article will help fill this gap.
Ready mixes
Today, ready-made mixtures of various brands are freely sold in construction markets and in specialized stores, each of which best suits its purpose. On thick paper bags, in addition to the manufacturer’s logo, it is indicated why this material is needed. There are mixtures for outdoor use, rooms with high humidity, and many other varieties of gray powdery mass, to which, as advertising for instant lemonades says, you just need to add water. These materials are certainly good; they have only one drawback, which, however, outweighs all their advantages. A ready-made cement-sand mortar will cost twice (and sometimes more) more than a homemade one. If the owner of the house has the funds to buy a branded mixture, then, as a rule, he will find money for a master. But those who decide to do everything with their own hands will prefer to save money.
Most common mistakes
Quite often, when you plan to quickly lay tiles, a number of mistakes are made when preparing the mortar:
- Often you come across low quality sand, not sifted and not dried, and in a hurry this is what is used.
- It is also an unacceptable mistake to use old cement, which often loses its properties.
- Only clean water should be used; in no case should sea water or dirty, settled water be used.
- The mixture must be thoroughly mixed so that no lumps remain, which entails a loss of quality.
- It is also a mistake to lay tiles with increased requirements (for example, porcelain stoneware) using a standard adhesive mixture or cement mortar.
This was a series of mistakes when using cement mortar, now let’s look at the use of ready-made compositions:
- The use of cold or hot water is strictly prohibited.
- You cannot add the mixture first and then add water, otherwise lumps will form.
- Do not soak the tiles or wet the base.
- Containers for preparation must be clean, after each batch they must be cleaned and washed.
- The mixture must be stirred at a low speed of rotation of the mixer. At high speed the mixture will foam, at low speed there will be lumps.
And finally, a little advice, if you plan to lay tiles on tiles, our article on this topic will help you decide which adhesive to use.
Main and additional ingredients
The composition of cement-sand mortar, as the name implies, contains cement and sand. In addition to these main ingredients, it may also contain additives that change the properties according to the requirements for the building material. If you do not take into account some high-tech active substances, which, according to advertising, are saturated with ready-made mixtures from leading manufacturers, then you can choose from the products available to the average buyer quite effective and inexpensive additives that will increase the adhesive ability, give some elasticity and durability to the layer, and , therefore, will provide the necessary resistance, strength and durability to the entire composition. But more on that later, but for now we should dwell on the quality indicators of the main components.
Cooking process
The best solution is prepared in a concrete mixer, which will combine the components efficiently and at the same time remove air bubbles from the mixture. If you don’t have a concrete mixer, you will have to mix the solution by hand, using a drill attachment or a regular shovel.
The mixing procedure is as follows:
- The entire volume of cement is diluted with a small amount of water and mixed.
- Continuing the kneading, gradually add pre-sifted sand, while adding water.
- If dye is to be added, it is diluted in water and gradually poured into a container.
The procedure for placing components into a concrete mixer:
- half dose of water;
- cement;
- sand;
- the rest of the water.
Kneading time is 2-3 minutes for an inclined apparatus, 1 minute for a horizontal one. Stirring for too long is not advisable: the solution will lose its plasticity due to moisture evaporation.
Cement quality
In addition to the brand, cement is characterized by age. The fresher the main binder, the better the result. You should not stock up on this type of building material for future use: it is hygroscopic, and therefore, having absorbed moisture, it becomes a monolith, no matter how hard it is to break, it is also useless. You can also buy stale goods on the market if the seller is not honest enough, but if you just scoop up a handful of the product, then determining how old it is will not be difficult. The new product is “fluffy”, it spreads between your fingers so much that you won’t notice how your palm is empty. A stale one, on the contrary, will immediately begin to clump, so it is very easy to distinguish good from bad, even for an inexperienced buyer. The calculation below for the grade of cement-sand mortar is made from the initial assumption that the cement is new, and if you still find it is not very fresh, then, of course, you can use it, but you will have to experiment a little. And be prepared for the fact that its consumption will increase.
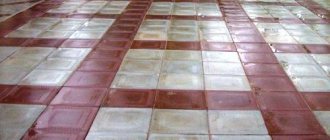
Arrangement of tiles on the wall
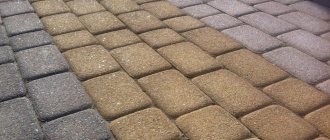
There are 3 ways to arrange tiles: staggered, seam-to-seam and diagonally. Arrangement of tiles seam to seam (a). This method is the most popular. There are 2 options: - asymmetrical masonry (the first tile is laid in the corner of the bottom row, and from it the tiles are laid to the right or left); - symmetrical masonry (the first tile is placed exactly in the middle of the first row, and then the remaining tiles are placed to the right and left); Arrangement of tiles staggered (b). This type of masonry is similar to brick. Laying tiles this way is not at all difficult, you just have to trim the tiles adjacent to the wall. Arrangement of tiles diagonally (c). This arrangement of tiles causes the greatest difficulties, especially for beginners, since in this case it will be necessary to cut all the tiles adjacent to both corners of the wall, and those from which the top and bottom rows will be laid out. In addition, in this case it is more difficult to lay out the tiles evenly.
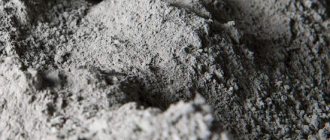
Sand
It is best if it is river and already sifted. Otherwise, you need to take a fine-mesh sieve, a shovel, and go ahead. Clay inclusions are undesirable; they reduce the overall density of the cement-sand mortar, which will affect the result. The main thing to remember is that there should be no shells and pebbles, they will worsen the fit of the tiles, and they will have to be picked out at the most inopportune moment. Good preparation is half the battle, as the British say, and this statement is quite applicable to the process of preparing the second most important ingredient, sand.
Water
There are no special requirements here, it can be taken from the tap, but in the case of lake or river water, you need to make sure that there are no algae or other microorganisms in it. Adding moisture to the finished mixture is preferable to working in reverse because it is easier to achieve the desired consistency. The cement-sand mortar should be the same as a good housewife's dough: not liquid (otherwise it will all slide off), but plastic enough to stick well to the wall while waiting for the tiles. Too dry is also bad - it won't stick as well as it should.
What is included in the solution?
First, let's see what materials we need to make the mixture.
Cement for the right mortar
By default, any concrete is made with a cement base. In such a mixture, cement is the binding component. Depending on the geographical location, the industry produces a variety of varieties. There are Portland cement, Portland slag cement, aluminous and sulfate-slag cements, sandy and pozzolanic Portland cements.
Types and characteristics of cement.
You need to choose cement grades in the range from 300 to 700. The grade is determined by the degree of compressive strength. The best option for the production of paving slabs is M500 cement. At home, you can also use the M400, it is cheaper. But it needs to be added to the mixture in larger proportions, which makes the savings questionable. And the risk of receiving a low-quality product increases.
Cement also offered on the market differs in the presence of mineral additives and their absence. The marking will help you figure it out: PC I-500 – Portland cement without foreign inclusions, high quality and capable of withstanding loads of up to 500 kg/cm2; PC II/A-Sh 500 is cement with mineral additives and is not suitable.
An important role in the choice of cement is played by its batch and manufacturer. To produce a specific batch of paving slabs, it is advisable to purchase from one manufacturer and one batch. Due to differences in the production process, the color may vary and it will be difficult to select a dye for a batch of the same shade.
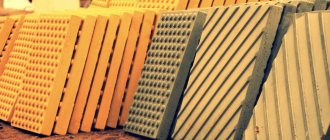
Crushed stone, sand and plasticizers
The second component of the mixture is crushed stone. You need to select crushed stone with a fraction of 5-10 mm. If you are going to produce paving slabs on an industrial scale, it is advisable to find durable ones with high frost resistance. Ideally, this is crushed granite. For home production, you can relax the requirements: screening out crushed stone, crumbs, coarse sand with pebbles from 2 to 5 mm. You can refuse to use crushed stone.
An essential component that you can’t do without is sand. It is best to choose pure river water without impurities. You can also sift the regular one. The main thing is that the presence of clay is less than 5%.
Next, you will need plasticizers or superplasticizers and a dispersant, which improve the quality of the product, greatly simplify molding and improve the appearance of the tiles.
If you intend to make colored paving slabs, then you cannot do without dyes. Iron oxide pigment dyes are used in the production of tiles. They should not fade in the sun or be destroyed under the influence of adverse weather conditions. Dyes do not dissolve in water, so they are mixed with cement during the preparation of mortar for paving slabs. Particular attention should be paid to ensure that the dyes are evenly distributed throughout the entire volume of the mixture. The correct technology for using dyes increases the attractiveness and durability of the product.
To prevent the formation of cracks in the finished product, it is recommended to use another component of concrete for paving slabs. Typically, steel reinforcement is used for this purpose. In our case, there is a chic, more economical alternative - polypropylene fiber. It consists of fibers with a length of 5-20 mm and a diameter of 5-50 microns and serves to increase wear resistance and impact resistance.
And one more necessary element to create the mixture is water. There is only one requirement for water: it must be clean.
Available Supplements
Now it’s time for the “secret additives”:
- The first place among them deservedly goes to the good old polyvinyl acetate glue, also known as PVA. It has the wonderful quality of resisting moisture when frozen. In addition, the adhesive properties are significantly enhanced. You don’t need a lot of it, but you need to keep a couple of kilogram jars on hand, so that each bucket of cement contains 200 grams.
- Detergents give the solution elasticity, which increases durability.
- If the tiles need to be laid outdoors, then you should add a plasticizer with an anti-frost compound (it is sold), and it should be used according to the instructions printed on the package.
Share of cement and grade of cement-sand mortar
So, the main binding substance is cement. It can be different. In addition to the usual portlad, there are also brands used to create super-strong layers and even plug oil wells. They rarely come on sale, but if somehow the future tile laying master does come across some special cement, then you should remember the general rule: the larger the number indicating the brand, the more sand needs to be added to the solution. This must be taken into account because the high hardness of the final layer between the wall and the back of the tile does not at all mean better adhesion. With vibrations that building structures experience, microcracks appear over time, and, as a result, the hardened mortar is destroyed. This will not happen if the tiles “sit” on a softer base. Cement-sand mortar M100 (and it is quite sufficient for high-quality cladding) is prepared by mixing three parts of sand and one part of cement grade 400. In this case, its volume should be a quarter of the total mass. However, novice repairmen do not always have enough experience; they want the tiles to stick faster. This is possible, but it is important not to overdo it. It is easy to calculate that a more viscous and quickly hardening cement-sand mortar M150 will be obtained if there are two and a half buckets of sand per bucket of cement. There is no need to knead any more.
Some nuances
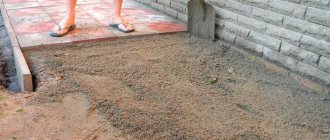
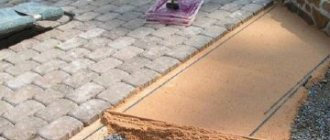
Considering the floor cladding, it should be noted that the layer is thicker, in contrast to the walls, which exceeds 3 mm. And therefore, what kind of solution is needed for the tiles will be determined by several factors.
- First of all, the evenness of the base. Because in the presence of unevenness, it is advisable to use cement mortar, which will not only serve as glue, but also help smooth out the unevenness. In this case, the thickness of the solution layer can reach 3 cm. In turn, the use of ready-made adhesive mixtures requires a perfectly flat surface.
- The type of tile also becomes an important factor. Considering, for example, porcelain stoneware, this material has low adhesion, therefore the mixture for laying tiles of this type must contain special plasticizers that improve this indicator.
- The human factor, or more precisely, the economic factor, also has an impact. Since a self-prepared mixture is cheaper than a ready-made one, if everything indicates the possibility of using a standard cement mortar, then it is better to use it.
Speaking, by the way, about the issue of saving, there are also several factors here:
- When finishing a cement base, slightly more mortar will be spent than when laying it on concrete.
- There is also another factor regarding tiles. In particular, a glazed one will require less solution than an unglazed one.
Get to work!
No matter how good the cement-sand mortar is, if it is used incorrectly, the matter can end in a complete fiasco. How to lay tiles correctly is a topic for a separate discussion, but the main reasons for failure can be briefly listed right now. These include:
- poorly prepared surfaces (namely, remnants of old paint, loose plaster, serious unevenness, etc.);
- dry tiles (it must be pre-soaked for half an hour or more until it stops hissing in the open air);
- desire to lay the tiles end-to-end, without gaps. It is almost impossible to do this absolutely evenly, and if you do succeed, then due to natural vibrations the tiles will press on each other until the entire layer falls away. To create the required gap, special plastic “crosses” are sold, but you can get by with matches - they are just the right thickness.
There are other mistakes made by novice masters, but they are not so critical. However, only slackers always act correctly. With them, their word never diverges from their deeds! And to everyone else - good luck and determination!
Laying ceramic tiles on cement mortar.
Everything that will be said below does not call for a return to the technologies of 30 years ago.
This knowledge is necessary to understand the basis of durability in cladding processes. To begin with, two examples of how tiles adhere to cement mortar with the right technology.
The first case is the tiles on the walls of a bathhouse built 50 years ago. According to all scenarios, the lining should have crumbled immediately after the closure of the bathhouse complex. Wet walls, wet tiles in an unheated room, plus frost, etc...
The second case is the reconstruction of a swimming pool built 25 years ago. Conditions for tiled cladding are also not so hot:
And then, to continue the theme, a cut of photographs where structures (sculptures) stood, uncovered, for several centuries. On the eaves of the temple, without tides, snow accumulated every winter and melted in the spring. And despite such conditions, there are no signs of destruction.
This means that there was an effective technology, without modern mixtures and primers, that made it possible to achieve such results. So it's not a matter of mixtures?
In addition to ceramic tiles, marble cladding was previously made using cement mortar. Many facades with such finishing have survived to this day (this is 30-40 years old). The technology is simple. Marble slabs were installed at a distance of 1-2 cm from the wall. They secured it with a temporary support and poured liquid cement mortar into the gap. In proportion 1:2.
This technology is still used when cladding walls with natural stone on the outside of a building.
Important points to note:
- Natural stone (including marble) is a porous material.
- The solution has a high grade. No less than modern adhesive mixtures.
- The solution is liquid. The surface of the wall and stone is not wetted by water and the solution penetrates as much as possible into the pores of the wall and stone, without creating a dry film at the interface of the materials.
Technology of laying ceramic tiles on cement mortar.
The technology of cladding with cement mortar is based on the above properties.
In the case of floor tiles, a freshly laid thick screed is poured with liquid cement laitance to create a contact layer. With this technology, the tiles do not need to be wetted. Floor ceramics have a dense structure with low water absorption. The moisture in the liquid solution is sufficient to create reliable contact.
And when covering walls, the tiles are soaked in water for 5-8 seconds. This is necessary for two reasons:
- The solution is prepared convenient for installation, that is, thicker. Under such conditions, there is not enough moisture and a layer of dry mixture appears at the tile-mortar interface.
- Wall tiles have high water absorption, more than 3%. This surface strongly absorbs moisture. Laitance on such a surface might help. But practically this is difficult to implement. That's why they compromise with partial soaking. Longer soaking also gives a negative result. The pores in the ceramic, saturated with water, stop drawing in the solution.
The correct solution (in terms of thickness) is clear in the following video. There, you can also see a system of three fishing lines - two vertical and one horizontal. The fishing lines allow you to make cladding in one vertical plane.
The only point is that the tiles are dry (as far as can be understood from watching the video). With this approach, it will fall away, over time, with a clean backside.
Is it always possible to lay tiles on cement?
Based on the properties on which the technology is based, porcelain stoneware is poorly suited for this case. It has the lowest water absorption. Adhesion occurs on the surface, due to the ribbed back surface, without penetrating into the pores.
Indoors, such strength may be sufficient, but outdoor temperature changes will undermine the tiles:
There is an example of laying terracotta tiles on a mortar (street). And there is no need to consider those masters idiots. They have their own proven technology, confirmed by examples. If you carefully understand their actions, they fit into the rules listed above.
Terracotta tiles are laid on a fresh screed. This material has good porosity. Laying is carried out on a liquid layer of cement mortar. It looks like cement. The work is carried out in Cambodia or Vietnam. Temperatures are positive all year round:
Advantages of laying ceramic tiles with mortar.
- Cheapness. There are no costs for adhesive mixtures or primers.
- There is no need to level the surface with plaster. The materials needed for the leveling layer are used in the cladding.
- The speed of lining with mortar is lower than with mixtures. But taking into account the entire process (starting from plastering and technological breaks), it is faster.
If desired, you can use crosses, followed by filling the seams with grout. This is what they did at the time of the first European-quality renovations.
The presence of a laser plane builder simplifies the installation of vertical lines. The laser allows you to install the beam at a distance of 8 mm from the wall. You can do without a scaffolding system by installing the device on the first row of cladding, in a place where there are currently no tiles. And conduct the facing along the beam. It’s hard to say how convenient this is. The beam, even green, hits the eyes.
Installation of a scaffolding system for laying wall tiles on the mortar.