Even when building a small country house made of brick or wood, the financial costs will be considerable. Foundation work requires approximately one-fifth of the total construction cost. In the case of a foundation made up of foundation blocks, this includes the purchase of material, payment for the work of builders, and the cost of special equipment. Some of the costs can be reduced, or even eliminated, if you prepare the materials for construction yourself, that is, make the blocks yourself. To do this, you will need to perform preliminary calculations, as well as stock up on materials.
A foundation block made independently is not inferior in quality to a block purchased at a construction site.
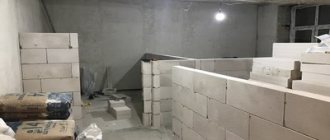
Work on the construction of the foundation for which the blocks were made with your own hands can be done in this way: the prepared formwork is installed in place, a mixture for preparing concrete is poured into it. After the composition has hardened a little, the formwork is removed and rearranged further. The process is repeated. One formwork is used repeatedly in this way. But the described method may not always be convenient, even if several formworks are used. More often, blocks are made separately with your own hands and stored.
In terms of reliability and strength, concrete blocks made by hand are not much inferior to those purchased using building materials. They are quite strong and reliable, and as for the manufacturing technology at home, it is not so complicated. The main thing is to correctly calculate the dimensions most suitable for the future cement product. Its length should be such that it is easy and without sawing to lay the product into the foundation. When making calculations, you need to select the dimensions in such a way that you can move the blocks with your own hands or with assistants, without the use of special equipment.
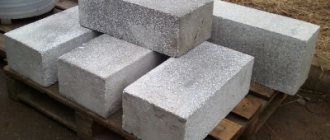
DIY concrete blocks
Concrete blocks are a very popular building material needed to build a house, barn or fence.
The width for a homemade block should be chosen to match the width of the foundation.
In addition, you can make concrete blocks with your own hands without much difficulty, this will significantly save money on construction costs.
Site and formwork preparation
First you need to decide on the sizes. Usually the width for a homemade block is chosen the same as the width of the foundation masonry. However, its deviation downward by 3-5 cm is allowed. The thickness of the bottom of the voids should be at least 2 cm, and the thickness of the walls - 4 cm. If you make a block of dimensions 29x29x44 cm with two vertical voids, then its mass will be about 42 kg.
The optimal size for blocks is 20x20x20 cm or 20x20x40 cm. Thanks to their small dimensions, the process of laying the material, as well as the manufacturing itself, becomes convenient and simple. It should also be taken into account that for special types of work it may be necessary to make half blocks.
To make concrete blocks with voids, a special mold is needed.
Concrete blocks should be made on compacted soil or on a level area (for example, built from boards). The surface must be covered with oilcloth or thick film. The molds in which the blocks are formed are made without a bottom. They are made from boards, chipboard or plywood sheets, and covered with sheet metal on top. Several liners are made from wooden logs, with the help of which voids will be formed in the blocks, due to which the building material will become lighter and warmer. The edges of the logs are sheathed with metal and handles are mounted to them, which in the further process will help you pull out the liners from the setting cinder block without unnecessary effort.
Experts say that it is most convenient to make several forms at the same time. To build them, you need to knock down or fasten with screws a frame with the height of the sides equal to the height of the block, in the middle of which plywood partitions are inserted. By the way, you should first install the longitudinal partitions, and then put the transverse partitions on them.
All elements and parts of the formwork must be coated with drying oil or machine oil, as a result of which the hardened blocks will be much easier to remove from the mold.
Laying the concrete mixture
- cement,
- fine gravel,
- sand,
- lime,
- water,
- rigid reinforcing wire.
The size of gravel grains can reach 1 cm.
The amount of materials depends on the required number of finished blocks. Cement, sand and gravel are taken in a ratio of 1:3:5.
The blocks are made of concrete based on a mixture of gravel and sand. Fine gravel, sand, lime (in small portions), and cement are poured into a metal basin. Mix the constituent elements thoroughly and then add water. There should be just enough water so that no problems arise during the process of laying the formwork (the mass should not be liquid).
The strength grade of such a material will be approximately 135 kgf/sq.cm. The size of the filler grains can reach 1 cm. Insert cores to form voids are placed in the mold when a solution 2 cm thick has already been poured and compacted. To fix the distance of the core, it is recommended to install special slats, about 4 cm wide, between the mold wall and the core. These slats can only be removed once the concrete has been loaded and compacted to one-third the height of the form.
The bottom of the form can be covered with old newspapers, which will prevent the block from setting to the previous base. The mixture should be semi-dry during installation. That is, when taken in a fist, compressed into a ball and then placed on a flat surface (for example, on a board), the mass should not spread.
Each formwork compartment is filled with a maximum of half of the solution, after which rigid reinforcing wire is laid.
To prepare the solution at home, you can use a stationary concrete mixer.
Some craftsmen make blocks using glass bottles as heat-insulating cinder block air chambers. To do this, plug the bottles with corks and install them in the middle of the block. After this, the forms are filled to the top, the solution is compacted and then smoothed with a trowel.
Homemade blocks harden quite quickly - within 3-4 days, after which they can be safely removed from the formwork. However, this does not mean that they are completely dry. They can be used in construction no earlier than two weeks later.
Block care
The solution sets within 1.5-2 hours. Therefore, if there is a small amount of material for constructing the formwork, after this time it can be disassembled in order to make the next cinder block. In such cases, the concrete mass is prepared in portions for each mold. Using one formwork, you can make about 5-6 blocks per day.
After the building material is ready, it is covered with film. It serves to protect the cinder block from precipitation, as well as protection from excessively rapid drying. If there is no film, it is recommended to water the block daily (starting from the second day after production) for 2-3 weeks. To ensure uniform drying, the material must be turned periodically.
Making cinder blocks with your own hands, of course, first of all saves money. But if you have the necessary materials and time, anyone can handle this task.
Making cinder blocks by hand
If the planned construction is not too large-scale, the blocks can be made without a brick press.
Making a mold
Mold for cinder block
We assemble a mold with dimensions of 40x20x20 cm. If desired, you can adjust the dimensions at your discretion. To make the mold we use metal sheets or wooden boards.
The design is extremely simple: bottom and side walls. We fasten the walls taking into account the selected width and length of the block. The height of the edges of the form must also correspond to the planned height of the building elements.
Helpful advice! You can make molds with cells to make 4-6 blocks at a time - very convenient. You just need to increase the length and width of the outer edges and install partitions between them.
Prepare empty glass bottles. You will use them to create voids in the blocks.
Mold option for cinder block
Filling the blocks
Pour the solution evenly into the mold to the brim.
Putting the mixture into the mold
Place the bottles with the neck up in the poured mixture. We level the surface of the fill, removing excess mortar.
Layout of bottles in poured blocks
We wait about 5 hours and take out the bottles. We leave the cinder blocks in the molds for a day, after which we carefully remove them and lay them out in stacks on a horizontal surface.
We leave the blocks to dry for a month. Only after the specified time can the material be used for construction.
Making cinder blocks
Helpful advice! Cover the blocks with plastic wrap while drying. It will protect the products from cracking during the heat and prevent them from getting wet in case of rain.
Methods for making concrete blocks with your own hands - mortar proportions and work procedure
Do you want to build a shed at your dacha or a fence, or maybe the dacha itself?! Then concrete blocks will come to your aid. Their name speaks for itself. FBS - foundation blocks of walls. We can say that this is one of the most common types of materials used in the construction of foundations.
Depending on your goals, you will choose products of different densities, weights, and heights. For example, blocks made of lightweight concrete are very mobile, since their weight is much lighter than other types. They usually consist of porous concrete or foam concrete. Lightweight ones are suitable for building both internal and external walls.
Characteristics and properties
Blocks made of ordinary concrete are heavy, so it is used less in construction. Their prices are also correspondingly lower. Load-bearing capacity refers to whether they can withstand a certain load. In this quality, heavy blocks are superior to foam concrete. But you can also find materials made from lightweight concrete that are perfect even for load-bearing walls.
Read on to find out more!
Basement and foundation waterproofing
What do you need to know before laying the foundation?
Driving piles
Where to buy reinforcement for the foundation
House foundation price
Columnar foundation
- 2.69
Rating: 2.7 out of 5 Votes: 139
- 1
Reply
6 years ago
How to make foundation blocks yourself?
The construction of even a small country house, wooden or brick, requires considerable material costs. Moreover, 18-20% of the total cost of building a house falls on foundation work: purchasing blocks, paying hired builders, paying for the operation of equipment. This part of the cost can be completely eliminated if you make the blocks yourself.
Block foundation diagram.
The strength and reliability of self-made concrete blocks are not inferior to purchased ones. The technology for their manufacture is simple. The first thing to do is calculate the dimensions of the future foundation block. Its length should easily fit into the foundation, without sawing, etc. In addition, the blocks must be lifted without lifting equipment.
Required tools and materials
To work you need to prepare:
- collapsible formwork in which the blocks will be poured,
- Portland cement M300,
- crushed stone, fraction no more than 10 mm,
- coarse sand, fraction 1.5 mm,
- water,
- shovel,
- construction trowel,
- wood hacksaw,
- metal scissors or hacksaw,
- electric drill.
Making formwork with your own hands is quite doable. For this you will need:
- 2 boards 20 mm thick. You can use moisture-resistant plywood,
- steel sheet 1 mm thick,
- metal rod with a diameter of 12 mm,
- 2 M12 nuts.
The boards are taken with a width equal to the height of the blocks and a length equal to the length of the blocks plus 20 cm. One of the flat sides of each board is planed and painted with waterproof paint. On the painted side of the boards, on each side, at a distance of 10 cm from the edge, you need to make 2 transverse cuts 5-6 mm deep. There should be a distance between the cuts equal to the length of the block. On the sides of the boards, approximately in the middle between the notch and the edge, holes with a diameter of 14 mm are drilled to tie the formwork.
2 rectangles are cut out of the steel sheet, which will cover the sides of the formwork. The length of one side of the rectangle is equal to the height of the block, the length of the other will be 10 mm greater than its width. All that remains is to make the tightening rods. The length of the rods is taken 80-90 cm greater than the width of the blocks. If it is not possible to make carvings on the ends of the rods yourself, you can contact a workshop.
The formwork is easy to assemble. This is done like this: the boards are placed parallel to each other on the side edges, and the painted surfaces should be facing each other. Tension rods are inserted into the holes. Metal rectangles are inserted into the grooves from the cuts - the ends of the formwork. Place nuts on the rods, but do not tighten them completely.
First you need to install the wooden inserts next to the rods, only then can you tighten the nuts completely.
Inserts fix the width of the blocks.
Manufacturing of foundation blocks
Drawing of the foundation block.
Do-it-yourself foundation blocks are most often made from concrete grade M200, class B15. If everything was done correctly, such strength is quite enough to support a house of 1-2 floors. The higher the grade of cement, the stronger the blocks. For concrete grade M200, use Portland cement grade M300, fine crushed stone (up to 10 mm) and coarse sand (at least 1.5 mm). If concrete is reinforced with pieces of metal wire, the blocks will become even stronger.
It is not difficult to make concrete mortar yourself. All dry ingredients are taken in a ratio of 1:4:2, respectively, and mixed with a shovel in a metal or wooden container. Continuing to stir, gradually add water. Water is added in portions until the mixture becomes plastic and viscous. They check the “readiness” of the concrete this way: take a little solution into your fist and squeeze it tightly. The lump on the open palm should not fall apart, but there should not be a trace of dirt on the skin. Now you can start pouring concrete into the formwork.
Cheap shallow foundation on medium heaving soils
On soils with a medium degree of heaving, two monolithic reinforced concrete belts are added to the foundation structure made of masonry materials .
One belt is a monolithic reinforced foundation base. The second belt is placed along the top of the foundation or plinth.
In addition, an anti-heaving sand cushion is made under the base of the foundation.
Not buried foundation for a wooden or frame house or bathhouse on medium heaving soils: 1 - sand and gravel anti-heaving cushion; 8 - laying the foundation and plinth; 10 - soil backfill of the floor along the ground; 11 - monolithic reinforced concrete belt along the top of the base; 13 - monolithic reinforced concrete base of the foundation.
The thickness of the monolithic reinforced concrete belt along the top of the plinth (11) and the base (13) of the foundation is 10 cm. A reinforcing mesh with 2 or 3 bars of working reinforcement of class A-III, with a diameter of 10 mm, is placed in the monolithic belt.
It is convenient to place a monolithic sole (13) on top of a profiled membrane laid on a compacted sand bed (1).
For light wooden and frame houses, it is dangerous to bury the foundation into the ground. The lateral surface of buried foundations is affected by the tangential forces of frost heaving of the soil. These forces may be sufficient to lift a light building out of the ground.
For light wooden and frame buildings, a non-buried foundation will be more economical and safer.
(in the picture above)
.
Due to the absence of a side surface buried in the ground, such a foundation is not affected by the tangential forces of frost heaving of the soil.
Making concrete blocks with your own hands
Content:
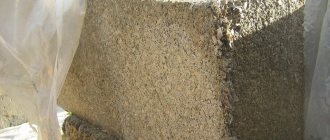
For the production of concrete blocks, the following fillers are suitable: slag, ash, coal combustion waste, crushed stone screenings (stone, granite), brick waste, gravel, sand, sawdust (after processing), expanded clay, perlite, sand-gravel mixture, granulated slag, zala , crushed stone, sawdust, gypsum, broken bricks, etc.
Solution for making cinder blocks
Mortar for cinder blocks: coal slag: coarse sand (expanded clay): gravel 5-15 mm, M500 cement, water (7: 2: 2: 1.5: 1.5-3). It is important to control the amount of water so that the blocks do not spread when removed. The solution should crumble when it falls to the ground, but should unite in the fist.
To make the blocks plastic, you can add a plasticizer (5 grams per block - strength, water resistance and frost resistance, fewer cracks) during vibration casting, it is also possible during vibration pressing, but you need to add too much for the effect, and this is expensive.
To make cinder blocks durable, you need to consider:
Quality of sand – you need coarse sand.
Blast furnace slag is ideal.
Cement – high-quality M400.
Equipment – in order to press better, you need to achieve vibrocompression.
Preparation time and storage of concrete blocks
mother from the tape can be done in a day. Completely dry in a couple of months. After a day, the blocks can already be worn - they don’t break; they can be put down after a week.
When using a plasticizer, finished blocks can be removed from the site and stored after 6-8 hours. Without UPD - in two days. Ready-made slag concrete blocks should be stored in pyramidal stacks of 100 pieces with a small (2-3 cm) gap between the blocks so that the “sides” can dry out.
At first, concrete can be prepared by hand. Subsequently, it is more efficient and easier to use an electric concrete mixer with a volume of 0.2-0.5 cubic meters. m.
Production site - a room with a flat floor, good ventilation/heating, or a flat area outside under a canopy.
Advantages of cinder blocks
- low cost
- high speed of construction from cinder blocks,
- good sound insulation
- good thermal insulation
- You can make it for yourself or for sale
Negative opinions on making concrete blocks with your own hands
The machine is profitable only if there are cheap or “free” raw materials or with huge volumes of work.
A hollow block made anywhere is more expensive than a section of wall of the same size, made using removable or permanent formwork, the more you waste your time and effort. Therefore, basically, selling these machines is just an opportunity to make money on others.
Example of expenses and cost of making homemade blocks
The production of one cinder block requires 0.011 cubic meters of solution, in a ratio of 1:7 (cement: granular slag), i.e. 1 bag of cement = 36 blocks.
Legislation
Decrees of the Government of the Russian Federation dated 08/13/97 No. 1013, Gosstandart of the Russian Federation No. 86 dated 10/08/2001 and Gosstroy of the Russian Federation No. 128 dated 12/24/2001, the list of products requiring mandatory certification does not include building concrete blocks with various fillers (slag, expanded clay , sawdust, etc.), as well as vibration-forming equipment for their production.
Making your own mold for casting concrete blocks
The form for making cinder concrete blocks yourself is a box made of 3 mm metal without a bottom with handles. To make the front part of the blocks more even, they need to be dried on a rubber band moistened with a solution of some detergent.
We begin the manufacturing process
What is needed for that? First of all, you need to decide on the sizes. I suggest choosing the following sizes: 200x200x400 mm and 200x200x200 mm (these are “halves” and they will definitely be required during the work).
Now let's prepare the formwork. To do this, it is necessary to cut old furniture panels from chipboard of appropriate sizes and connect them with screws through transverse and longitudinal partitions cut from 40 mm boards (see picture).
This form is convenient because 4 blocks can be placed in it at the same time. Next, we place the form without a bottom on a flat base under a canopy, covered with plastic film. Their internal surfaces are coated with used machine oil. This is done to make it easier to install the blocks after they harden.
Now let's prepare the material from which we will make blocks. Pour gravel, sand and a little lime into a concrete mixer, or if you don’t have one, into any container. After this is mixed, add cement.
The ratio when laying should correspond to the proportion - 1 part cement to 4 parts aggregate. All this is thoroughly mixed and diluted with water to the desired consistency. The solution should be such that it is convenient to put it into the mold.
Next, two shovels of mortar and reinforcing wire are placed in the mold. On top of all this you should also place two glass bottles, plugged with corks. The bottles will play the role of sealed glass blocks and thanks to them, two air chambers are created inside the block, creating thermal and sound insulation.
Making cinder blocks on a machine
Photo of the structure from different angles
The machine can significantly increase work productivity. The equipment has a fairly simple design.
Vibrating machine
Assembling the machine
The main element of a homemade vibratory compacting machine is a mold (matrix) for slag concrete mortar. By its design, this form is a metal box with internal elements in the form of voids. The void stoppers can also be removable.
Compact cinder block machine
The work kit includes the following materials and tools:
- welding machine;
- standard set of locksmith tools;
- grinder;
- vice;
- sheet steel 3mm thick. It will take about 1 m2;
- a pipe with a diameter of 7.5-9 cm. Approximately 1 m of pipe is needed;
- metal strip 3 mm thick. You will need about 30 cm of material;
- electric motor with a power of 0.5-0.75 kW;
- nuts;
- bolts.
Compact cinder block machine
Side view
Front view
Front view
First step. We make a mold according to the size of the future blocks. We cut out the side faces of the matrix from sheet steel. We will make a form for 2 blocks at once. To do this, we cut out the inner central partition from steel and fix it in the box.
Second step. We determine the height of the elements to decorate the voids.
Important! In accordance with the technology, the height of the voids should be such that the bottom wall has a thickness of 3 cm.
Third step. We cut 6 pieces of pipe along the length of the limiting cylinders to form voids.
Fourth step. We give the pipes a conical shape. To do this, we cut each piece of pipe longitudinally to the middle, compress it with a vice and connect it using a welding machine. We brew each cone on both edges.
Fifth step. We connect the stops in a row along the long edge of the cinder block. Along the edges of the row we add a 3-centimeter thick plate with holes for fastening with eyes.
Sixth step. We make a cut in the middle of each such compartment. We weld lugs on the back side of the form. They will allow temporary fastening of elements to create voids. A very convenient solution - it will be possible to remove the cylinders and make monolithic blocks.
Compact cinder block machine (press on top)
Press machine
Press machine
Seventh step. On the outside of one of the transverse walls we weld 4 bolts for the mounting holes of the vibration motor.
Eighth step. Using welding, we attach an apron on the loading side and blades along the edges.
Ninth step. We prepare all structural elements for painting - we clean them and thoroughly polish them.
Tenth step. We do the press. It will look like a plate with holes repeating the location of the holes in the block.
Important! The diameter of the holes on the plate should exceed the same parameter for the recesses in the block by approximately 0.5 cm.
We make the plate of this size and fix it in such a way that it can go deep into the box at the place where the limiters are installed by 5-7 cm.
Finally, all that remains is to weld the handles to the press, coat the structure with a primer mixture and mount the vibration motor.
An ordinary electric motor can be converted into a suitable vibration motor. To do this, it is necessary to weld eccentrics onto the engine shafts. We won’t bother too much - we’ll just weld the bolts so that their axes coincide. To regulate the frequency and strength of vibration, screw nuts onto the welded bolts.
Compact cinder block machine
Motor
Motor
Vibration device
Prices for machines for cinder blocks
Cinder block machine
Making blocks
Recommendations for preparing the solution are given above. You can use the standard recipe or modify it at your discretion. The main thing is to obtain optimal viscosity. It can be determined “by eye” - the lump of mixture should hold its shape steadily.
Before loading the mixture, lubricate the contact metal surfaces with oil. Thanks to this, the solution will not stick to the iron.
We place the finished mixture into the matrix and begin pressing.
Place the filled forms on a vibrating plate and let it compact the solution for 5-15 seconds. After the specified time, add more solution to the mold, because previously loaded will inevitably settle.
We repeat the process, only this time we do not turn off the vibrating plate until the clamp reaches the limiters. We remove the mold until the machine stops.
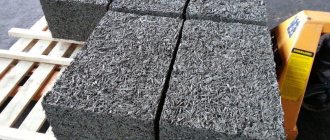
Ready cinder block
We give the blocks 1-3 days for initial drying, carefully remove them from the blocks, lay them out on a flat horizontal surface and cover them with plastic wrap. The material can be used for its intended purpose no earlier than after a month.
Comparison of characteristics of cinder blocks and foam blocks
Find out how to make wood concrete blocks with your own hands from our new article.
Good luck!
Process Features
The shavings and sawdust must be soaked in water, then mixed with liquid glass, calcium chloride and slaked lime.
Then all the resulting mixtures must be mixed in a concrete mixer with cement and poured into pre-prepared molds, compacted manually with tampers.
Correct casting of the mixture
Using a trowel or shovel, you need to carefully pour all the components into a container of water and let this mass sit for some time. Next, it is transferred to a metal sheet and brought to the desired state by thorough mixing.
Afterwards, the finished mixture is placed in a mold and subjected to vibration using a special device that creates vibration impulses. You can also get by by tapping the sides of the mold with a shovel.
After two days, the compacted block must be carefully released from the mold by unhooking the closures on it, and in this form it must be left to harden for another 26 days.
A standard block of expanded clay weighs from 16 to 17 kg and requires about 1.5 kg of cement, 4 kg of sand and 10.5 kg of expanded clay. Having made some simple calculations, we find that each block costs about 25 rubles, with the average cost of finished expanded clay being 30 rubles without delivery.
Component ratio
Technological process for manufacturing building blocks.
To make a high-quality mixture, you need to take:
- 1 part of the binding material - cement of a grade not lower than M400;
- 8 parts of expanded clay (approximately 300-500 kg/m³). It should be added that about 5 kg of expanded clay of a fraction from 5 to 20 mm can be placed in a 10 liter bucket;
- sand - 3 parts without admixture of clay and other components;
- 0-8 - 1 part water.
Experts advise adding a teaspoon of any washing powder to the solution to make the solution more flexible.
Foundation waterproofing and water protection for a house with a basement
Foundation walls in a house with a basement require enhanced protection from moisture. For conditions when the groundwater level is below the base of the foundation, coating waterproofing in the form of a layer of polymer-bitumen mastic is applied to the surface of the walls.
The outer walls of the basement are additionally covered with two layers of waterproofing roll material.
The profiled membrane is convenient and profitable to use for waterproofing the floor in the basement. There is no need to make a concrete base for adhesive waterproofing.
Only wall drainage can provide reliable protection of the basement from water. Be sure to do it.
Wall drainage around the foundation will reliably protect the basement of the house from water
Read: “Wall drainage around the foundation.”
Material Formation
Experts recommend making molds for blocks from boards and covering their walls with linoleum to make it easier to remove the building blocks. When manually tamping, it is done in layers using a tamper made of wood and lined with iron. Afterwards the block is kept for a day and then removed. Then it is left under a canopy to be fully refined to the required strength. In this case, it should be covered while still wet to allow hydration to occur.
The optimal temperature and period for this is 15 degrees and 10 days. Lower temperatures will require longer soaking time. It is important not to allow the level to fall below zero and do not forget to periodically water the blocks with water.
Preparation
What is needed for artisanal production?
Equipment
| Device | Description |
| Concrete mixer | Each is electromechanical. The capacity is determined by the number of molds filled once. The tool is used for making sand-cement mixing and mortar with foam. |
| Foam generator | Foam generating device. The price of special productive foam generators for foam concrete starts from approximately many thousands of rubles; but for small volumes it is possible to get by with a much more inexpensive mini-wash-foam generator for washing cars (8-15 thousand rubles). |
| Form | This may be a factory-made collapsible iron form or a home-made structure made of wood or plywood. The main requirement is a constant stable geometry and cell size. |
Cement
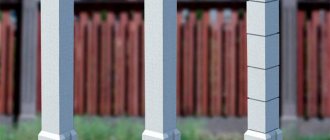
Cement foundation blocks are used for the construction of various types of structures of single/multi-story buildings (plinths, foundations, and sometimes walls). In addition, they are used in industry in the construction of production facilities, columns, fences, fences.
The main disadvantage of the elements is the need to use special equipment to move the blocks. That is why blocks of 20x20x40 centimeters with a weight of up to 35 kilograms are most popular in private construction - they can be installed by yourself.
The main advantages of a concrete block:
- Stability of the quality of blocks and structures made from them
- Minimum service life of 50 years
- Elimination of errors during the installation process due to the evenness of the blocks
- High frost resistance, non-perception of sudden temperature changes
- No need to construct a sand block
Features of FBS:
- Not suitable for construction on heaving soils
- The need for additional waterproofing
- The appearance of cold bridges at seams
- Can be with or without reinforcement, solid or hollow
- Strength grade – from M75 to M200
- Frost resistance – from F50 to F200
- Thermal conductivity – within 1.1 W/m*C
- Quantity per square meter – 12.5, per cubic meter – about 62.5
- Weight – 28-35 kilograms
- Water absorption – about 6%
- Density – minimum 1500 kg/m3
- Exact dimensions – 188x190x390 millimeters
There is a large selection of blocks available in Moscow and the regions, so purchasing and delivering products to the site in the required quantity and on time is not difficult.
Creating a form yourself
Please note that final processing of the product should be carried out after complete hardening. If the product is raw, further actions (for example, cutting) are illogical and ineffective. Creating a form:
- Start production with available materials. For example, you can use polystyrene foam. Cut out the stamp, fill it with a pre-prepared mixture (sand and cement). You will receive one copy of the concrete decoration mold. You can use plastic containers of different sizes instead of stamps.
- Assemble the product from scraps of chipboard, laminate, wood. The basic rule is that the surface should be smooth. If it is rough, cracks will form between the blocks and the surface or the concrete will be unevenly distributed, which will make it difficult to remove the product.
- Fill the mold with the concrete mixture and leave it for several days until it dries completely (depending on the type of mixture and material of the product. Check the instructions for the material for the required indicators).
- After complete drying, carefully remove (for example, with a spatula or similar object) the finished product.
- Carry out (if necessary) the required decorative work.
If you do not have the time/desire to carry out the process yourself, use the services of construction companies. By contacting the company you need, you can place an order for the form you need. Explain the purpose of construction, the desired material, and specify the timing. For a set price (must be agreed upon in person, by phone), you will be advised and your order will be accepted. Thus, you can be confident in the quality of the resulting product, its durability, and the correctness of its creation.
Return to contents