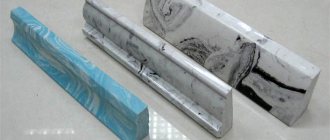
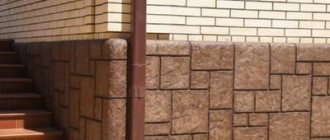
Modern imitations of stone are widely used for finishing the facade and interior. Such tiles are made from gypsum or cement mixture. This allows you to obtain inexpensive cladding with good aesthetic and technical characteristics.
If such elements are made independently, then the required textures and colors will be more accurate for realizing the design idea than commercially available series from different manufacturers.
How to make an artificial boulder for the garden with your own hands
Do-it-yourself artificial boulder is popular in the field of landscape design:
- does not require large financial outlays;
- easy;
- lasting;
- environmentally friendly;
- resistant to weather changes;
- has many colors and textures.
It is used to decorate ponds, fountains, rocky gardens, to decorate garden paths, flower beds, and alpine slides. Sometimes used to create interiors in restaurants, cafes, and offices. Hollow boulders are used to decorate equipment on the site: artificial cobblestones are “put on” hatches, unsightly tree stumps in the garden, and used to cover pumps and wells.
These methods are simple, and therefore popular for creating decorative decorations at home. After all, to make a boulder for the garden, there are enough available materials that are available in every home (old waste paper, plastic bags, burlap, fabric). Surely, there will be components for preparing cement mortar, and if not, then they are inexpensive.
To watch a video of what the product looks like in a landscape:
Necessary materials for making stone
To make an artificial boulder with your own hands, you do not need hard-to-find materials. The bulk is represented by secondary waste (construction waste).
- latex gloves;
- cement;
- sand;
- water;
- wire mesh;
- polystyrene foam, newspapers, cardboard, bags - for filling;
- burlap or old fabric;
- pigments - optional;
- sealant;
- plastic film.
Preparing a solution for the future stone
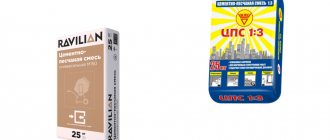
To prepare cement mortar, mix 1 part cement with 3 parts sand in a bucket, dilute with water until medium thick, stir with a stirrer. If the solution is too liquid, it will flow down the frame. Therefore, it must be such that it can be laid in “flat cakes”.
Premises requirements
The production of decorative facing stone from gypsum as a business can be started by preparing a small utility room or extension. As you increase your momentum, think about renting an area of 50-80 m². There are a number of requirements for the premises:
- heating - the temperature should not fall below 15°C;
- good ventilation;
- connection to the electrical network for equipment operation;
- there must be a canopy in the open area for the warehouse;
- convenient transport access routes.
Video - Production of decorative stone (mix, pouring, drying):
Video - Painting stone:
Process of making boulder using wire frame
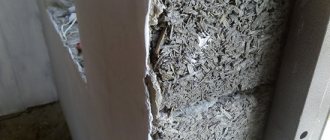
With your own hands, you need to create a stone frame from wire, fill it with bags, foam plastic, newspapers, cardboard (whatever is at hand) and secure the structure with cement mortar. The frame can be round, oblong, vertical - whatever you want.
The first layer of concrete must dry, after which the future boulder is coated with a more liquid solution. This can be done by hand or with a spatula. At this stage, depressions and bulges are formed that imitate natural stone. Then the workpiece is covered with plastic film and allowed to harden. After which the artificial boulder is turned over and the bottom is formed.
For greater resemblance to natural cobblestone, you can add pigments of warm and black shades. Light ones are added first, then black ones, then sprinkled with water and brushed over. To get the desired shade, you can repeat the coloring several times.
Finally, after complete drying, a sealant is applied to protect against adverse environmental conditions.
In the video, manufacturing technology using a garbage bag:
Making Hollow Stone Boulder
A hollow stone with a void inside is created similar to the previous version. A cardboard frame of the desired shape is covered with construction mesh and covered with a thick cement composition. The walls must be more than 2 cm, otherwise the decorative element will be fragile.
The workpiece is covered with film and left to dry for at least a day. After hardening, you can paint with pigment or concrete paint. When everything dries, the result is sealed with sealant. The last step is to remove the cardboard. The hollow boulder for the garden is ready.
Making an empty cobblestone inside:
TOP 7 manufacturers
To simplify the selection of high-quality products for paving walkways in the country, below is a rating of the 7 best manufacturers of these products, compiled based on customer reviews of these factories
Kerama Marazzi
Concrete tiles made to look like natural stone are in high demand throughout the European part of the Russian Federation .
The company was founded in 1998 in Smolensk, and is currently developing dynamically.
Average cost – from 550 – 800 rubles. for 1 m2.
Cobalt
A relatively young Moscow company that has advanced German equipment and has been producing all types of textured elements for cladding building facades since 2012.
The company constantly takes part in government orders, which significantly exceeds its rating among consumers.
The average cost is from 600 – 1000 rubles. for 1 m2.
Terracotta
The Tula enterprise was founded back in the 90s of the last century, on the basis of the old KPD plant .
In 2004, the enterprise's production facilities were completely modernized, which significantly expanded the scale and geography of sales.
Average cost – from 490 – 740 rubles. for 1 m2.
Casawaga
A unique production and trading company from Orel, it has long been focused on the production of non-standard explosive tiles for interior and exterior work based on natural aggregates from valuable non-metallic materials.
Consumers can choose products that suit their requirements from more than 120 models.
Average cost – from 800 – 1100 rubles. for 1 m2.
Monopole Ceramica
Despite the fact that the company has been operating on the basis of an old DSK in Tver , since 2008, the management has established active supplies of finished high-quality products both to the Moscow region and to other parts of our country.
The brand's products are distinguished by high quality, reliability and durability.
Average cost – from 650 – 900 rubles. for 1 m2.
EcoClinker
A large Moscow enterprise with extensive workshops and a huge range of products.
The company is often involved in the supply of products for facade work of various categories in the capital region, and consumers leave only positive reviews about it.
Average cost – from 550 – 850 rubles. for 1 m2.
Interbau
Another large Moscow company that has the most modern equipment with a high level of automation, which almost completely eliminates defects and deviations from the specified geometric parameters.
Buyers can purchase products with any configuration, in dozens of colors, with different types of finishing on the front surface.
Average cost – from 950 – 1250 rubles. for 1 m2.
The rating below is purely subjective and cannot be used as a direct guide to purchase, as it is advisory in nature.
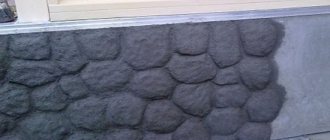
Making stone using burlap
You can make a boulder for the garden with your own hands using burlap or any other old fabric. To do this, the burlap is dipped into liquid cement mortar, lightly wrung out and laid on the cobblestone frame. You need to take care of the frame in advance. Make it from wire or purchase a ready-made version.
When the burlap is distributed over the frame, you can begin to coat it with a thicker cement mortar (1 part cement and 3 parts sand). For naturalness, imitate pits and bulges with your hands. Finally, wrap the block in film and leave to dry.
If desired, the stone can be painted tan and sealed with weatherproof sealant.
When the artificial stone is completely dry, it can be taken out into the garden. Experiment with sizes, shapes, pigments - and you can create with your own hands a truly unique and inimitable decorative element for your garden.
Average prices for installation work
On the Internet you can find many commercial officially registered organizations that offer installation of concrete tiles on the facade or in the interior. Considering the high level of competition between these companies, prices for their services are approximately the same, regardless of the region of the Russian Federation :
Dismantling the old coating (if necessary) – from 400 – 550 rubles. for 1 m2.- Installation of a plaster base from – from 450 – 550 rubles. for 1 m2.
- Installation of concrete tiles in a staggered pattern, using a row system, or with chain ligation of seams - from 400 - 450 rubles. for 1 m2.
- Installation of concrete products with a pattern and several shades - from 600 - 650 rubles. for 1 m2.
- Installation of concrete tiles with a lot of trimming, with different thicknesses and textures - from 750 - 900 rubles. for 1 m2.
- A set of works on the installation of facade elements with preparation of the installation plane, marking, laying tiles and grouting joints - from 1200 - 1400 rubles. for 1 m2.
The final cost of work, as a rule, is determined on the basis of an estimate, which takes into account both basic prices and adjustment factors depending on the volume of work, the complexity of installation, as well as the company’s internal pricing policy.
Do-it-yourself boulders made of fabric, boxes, concrete to decorate the site
We decided to create an alpine slide with our own hands. We saw enough beauty on the Internet and wanted something similar on our site to decorate and update the look. Buying boulders (large stones) is expensive. For 10 stones (medium size) you will have to pay 1500 - 2500 rubles. We thought it would be better to make the boulders ourselves.
The stone is now used for paving garden paths, decorating sewer hatches, wells, and stumps. Stones will help you decorate a beautiful pond, waterfall, or fountain.
Production Features
Attention: If various plasticizers, additives, and coloring pigments are used to make concrete artificial decorative stones, it can be difficult to distinguish them by appearance from real stone of natural origin.
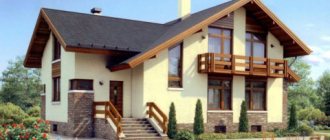
Such materials obtain characteristics very close to those of natural products; they have high moisture resistance, strength, and reliable cladding. Therefore, they decorate the walls of rooms and facades of buildings, finish window sills, window or door openings, niches, ledges, fireplaces, sinks.
Advantages of finishing with concrete slabs:
- Many variations of color, texture, shape, imitating natural raw materials. This allows you to select tiles that will decorate a specific architectural object with the least waste.
- Since the cement-sand composition after hardening becomes very durable, with a dense surface, without pores, the development of mold, mildew, and other harmful microorganisms does not occur. In combination with the environmental friendliness of the components used, such cladding does not emit toxins and is harmless to humans.
- Cleaning is simple and easy, and different aqueous solutions of detergents can be used, which does not harm the decorative coating of the material.
- Decorative concrete stone does not respond to temperature fluctuations, high humidity, mechanical damage, or direct sunlight. This provides the coating with reliability, durability, and strength.
- If the color is added to the concrete mixture, then even with small chips and scratches there will be no noticeable damage to the decorative layer. This makes it easier to repair and correct damaged slabs.
- When treating a concrete coating with special protective compounds, even water containing bleach will not change its properties or appearance.
- Due to its high fire resistance, the material is safe and can be used for lining fireplaces, stoves, and other surfaces in contact with flame sources and elevated temperatures.
- The price of concrete decorative stone is lower than its natural counterparts with the same surface texture.
Important: Among the disadvantages is the only need for finishing with special hydrophobic compounds against moisture.
How to make a boulder yourself?
1 way
Dig holes to suit the size of the stones. We decided to dig a depth of about 15 - 20 cm. Mix the solution. Proportions: cement 1, sand 3 and crushed stone - 5.
We place garbage bags in the dug holes so that the stone is smooth and so that water from the cement does not go into the ground. Fill homemade molds.
After a day, you can remove the stones. This will be easy to do. If the stones turn out to be damp, you can process the edges as desired. The stones are ready! Now you can lay out the alpine slide.
Method 2
We need to prepare the frame. Even thick cardboard will do. Glue from a cardboard box like a stone, use tape to glue the parts together. Wrap the resulting cardboard stone with construction mesh. Mix 3 parts sand and 1 part cement.
Apply the solution to the entire surface with a thickness of at least 3 cm. Cover with film. After (a day later) apply another layer of solution. You can add paint to it first. You can fill the inside of the box with newspapers, foam plastic, etc.
3 way
Artificial stone made of fabric. Any fabric that you don't mind throwing away will come in handy. Soak the fabric and then put it in cement mortar. It is necessary that the fabric absorbs the cement well. Cover a large stone with polyethylene and place a cloth soaked in the solution on top.
After 1 day, apply a layer of cement mortar on top of the fabric (without removing it from the stone). Now soak the second cloth in the solution and place it on top of the stone. You will get 2 layers of fabric. In a day everything will dry out and you can remove the fabric from the stone. If desired, you can apply a thick cement mortar on top to level the surface of the resulting artificial stone.
This way you can save on cement.
The Decorochka channel thanks you for your likes and subscriptions. All the best and success in your creativity!
Sales
Finding buyers is an important factor for a quick return on investment for a project. Therefore, it is worth connecting all possible ways to establish sales channels:
- personal meetings with owners of retail outlets, repair and finishing companies;
- participation in construction exhibitions and presentations;
- placement of information in local media;
- creation of a business card website;
- promotion on social networks;
- outdoor advertising (banners, signs, posters);
- dissemination of information (distribution of leaflets, business cards, brochures) with product descriptions.
Artificial boulder made from old fabric
The wooden stump-stand for a vase in the shape of a concrete swan has completely rotted and the time has come to make an artificial boulder to replace it. This idea arose quite recently when a swan was placed for testing on a large stone that had once been dug out on the site.
The boulder looked pretty good and the question arose: how to replicate it, at least close in size and outline.
After reading articles and watching videos on this topic, we were convinced that mainly three methods are used to make an artificial boulder:
- On a metal frame with a mesh and applying a concrete mixture, just like concrete sculptures are made.
- Using polyurethane foam applied to a metal mesh or an assembled non-metal frame.
- Using synthetic resin, fiberglass and formwork.
But I wanted to try something different. I remembered the method of making vases from fabric. There was enough old fabric to throw away (we use it as a rag) and it was decided to take this method as a basis and modify it a little, since the swan vase is very heavy and the artificial boulder must be strong enough to support it.
Staff
Even if you don’t plan to hire workers at the start, and you haven’t encountered the peculiarities and pitfalls of the production process before, consult a technologist. For a medium-sized business organization, a technologist must work in the main staff. His task is to develop recipes, expand the product range, select colors, and quality control. He must know what kind of gypsum is used and what the ratio of all components should be. In small organizations, he is responsible for logistics and working with customers. To produce 50-100 m² of artificial stone per month, you need to hire two workers.
Artificial stone made of fabric
The process of its manufacture was as follows. The large stone on which the vase was temporarily placed was decided to be used as a mold for our future boulder.
First, we found a piece of loose fabric that was the right size for us, since it completely covered the entire stone.
The excess parts of the fabric were cut off. The fabric was soaked in water and, after squeezing, placed in a previously prepared cement mortar.
By rinsing and squeezing the fabric, we ensure that it is completely saturated with cement.
To protect the stone, cover it with plastic wrap.
We place a cloth soaked in cement mortar on it, leveling it.
We also cover it with plastic wrap and wait a day.
After waiting for this time, remove the film and evenly apply a thin layer of ordinary concrete mixture (1:3) onto the hardened fabric, but so that it does not drain and remains on the fabric.
Before this, we (just like with the first fabric) soak scraps of old fabric (which absorbs well) in cement mortar.
Then, in random order, we place them on our blank. In this way, a workpiece is formed in two layers of fabric.
Cover the workpiece again with plastic wrap and wait a day. Then we check the quality of the resulting “hat”. If everything is done correctly, you can safely turn it over and make sure it holds its shape.
And this is what the future artificial boulder looks like from the front side.
Step-by-step instructions for installation steps
Laying concrete tiles under stone on a facade or indoors is a responsible process that requires the involvement of professionals. If this is not possible, you can do all the work yourself, provided you carefully follow the step-by-step instructions given below.
Indoors
To install concrete tiles in the interior, you must follow all the steps of the following algorithm :
The surface of load-bearing or enclosing vertical structures in the interior is cleaned of dust, dirt and other debris.- A leveling plaster layer of cement-sand or gypsum mortar with a specified thickness is installed.
- If necessary, utility lines are installed in the thickness of the plaster.
- Mix the tile adhesive in a separate container, according to the recipe on the bag.
- Arrangement of templates for selecting the desired masonry trajectory of the first row.
- Installation of a supporting corner to distance the elements of the final wall covering from horizontal structures, which helps compensate for thermal expansion and contraction.
- Laying the first row, in accordance with the development of wall structures.
- Monitoring compliance with geometry when laying the first row.
- Installation of the entire wall plane in the room with setting the required gap between the tiles at the selected height, according to the drawings.
- Trimming the edges of products, if such an operation is required after measurement.
- Arrangement of utility network outlets, if necessary.
- Refinement of the plane with laying of multiple elements of the vertical plane.
- Filling joints, grouting, checking the installation plane.
After grouting the joints, it is recommended not to use the room and not to change the temperature and humidity conditions for 24 hours, for reliable polymerization of the cement-sand or other adhesive composition.
Outside
To install concrete tiles with a natural stone texture when performing facade work, or when cladding the basement of a residential building, it is necessary to complete a certain technological map :
- Measurements of the façade plane, identification of defects and deviations from orthogonal axes.
- Applying markings, installing horizontal lines and vertical plumbs.
- Installation of beacons for applying exterior weather-resistant plaster.
- Installation of a subsystem for mechanical fixation of tiles (if necessary).
- Arrangement of supporting profiles for the installation period.
- Mixing the adhesive composition.
- Laying the first rows, fastening small-piece concrete products to clamps with control of filling the gaps with mortar.
- Checking the geometric position of the first row.
- Installation of all subsequent rows with the required dressing and spacing the parts from each other using steel rods or polymer spacers.
- Sealing of junctions with dissimilar structural elements of the façade.
- Framing of window and door openings
- Grouting joints.
- Checking the quality of work performed and, if necessary, eliminating errors.
The space between the tiles should be filled with a semi-rigid cement-sand mixture, which acts as a grout and also prevents precipitation from penetrating under the hard surface, which significantly extends its service life.
Artificial boulder and decorative concrete
Now the time has come to prepare decorative concrete, similar in composition to that which we used in the manufacture of the vase for the fountain.
In this case, it is necessary to obtain other physical characteristics of the mixture, the main ones being stickiness and plasticity (as in the construction of a concrete rock). Strength properties, unlike a vase for a fountain, are additionally created by fabric reinforcement. Therefore, we will save money and will not add ash, microsilica and white cement to the mixture. But to increase stickiness, we add RPP in an amount of 2% by weight of cement. More information about the composition of dry construction mixtures can be found at this link.
We will make the ratio of cement and sand 1:1, microtalc, fiber and EC will remain in the old proportions.
Instead of the previous superplasticizer, we use regular Fairy (0.25%). Let us take the ratio of water and binder to be 0.4.
Divide the resulting dry mixture in half and add red-brown iron oxide pigment (about 3%) to one of them. You can add other colors, it all depends on what shade of stone you want to get. Add water and prepare solutions.
I would like to note that the processing of decorative concrete (for example, a concrete rock or a path made of concrete cakes near a pool) is completely different compared to ordinary concrete, which can only be worked with after a few hours, when it begins to harden. Only after this can it be carefully cut, picked, stamped and other operations to form the surface.
Depending on the composition of ordinary concrete (quality and grain size of sand, brand of cement, type and amount of plasticizer), this time can vary significantly and must be “ caught .”
The main advantage of decorative concrete (depending on the application, it is also called sculptural, artistic, architectural) is precisely that this is not necessary.
It is easy to work with, you can repeatedly add and edit immediately after applying it to the workpiece.
Selection rules
Before purchasing stone-look concrete tiles, it is important for consumers to pay close attention to the following important nuances :
- Availability of a quality certificate for the products sold.
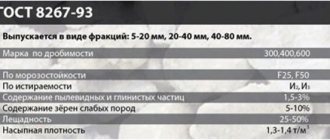
- Compliance of the material structure with the requirements of current GOSTs.
- Strength indicators of concrete products.
- Water absorption coefficient, frost resistance grade.
- Brand strength of the cement included in the tiles.
- Type of pigmentation of the material.
- Deviation of geometric dimensions from the indicators declared by the supplier, using the example of analysis of sample tiles from a general batch.
- Porosity of the front and back surface of concrete.
- Uniformity of coarse aggregate.
- Type of finishing processing of the front plane of the material.
One of the main selection criteria is the popularity of the manufacturing company, the year it was founded, as well as the customer trust rating, which is expressed in the number of positive reviews on independent forums on the Internet.
Tools and stages of working with decorative concrete
In our case (an artificial boulder), for the upcoming work we will use a trowel, a brush with stiff bristles and a brush brush as tools (see the link at the end of the article).
Using a trowel, we alternately throw the prepared concrete mixture onto the surface of the block. Alternatively, it can be pre-mixed by making several turns with a spatula (as was done when making a vase for a fountain).
We vary the thickness of the layer, roughly forming the main outlines and shape of the stone.
Since the mixture is soft and plastic, like sculptural plasticine, using a trowel you can easily obtain any surface relief. When comparing with natural stone, you can take your time and calmly “draw” similar contours. Having finished, we slightly smooth out the unevenness with a trowel and lightly go over it with a brush with stiff bristles.
Artificial boulder after initial surface shaping
After the surface is formed, we leave it to dry for one day. It is advisable, as in the previous stages, to cover the artificial boulder with plastic wrap at this time.
After a day, we continue to treat the surface using a brush. After this, the stone takes on the following appearance.
Next, we prepare several paints on gray cement, adding pigments to it: brick color, black and gray-yellow.
Using a brush with stiff bristles, we achieve the required color by spraying and stamping.
After half an hour, you can once again lightly walk over the surface of the stone with a brush.
This concludes our work. Having installed a swan vase on our boulder-stand (as a form for a swan is made), we observe what happened in the end.
After painting artificial stone, many people coat it with a protective varnish. But we will not do this, since there is no such need due to the method used for painting concrete.
Preparing the base
When arranging concrete garden paths with your own hands, it is important to correctly mark, keeping in mind the concreting method. For pouring into formwork, it is better to choose rectilinear contours with angular turns: it is more convenient to install enclosing elements; there is no need to form curved formwork
The same applies to pouring into prepared forms: most often the finished products have complex geometry, but they can only be joined in one way - to form a straight path or a rectangular area.
Using homemade molds gives you more opportunities to create curved trajectories. When using homemade paving slabs, there are no serious restrictions on the geometry of the paths.
After marking, which is done with the help of pegs and a stretched cord, the bed of the path is prepared: the soil is removed to a depth of 15...30 cm (for critical sites, the depth of the pit can be increased to 50 cm or more).
To prevent the embankment from spreading and plant roots growing through it, geotextiles can be laid on the bottom of the pit. Two methods are used for flooring:
- with an overlap on the edges, after installing the embankment and concreting, the ends of the panel are masked with a fence or decorative design of the path. Interestingly, on dense, non-floating soils, when using geotextiles, you can do without a sand-gravel cushion;
- between already installed curbstones/fences.
After preparing the pit, the cushion is backfilled and compacted. For homemade paving slabs, it can be purely sandy; for continuous filling, it is necessary to use sand and gravel (crushed stone) layers at least 5 cm thick. When pouring into a mold, it is better to use either alternating layers of sand and crushed stone, or a mixture of materials with fractions of 2...10 mm.
Sand can be easily compacted by “spilling” it with water, that is, moistening it abundantly and allowing it to dry.
It is better to compact gravel or crushed stone. The method of compacting crushed stone manually in a trench is shown in the video.
Business registration
The form of business registration is determined by the scale of production. If you plan to sell small quantities to retail clients or small construction companies, you shouldn’t complicate your life - it will be the best option. In a situation with a large-scale business, LLC will become a priority. Taxation system – simplified tax system or UTII.
The production of artificial stone is not subject to mandatory licensing, which greatly simplifies the registration procedure. However, over time it is possible to obtain a voluntary certificate. The very presence of this document will help increase consumer confidence and loyalty of wholesale buyers.