During any construction from foam block or other material, at the design stage we must decide exactly what the house will be like. Let's look at the issue of building a foam block option, in several directions.
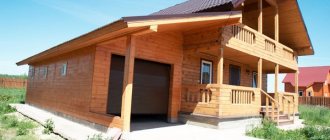
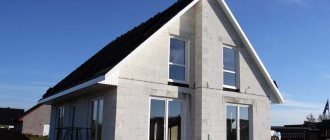
Photo of the project with a garage
Let us explain what we mean by directions:
- A simple one-story building.
- Attic option.
- With a garage.
- A house made of foam blocks with an attic and a garage.
- Two-storey house.
Each of these types will require a separate design from us and has its own unique features in operation. In addition, we will consider the option of independently adding an extension to the house after the fact.
How to properly attach a garage to a house made of aerated concrete (an extension from an aerated concrete block to a wooden house)
An aerated concrete extension to a brick or wooden house is not as rare a structural element as it might seem.
Quite often, due to the fact that something was not thought through in the project initially or the house was purchased as is, residents feel the need for some additional premises and for one reason or another it is not possible to build them at a distance from the main building . In some cases, they add a garage or workshop that they want to connect to the house with an internal exit, so they have to attach the premises to the main building. In other cases, the construction of a structure separately does not allow the area to be too limited. One way or another, extensions to a house are a fairly common occurrence, and if everything is done correctly, they turn out to be durable, strong and reliable.
The most popular option is an extension to a house made of aerated concrete, due to the lightness and simplicity of the material to install, the high speed of construction, the relatively low cost and the absence of the need to make a strong foundation. Most often, garages, utility blocks, workshops, storage rooms for equipment, etc. are added.
An additional building made of aerated blocks must be built taking into account not only general construction standards and rules, but also the characteristics of the material from which the main building is constructed. And before starting work, everything needs to be carefully thought out and calculated.
Article on the topic: Which machines to put in the garage
The most popular option is to add a car box to the house, and this is due to the following reasons:
- It is not always possible to secure a detached garage - the size of the plot does not allow it.
- An extension made of aerated concrete is cheaper.
- The house receives additional thermal protection - one wall is, as it were, insulated with a kind of vestibule.
- The entrance to the garage can be made from the house.
- The box becomes less accessible to car thieves - strong bolts are located inside, but there are no locks on the outside.
Do-it-yourself construction of a one-story house with a garage made of foam blocks
Why a garage made of foam block
If we decide to attach a garage made of foam blocks to a one-story house, we need to understand why we will build from this particular material.
We can talk about the merits of this material for a long time, but the first thing that needs to be said is the unique composition of the foam block. It should also be noted that it is extremely easy to work with, which will make it possible to independently build not only a garage, but the entire house.
It is important to note that building a one-story house with a garage using a ready-made project is much easier than if it were a project for a large project for residential construction. It will also be useful to determine the cost of building a garage from foam blocks on your own.
Advantages of foam block as a building material:
- safe and environmentally friendly;
- has a fairly low thermal conductivity (even outbuildings will be warm in winter);
- easy to install and fit;
- relatively inexpensive;
- makes it possible to erect buildings on difficult soil;
- has sufficient strength.
It is clear that all the advantages of foam blocks are very important in the construction of not only one-story residential buildings, but also two-story mansions with a garage.
Important: the construction of a garage can be carried out not only from foam blocks, but also from cinder blocks.
The design of a house made of foam blocks, whether with or without a garage, has its drawbacks, namely:
- high hygroscopicity, reducing thermal insulation performance;
- interior or exterior finishing that may affect the environmental properties of the material;
- The masonry made from foam blocks is often rough and requires additional finishing; naturally, this will only increase financial costs.
However, by comparing all the advantages and disadvantages of cinder block, we can come to the unequivocal conclusion that this material still has more advantages than disadvantages.
About the nuances of a construction site
If we have a medium-sized plot with a geological survey suitable for construction work, this is a suitable area for building a one-story house and a garage with foam blocks.
Definitely, in terms of complexity, the construction of a one-story residential building and a two-story one with an attic have their differences, if we take into account that we will build it with our own hands.
In addition, it is very important for us to know the geological condition of our site. This is the condition of the soil, which directly affects the choice of foundation, as well as whether the construction of a garage in the house or as an extension is suitable.
Everything is quite simple here. If we build a one-story house with a garage made of foam blocks, then the structure will have a large perimeter, which indicates a large load on the foundation, the weight of which will be distributed more widely over the ground. This has its advantages, doesn't it?
It is also important that the garage construction instructions indicate additional variable loads on the soil and foundation. The weight of the building, as well as one or more vehicles, must be taken into account. All this must be taken into account.
And if our project considers a two-story house with a garage made of foam blocks. It will have a smaller foundation perimeter, but due to the second floor, the load on the soil will definitely increase.
So it is very important to analyze all possible loads not only on the foundation, but also on the soil, and only after that make one decision or another.
We build it ourselves
Now let’s come directly to how we can attach a garage to the house, and all our actions will be viewed through the prism of completely independent work.
We can easily find free approximate designs of houses made of foam blocks with a garage, and based on their patterns we can form our own idea of what our house might look like.
Let's actually start building the garage, and go strictly step by step.
Preparation
In preparation, we can divide everything into several stages:
- Preparation of the site itself. Ensuring normal access to the construction site, supply of communications.
- Preparation of material, depending on the type of foundation.
Our plan for building a house with a garage made of foam blocks involves a strip foundation, so we prepare everything necessary:
- Fittings.
- Components of formwork.
- Sand, crushed stone, cement.
- Tools.
Job
Let's first consider the option of building a garage in stages, and then the option in which we build an extension to an existing building.
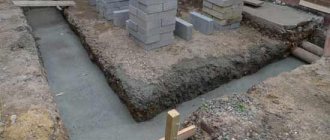
- We make a marking and excavate the soil along it. A strip foundation will require going deep at least one and a half meters in order to be at a depth greater than the freezing level of the soil.
- We arrange the formwork. Depending on our design, we raise it to a level above the ground.
Advice! Do not forget that the mass of concrete that will be poured into the formwork can burst it, and then we will not only have deformation of the foundation, but also a decrease in its strength, and as a result, operational performance. Therefore, we install the grillage with a margin of safety!
- We lay the fittings. To do this we will have to tie it. There is nothing complicated about this, we just use wire.
Article on the topic: How to expand a garage in nfs most wanted
Advice! You can often hear a lot of recommendations for choosing reinforcement for a strip foundation. We always offer a simple option, in which we simply add a safety margin to the design cross-section figures, and we get more reinforced reinforcement. The price of the foundation increases somewhat, but the issue of foundation for a house and a garage is not the best place to save money.
Now about the main thing, if we carry out work simultaneously with the construction of a house, then naturally our foundation is completely solid and covers both the main structure and an extension in the form of a garage.
Otherwise, we need:
- Separately calculate the loads that will be exerted on the base of the garage.
- Attach foundations. This can be done by drilling several holes in the main foundation, placing reinforcement in them and connecting everything with concrete to the new foundation.
- As soon as up to 5 days after pouring the concrete, the formwork can be removed. The concrete has already hardened enough for laying to begin.
- We carry out waterproofing with our own hands; this can be done by simply covering the concrete with a layer of roofing material or priming everything well with mastic in several layers.
- Then we install two guides, a horizontal and a vertical plumb line, this will help us carry out the laying without deviations.
- As a rule, designs for houses made of foam block with a garage assume a standard size of the foam block, so we can very easily lay it according to exactly the same principle as a brick wall.
The main thing here is not to deviate to the sides, and the construction level will also help us with this.
Note! When building a garage for an existing house, great attention will need to be paid to the connection of the two buildings. To do this, it is recommended to carry out work using a reinforced bond, when reinforcement is laid in the wall of the house and then it goes into the masonry of the garage.
Laying walls
Before installing the blocks, you must carefully waterproof the base. To do this, they most often use ordinary roofing felt in several layers:
- The first row is laid on cement mortar. Its construction begins from the corners of the foundation. It is very important to do everything correctly, because the evenness of the entire building depends on this row. When it is completed, the remaining rows are laid on glue-cement.
- Every 3 rows the blocks are reinforced. To do this, grooves are made in them, into which the reinforcement is placed and filled with mortar. A concrete lintel is required above each opening.
- When the masonry of the walls is completed, the reinforced belt is installed and the floor slab is laid. Upon completion of this work, you should begin cladding the facade so that the blocks do not deform under the influence of precipitation.
- In conclusion, building an extension is not an easy task. Therefore, it is important to follow all the rules during work. Especially at the stage of laying the foundation.
What blocks are suitable?
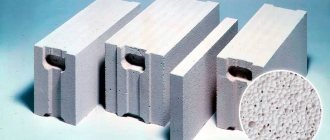
For heated extensions made of aerated concrete stones, products of linear dimensions are used:
- Height: from 200 mm to 250 mm.
- Length: from 600 mm to 625 mm.
- Width: from 100 to 400 mm.
Article on the topic: Is it possible to host a hostel in a garage?
The load-bearing external walls are laid from aerated blocks with a width of 200, 240, 300 or 400 mm.
The size of masonry stones for dividing partitions and internal walls depends on the degree of loading of these structures; in standard situations, blocks with a width of 100 to 150 mm are used.
also need to take into account the density of the aerated concrete block, marked with the letter “D” . In a simplified way, this value shows how many air bubbles are contained in a cellular concrete product. Density is measured in kg/m3 and shows the ratio of the weight of the block to its volume.
There is a regularity: the higher the density, the lower the thermal conductivity of the product.
When choosing a masonry material for the external walls of an attached room, you should give preference to a denser D400 gas block, which will better store internal heat.
Internal partitions and walls adjacent to an existing house made of brick or wood are made of aerated concrete stones of grade D500, characterized by greater thermal conductivity. Thanks to this division of masonry material by density, it is possible to significantly save on its purchase and at the same time create a comfortable microclimate in the attached room.
Formwork and reinforcement
Removable board formwork
The next stage of work will be the installation of formwork. To do this, you need to make panels from edged boards that match the height of the future foundation. They are installed along the entire perimeter of the pit, both on the outside and on the inside. The panels must be secured with wooden spacers to prevent them from moving.
Note! The panels must be installed so that the transverse boards connecting them are directed outward. This makes it easier to remove the shields.
Before you start assembling the reinforcement frame, you need to lay a layer of waterproofing, which can be used as roofing felt.
Note! In order to give the foundation strength, a reinforcing sheathing must be installed inside the formwork. For its manufacture, metal fittings are usually used.
Foundation
The supporting structure ensures the durability of the building. The correct choice of the optimal base design option determines the fate of the structure. If you need to attach a garage to a house made of aerated concrete, it is not recommended to combine the foundations of both buildings.
Any changes, subsidence, winter heaving can have a destructive effect on the support. It is necessary to take into account that changes in the foundation may be subtle, but the walls will react to them with the appearance of cracks, and in the most severe case, collapse.
The most common types of support systems are:
- strip foundation;
- slab;
- pile
They all have their advantages and disadvantages. A strip foundation requires competent preparation, assembly of a reinforcing belt, pouring and curing using a certain technology. The slab is a material-intensive and heavy structure. Piles should not be driven near buildings and structures in use. However, for each type of foundation there are ways to solve problems:
- You can make a shallow strip foundation that does not require extensive excavation work. The trench for it is usually made no deeper than 50 cm; much less concrete and reinforcement is required than for a full-fledged tape;
- instead of pouring slabs, a ready-made structure is often used - a hollow or monolithic floor slab;
- There are types of piles that are not driven, but filled with concrete on site (bored) or screwed into the ground like giant screws (screw).
Article on the topic: How to make a columnar foundation for a garage
The choice of foundation design is made based on the characteristics of the soil on the site. If it absorbs water normally (sandy, sandy loam), choose tape. For unstable, heaving soils, a slab is the best choice, and for high groundwater levels, a pile foundation is the best option.
In any case, it is recommended to consult with specialists and take their advice into account when choosing the type of foundation. This is too important an element; almost all cases of a frivolous attitude towards the construction of the foundation ended in the appearance of cracks, the collapse of walls or roofs.
In addition, the foundation must be carefully calculated taking into account the weight of the building, climate conditions and other factors. This is another argument in favor of purchasing a ready-made project, in which all elements are calculated by specialists.
Required Tools
To perform general construction and finishing work, you will need the following equipment and tools:
- shovels, crowbars, other entrenching tools for excavation work and foundation construction;
- trowel, spatulas for direct laying of blocks, alignment of lintels and reinforced belt;
- tape measure, levels, plumb lines for marking, controlling dimensions, correct positions of foam concrete blocks.
You will also need a drill with a mixer attachment, a screwdriver, hammers, pliers and other standard tools that are necessary for any construction work. To install the roof you will need a chainsaw and a miter saw.
And if you plan to prepare concrete for the foundation yourself, it’s worth purchasing a concrete mixer with at least a capacity of 70-120 liters.
Advantages and disadvantages
Aerated concrete blocks are superior to expanded clay blocks in many respects. Therefore, before purchasing, compare the characteristics of some types of porous materials, and then make sure that gas silicate is better than the rest. Undeniable advantages:
- the quality of heat and sound insulation is at the highest level - this is due to the porous structure of the products;
- aerated concrete blocks do not burn at extremely high temperatures, which ensures fire safety at home;
- the material is environmentally friendly, since it is made from natural ingredients: sand, lime and Portland cement, so you can forget about the harm to health;
- although the material is inferior to cinder blocks in strength, it is still able to withstand strong mechanical shocks;
- The weight of the product is very light, which reduces the cost of building a foundation and increases the speed of work.
- When building walls from aerated concrete, you should remember that their vapor permeability is very high, and the material will absorb moisture, a problem that can be solved if you use garage finishing;
- the next drawback is low strength due to porosity; if a car enthusiast decides to hang a shelf and place heavy objects on it, the fasteners may fly off.
Aerated blocks are placed not on cement mortar, but on special glue, therefore, there will be no cold bridges. In addition, the row spacing seams are only 2 - 3 mm, this reduces heat loss. Walls made of gas silicate, unlike bricks and cinder blocks, are laid 4 times faster.
However, this material is not without its disadvantages:
Article on the topic: How to make a garage from a metal profile
To avoid problems with cracks and deformation of the walls, it is necessary to do the work correctly. Metal anchors are used for hanging garage furniture. As a last resort, you can build a metal stand that does not have to be fixed to the wall.
Building a garage with your own hands, step-by-step instructions
You can make a garage from aerated concrete with your own hands according to the instructions:
- Foundation.
- Walling.
- Roof installation.
For comparison, a garage made of gas silicate blocks is built using a similar technology. The difference between the materials lies in strength and shrinkage. Gas silicate absorbs water more actively and is less frost-resistant.
Construction of the foundation
The calculations have been made and it turns out that we need to start building the foundation. In the case of an aerated concrete garage, the following options are available:
- monolith;
- pile-tape.
You can build a garage after a preliminary assessment of the soil. A monolithic foundation is chosen when the groundwater is deep and the structure is not in danger. When the garage block is washed away, you need to choose a pile-strip foundation. It will not move even with heavy precipitation.
Walling
When we are building a garage from a gas block 600x300x200 5x8 meters, it is better to focus on preparing a high-quality solution. For such material you don’t have to do anything supernatural. The solution is used exactly the same as when laying bricks. However, there is one feature - the addition of an adhesive mixture. With its help, the block lies flat and large seams are not formed. The second nuance is better thermal insulation. Water will definitely not pass through the presented mixture.
A bucket of sand, cement is poured into the container and water is added.
Depending on the quality of the material, it is important to look at the consistency. If the solution is taken well and can be distributed over the surface without smudges, then you need to start
The first row is pricked along the markings and a small amount of glue is applied. After checking the deviations, construction becomes easier. Subsequent rows need to be slightly tamped to prevent further shrinkage.
Stages of construction of a gas silicate garage
Despite the relative simplicity of the design and small dimensions, the garage, like any more or less solid structure, requires a serious approach. The entire process must be divided into stages, at each of which all operations must be carefully performed.
Gas silicate garage
Designing a gas silicate garage
Design is the very first and almost the most important stage in any construction. Its service life and operational safety depend on how thoroughly all the details and nuances of the future structure are calculated and taken into account. At this stage, there are two main ways: using a ready-made (standard) garage project, or turning to a specialist for help to create an individual project.
Although, if you plan to build a simple stone box for storing a car, in which there will be no communications and specialized solutions, you can try to draw up a project yourself. But even in this case, this stage must be taken seriously and all sides of the issue must be studied.
Two car garage project
Laying the foundation
The relative lightness of the structure allows the use of a shallow strip foundation for a garage made of gas silicate blocks. This base option is the most common. First, a trench 0.7-0.8 meters deep is prepared. The width of the trench should be determined by calculating the sum of the width of the block and the thickness of the formwork walls. Thus, the foundation strip after pouring cement should not be narrower than the width of the gas silicate block.
After this, it is necessary to create a damper pad. It is done by placing sand and brick chips (or gravel) at the bottom of the trench. The thickness of the damper should be about 0.2 meters. Its goal is to level out the impact of frost heaving forces on the structure being built.
Article on the topic: How to attract customers to a car service located in a garage
After creating a sand and gravel cushion, formwork is constructed inside the trench, which will act as a form for the poured concrete. A reinforcing foundation frame will be formed inside it. It is made of metal reinforcement and serves to increase the resistance of the garage foundation to mechanical damage.
Wall masonry
For laying gas silicate blocks, it is recommended to use specialized glue or a solution of cement and sand in a ratio of one to three, respectively, and with the addition of a plasticizer. Regardless of the chosen product, the first layer is always placed on a sand-cement mortar.
The first row of masonry is always laid on sand-cement mortar
First, use a level to make sure that the surface of the base is smooth and horizontal. If differences of more than 2 centimeters are detected, it is better to adjust the base. Differences of up to 20 mm can be leveled using a solution. It is extremely important that the first row of blocks is perfectly level. The quality of the masonry of the entire wall largely depends on this. After completing the first row, the solution must be allowed to dry.
It is recommended to start laying from the corners. After the corners are laid, a cord is stretched between the outer blocks, along which the remaining blocks of the row will subsequently be laid. The horizontal position of the cord is checked using a level. It is recommended to stretch the cord to control the horizon on each row.
After the first row is laid, it is reinforced. Along the entire perimeter of the walls, gutters are created into which reinforcement is laid. Reinforcement is performed on every third row (first, fourth, etc.).
When building a gas silicate garage, it is recommended not to delay the treatment of the walls. It is necessary to protect them from moisture as soon as possible.
Erection of the roof
The last major stage of building a garage is arranging the roof. The most economical option would be a lean-to structure. It will allow you to save on materials and not involve a team of professional builders in the work. You can handle the construction of such a structure yourself. The roof slope should start from the side of the gate and end at the rear wall. A gable roof can also be used on the garage. In this case, the use of more complex structures is inappropriate.
Article on the topic: How to organize storage in the garage
To summarize what has been said, we can conclude: in order to build a garage from gas silicate blocks with your own hands, you do not have to be a professional builder. With a lot of desire and a small level of skill, every car enthusiast can cope with this task. Almost all of the recommendations described above are also suitable for building a garage made of aerated concrete, since these two materials have similar properties.
How to build a garage?
Scheme for designing lintels made of aerated concrete blocks.
A garage built from blocks must be equipped with a ventilation system. It removes harmful exhaust gases from the room and also provides the cubic capacity with fresh air. The modern market offers a large selection of system models, which differ in the number of options and cost. The most economical are natural versions that do not require technological equipment. The greatest effect is achieved when operating a supply and exhaust ventilation complex, where the owner can independently regulate air circulation.
If you plan to use the garage in the winter, then it would be useful to protect its walls. In this case, it is advisable to use specialized insulating material. In addition to the basic function, its presence contributes to good noise insulation.
At the end of the garage construction, you can start finishing the exterior, because the dark gray blocks look rather inconspicuous. The range of finishing materials is extremely wide. It starts with traditional stucco mixtures and ends with siding or natural/natural stone slabs. Before starting work, the surfaces are washed with water and then primed. Interior walls covered with embossed wallpaper that have a pleasant shade look very good. This decor fills the interior space with comfort.
Despite all their shortcomings, walls built from foam blocks attract with their warmth, strength and reliability. They easily cope with street noise and frost. The price of this material is relatively low, therefore, during the construction process you can save a considerable amount.
Extension of a veranda to a house made of aerated concrete
Before starting construction of the veranda, you need to draw up a project for the future structure. It is important to understand the following questions at the initial stage:
1. Where will the entrance to the veranda be located (from the house or from the street)?
2. How will the veranda be connected to the house?
3. How will the roof be connected? Is it necessary to dismantle individual elements?
Construction must begin from the corner of the building. The walls are connected to the main house using metal brackets or fittings.
If the main house is made of wood, then you need to correctly combine different wall materials. A wooden house shrinks over time. Therefore, the seam between wood and aerated concrete must be made using flexible polyurethane foam.
The ideal roofing option for a veranda is a pitched roof. It will be a logical continuation of the main roof.
A gable roof will be much more expensive and will require additional rafters and insulation.
Preparation for work
Foam blocks
When the calculations are completed, you can move on to the construction work itself, to preparation. We are talking not only about preparing materials (by the way, for an extension to a non-metal garage it will be most convenient to use foam blocks), but also preparing the main garage for modernization. In particular, if the outside of the garage building was decorated with any material, then it must be removed from the wall to which the extension is supposed to be made.
Types of extensions to a wooden house
Depending on the type of building being built, the material, insulation, base and windows of the future room are selected. This could be a kitchen, toilet, garage. In central Russia you can often find a greenhouse that is attached directly to the building and has an entrance from the house - this is very convenient.
Connection diagram of the roof rafters of the main house and the extension
Watering can be carried out from the central water supply. It is clear that the construction of any building must be agreed with the supervisory authorities and carried out in accordance with technical regulations.
Article on the topic: Is it possible to host a hostel in a garage?
The construction of any structure to a building involves several stages:
- Choosing a location for the object;
- Calculation of the size of the future structure;
- Selection of materials;
- Checking the estimate, as you need to stay within the budget;
- Calculation of communications;
- Thinking through the passage from the main house to the constructed part;
- Thinking through the location of windows.
An example of a drawing of an extension made of foam blocks to a wooden house.
Of course, it is better to build a room from the same material as the house itself, but this is not always possible. If the house is wooden, and the new room is planned to be more massive, then it is best to build it from foam blocks.
It is better to make the extension from the same material that the house itself is made of.
Connection to the wall of the house
You cannot use the wall of the house as the fourth side of the garage, since seasonal movements, as well as shrinkage of the building, can cause cracks and destruction of the vertical planes.
The abutment areas must be made in the form of elastic expansion joints that compensate for movements of the extension. The contact points between the roof and the wall are also made plastic so that the tightness of the seam is not compromised.
The roof, in most cases, is pitched - this simplifies the design of the rafters; the slope is directed away from the walls of the house so that rainwater flows in the correct direction.
And in order not to waste your energy on floor equipment, contact the professionals - the construction company Technogroup, who will carefully and beautifully do the plaster for you and lay out the floor for you using the semi-dry screed technique.
The procedure for carrying out construction work
Adding a garage to a house is not an easy process, requiring special attention when joining the foundations of two structures. The difficulty lies in the fact that the main structure has already passed the stage of shrinkage, and the extension is just beginning to shrink. If the foundations are not joined correctly, the connected structures may become skewed, which will subsequently lead to a violation of the integrity of the entire structure.
Regardless of the method of joining the two foundations, it is recommended that after pouring the base of the extension, keep it in a calm state for at least one year - this will ensure that the formed structure is stable.
There are several ways to connect previously constructed buildings to the foundation of a newly constructed extension.
Rigid connection of two foundations
Rigid connection of two foundations
At the level of the concrete foundation of a residential building, trenches are dug into which a gravel-sand cushion is poured. Then reinforcing bars 0.5 m long are driven into the existing foundation. To do this, holes with a diameter slightly smaller than the diameter of the reinforcement are punched in it using a hammer drill, into which it is then “driven.” Next, a reinforcing frame is laid on the sand and gravel cushion, to which hammered pins are tied with wire. Then the resulting structure is filled with concrete.
“Soft” connection of extensions.
The concrete base of the extension and the old foundation are separated by a soft layer, which is most often used as roofing material. This ensures a “decoupling” of the two foundations. When shrinking the garage, this option will help avoid sudden distortions and cracks.
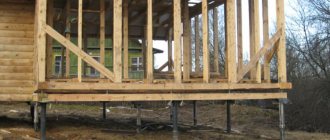
Lightweight frame garage extension
A lightweight garage made of sandwich panels can be installed on a weak foundation in close proximity to the main building without being tied to its main wall. In this case, concrete is poured into trenches 50-60 cm deep with reinforcement with four rods with a diameter of 10 mm. They only insulate it on the outside, which is not adjacent to the house. The minimum pressure that such a structure exerts on the ground reduces the risk of deformation and subsidence of the foundation of the main building to zero.
Open strip foundations are U-shaped concrete castings laid to the freezing depth of the soil. Their rigidity is low, so they are used in the construction of lightweight frame extensions from SIP panels and gas or foam concrete blocks. In the same way, you can attach a garage to a wooden house.
The closed bases have the form of two quadrangles located with a small gap relative to each other. This combination will allow you to attach heavy garages made of bricks or cinder blocks to the main building.
It is quite difficult to calculate the parameters of a concrete garage foundation in accordance with settlement. Therefore, the base of such an extension is poured with a height reserve.
Walling
The walls can be laid out when the foundation concrete has completely hardened.
After the foundation acquires the necessary strength characteristics, the construction of walls begins. It is best to use cellular concrete blocks instead of bricks for these purposes - they are light, easy to process and inexpensive. Dimensions allow to reduce construction time.
Construction begins with waterproofing. To do this, use roofing felt or special mastic, which is laid on the base in several layers.
Then the mortar is applied and the laying of the wall material begins. When using bricks, cement is used, but for blocks made of cellular concrete you will need special glue. The wall of the house must be connected to the wall of the garage adjacent to it. For this purpose, reinforcement with a diameter of 10 mm is used, the pins of which are driven into the wall of the house at the level of the masonry joint. If the garage is being built from brick, the pins are driven in every 6-10 rows, and if it is made of blocks - every 3-5 rows. 2-3 pins are driven into each row, their protruding part must be at least 25 cm. If a wooden garage is attached to the brick wall of the house, metal corners, anchors and long wood screws will be needed to secure it. In this case, each beam is attached to the wall of the house.
Upon completion of the work, the wall adjacent to the main building is treated with a fire-resistant compound, after which the construction of the roof begins.
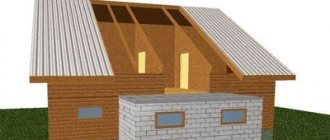
Garage roof
Shed roof - the most convenient type
As a rule, the choice falls on a single-pitch structure, which is characterized by ease of installation and cost-effectiveness.
- The height of the building is determined and a horizontal beam is attached at the highest level along the entire length of the building. Its minimum cross-section should be 50x100 mm. The method of fastening the timber is not significant; the main thing is to ensure sufficient fastening strength.
- A Mauerlat is attached to the opposite wall of the garage.
- The rafter legs are attached at one end to the mauerlat, and at the other to a beam fixed to the wall of the house. They are connected with steel corners and self-tapping screws at a distance of at least 20 cm from each other.
- Then a sheathing is mounted on the rafter legs, on top of which waterproofing is laid, and then the roofing material.
- The gables are covered with wall or roofing material. You can also use any sheet materials.
When arranging a garage extension, it is important to create a harmonious architectural complex. This will be easier to achieve if the roof of the main structure and the attached garage are made of the same material.
Optimal location for garage extension
Before planning to add a garage to your house, you need to pay attention to a number of important aspects of the construction and layout of this structure.
When building such a room, communications will most likely be carried out inside it - power supply, sewerage system, water supply and, possibly, heating.
How is an expansion joint constructed?
Considering that a garage is a room with a high fire hazard, it is even more dangerous in close proximity to a residential building, since the presence of a large amount of volatile flammable mixtures in the air inside the garage can provoke their detonation.
This suggests that when constructing such an extension to the house, you should definitely take care of the fire alarm and fire extinguishing system. When figuring out how to properly attach a garage to a house, you should first weigh the pros and cons of such an idea.
The undoubted advantages of this project are the expansion of personal space, savings on heating the garage - due to the fact that the wall of the structure is adjacent to the heated wall of a residential building, it is possible not only to save on heating the garage space, but also to reduce heat loss from the house.
In addition, an undoubted advantage is the rapid melting of snow and ice from the access area, which is possible due to the inclined surface.
But, oddly enough, some advantages are also disadvantages of the “neighborhood” of a house and a garage. First of all, it is worth noting that the driveway takes up quite a lot of personal space, which, in the absence of a large yard, can cause discomfort to all residents of the house.
Also, taking into account the high fire hazard of this extension, the walls adjacent to the residential building must be insulated with fire-resistant materials, which will avoid the ignition of the residential part of the building if the garage catches fire.
As for the location of such an extension, it is better to build the garage on the side of the house where there are no windows or on the side of the corridor. It is undesirable to place such buildings from the kitchen, living rooms and bathrooms.
Stages of work production
In order for a building to serve for decades, you need to know how to attach an extension of foam blocks to a house correctly, and act according to technology. Let us introduce you to the sequence of stages in constructing a house made of foam blocks.
- An important stage of construction is design. The service life of the structure depends on whether the calculations and drawings are made correctly.
- The second stage is the construction of the foundation. It should be noted that the foundation of the extension and the main house must be at the same level, with the same shrinkage. If the extension is installed on a columnar foundation, then the walls can be erected immediately, without waiting for the house to shrink. The strip foundation is installed after six months of shrinkage.
- After pouring the foundation, they move on to laying the walls. Roofing felt or Bikrost TPP is laid between the foundation and the walls to ensure waterproofing of the foundation.
- The next stage is the installation of window and door lintels. Foam blocks are installed if the opening width does not exceed 1.75 m. In other cases, the lintels are made of gas silicate bricks.
- Formwork is made and a reinforced belt is poured.
- An important stage is the installation of the roof.
- The installation of the extension is completed with façade cladding.
Stage 1 - Sketching the layout of the extension
At the beginning of construction, it is important to assess the condition of the object, identify the depth of soil freezing, soil type, and climatic conditions. Then calculations are performed. It is better to entrust design to specialists.
They will correctly calculate the amount of building material for the house, their cost, and determine the dimensions of the components of the structure.
Scheme of masonry and reinforcement of an extension made of foam blocks
Stage 2 - Which foundation to choose
To construct an extension, the following types of foundations are used:
- tape It is installed around the perimeter in the form of a tape of trenches. The foundation can be shallow, 50-70 cm deep. It is installed for a one-story building. If the building is two-story, and a basement or garage is planned inside the extension, then the pit is dug 20-30 cm below the soil freezing level;
- columnar is installed on non-heaving soils;
- pile is used on soils with high buoyancy. Piles can withstand weight from 2 to 5 tons;
- slab. Its cost is high.
Stage 3 - Foundation construction
Basically, a monolithic strip foundation is installed for the extension.
- First, markings are made using pegs and a cord.
- Trenches are dug, at the bottom of which a sand and gravel cushion is laid. It gets compacted.
- Geotextiles are laid on it.
- Reinforcing bars and formwork are installed.
- The formwork is filled with concrete mixture.
Stage 4 - Laying walls
The first row of foam blocks is laid on a cement-sand mortar. The bottom of the foam blocks is moistened for better adhesion to the surface. The blocks are mounted in the corners, with a cord stretched between them. The remaining foam blocks are aligned along it. The next rows are mounted using an adhesive solution.
The seams between the foam blocks are thin, only 2-3 mm. The layer is compacted with a mallet. Every 4 rows, reinforcement is laid in the corners. To do this, grooves are cut into which it is mounted.
The free space around the reinforcing bars is sealed with adhesive. Reinforcement can be installed between blocks.
Stage 5 - Installation of window and door lintels
Door and window lintels are made:
- with removable formwork. A reinforcement frame is installed. Support bars are installed along the edges of the opening, and the horizontal formwork is covered with shields. The inner side of the formwork is laid out with foam blocks, pre-sawn to length and moistened. From the inside, the formwork is filled with concrete;
- with permanent formwork. U-shaped blocks are used for its installation. The block is placed in the corners at the top of the opening with the hole facing up onto the adhesive compound. The reinforcement frame is secured with spacers;
- using metal corners 50*50*5 mm.
The support of the metal corners of the lintel on the walls must be at least 250 mm
Stage 6 - Installation of an armored belt to increase the load-bearing capacity of the walls
A reinforced monolithic belt is placed on top of the walls, which strengthens the structure and makes it more stable.
The armored belt connecting the walls increases the load-bearing capacity of the walls. Frames are placed in wooden templates at the corners of the walls. They can be connected to each other by welding. Using a level, their horizontal position is adjusted. Foam blocks are cut. Then they cover the reinforcing belt and fill the template with concrete.
You can “kill two birds with one stone” - make a reinforced belt together with lintels above the windows and doors, if you do not need a large extension height
Don’t forget to insulate the armored belt from the outside with penoplex to prevent freezing.
Stage 7 - Installation of insulated roof
The roof of the extension is usually pitched. It is located below the main one.
Single-pitched roof of the extension
- First, the Mauerlat is installed. It is necessary to support the rafter legs. In a wooden frame, the function of the mauerlat is performed by the upper crown.
- Then the rafters are attached.
- An overlapping waterproofing film is laid on the rafters. The joints are connected with double-sided tape.
- Counter-lattice boards are stuffed on top to ensure ventilation of the under-roof space.
- The sheathing is placed on the counter-lattice.
- Insulation is inserted between the lathing slats.
- A vapor barrier film is fixed at the bottom of the insulation.
- Corrugated sheeting, metal tiles, and bitumen shingles are used as roofing. Materials are laid from below on the side opposite to the prevailing wind direction. The roof of the extension is connected to the wall of the main house using a special strip with or without grooves.
Stage 8 - Facade and interior decoration
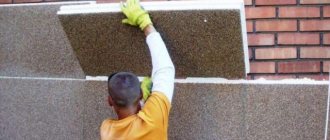
Particular attention should be paid to the decoration of the facade. Decorative finishing will improve the appearance of the house and protect the foam blocks from destruction.
The following materials are used as cladding:
- siding;
- plaster;
- lining;
- block house;
- decorative panels;
- artificial or natural stone.
To reduce heat loss, the extension can also be insulated with mineral wool, extruded polystyrene foam (Penoplex type), ecowool, polyurethane foam.