Whenever it comes to the next renovation and re-laying of linoleum covering is required, concerns arise as to whether the risk of laying linoleum on OSB is justified. There are no serious reasons not to use OSB, but there are vague doubts whether laying linoleum on OSB will damage the wooden base, for example, it may rot, as is usually the case with plank floors.
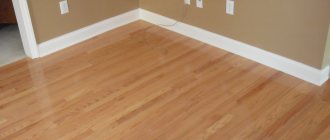
The material can even be installed in the bathroom
Is it possible to lay linoleum on OSB?
The most ardent opponents of the use of particle board give the following arguments against its use as a substrate for linoleum:
- The material does not provide reliable insulation from condensation formed under the floor covering. As a result, the pressed sawdust will overheat and the surface will crumble;
- The highly porous structure of OSB, like a sponge, absorbs moisture, so an odor will appear, possibly mold, with all the ensuing consequences.
For your information! It is believed that even if an OSB sheet is varnished or coated with impregnation or drying oil, this does not guarantee the absence of problems, for example, in the event of flooding in the kitchen or hallway.
This problem is usually associated with the fact that linoleum is an absolutely vapor-proof coating based on PVC, polyurethane and polyester film. But the point here is not even in the structure or properties of linoleum or OSB; the problem is in laying it in compliance with the technology and using the right materials. OSB board for flooring under linoleum fits perfectly. When compared with a plank base, chipboard or fiberboard, OSB turns out to be much better and more reliable.
Laying OSB under linoleum is beneficial
Advantages of a rough base made of OSB
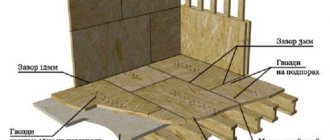
Laying linoleum on an OSB board is even easier than on a plank or concrete floor. The structure and characteristics of a slab made of pressed sawdust are such that, if the technology for laying it is followed, this method guarantees two quite significant advantages:
- The OSB board itself has enormous strength, therefore, even if the base is assembled with minor flaws, the floor will withstand the load from furniture or household appliances without deformation or seam breakage;
- The surface for laying on laminate turns out to be perfectly flat, and most importantly, there will be no guillotine effect at the joints between OSB boards, which is typical for plank floors.
This means that the coating will not experience shearing and bending loads, which means that after 10 years of operation there will be no cracks or breaks in the linoleum on the surface.
As for the poor resistance to water vapor and condensed moisture, this problem can be solved either by double-sided treatment with special wood impregnations, or by using a waterproof modification known as OSB 3. It does not contain harmful phenols or formaldehydes, as in the case of chipboard, and the material withstands direct contact with water and can be used both indoors and laid on a veranda or covered terrace.
tongue and groove OSB-3 with locks
The only significant disadvantage of OSB 3 is the high cost of the material. It makes sense to use the third version of OSB if you have to lay linoleum directly on a concrete floor. The strand-oriented board simultaneously acts as a heat insulator and a vapor barrier. In other cases, without any particular concerns, we lay linoleum on OSB 2.
Practical use
Using OSB, you will get a smooth and rigid base on which you can safely lay linoleum, laminate, parquet and even tiles. Here are the main functions of this material:
- installation of subfloor . OSB-3 and OSB-4 are quite often used for this purpose. Note that slabs can be laid on both the top and bottom sides of the joists,
- surface leveling . We already know that any floor covering requires a level floor. By installing OSB on top of a wooden or concrete floor, you will make the surface perfectly flat,
- heat/sound insulation . OSB consists of 90% natural materials (wood chips). Thanks to this, OSB boards have thermal insulation properties and can be considered as a universal insulation material. And thanks to the multilayer structure, the plate perfectly absorbs vibrations (noise).
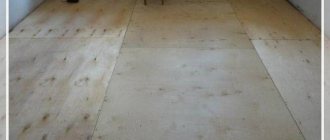
Preparing the surface of the OSB board for laying linoleum
It is clear that lining material made from wood-oriented board requires preliminary preparation. At a minimum, it is necessary to ensure that there is no damage and that the surface geometry is correct. If the material is stored incorrectly, OSB sheets are bent like a “propeller”; under the influence of air and sun, the pressed chips quickly age and begin to crumble.
A high-quality OSB board for flooring under linoleum should be absolutely flat, with smooth, sharp edges. OSB production technology is such that one side is smoother. If the linoleum panel is planned to be laid with glue, then we treat the OSB under the linoleum on a wooden floor with protective impregnation only from the back side. Otherwise, it is recommended to varnish or cover with drying oil completely.
Advice! If you are confident in the quality of the wooden floors on which you will need to lay OSB and glue linoleum, then the oriented strand material does not need to be varnished or oiled.
Good ventilation of the underground space guarantees reliable preservation of both joists and floorboards, as well as the OSB boards themselves. Special attention should be paid to the preparation of slab material for laying on a concrete floor without insulation. For example, if you plan to lay laminate flooring in a summer kitchen, or in a hallway, on a veranda, where there is no polystyrene foam or expanded clay laid under the screed.
Modern brands of glue allow you to glue chipboard, fiberboard and OSB directly to concrete without any problems. But a cold cement-sand surface, even with waterproofing, becomes a source of condensation. Condensed water must be dealt with, so wooden slats treated with oil or varnish are sewn onto the back of the OSB panels. The air gap will provide additional thermal insulation and at the same time allow for the effective removal of water vapor from under the rough OSB layer.
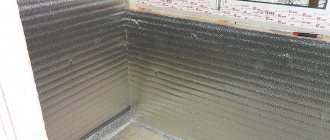
It is better to lay OSB on slats rather than on concrete
Peculiarities
OSB or OSB – there is often confusion with this abbreviation. In fact, everything is simple: OSB is an oriented strand board, and this is what the material should be called correctly, everything is in accordance with the requirements of the Russian language . When they say OSB boards, they are making a mistake. This is due to the mixing of OSB and OSB (Oriented Strand Board). The English title in translation fully corresponds to the Russian one.
The material is made from long, at least 6 cm, wood chips. This is coniferous wood chips that are mixed with synthetic wax and resins. In general, binding elements make up from 5 to 10% of the total mass. Wood dust and small chips from the raw materials that will be used for the slabs are removed. And this helps the material to be more flexible and stronger, and this also increases its cost.
Why OSB is a good substrate:
- not subject to rotting;
- practically does not swell in water, retains its shape after drying;
- not afraid of mold and fungi;
- burns low;
- has high elasticity;
- demonstrates excellent soundproofing characteristics;
- cuts well;
- lends itself (and very well) to subsequent paint and varnish treatment;
- allows the possibility of gluing sheets.
Some factors do not directly relate to the laying of linoleum, but give an accurate description of the material as a whole. Together with the low price, this all makes the material very popular. And they consider it necessary to put OSB under linoleum, since it is stronger than, for example, chipboard, it demonstrates low sensitivity to humidity, and meets eco-standards. As for the linoleum itself, even before laying it, you need to take into account some important points.
Features of laying linoleum on OSB:
- you should never bend the material - the surface of the slab will not help it further straighten;
- linoleum should rest for at least a day in the room where it will be laid for acclimatization;
- if you lay linoleum at low temperatures, it will break;
- the adhesive installation method is used extremely rarely, if the room is less than 20 square meters - almost never, the material lies flat under its own weight, pressed against the baseboards;
- The optimal room temperature for laying linoleum is from +20 degrees.
The main rule for laying linoleum is a good substrate. If there are no complaints about it, in 99% of cases the linoleum lays down without problems.
Leveling the OSB floor with a linoleum board
The most difficult task is leveling the base for the future linoleum covering. If the slabs are planned to be laid directly on a wooden floor, then the surface of the floorboards is sanded or milled in order to increase the contact area and level the base horizontally.
The gaps between the floorboards are not sealed; if there are “weak” boards, they are nailed “crosswise” together. The situation is considered more complex when there are rotten or destroyed joists under the wooden floor. In this case, it will be necessary to remove the floorboards, sew repair beams onto the supporting beams and lay the material back.
Before laying linoleum, the seams must be filled with sealant.
On uneven concrete foundations, it is most often necessary to lay a self-leveling layer; using a simple concrete screed it is quite difficult to adjust the surface to a more or less horizontal state.
To glue or not
Before laying linoleum, you need to decide whether you will glue it or not. There is an opinion that it is not necessary to glue it in houses and apartments. It is pressed against baseboards, furniture, large appliances, etc. All this “holds” him in place. Sometimes it works, sometimes it doesn't. It usually works on hard semi-commercial and commercial types of coating, but does not work on softer - household ones.
It's a matter of thermal expansion. In the summer, when it’s hot, linoleum expands, “creeping out” from under furniture and appliances. In the fall, it shrinks to its previous size, but does not return under the furniture. Waves and bumps form. Therefore, the majority agrees that it should be fixed.
If you don't glue it, it might look like this
Just keep in mind that linoleum either does not need to be glued at all, or glued completely. Glue it in some places - you are almost guaranteed to get humps and swelling after a while.
How to glue linoleum to OSB board
Linoleum flooring is usually laid over oriented strand board without the use of adhesive only if the flooring needs to be replaced in a small area. In this case, only the joint lines between the OSB boards are glued.
For gluing linoleum, you can use water-based acrylic adhesive compositions, both domestic and foreign. For example, the excellent Italian glue “POVICOL PROBOND” or the Soviet PVA-M.
The best solution is considered to be polyurethane adhesives, for example, Legnopol 2000, Basf Fast 3000, Ecosimp. It is worth considering that the strength of these adhesive compositions is so great that it will be impossible to tear off incorrectly glued linoleum from the particle board.
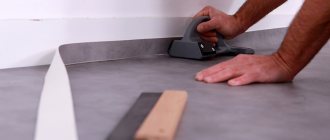
You need to lay linoleum towards the exit, as you will still need to roll and squeeze out bubbles
Popularity of tongue and groove connections
Not ordinary, but tongue-and-groove slabs have gained particular popularity. It is explained by the presence of the tongue-and-groove system, which allows you to create the most durable and motionless base. Due to the fact that there are no gaps between the slabs, the subfloor is as durable as possible. Especially if the joints of the plates are glued with a special glue - in this case the structure will be as airtight as possible, not requiring the installation of waterproofing.
Thanks to the tongue and groove, another goal is achieved - uniform distribution of the load across the entire floor. And this type of connection is much stronger and more reliable than between sheets of plywood nailed to the floor.
How to lay linoleum on OSB
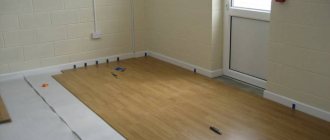
It is possible to determine how smoothly the particle board will lie on a rough concrete or plank base only by testing the installation of OSB. Therefore, the sheets must be brought into the room in advance and laid on the floor without any fasteners.
As a result of such fitting we determine:
- Places where OSB fits most tightly to the base;
- The presence of height differences at the seams between sheets;
- We mark the cutting and trimming lines for the material. We are trying to use OSB in the most optimal way, that is, with a minimum amount of small trimmings and waste.
Duct tape helps secure edges
Sometimes it is necessary to load the panels laid “idle” in order to slightly level and press the material towards the base, even before the OSB is fixed to the rough base using glue or self-tapping screws. Be sure to mark and number the sheets so as not to mix them up during final installation.
Laying OSB on a wooden floor under linoleum
Upon completion of the marking procedures, we remove all the panels from the room, vacuum the floor and begin laying OSB on the floorboards. There is one important note - panels and slabs cannot be cut in advance, even if you are sure that the markings are correct. Often, such confidence leads to the fact that the dimensions of the workpieces do not correspond to the real picture, and either a gap will appear between the sheets, or the joint between the walls and the OSB base will have to be sealed using wooden planks.
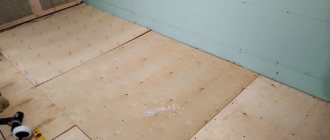
We recess the heads of the screws into the body of the substrate
We lay the slabs on the floor and fix them with two self-tapping screws. Only after the adjacent sheet has been laid can the material be sewn to the wooden base. To do this, mark the points and drill for the fastener head. This is necessary so that the head of the screw fits completely into the body of the OSB and does not stick out on the surface.
We glue the joints between the sheets with a mixture of sawdust and mounting adhesive so that the seam does not stick to the linoleum. A couple of hours after sealing, you can lay the main coating.
Almost all modern brands of linoleum either do not have shrinkage or have a minimum amount of shrinkage. Flooring manufacturers guarantee that the material can be laid without having to sit on the floor for 24 hours. Experts recommend that before starting installation work, unroll the roll and leave the linoleum in a free state for at least a day.
Laying OSB on a concrete floor under linoleum
Installation of oriented strand board on concrete can be done either with an adhesive base or using self-tapping screws and dowels. If linoleum is planned to be laid in a utility room, then OSB, like linoleum itself, can be glued using waterproofing mastic.
Laying OSB on self-leveling floor
If a layer of insulation is laid under a concrete screed, OSB must be laid on an adhesive basis, for example, using “Basf Fast 3000”. The adhesive is a viscous thixotropic mixture that is applied to the concrete using a notched trowel. After laying, the mixture hardens within 2 days, so you need to plan your work and lay the sheets in such a way as not to step on already laid sections.
All that remains is to seal the joints between the tiles and lay the linoleum itself. Manufacturers of the adhesive composition suggest using it for laying linoleum flooring. If customers are not embarrassed by the price of German material, then it will be possible to install it with branded glue without looking at the structure of the floors. One of the options for how to properly lay linoleum on OSB is shown in the video:
Preparation of materials and tools
To install OSB boards on the floor, you must have a set of tools.
A set of woodworking tools
From this set you will definitely need:
- jigsaw or fine-toothed hacksaw;
- hammer;
- hammer drill or drill with operating modes for concrete and wood;
- a set of twist drills for wood and impact drills for concrete;
- nail puller or pliers;
- screwdriver;
- laser or bubble building level;
- grinding machine;
- gun for working with sealant.
In addition to the plates themselves, consumables are needed:
- material for sealing joints (acrylic putty, parquet varnish, acrylic or silicone sealant);
- dowel-nails or self-tapping screws for fixing the slabs to the base base.
To lay linoleum on OSB, the base should be prepared:
- roulette;
- steel guide bar or long ruler;
- masking and double-sided tape;
- roller (disc) knife;
- month-shaped knife;
- regular and serrated spatula;
- adhesives - construction adhesives for fixing sheets to OSB and “cold welding” for joining sheets;
- rolling roller;
- skirting boards.
For the final installation of plastic skirting boards with cable ducts, you will additionally need fittings (corners, plugs, transitions) and dowels and nails.
Dowel-nails and corners for skirting boards
Advice from professionals
Despite the fact that today there are quite effective, safe and durable adhesive compositions, if you have to lay OSB on floorboards, it is best to limit the use of glue. It is believed that on plank floors, OSB sheets and linoleum should be fixed pointwise, leaving most of the surface free. This will preserve the system of logs and beams. In addition, laying the material is not the most difficult thing; you still need to think about how to remove it in the future during the next major overhaul.
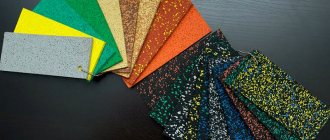
Choice of coverage
Now it would be appropriate to express a few thoughts on the issue of choosing linoleum itself. It’s better to immediately forget about cheap household coatings with a pungent, specific odor. Not only is this, so to speak, linoleum of extremely low quality, it is also toxic, and therefore harmful to health. High-quality items rarely have low prices. This also applies to floor coverings.
In rooms with low traffic, for example, in the bedroom, on the balcony/loggia, it is advisable to lay household linoleum. Its top coating (protective layer), which “takes upon itself” all mechanical impacts, ranges from 0.1 to 0.3 mm.
In rooms where traffic is higher - in the living room, hallway, kitchen, install semi-commercial. It is more durable and wear-resistant thanks to a protective layer of 0.4–0.6 mm. Keep in mind that thickness is not an indicator of quality. It is needed only to hide minor irregularities.
So, for a coating 4 mm thick, the protective layer can be only 0.2 mm (or even less). And with a thickness of ±1.5 mm, the top layer can be 0.5 mm or even 0.6 mm. Accordingly, the second option is preferable.
If we talk about manufacturing companies, the brands Tarkett (Germany), IVC (Belgium), Sinteros (Germany-Russia) have proven themselves well in Russia and Eastern European countries. The latter is a subsidiary of the Tarkett brand. Of course, there are other brands in Russia that produce high-quality products, but, as a rule, the presence of these three companies in stores is wider than others.
Now you have some knowledge of how to install OSB under various types of floor coverings. Remember that the expression “change floors” in most cases is not limited to replacing the old linoleum/laminate with a new one. Its meaning lies deeper, and in the literal sense too.
All the best, and see you again!
In accordance with applicable law, the Administration disclaims any representations and warranties that may otherwise be implied and disclaims liability in relation to the Site, the Content and its use. More details: https://seberemont.ru/info/otkaz.html
Was the article helpful?
Tell your friends
Today, many people choose OSB boards as the basis for their floors, and this is not surprising because this material has many positive characteristics. In addition, it paints well, you can apply varnish, plaster and even tiles on it.
The first step is to ensure that your floor is reliable, you need to choose the correct size of the OSB sheet so that it does not deform under loads. And only then start laying linoleum on the floor.
When your base is made of a suitable material, it’s time to find out how to lay linoleum on an OSB board.
Step-by-step instruction
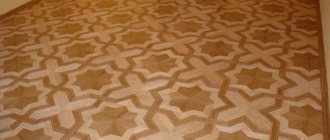
And now it’s worth saying in more detail about such an item as correcting substrate unevenness. The presence of seams from slabs is a problem that is almost impossible to get rid of. But you can minimize visual issues by eliminating differences in heights of adjacent panels. The edges must be carefully rubbed or sanded. A sander will be the best assistant in this matter.
It makes sense to check the entire area of the substrate, since bulges are sometimes found on the slabs. They are “organized” by incorrect transportation of the slabs, but sometimes it is also due to illiterate installation. And these irregularities also need to be eliminated.
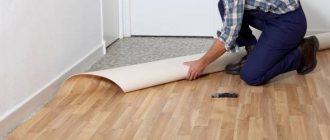
So, if the substrate is prepared with high quality, all irregularities are eliminated, there should be no problems with laying linoleum. The installation itself starts with the need to decide how the material will lie, because every owner wants there to be less waste.
Laying plan for linoleum.
- The area of the room is measured , a plan is drawn, and the location of the material is determined on paper.
- The linoleum is laid out so that the material extends 5-10 centimeters onto the walls. Take a sharp knife (you can use a wallpaper knife, or even a blade). Using a ruler, cut off the places where the entrances to the walls are located, exactly where the entrances lie in a straight line.
- Once the straight spots are trimmed, you can move on to the door frames. There you will have to cut along a different vector, more complicated. There is no need to rush; you will have to cut linoleum with almost pinpoint precision. That is, the tactics of small, leisurely cuts will be optimal.
- If there are semicircular areas, you need to make cuts straight from the edges. That is, first the linoleum is laid on the slab, and only then the material is cut off.
- If the linoleum installation will consist of a number of pieces, you will definitely have to stick adhesive double-sided tape under the joints. The evenness of the joints must be clear. But if it doesn’t work out that way, you can overlap the edges of the linoleum. This will be within 3-5 cm. You can fix them with double-sided tape so that they do not move. You can make a double cut by making a cut at the jointed edges.
- By removing the cut fragments, you can form beautiful joints. It will be very difficult to notice them.
Many people are interested in the topic of fastening joints using cold welding. When the material is laid, masking tape is glued to the edges. The tape will act as a protective layer.
If the tape has sealed the seam, you need to go over it with a blade, freeing up space. And then the cold weld is carefully squeezed into the seam. After 10 minutes (approximately), the composition will harden, and the masking tape can be easily removed.
Some rules for greater safety
The first time (about six to seven months) after installation, the most intense release of harmful fumes occurs. If you regularly ventilate the room, the negative impact on the body will soon begin to subside. But for greater safety, additional processing of the slabs is carried out.
If the work takes place in a children's room, then compositions with detoxifying properties are chosen as a primer. For common areas, simple water-dispersed paints, varnishes, wax, and penetrating primer are suitable.
Particular attention is paid to the ends. It is through them that the main amount of harmful substances is released
It is enough to saturate them with varnish or primer.
Priming is one of the safety measures that allows you to reduce the amount of harmful substances released
It should be taken into account that the rate of release of toxic elements is affected by temperature. The higher the indicator, the more formaldehyde in the air. The norm is considered to be 30 °C.
In general, there are two main ways that allow, without making excessive efforts, to rid the room of chemical components and saturate it with oxygen. Namely, frequent ventilation and the presence of indoor flowers.
OSB is not recommended for use in rooms where temperatures exceed 30 °C
Any modern building or finishing material that is made using chemical components can emit harmful substances. But manufacturers are constantly trying to keep these figures to a minimum.