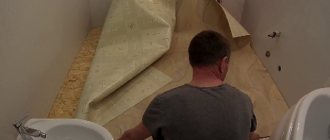
Preparing the base for linoleum
Laying linoleum at home consists of the following steps:
- Room measurements and material calculations.
- Preparing the floor for installation.
- Cutting linoleum, laying it and securing it.
In order for it to last long enough, maintaining its original appearance, the second point must be approached with the greatest responsibility and prepare the floor as carefully as possible, since thanks to the characteristics of linoleum as a coating, every crack, scratch or other unevenness located on the surface will become visible quickly enough .
Laying linoleum on a concrete floor requires the least amount of labor compared to other subfloor materials. For example, leveling a wooden floor will require several times more skills and materials.
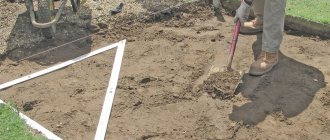
So, in order to prepare a concrete floor, you must first clean its surface. It is worth taking out all the furniture, removing the old covering, if any, removing the old baseboard if present, and also sweeping out all the construction dust that is formed during dismantling, after which the floor must be slightly moistened with water.
The most common and simplest way to level the floor is with a screed, which is a mixture of sand and cement. The required solution is obtained by mixing cement and well-sifted river sand in a ratio of 1 to 3. The resulting leveling mixture must be thoroughly mixed and then applied to the floor, remembering to carefully level it.
For convenience and to achieve the most even surface possible, it is worth using special beacons - these are wooden or metal slats that are installed on the floor at a distance of one and a half meters from each other. The putty fills the distance between the beacons, providing the same level of coverage. The thickness of the applied layer will directly depend on the initial relief.
The floor screed dictates some rules for the master. For example, while the solution is drying, it is imperative to ensure its constant moistening, otherwise cracking of the coating may occur, which will require additional work or even its replacement. Typically it takes 5 days to a week for complete drying. These manipulations will allow you to get a perfectly flat floor, on which, immediately after a little sanding and dust removal, you can lay linoleum.
In addition, an uneven concrete floor can be saved by laying plywood or cork sheets. Such a substrate can provide an even coating with additional sound insulation. The time required for this leveling option is several times less, however, due to the installation of a wooden base, this method is better suited for a wooden floor, since the plywood is attached to it using self-tapping screws, but for a concrete base you will need to purchase a special glue.
If necessary and desired, you can combine two methods of leveling the floor. Immediately after the cement screed has completely dried, it is necessary to lay cork sheets, plywood or polyethylene foam on the floor surface. These substrates will not only consolidate the leveling effect, but also provide additional heat and sound insulation, as well as better adhesion to linoleum.
Repairing a concrete floor for linoleum can be done in several ways. Each of them is suitable for certain operating conditions, the size and type of defects, and the characteristics of repair work. All three methods can be used to carry out repairs; they do not require the involvement of special equipment or a large number of specialists.
1) Self-leveling floor - flowing self-leveling mixtures are used. Laying the screed is very simple: the substance is simply poured onto the surface and evenly distributed over the area on its own, compensating for all the bumps, depressions, and cracks. There is no need to manually level the surface, since a feature of such solutions is the ability to take the desired position without external intervention.
2) Semi-dry screed - a thick leveling mixture is used, then manually distributed according to the level. Next, you need to grout and finish the screed with a special finishing mixture.
3) Dry screed - mainly mounted from sheet materials, which are installed on a leveled mound of expanded clay.
Semi-dry and wet screeds are considered the most reliable and durable; they are not afraid of sudden changes in temperature and moisture, but require time to dry. Dry screed, due to the use of gypsum fiber or wooden sheets, is inferior in strength to its concrete counterparts, is afraid of moisture, is more expensive, but is installed within 1-2 days.
Before leveling the floor, a number of measures are carried out to prepare the surface: dismantle the old floor covering, evaluate the base for chips, cracks, and degree of wear, clean the surface, carefully remove any remaining debris and dust. Next, use one of the leveling methods, wait the required time and lay the linoleum.
The method is suitable for floors whose base has a considerable number of irregularities, defects and differences. Laying sheets of chipboard or plywood is the fastest and easiest way to level the floor with your own hands. Special plywood is used, impregnated with moisture-resistant compounds.
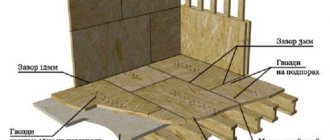
Usually, sheets with a thickness of 10-14 millimeters are chosen and mounted with self-tapping screws to previously installed joists. The logs are aligned horizontally; their role is played by square wooden blocks with a cross-section of 4-5 centimeters, pre-impregnated with antiseptic compounds. They are installed with a step that is optimal so that the plywood sheets fall in the middle of the bars.
Damper tape is glued around the perimeter of the room and beacons are installed. Next, the floor is covered with expanded clay or quartz sand; polystyrene foam can also be used.
The sheets need to be adjusted as close as possible to one another, glued and/or fastened with self-tapping screws, and after the joints and holes are treated using putty, be sure to clean them with sandpaper.
To level the floor under linoleum based on foamed PVC without glue, a variety of substrates are chosen, which simultaneously act as a sound and heat insulating layer and eliminate unevenness. When choosing, take into account the type and size of floor unevenness, as well as the properties of each of the substrates.
Substrates for linoleum:
- Jute - the most practical and durable, are not afraid of moisture, and are laid with glue under linoleum. They can be of different thicknesses, capable of leveling surfaces with differences of up to 3 millimeters.
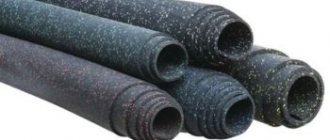
- Cork - made from crumbs. This is a natural, environmentally friendly material that is resistant to local mechanical loads from sharp heels and furniture legs. It has excellent heat and sound insulation properties. Typically used for flooring in children's rooms, attached with double-sided tape.
- Natural flax - such substrates are cheaper than jute ones, but in comparison with them they have a much shorter service life.
- Combined substrates - a mixture of flax, jute, wool, impregnated with antifungal agents and fire retardants. They can be made either as one independent coating or from several layers, mounted on mastic or glue. Well suited for use at home.
- Foam plastic ones are cheap, do not cope well with loads, have a short service life, so they are usually used together with cork ones or as a temporary base.
READ MORE: Linoleum in the interior (50 photos): design ideas for an apartment, how to match the color to the wallpaper in the living room, color options for bleached oak and wenge
The range of linoleum in construction stores is huge, and its characteristics can vary significantly. To choose a reliable and durable coating, you need to know the basic classification of linoleum.
Types of linoleum
According to the materials used in the production of coatings, linoleum is divided into natural and polymer - PVC. Natural linoleum has a top layer made from a mixture of natural components - crushed cork, wood flour, resins and mineral fillers; jute fiber is used as the bottom layer.
Natural linoleum
It does not burn, has antistatic properties, but is not moisture resistant and is quite expensive. In addition, it does not differ in a variety of colors and has a predominantly uniform pattern.
Natural linoleum floor
PVC linoleum is more common; the range of colors and patterns is much wider, which allows you to choose the material to suit any interior.
Various linoleum samples
According to the area of application, linoleum is divided into household, semi-commercial and commercial. Household linoleum is suitable only for rooms with low traffic - a bedroom, a children's room, a storage room. It is better to choose semi-commercial linoleum for the kitchen, living room and hallway, and commercial linoleum for offices and public buildings.
Wear resistance of linoleum
The structure of linoleum can be homogeneous, consisting of one layer with a thickness of at least 2 mm, or heterogeneous, consisting of several layers. Thanks to its homogeneous structure, homogeneous linoleum can be welded without creating seams, and can also be sanded when small scratches and stubborn dirt appear.
Homogeneous linoleum (samples)
Commercial homogeneous linoleum
The range of colors of homogeneous linoleum is not too wide, but by welding different samples you can get an original floor covering.
Homogeneous linoleum floor
Heterogeneous linoleum consists of a base - fiberglass. Various functional layers are applied to the base on both sides: on the bottom - a substrate, a heat-insulating layer of non-woven fabric or foamed polymer, on top - decorative and protective layers.
Heterogeneous linoleum - structure
Linoleum with a backing is called basic, without a backing - baseless. Thin baseless linoleum requires careful preparation of the base, otherwise its service life will not exceed 2-3 years.
Linoleum with base
linoleum tarkett
Linoleum, in addition to the characteristics described above, varies in width, which can range from 1.5 to 6 m. When cutting the material, you must:
- measure the length and width of the room;
- add 10-15 cm on each side to overlap the walls;
- choose linoleum of a suitable width and measure the required length.
If the standard width of the selected linoleum is not enough, it must be joined. In this case, the nature of the pattern is additionally taken into account and a fitting allowance of one pattern repeat is added.
Dry screed tool
Prepare the following tool for dry screeding:
- Electric jigsaw for cutting gypsum fiber boards;
- The building rule is 2-3 meters long, depending on the width of the room;
- A set of screwdrivers or a screwdriver;
- Metal spatula for sealing seams between sheets;
- Devices for attaching damper tape to the wall. If the wall is wooden, then you need a construction stapler; if the wall is concrete or plastered, then you need construction tape;
- A laser level wouldn't hurt.
Leveling the floor, preparing the base
- Heat and sound insulation.
- Elimination of small horizontal differences (no more than 2 mm per 2 m²).
If the product is spread on the first floors, the presence of a substrate is required. Many people prefer to install waterproofing as an additional layer to the substrate. This measure is resorted to in case of increased evaporation from the base on the ground. Linoleum and concrete are cool materials, so insulating the coverings is desirable, especially if there are small children in the house.
The material is made from a plant – jute. Its fibers are used in the manufacture of not only backings, but also the bases of carpet roll materials. The fiber is distinguished by the fact that it absorbs moisture and removes it in an optimal way, without affecting or destroying the coating.
Since the material is natural and can provoke the appearance of mold, fungi and other microorganisms, it is customary to treat it with special compounds - fire retardants. The measure allows you to eradicate the shortcoming and improve the characteristics of the product. The jute base is an excellent solution when choosing a substrate for linoleum. However, the high cost is a deterrent.
READ MORE: How to paint a wooden floor and how to do it yourself correctly, painted floors in the house
The material is made from flax - a natural and environmentally friendly raw material. It is distinguished by its ability to self-ventilate. The substrate will not allow the appearance of microorganisms, mold and fungi due to its peculiarity.
The material is additionally processed with special components. They give the product fire-resistant qualities and prevent the product from rotting. Linen backing has a more affordable price; experts recommend its use in homes where people prone to allergies live.
- Identify all the imperfections of the foundation - cracks, bumps, holes, differences in horizontality. If there are any, it is necessary to cut off the bulges, cover up the cracks and depressions. Use the level to determine the size of the differences in horizontality. If the difference is small, then filling the screed will not be required. If the parameters are exceeded - more than 7 mm for every 2 m² - it is necessary to level the floor with a cement screed.
- The screed or “light” floor must dry thoroughly. Otherwise, the substrate flooring made of any material will quickly fail due to excessive moisture.
- If you decide to make a base for linoleum from plywood, you need to lay a layer of waterproofing on the concrete floor. A wooden base will be better preserved and last longer if protected from moisture. It is advisable to go over a wooden surface with a sanding machine.
- The joints and seams of the substrate are treated with construction tape. Accordingly, the material is not overlapped, but joint to joint. The backing does not stretch and lies freely.
Then the quality of the concrete pavement should be assessed. Using a building level of appropriate length, measurements should be taken and all bumps, dents, and height differences between building slabs should be noted. If the total number of unevenness exceeds 15–20% of the total floor area, then it is necessary to re-concrete screed. It is best to level the concrete surface using a self-leveling mixture, which will independently fill all the holes and irregularities.
The last stage of preparing the concrete base should be treating the floor with a primer.
Cost of repair work
If you do not have free time to level the floor yourself, then the work can be entrusted to repair teams, whose advertisements abound on the Internet. Specialists can do not only leveling, but also provide other repair services. But all this will have to be paid for. Of course, the cost of the work depends on the skill level of the master and the city in which the work is performed (prices for leveling in Moscow are much higher than in other cities).
Cost of floor leveling
Let's consider the average cost of work per 1 sq. m. So, the asking price:
- installation of plywood sheets on a base made of wood – 110-130 rubles;
- leveling with self-leveling floor – 150-180 rubles;
- dry screed – 400-500 rubles;
- leveling the floor with joists – 520-600 rubles;
- cement floor screed with installation of beacons - 600-650 rubles.
Leveling the floor: before and after
Leveling the floor yourself is a difficult job that requires patience and care. Therefore, if you doubt your abilities and are not sure that the leveling will be done efficiently, it is better to entrust the work to qualified specialists
Of course, you will have to pay a lot for their services, especially if the room is large, but the result is worth it.
Using the mixture to level the floor
How to prepare wood flooring
To prepare the wood flooring, you first need to carefully seal all the cracks. To do this, you can use special blades, but it is much more effective and cheaper to use a homemade composition. Take old newspapers, chop them finely and fill them with plenty of warm water. When the paper softens, you need to squeeze it out and mix it with glue. Use the resulting paste to carefully seal all cracks, chips, crevices and irregularities.
After this, the floor surface must be thoroughly sanded to remove roughness. Of course, you can treat the floor with sanding. This can be done either manually or with a special device. Then the surface will become perfectly flat and the underlay on the floor under the linoleum will lie flawlessly.
Before fixing the linoleum, it is important to properly prepare this coating. The rolls are rolled out on the floor surface to their entire length and left there for several days (some recommend letting the linoleum rest for about 10-15 days). This will allow the coating to level and stretch.
Linoleum needs to be rolled out on the floor surface
Linoleum is usually laid either in the direction from the walls to the window, or along the room.
Gypsum fiber moisture resistant Knauf supersheet (GVLV)
| Application area: | Walls, Ceilings | Edge type: | PC, FC |
| Length: | 2500 mm | Amount in a package: | 50 pcs, 40 pcs |
| Vapor permeability: | 0.12 mg/(m•h•Pa) | Tensile strength: | >5.3 kPa |
| Thermal conductivity: | 0.22-0.36 W/(m*K) | Thickness: | 12.5 mm, 10 mm |
| Width: | 1200 mm | Gross weight: | 36.1 kg, 45.12 kg |
Knauf supersheet moisture-resistant (GVLV) High-quality, environmentally friendly moisture-resistant plasterboard for dry construction in rooms with high humidity with high requirements for fire safety, heat and sound insulation.
Moisture-resistant gypsum fiber Knauf supersheet (GVLV) is a sheet finishing building material of rectangular shape. It is manufactured in accordance with GOST R 51829-2001 by pressing a mixture of gypsum binder and fluffed waste paper fibers, evenly distributed throughout the entire volume of the sheet.
Artificial analogues
A product made of foam material - isolon, penofizol, has become very popular due to its low cost. Its availability sometimes overcomes all the shortcomings of the material. The fact is that the product quickly fails and becomes deformed.
Accordingly, the comfort of walking quickly disappears, and the installed furniture begins to “walk” and lose stability. In other words, there is no correspondence between the service life of linoleum and the substrate. It is better to spend more and one time than less and ten times.
My friend's new tactic
After practicing in my kitchen and already gaining experience, my friend decided to improve his styling technique. In his kitchen, he also did without profiles, but began laying the floor not from the far corner, but from the threshold, and this turned out to be both more convenient and faster.
Starting from the far corner and moving towards the entrance to the kitchen, he poured in expanded clay, compacting it with a “pusher” and leveling it over the surface. Consulting a laser level, he gradually worked the floor backwards.
In other rooms the floor was laid differently. Remembering how they level walls according to beacons, he decided to do something similar. Instead of profiles, I built original rails at a certain distance from each other from mortar (putty). These profiles had a given height.
Why this design? This allowed him to fill, compact and lay the entire floor at once. It turns out very quickly and more accurately in height. This is how new styling ideas came from room to room.
What kind of underlay should be used for linoleum on a concrete floor: tips and reviews from builders
Despite the variety of modern finishing materials for flooring, linoleum still remains the most popular and in demand. This happens because linoleum has long proven its practicality, durability and wear resistance. In addition, the cost of such coverage is very affordable. However, before you finally make your choice, it is worth deciding whether you need an underlay for linoleum when laying it, whether it is better to lay it on a concrete or wooden floor and how much it all costs.
Frequently asked problems and questions
How to glue linoleum to a concrete floor? There are many compositions for adhesive installation of coatings on the market. The choice of mixture depends on the characteristics of the base and the material itself. The safest and most universal is the water-dispersion composition.
There are many ways to stick
How to level a concrete floor under linoleum? Differences in the height of the base are eliminated using a scraping machine or by puttying. Other methods are laying plywood under linoleum or using a self-leveling mixture.
Is it possible to lay linoleum on a concrete floor? Before laying the coating, leveling the surface is required. This is done using a screed, self-spreading mixture or dry method.
Sanding machine
How to treat the floor before installation? The surface of the base is carefully leveled, otherwise all defects will be visible on the finish coating. In case of fixing with bitumen mastic, a double primer of the floor is required.
How to lay linoleum on a concrete floor? Laying the material is simple and does not require special skills. The coating is fixed in a floating manner, using glue or special tape.
Installation is simple and does not require special skills
When choosing linoleum, you should take into account the technical characteristics of the material and the operating features of the future floor. The coating is laid on a well-prepared concrete base. This is an important point on which the quality, service life, and comfort of the floor depend. Taking into account the technical features of materials and adherence to installation technology gives an excellent result in the form of a comfortable, durable coating.
Natural substrate
The most popular material for making natural backing for linoleum is cork. It is produced by pressing granules from cork oak bark, and only natural binders are used. So the end result is a 100% environmentally friendly material.
Linen or, for example, jute backing is also quite popular. You can also lay combined insulation under linoleum - this is a mixed insulation consisting of jute, flax and wool.
Jute backing for linoleum has some advantages. During production, it is treated with an antiseptic and fire retardant compound, which prevents fire, rotting and mold formation. Jute insulation has the ability to absorb moisture and release it back, but it does not get wet.
The linen underlay for linoleum on a concrete floor is also quite environmentally friendly and, as in the previous case, is treated with special compounds, so it also does not rot, and no “living creatures” will grow in it. It is made by punching natural flax with a double needle and rolling it on a roller.
When is the Knauf system relevant?
Such floors have a wide range of possibilities and, in some cases, can be done at low cost. to use a dry screed:
- to eliminate differences in the floor base over 40 mm. This applies to apartments of old buildings, where a serious difference in elevation is the norm;
- when installing electrical wiring and water supply systems after completion of repairs;
- with limited time frames for repair work;
- the ability to install a floating floor at low air temperatures;
- when the logs become dilapidated.
Polymer substrate
The underlay for linoleum on a concrete floor, photos of which can most often be found on the Internet, is made of polymer materials. This is the most inexpensive and common insulation, but it is not very convenient to use it under linoleum. Although these materials also have sound insulation and have good thermophysical properties, under the rolled material they quickly wrinkle and lose their qualities.
To determine which linoleum substrate is right for your case, you should pay attention to the price of polymer substrates (they are much cheaper than natural ones), as well as their variety.
ABOUT KNAUF superfield
Knauf superfloor, produced by Knauf, is correctly called a prefabricated floor base. It is also called dry screed Knauf. The dry screed kit includes a special bedding and floor elements. The floor elements are two standard gypsum fiber board sheets (10 mm), glued together with a diagonal offset of 5 cm. The thickness of the floor element is 20 mm. This offset creates a locking connection along the edges of the sheet, which allows you to lay the sheets overlapping (see photo). The locking connection allows you to maintain the same thickness of the entire resulting base.
Insulation of a balcony or loggia
The backing for linoleum on a concrete floor on a balcony is also usually a multi-layer structure. Only here infrared floors are most often used; they are not afraid of moisture and do not contribute to fire. The floor temperature is regulated by thermal sensors, and copper-silver conductors are hidden in the graphite strips, through which an electric current of 220 V passes. In principle, in this case you can do without a substrate at all, but if the linoleum is not thick enough, you risk damaging the heating film.
Laying technology
We opened the floor quickly and without much difficulty. Then, by removing the logs and excess debris, we got a clean space. Since this happened in a panel house, before filling in the expanded clay, all the joints between the slabs were sealed, otherwise the expanded clay, like sand, flows even into small cracks.
Briefly, the installation technology is as follows: the height of the subfloor is marked with a laser level. Next, metal profiles are laid to the required height at a certain distance. Expanded clay is poured between the profiles, and superfloor sheets are already laid on top. Everything seemed simple.
Armed with the knowledge gained from the Internet, we got to work. The profiles were laid, but it seemed to us that it was not serious. Therefore, we decided to go our own way. First, a dowel was installed - nails into the floor at a given height, then expanded clay was poured in, and then the profile was sunk onto the dowel and expanded clay to the height of the subfloor, taking into account the thickness of the sheets.
Expanded clay was poured between the profiles and leveled. A superfloor was laid on top of the profiles and expanded clay. It is recommended to glue Knauf sheets using PVA glue, but we installed them on foam. All joints, according to the recommendations, were secured with gypsum plasterboard screws.
I must say that working with expanded clay is quite dusty. It is inconvenient for two people to stack sheets, and it is also inconvenient for one person, and besides, it is very difficult. KNAUF is a very heavy material. You can cut it with a hacksaw.
This is how the floor in my kitchen was laid. Everything was fine, but something didn’t go as we would like. I was confused by the fact that the floor was somehow floating and somehow behaved unstable. Thinking that the expanded clay would shrink over time, I almost calmed down.
My peace of mind came to an end with the arrival of the tiler, who walked around, jumped around and gave the following verdict: the floor needs to be redone. It was clear that the entire floor was supported only by the profiles, and the expanded clay had settled down and was below the level.
Where can Knauf be used?
There are practically no restrictions when using a screed. The only thing is damp rooms. We are talking about baths, baths, swimming pools. In other rooms, the adhesive joint of the boards can withstand slight moisture.
Where is it better to use dry material? Such a screed will be indispensable for floors with large differences in height, old houses, and clean rooms. Why is that? It's simple. When there are large differences, a lot of wet material is needed. The weight of such a structure will be several tons. This is detrimental to the floors.
This type of screed is most often used in apartments
Also, dry material is ideal for rooms where renovations have already been done. Wet work can ruin the finish. When working dry, the level of contamination is minimal. In addition, sometimes the time frame for repairs is limited. A wet screed takes about a month to dry. Then it still takes time to lay the finishing coat. Dry building material can be laid in a day. The next day you can lay the pre-selected floor covering.
Dry screed is a relatively inexpensive way to screed a floor.
Source
