Rolled and sheet penofol is attached to the concrete base only with special glue. The adhesive composition allows you to preserve and even strengthen the technical qualities of the heat-insulating material. For high-quality fastening of polyethylene foam, targeted adhesive preparations are used, the technological development of which is aimed at the rapid connection of concrete with penofol.
How to glue isolon to concrete
how to glue isolon to concrete
During the construction of industrial facilities and residential buildings, modern building materials are used to meet the most important construction requirements for heat and sound insulation. Such material, for example, is isolon or polyethylene foam. The use of isolon allows you to reduce construction time and heating costs due to the excellent thermal insulation properties of this material.
Isolon has the following characteristics: 1. Low density (light weight) and at the same time good thermal insulation properties. A 10 mm layer of isolon can replace a 15 mm layer of mineral wool, 45 mm of wood or 150 mm of brickwork.
This reduces the weight of structures and helps save usable space. 2. Freons and other substances hazardous to humans are not used in the production of isolon. Izolon is non-toxic, does not affect the skin, and does not emit harmful substances when used. Has a hygiene certificate, 3.
Isolon is a chemically inert material and is not affected by organic solvents. It is possible to combine isolon with other building materials (concrete, gypsum, cement, lime, wood). It practically does not absorb water and steam, therefore it is resistant to rotting, mold and aging, 4.
Excellent shock-absorbing properties due to flexibility and uniform cellular structure. Isolon is used as a backing for carpet, laminate, linoleum or parquet. Izolon sheets are used to separate adjacent walls if the adjacent walls are subject to movement or vibration, 5. The operating temperature range is from -60`C to +75`C, and if there are no mechanical loads, the operating temperature increases to +100`C. With the exception of special isolons with fire-extinguishing additives, isolon is a flammable material. But at temperatures less than +140`С no harmful substances are released from isolon, 6.
Izolon is produced in different thicknesses and densities (with different foaming coefficients) and is supplied in the form of rolls, sheets, tape or blocks. This significantly increases the possibilities of using isolon in construction. Depending on the production method, isolon is divided into cross-linked (when molecules are cross-linked, a network molecular model is formed) and non-cross-linked (there are no chemical bonds between the polymer molecules).
Cross-linked isolon, compared to non-cross-linked, has improved characteristics: 1. Heat resistance increases (the operating temperature range increases by 20°C), 2. The service life of the material increases due to increased resistance to ultraviolet radiation and organic solvents: oil, gasoline, diesel fuel, Izolon can be used 1.
For sound, steam, heat, waterproofing of walls, foundations, floors and roofs for country houses, cottages, garages, 2. As a sealant under slate, ribbed metal roofs or tiles, 3. Isolon tapes with an adhesive layer seal the joints of windows and doors, connections between the frame and glass, protect from dust, moisture and noise, 4. Izolon strips can be used to insulate cold and hot heating pipes, as well as ventilation pipes, 5. Izolon with a polymer metallized film is used as a heat-reflecting screen to protect against heat loss through the areas behind the radiators of the walls. When using a combined material, a double effect is obtained.
Due to the metallized film, up to 90% of the heat emitted by radiators or other heating devices is reflected back into the room. The big advantage of isolon is its ease of use and installation. It is easy to cut and can be glued to the surface with adhesives (pre-glued surfaces should be cleaned of dust and degreased).
To attach to a smooth surface, use screws, slats, and furniture staplers. To connect the joints, use a hair dryer. Isolon is attached to curved surfaces with double-sided mounting tape.
Thus, when using this modern material, it is possible to significantly reduce construction time and heating costs.
How to glue isolon to concrete
How to glue Izolon to concrete How to glue Izolon to concrete During the construction of industrial facilities and residential buildings to ensure the most important construction requirements for heat and sound insulation
Features and applications of penoplex glue
There are many options for materials for construction and finishing. Penoplex is in great demand. The surface finished with such panels should serve for a long period. Properly selected adhesive for penoplex will ensure the performance of this function.
You need to choose the adhesive for insulation very carefully. After all, it is on this that the slabs themselves will need to be glued, and the entire insulating structure rests on it. If the glue cannot cope with the load, the consequences will not be very pleasant.
How to install reflective insulation on a concrete wall?
How or with what can you glue or attach reflective insulation to a concrete wall? Thank you.
Reflective insulation is a lightweight, flexible material with a thickness of 4 mm or more, consisting of a layer of foamed polyethylene or other polymer, onto which aluminum foil or metallized film is glued on one or both sides. Foil thermal insulation materials are environmentally friendly, easy to install and significantly reduce heat loss.
Manufacturers of reflective thermal insulation materials do not exclude the use of glue during installation, but draw the attention of consumers that they are most effective if an air gap of 2 to 10 mm is created between the wall and the thermal insulation. After all, air is also an additional thermal insulation layer.
The method of attaching reflective thermal insulation to a concrete wall is chosen depending on the type of material, capabilities, location and purpose of the room. In any case, the concrete wall must first be cleaned of dust and treated with an antiseptic, and if necessary, dried.
When insulating balconies or cold external walls with a heat insulator with a double-sided foil coating, it is necessary to fill the concrete with a lathing of slats 5-7 mm thick and attach the material to it with a construction stapler or glue. A second sheathing is mounted on top of the heat-insulating material for laying the finishing coating with an air gap.
When installing on reflective materials with a one-sided metallized coating, it is allowed to use rubber or acrylic-based adhesives such as 88-NP, Akrol Contact, Neoprene 2136 spray, etc. You can also use polyurethane foam, sealing sealant and double-sided reinforced construction tape . The adhesive composition is applied to the back side of the material pointwise in a checkerboard pattern or randomly, so that after gluing to the concrete the required air gap of about 2 mm remains.
Reflective insulation sheets are glued end to end and the seams must be taped with aluminum tape. As a result, an airtight coating is created on the wall, reminiscent of a thermos, onto which a lath of slats can be mounted to secure the finishing material.
Finally, if increasing the thickness of the walls is undesirable or impossible, self-adhesive foil thermal insulation material can be used for insulation. To install it, you only need to prepare the concrete surface and remove the protective film from the underside of the canvas, and after gluing, seal the joints with foil tape. But when fastened to the sheathing, the efficiency of self-adhesive metallized insulation is higher.
How to install reflective insulation on a concrete wall?
Tips on the method of fastening reflective thermal insulation to a concrete wall, depending on the type of material, purpose and capabilities of the room
How to glue at home
If there is a need to glue polyethylene at home, then you need to use IZ products. The gluing process depends on what base the film is attached to.
Interesting video on the topic:
Between themselves
The polyethylene film will stick to each other BF-2. But before work you need to prepare:
- The surface is thoroughly cleaned of dirt, dust deposits, and degreased.
- Apply a layer of adhesive, distribute evenly, connect the surfaces.
- Press for a couple of hours until the mass sets.
This preparation is suitable for all types of connecting compounds.
Glue - toxic compounds, work is performed with gloves.
In addition to glue, double-sided tape, soldering the ends between two metal plates, or molten plastic will help to glue the film.
To metal
In order for the polyethylene to tightly and reliably cover the metal surface, you need to do the following:
- the metal plane is cleaned and degreased;
- warms up to 120–150 degrees;
- the film is carefully stretched, gradually applied to a metal plane, and rolled.
To concrete
It is not difficult to stick insulation to concrete, the main thing is to follow the rules:
- the concrete surface is cleaned, leveled, primed;
- glue is applied to the side of the insulation where there is no foil;
- wait a minute for the glue to soak in;
- apply cloth, press;
- the edges are additionally coated and fixed;
- wait until it dries completely.
What kind of glue to glue foamed polyethylene with?
When choosing insulation, a special place is occupied by foamed polyethylene - a material with sound, heat and vapor barrier properties. Depending on the manufacturer, it can be penofol, isolon or polyfoam. The construction market offers different types: with one-sided or double-sided foil, as well as with a self-adhesive plane. The material on which the insulation is attached also varies. Based on all the parameters, you need to be able to choose the appropriate adhesive for polyethylene foam.
How to choose adhesive for penofol
Finishing and repair work often involves fastening various building materials together. Sheet or roll insulation cannot be fixed to insulated structures without special devices, otherwise their heat-insulating properties will be lost and their wear will be faster.
Use of Penofol
For such purposes, the material that is optimally suited is penofol, which has a layered structure and consists of aluminum foil supplemented with polyethylene foam. It is characterized by its low thickness and low weight, as well as ease of installation.
This material is used for finishing building structures, units of specialized machines and entire mechanisms, individual parts of technical equipment on a production scale, pipelines, air conditioning systems, drying cabinets, as well as inclined surfaces with a complex profile.
In order to ensure maximum steam, thermal, hydro and noise protection, Penofol must be glued to a previously prepared surface (cleaned and well-dried).
Before you begin gluing Penofol and the working surface, it is recommended that you read the instructions for the selected adhesive. However, there is one rule that applies to working with any adhesives, namely, all surfaces to be fastened must be clean and solid.
It is first necessary to eliminate existing chips and cracks, even the smallest irregularities, dirt, and blockages of various origins. If wooden, metal, or polymer surfaces require a primer, its chemical composition must be suitable for the selected type of adhesive. This is the only way to ensure maximum and strong adhesion of the fastening planes.
Selecting adhesive for Penofol
The modern construction market offers universal and special adhesives for Penofol, but all of them must correspond to the operating parameters of the material being described, namely:
Many conditions also depend on the target objectives. For example, when insulating external walls, the adhesive must be resistant to external factors - sudden temperature changes, snow and rain, direct sunlight, etc.
When working in baths or saunas, the adhesive must withstand sudden temperature changes and constant excess moisture.
If we are talking about insulating residential buildings and apartments, it is necessary to use polyurethane glue that is non-toxic and completely safe for the human body.
Types of glue
Since penofol is a fairly lightweight insulation material, the adhesive for attaching it does not pose great demands on strength.
Secret. How to glue foil insulation to a wall.
Kind. Somehow I encountered a problem with gluing foil insulation to the wall. There is a lot of information on this matter on the Internet. But I didn’t try what kind of glue I used, and in the end it didn’t work out. Everything was falling off. And the secret is simple. The insulation is covered with a thin polyethylene film, to which the glue does not stick (to a smooth surface, there is nothing for it to catch on). The manufacturer did not take this into account, or did not want to. It is enough to make the glue application areas rough, that is, sand them with sandpaper. You can use any glue, as well as polyurethane foam. And you won’t need a stapler, nails, dowels, or military-strategic toxic liquids - as mentioned in many construction forums. Good luck everyone, keep at it.
Minor observation. But many do not see the little things. Hence the big problems.
It is enough to make the glue application areas rough, that is, sand them with sandpaper.
And most importantly, why waste money on this and other materials and glue something that will not bring any effect.
jekasus wrote: And most importantly, why waste money on this and other materials and glue something that will not bring any effect.
I’ll support it. Apparently TS just has free material and needs to kill time.
jekasus wrote: And most importantly, why waste money on this and other materials and glue something that will not bring any effect.
Yes, I agree with you. But this effect does not consist in preserving heat; there is enough of it; water heating comes from the house. If you look more closely at the last photo - this is an extension to the future greenhouse on the north side, of course there will not be enough light for the plants. Reflective paint is not available. So the foil serves to reflect it. Even with artificial lighting, when entering a room at night it is impossible to look; the eyes are hurt by the bright, dazzling, iridescent light. (Checked, a few electric lamps are enough) This is a plus for energy saving. In general, the issue was not considered regarding the construction of greenhouses and where and why to glue foil insulation. The meaning is how to glue it!
How to attach isolon to the wall
Kind. Somehow I ran into a problem **gluing** foil insulation to the wall. There is a lot of information on this subject on the **Internet**. But how and with what kind of glue I haven’t tried - in... - photo - Mastergrad Forum
Some tips for working with the material
When carrying out gluing work, you must follow the advice of the masters:
- If maximum joint strength is required, then only the welding method is used. In this case, the cooling of the weld should occur gradually.
- Cleaning and degreasing are carried out using any connection method.
- If acrylate glue was used, the connection should be kept at a temperature of 15–70 degrees for 5 hours.
- Epoxy glue does not provide the desired connection and is more difficult to work with.
- It's not difficult to make your own glue. To do this, crushed chalk or cement is added to acrylate glue.
Foil insulation for walls and floors
Foil insulation has relatively recently appeared on the construction market, but is rapidly gaining popularity for various reasons. Next, we will consider the types of this material, the advantages in comparison with traditional insulation and how to use it correctly.
What is rolled foil insulation
This is a combined material for insulating walls, floors and ceilings, consisting of several layers:
- Insulation made from familiar materials.
- A layer of foil.
The material is rolled, therefore it has a relatively small sheet thickness. How does heat retention occur?
- A thin working layer delays the penetration of cold air from outside,
- The foil reflects heated air into the room.
Varieties
Roll insulation materials are classified according to the main material:
- Foamed polyethylene with foil that can be attached on one or both sides.
- Folgoizol is created on the basis of bitumen/rubber, mineral fillers and antiseptic.
- Mineral wool rolls with one-sided foil surface.
- Basalt lamella insulation,
- Expanded polystyrene boards with one aluminum surface.
Each of the presented materials is intended for use in certain conditions.
Application
Penefol (closed cell polyethylene foam) is versatile in use. They insulate walls and floors in residential premises.
Laying penofol with an inner layer
Scheme for insulating a loggia with penofol.
As with floor insulation, in this case you will need penofol. This is the next stage of work. The rolls are laid on foam boards. Before this, you need to carefully seal all the joints. It must be remembered that penofol is placed with foil inside. It is fastened with self-tapping screws. In addition to retaining heat, it serves as a vapor barrier film. The seams are taped with special tape. It is advisable to lay it evenly and not overlapping. After this, installation of the sheathing begins. It is necessary to ensure ventilation of the insulation and to secure the facing layer.
For lathing, it is optimal to use wooden slats with a cross-section of 40 x 20 mm. They are nailed to the surface parallel to the floor, that is, horizontally, at a distance of 40-45 cm from each other. Lastly, they are nailed at the window. Levelness is checked using a building level. If necessary, you can use polystyrene foam when you need to level the surface. By the way, you can also insulate a loggia with polystyrene foam, but this method is more effective. Once the sheathing is ready, you can begin the exterior finishing. For these purposes, lining or plastic panels are suitable.
Return to contents
Advantages and disadvantages of the method
Insulation with foil has a number of features and a minimum of negative aspects. Advantages:
- Foil reflects heat. Thus, the heat remains in the house, on the other hand, it does not allow heat to enter the house in the summer.
- Increased wear resistance.
- Partially applicable as a waterproofing material.
- Easy installation, light weight, simple dismantling.
- The insulation does not allow cold wind to pass through. Maximum insulates from external influences. Resistant to deformation due to sudden temperature changes.
- Keeps out noise from the street.
- Does not rot or mold.
- This material is thinner than others, but is 20-30% more effective.
- The insulation does not emit substances harmful to health and prevents the smallest irritants and allergens from getting inside.
- There is no rigidity, so the top cannot be covered with plaster or wallpaper.
- Special adhesives are required for fixation.
- Sometimes insulation with foil is not enough to insulate a room.
Despite the disadvantages, foil material is widely used for various purposes.
Glue selection
The range of adhesives for penofol on the modern market is quite wide. Therefore, it is important to take into account the different characteristics of materials.
General rules
Penofol adhesive is selected based on the following:
- the product has durable adhesive properties;
- the thermal range coincides with the temperature characteristics of the insulation;
- a non-toxic certified product is used in the interior decoration of residential premises (apartment, office);
- for external finishing, you need glue that is resistant to temperature changes and weather conditions;
- saunas and baths require mixtures with water-repellent properties;
Where is the foil insulation method used?
Foil insulation reflects infrared rays, which are essentially thermal rays. But there is no need to use the material everywhere. In some places it will not work properly.
It is mainly installed near thermal energy sources:
- heating devices - batteries, air heaters. The insulation is mounted on the wall with foil in the room;
- boiler, fireplace stove.
It is also used when installing “warm floors”. The reflective layer will direct the heat in the desired direction.
Small spaces where every centimeter plays a role. Here, thin insulation would be appropriate on the walls and ceiling.
In the attic. Here the insulation is installed on the roof. Apply 2 layers to combat heat and cold.
In baths and saunas. The heating of the room is not constant; foil material is suitable for such purposes.
Garages, hangars, outbuildings - an installed radiator or potbelly stove.
They also insulate heating pipes, air ducts, wells and wells.
Main tasks of thermal insulation
The materials used to insulate a balcony from the inside can be very diverse. Mineral wool and solid insulation materials, such as polystyrene foam, penoplex, penofol and its other analogues, are also suitable. It is worth noting that working with solid insulation that does not separate into fibers is much more convenient. Installation is faster, additional insulation from the insulation itself is not required, it is easier to attach to the walls, it does not allow cold air to pass through, so a vapor barrier layer is not needed, which can significantly reduce the cost of work.
Option for insulating a loggia with penofol
You can insulate a balcony with penofol yourself. This process will not be difficult and will not require any special skills or tools. By glazing and insulating the loggia, you can turn it into a useful space that can be used at any time of the year, regardless of weather conditions. Such a hanging structure will not only preserve heat in the room, but also expand the space of the room by several square meters. They can be used as a relaxation room, an office, a library, or storage of various items that require certain temperature conditions and the absence of moisture.
Scheme for laying penofol insulation on a balcony
Insulating the balcony with penofol or similar materials will quickly and effortlessly insulate cold air, making the room comfortable. The costs of work and the purchase of material will be minimal.
Source
Foil insulation design
Thermal insulation with foil is produced in:
They differ in size, thickness and the foil-covered base layer used.
Base layer types:
- polyethylene foam;
- basalt wool;
- expanded polystyrene.
The foil is glued to the base layer or applied by spraying.
Some have layers of foil on both sides. Or with a layer of applied glue - self-adhesive, which allows for easy installation. Self-adhesive is used in corners and on uneven surfaces. The joints of the insulation are taped with foil tape.
When purchasing insulation with a reflector, you need to pay attention to:
- base layer;
- foil thickness;
- taped with a reflector on one side or both.
The thickness of the insulation itself depends on the base material used.
How to glue correctly: advice from professionals
Before starting work, you need to prepare tools and materials: the foam boards themselves, a primer for coating the concrete surface, a brush or roller, a degreaser, a spray bottle. It is also advisable to take care of personal protective equipment.
Glue application methods:
- Stripes
– four L-shaped stripes are applied to the sheet in the corners and two long ones in the center, giving an average level of fixation.
- Spot
– dense drops are applied in increments of 30 centimeters, the fixation is of the least quality.
- Solid
– the adhesive composition is evenly applied over the entire area of the sheet, retreating 3-4 centimeters from the edge, this way it is possible to achieve the highest quality connection.
What you need to remember when gluing penofol to concrete:
- It is advisable to do the work together.
- You need to study the instructions in advance, calculate the glue consumption, and purchase the optimal volume.
- For beginners, aerosol glue is best.
- Concrete must first be treated with a primer, which will protect against fungus and increase adhesion.
- If possible and funds allow, it is better to apply the glue in a continuous layer with a maximum thickness of 2-3 millimeters.
- The sheets are leveled immediately after they come into contact with the work surface.
Types of foil penofol
There are 3 types of penofol with foil on sale. Each is marked with Latin letters, which indicate the packaging.
Folgoizolon for external and internal work
TYPE A – heat insulator made of polymer, foil layer on one side. Produced in different thicknesses. Suitable for complex insulation of buildings inside. Glass wool is used together with this insulation. They also produce foil insulation with perforation. It is installed in log houses to allow the wood to “breathe.”
TYPE B – foil is located on both sides. This is maximum protection against heat loss. Penofol type “B” is used for thermal insulation of the attic, supporting structure, basement, and floor. As well as insulation of the pipeline and heating system.
TYPE C - on one side there is foil, on the other there is a thin layer of glue protected by film. Self-adhesive penofol is easy to install without spending a lot of time. For installation, cut into pieces of the required length and glue to the prepared surface.
TYPE R – a complete comparison to type “A”, but with a pattern on the foil. Used as decor for indoor walls. And also with multi-layer insulation, creating an air gap.
TYPE ALP – high degree of reflection. This insulation is used in agriculture, for example, to insulate incubators or buildings for calves.
Insulation of floors and ceilings using penofol
Scheme for insulating a loggia with penoplex.
Thermal insulation of the floor is an important component of the renovation. The technology is similar to the previous one. First, you need to level the floor surface, remove old baseboards, and so on. Then the sheathing is made from beams. Their height depends on how many layers of insulation are required. The frame is attached, retreating 10 cm from the edge of the wall. The step between the beams is 50-60 cm. The sheathing is fastened with a puncher or hammer. First, drill a hole, insert a dowel and nail a self-tapping screw. At the next stage, the insulation is installed. It is important that the rolls fit tightly together. It is recommended to cut penofol sheets slightly larger than the distance between the beams. This will ensure they fit snugly.
After this, plywood sheets are laid. When attaching them around the entire perimeter, it is necessary to leave a small gap of 1 cm. The sheets are fastened with self-tapping screws every 45 cm. Thermal insulation with penoplex involves a concrete screed with a layer of about 4 cm. Insulation of the ceiling is similar to insulation of the floor. But there are also differences. Here, after laying the first layer of insulation, it needs to be fixed with a wooden strip using self-tapping screws. The slats are taken in length equal to the width of the loggia. The joints are filled with polyurethane foam. The second layer of penofol will be attached with horizontal slats.
Their length is equal to the length of the loggia. That is, you get a kind of lathing of crossed slats. The outer slats are placed at a distance of about 10 cm from the wall, and the third is placed between them. Penofol is overlapped with a margin. Next, the slats are fastened with self-tapping screws in increments of 50 cm. Finally, the ceiling structure, like the floor, is leveled and finished using panels.
Return to contents
What is better - foil penofol or basalt insulation?
The building materials market is full of types of insulation. They have their own characteristics, positive and negative sides.
General thermal insulation parameters:
- Weight. The insulation should not weigh much, because when installing it on the structure there should be no weight.
- Thickness. The thinner the material, the more space remains in the room.
- Low thermal conductivity.
- Moisture permeability. The material should absorb moisture as little as possible.
- Noise insulation. Does not allow sounds from the street to pass through.
- Environmentally friendly material. Should not emit harmful substances.
- Easy to install.
When comparing basalt insulation and foil penofol, you need to compare their characteristics.
Basalt wool
Made from rock of volcanic origin. It does not burn, has good sound insulation properties, and does not lose its qualities over time. It is completely safe for health.
Penofol - application
Made from polyethylene foam with a porous structure. A layer of foil is glued on top as a heat reflector. This thermal insulation material is several times thinner than basalt wool. In addition, it reflects heat and practically does not absorb it.
Which insulation to choose depends on the budget for insulation, as well as personal preferences.
Required materials and tools
There are several types of foil materials in the retail chain. Their installation requires different materials and tools. Therefore, we provide a complete list of the required set of tools, specifying when and where they will be needed.
Materials you will need:
- foil insulation;
- wooden beam 50x50 mm for lathing;
- spacer bar (20x50 mm) for installing a counter-lattice;
- plasterboard or OSB for covering the frame;
- primer;
- adhesive for insulation - individually for a specific type of substrate (“CERESIT CT 190” for basalt wool, “CERESIT CT 85” for foam plastic);
- metal corners, self-tapping dowels for the wall and wood screws - fasteners for assembling the sheathing.
The tools you should have on hand are:
- homemade sawhorses or stepladder (you can use a strong table);
- a hammer drill or electric drill - will be required when attaching the sheathing trim to the wall;
- screwdriver;
- mixer attachment for stirring glue;
- glue container;
- wood hacksaw;
- construction knife with replaceable blades;
- putty knife;
- level;
- roulette.
The most popular type of insulation with foil for interior finishing is aluform
Bestizol or alufom is a bubble base consisting of aluminum foil (outer layer) and polyethylene (inner layer) on one side. The foil acts as a reflector of solar and heat rays. The polyethylene layer has a cellular structure and neutralizes sound waves and shocks. The advantage of this material is low thermal conductivity.
Bestizol can be used in both cold and hot weather. Due to its small thickness (1 cm), the material is used for hard-to-reach places:
- for winding ventilation pipes;
- air duct coverings;
- insulation of pipelines and other outlet communications.
Elementary knitting with a secret is a great way to create unique things
You can get amazing and unusual accessories and interior decor items by mastering just one crochet technique - a regular crochet stitch. Even novice craftswomen can create dense handbags that do not lose their shape, decorative baskets with or without handles, flowerpots, and organizers. The chosen technique allows you to quickly get what you want. There are several secrets here: the use of thick threads and cord, which is proposed to be used as a base. In this case, the products will be sufficiently rigid so that a frame can be dispensed with.
Work begins with choosing the bottom and tying it. You can use either ready-made bottoms or ones you cut yourself. In the latter case, you will have to independently supplement them with technical holes. The most convenient way to do this is with a hole punch. With the first loop pulled through the technical hole, we begin to knit a stitch. The peculiarity of the binding is that for each of the holes there are 3 posts, the bases of which converge in one place.
When the bottom is completely knitted, we make a connecting loop by simply passing the hook with the working loop on it through the first knitting stitch and pulling the working thread through both loops at a time.
Having measured the size of the bottom, we cut the rope into pieces corresponding to its perimeter and fasten it with tape. The number of fragments will be equal to the number of knitting rows.
Then it all comes down to knitting regular single crochet stitches with the difference that there will be a cord inside the stitch.
It is important that the cord is not twisted. It is also noteworthy that using the same technique you can get different textures. In this product, when tying, the hook is inserted under the outer half-loop of the top of the column of the previous row. The resulting texture resembles hoops stacked one on top of the other.
The same pattern looks different when the hook is inserted under the inner half-loop of the post. The half-loops remaining outside form a clear line and the texture changes completely.
More details about cord tying:
The hook is inserted from the outside of the product into the loop located under the cord.
The working thread is pulled through the loop and brought out. This way there are 2 loops on the hook at the same time. Next, grab the working thread with your hook and pull it through both loops. As a result, the stitch will be knitted, and the newly formed loop will remain on the hook.
Having reached the end of the row, we make a connecting loop, and then add another base cord to create the next row.
Installation of rolled foam foam inside and outside: how to stick it?
Basic installation rules:
- The material is mounted straightened, uncompressed, without folds. Fix to the lathing or directly to a clean surface.
- Penofol is secured with foil towards the heat to reflect it. This is an obstacle to the release of thermal energy to the street.
- The material is glued end to end. The borders are taped to seal.
- To glue the insulation, special types of glue or a self-adhesive type are used.
Installation is quick and easy, both inside and outside. The work is identical in sequence and principle inside and outside. It is easy to cut and quickly installed.
Before gluing penofol, you do not need to pay attention to its weight. The material is lightweight and can be supported by universal glue. But, for strength, they purchase adhesive compositions intended for this purpose.
The adhesive must correspond to the characteristics of the thermal insulation material:
- temperature range +100/-600C;
- indoor use, not outdoor use;
- non-toxic;
- good adhesion.
The adhesive composition should not emit harmful substances. Penofol is able to absorb 3% of heat, which means the glue on the back side can also warm up.
How to glue insulation with foil to the wall near the radiator and door
For gluing the surface and penofol, craftsmen recommend purchasing the following brands:
- Weicon Easy-Mix PE-PP 45. Two-component adhesive designed for gluing concrete (brick) surfaces with polyethylene, polypropylene.
- Moment - has many positive aspects, including good adhesion. The glue will quickly and permanently bond the insulation to the surface behind the radiator or near the door.
- Liquid nails are capable of fixing heat-insulating material for a long time.
Other brands: Titan, Tilit, Atlas Stopter K-20 kley, Ceresit (ST83).
Preparatory work
First, you need to properly prepare the concrete for gluing, which will ensure a monolithic, uniform connection. They eliminate all defects, unevenness, cover up cracks, repair chips, and thoroughly clean the surface from dirt and dust. Cover the base with a primer and wait until it dries completely. All metal elements must be treated with an anti-corrosion compound.
Gluing stage
The glue is applied to the side without foil in a thin, even layer, spreading evenly over the entire surface. The edges are impregnated with glue as thoroughly as possible so that the penofol does not lag behind the concrete surface. The insulation must be held for 10-40 seconds so that the adhesive composition can set and fix the sheet to the surface more efficiently. Next, the sheet is pressed against the concrete, carefully smoothed, distributed evenly, additionally gluing the seams.
Choosing a suitable adhesive for gluing penofol to concrete is a very important task that must be approached seriously. It is advisable not to skimp on the composition, since the strength, reliability, and durability of the fixation will depend on its compliance with the requirements and operating conditions.
Life time
Since foil insulation appeared relatively recently, it is not yet possible to determine the exact expiration date. However, after conducting experiments, we can say that the material does not lose its properties for 200 years.
The service life of the installed insulation depends on the adhesive used. If the adhesive composition has passed its expiration date, then you can re-install it with the same heat insulator.
There are a lot of insulation materials on the construction market. The choice is so wide that the question arises, which is better. To answer, you need to compare the characteristics of the thermal insulation material and the scope of application - street, living room, garage or agricultural building.
How to glue film (oilcloth)
How to glue polyethylene? There are a couple of possible answers:
- Iron welding. This is a fairly simple method, but it requires accuracy and subtlety of craftsmanship. To do this, the iron is heated to what temperature, it depends on the thickness of the material. The edges of the oilcloth are folded overlapping, then the edge or nose of the iron is drawn along the seam. Stay in place for no more than one second, as scorching will occur. Strength is checked by stretching two pieces of oilcloth.
- Open flame welding. For this method, you will need fire-resistant bars, between which the two edges of the film are fixed. An open flame from a match or gas burner melts the edges. This creates a dense bead that prevents the material from diverging.
We recommend videos on the topic:
How to weld polyethylene film?
For joining panels of polyethylene film
You can use a special homemade attachment that is attached to the iron.
The nozzle is made of sheet aluminum and bent as shown in the picture. It has a flat base, on the lower part of which there are ribs. weld
the pieces
of film
together .
Interesting materials:
What is better satin or microsatin? What is better satin or satin twill? What is better satin or jacquard? Which is better SBC or aptX? What is better to sow rapeseed or mustard? What is better selfie stick or monopod? What is better network adapter or router? What is better wood chips or sawdust for smoking? Which is better, wool or bamboo? What is better to putty or plaster?
Do you need insulation for concrete?
Despite their strength, concrete structures absorb moisture well, especially if there are microcracks. Moisture during frost quickly freezes, leading to cracking of buildings. There is a particular danger for buried elements or those in contact with the ground, which include floors on the ground. Thermal insulation for them must be built without fail, since there will be no heat in such a house.
From the thermal conductivity table it is immediately clear that heat will simply flow away through floors without thermal insulation and how the use of insulating materials can improve the situation.
| Material | Thermal conductivity coefficient, W/m*K | Vapor permeability coefficient, mg/(m *h*Pa) |
| Porous concrete | 1,4 | 0,030 |
| Concrete on sand | 0,7 | 0,030 |
| Light mineral wool | 0,045 | 0,6 |
| Heavy mineral wool | 0,055 | 0,56 |
| Expanded polystyrene | 0,04 | 0,013 |
| Glass wool | 0,05 | 0,6 |
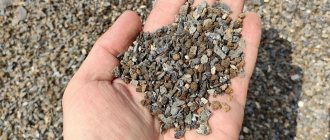
The most common thermal insulators for flooring are: expanded polystyrene, fiberglass thermal insulators and stone wool.
- Expanded polystyrene has proven itself to be a good quality insulation material for concrete floors. The price of products made from extruded foam is affordable, and its high moisture resistance is in demand when constructing the cover of the first floors, especially on the ground.
- Glass wool is also used in thermal insulation systems and has simple installation schemes. However, fragile threads can form dust that irritates human skin and respiratory organs, so its use is not always appropriate.
- Basalt fiber insulation, which does not have the disadvantages of its two main competitors, is very popular. Threads made from a mass of molten stones are elastic and do not break, and the high vapor permeability of fiber insulation allows them to be used in the floors of multi-story buildings.
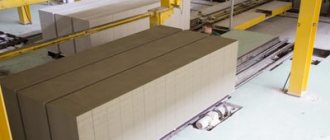
Laying slab material
Reflective thermal insulation in slabs
Reflective thermal insulation in slabs is installed primarily under heated floors, although it can also be used as regular insulation. With foil mats, make a floating screed and lay them between the joists.
Floating screed
Step 1. The concrete surface of the floor slabs is leveled using putty and grinding. Clean from dust.
Step 2. Using a level gauge, mark the screed pouring line on the walls.
Step 3. A damper tape is attached to the walls around the perimeter of the room and the base is primed.
Kermi damper tapes
Step 4. Plates are taken with a metallized coating, since aluminum is corroded by cement. Glue is applied pointwise to the base of the mats, after which the insulation is laid on the floor with the reflective layer facing up. When laying insulation, carefully adjust the joints so that gaps do not form.
Step 5. The joints are taped, and then the heat-insulating layer is filled with screed mortar. Level the mixture with a wide spatula or rule and leave until dry. After this, you can lay the finishing coating.
Video - Laying foil mats
Insulation by joists
Step 1. Remove the floor covering, clear the base of debris, check the integrity of the joists, and, if necessary, repair damaged elements.
Step 2. Place waterproofing material on top of the joists and secure it with a stapler on the inside of the beams, spreading the film well on the floor. The edges of the canvases are overlapped by 10-15 cm.
Step 3. The space between the logs is filled with foil plates, laying them in one or two layers. The slabs of the second layer must overlap the seams of the lower layer. A gap of 1.5-2 cm is left between the reflective coating and the upper edge of the logs. If it is not possible to leave a gap, a sheathing of 20x40 mm slats is placed on top of the logs.
Foil basalt mats
Step 4. Further actions depend on the type of flooring. If it is linoleum or laminate, the rough base is covered with sheet material - plywood, chipboard, OSB. If the floor is made of boards, they are placed directly on the joists.
Table of the main properties of foil thermal insulators
| Name | Properties | Thermal conductivity | Where is it used? |
| Izolon | Elastic material, lightweight, waterproof and durable | 0.040 W/mK | As a substrate for laminate and linoleum, mounted under heated floors |
| Penofol | Flexible, thin material, environmentally friendly, waterproof | 0.037-0.049 W/mK | Can be used as a vapor barrier for conventional thermal insulation materials |
| Izover | Non-flammable, dense heat-insulating material | 0.041 W/mK | For insulation of concrete and wooden surfaces |
| Rockwool | Durable, non-flammable material, resistant to deformation | 0.39 W/mK | Insulation of floors on joists, heat and sound insulation of walls and ceilings |
| Foiled polystyrene foam | Resistant to temperature changes, durable | 0.037-0.041 W/mK | For insulating a warm water floor, insulating a floating screed |
How to insulate a room from the inside yourself?
Insulating the inside of the house
Before you begin, you need to insulate the electrical wires and stock up on the necessary materials. In addition to penofol, the contractor will need assembly glue or a stapler, as well as wooden sheathing and hardware.
- The first task facing the performer of this work is the construction of a wooden frame to which the penofol will be attached. The air layer separating the insulation from the wall should not be less than 20 millimeters.
- Then, armed with glue or a stapler, you need to fix the insulation on the wooden frame, not forgetting that foil is an excellent conductor of electric current. All electrical wiring must be insulated in advance.
- Now it's time to install the second wooden frame. Finishing materials will be applied to it. The maximum thickness of the structure is 20 millimeters.
Installation methods
There are 3 ways to fix insulation to a concrete wall:
- Adhesive composition. You need to choose the right binder. They use dry cement mixtures, bitumen and polymer mastics, liquid compounds, polyurethane glue - it attaches well not only penoplex, but also foam plastic.
- Hardware. Dowels with wide heads are used for external thermal insulation of walls. The process is labor-intensive; the slab is nailed in the corners and in the center.
- In a combined way. Previous methods are combined, thereby increasing the quality and reliability of fasteners. The glue isolates the surfaces from the external environment, and the hardware takes on the load from the impact on the slabs.
Each of the methods has strengths and weaknesses, but the general step for their use is the preparation of the surface to be covered. The wall is cleaned of dirt, peeling, places where mold appears are eliminated with a metal brush and treated with an antiseptic - copper sulfate. Irregularities and cracks are sealed with putty and covered with primer.
Installation begins with fixing the horizontal starting strip with dowels as a support for the slabs of the lower row. A wooden block or perforated corner is selected according to the thickness of the foam foam being laid. With any of the methods, the insulation is laid from the floor from the bottom up, shifting the joining seam in each row and leaving compensation gaps between the slabs for temperature fluctuations.
Penoplex surfaces are smooth. To make the insulation stick better, roll the contact side with a needle roller or scratch it with a hacksaw. The installation is completed by applying a protective or decorative layer to the insulation.