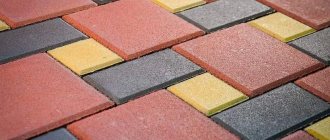
In the modern construction goods market, materials for facing work are presented in a wide range. Let's look at how to glue ceramic tiles to concrete after peeling them off. Let's get acquainted with the possible causes of the malfunction and what compounds can be used to carry out local repairs. Read to the end and you will find out in what sequence and how to perform the work, taking into account short-term or long-term effect.
Peeling of wall tiles from the base Source tvoya-banya.ru
How to glue tiles to concrete
Tile adhesive can be purchased at any hardware store. Most materials that are used to construct buildings require a specific finishing method, which differ from each other. As for concrete, this is a material that has increased strength and is able to absorb moisture well. This nuance makes it difficult to decorate walls with ceramic tiles. Before starting work, it is necessary to evaluate the condition and tenacity of the walls with the adhesive composition and, of course, their evenness, because during work, it is unlikely that anyone will be happy about the difficulties.
Two-component polyurethane adhesive
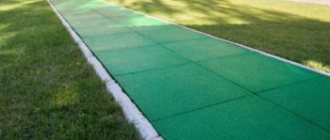
A thicker adhesive that has the same properties as a one-component adhesive. Crystallization occurs when two parts are mixed: the polymer base and the hardener. This is its main difference from a one-component polymer. Frequency is used in the repair of small areas. Excellent adhesion of rubber tiles to various hard surfaces (asphalt, concrete, tiles, metal, brick, wood, glass, plastic, etc.), with the exception of materials made of polypropylene, silicone, polyethylene, as well as places with oil stains. Maintains high technical properties over a wide temperature range. Can perform the functions of a sealant when working with PVC, chipboard and plywood. Glue consumption is economical, about 400 g/m2. Two-component adhesive is often used in the installation of safety coatings made of rubber crumbs and tiles on the steps of stairs, porches, ramps, as well as for the installation of elastic floor coverings.
How and with what to glue ceramic tiles to concrete
Experienced specialists know what to use when working with ceramic tiles when attached to concrete. Most often, if the slab comes off, they use paste-type glue or a dry mixture in their work. Which method you use is a matter of your choice.
Paste-like glue or mastic has a thick consistency and contains water. Due to the fact that after application the moisture evaporates, the adhesive composition hardens. This material is easy to use.
If we talk about dry mixtures, they contain sand and cement.
These mixtures have a number of advantages over the previous representative:
- Available in price;
- Can be used in various types of work;
- They are the most reliable;
- They are also in demand for external cladding work.
Adhesive compositions for boards have their own recipe, which determines their purpose for gluing to a specific surface.
Below is the main classification of installation adhesives:
- Universal glue. It is the most popular, as it is a multi-purpose binder.
- Basic glue. Used for gluing small slabs onto flat surfaces.
- Reinforced glue. Used for large slabs, as well as for gluing loose floor ceramics.
- White glue. Designed for laying mosaics or transparent elements.
- Highly specialized adhesives. Used for surfaces exposed to high temperatures or high humidity.
Based on this list, you can choose exactly the glue that is suitable for your type of work.
Separation of a section of ceramic coating along with the solution from the base
The most likely cause of such destruction is an incorrectly selected primer mixture or no priming at all before laying the tiles. A common mistake when preparing the base is priming with concentrated latex, which forms a thin rubbery film on the surface that prevents adhesion to cement-based tile adhesives.
The separation of the laid tiles along with the mortar from the base can be caused by deformation of the base
The preserved finish is inspected and tapped to identify voids that are fraught with additional destruction of the cladding. If the area of the collapsed finish and existing voids in total exceeds 20% of the total area of the base, then the wall or floor cladding will have to be re-done in full, taking into account the mistakes made, since after partial repairs the destruction of the old tiles will most likely continue.
How and with what to glue ceramic tiles to concrete
Experienced specialists know what to use when working with ceramic tiles when attached to concrete. Most often, if the slab comes off, they use paste-type glue or a dry mixture in their work. Which method you use is a matter of your choice.
Paste-like glue or mastic has a thick consistency and contains water. Due to the fact that after application the moisture evaporates, the adhesive composition hardens. This material is easy to use.
When gluing tiles, you do not need to apply too thick a layer of glue
If we talk about dry mixtures, they contain sand and cement.
These mixtures have a number of advantages over the previous representative:
- Available in price;
- Can be used in various types of work;
- They are the most reliable;
- They are also in demand for external cladding work.
Adhesive compositions for boards have their own recipe, which determines their purpose for gluing to a specific surface.
Below is the main classification of installation adhesives:
- Universal glue. It is the most popular, as it is a multi-purpose binder.
- Basic glue. Used for gluing small slabs onto flat surfaces.
- Reinforced glue. Used for large slabs, as well as for gluing loose floor ceramics.
- White glue. Designed for laying mosaics or transparent elements.
- Highly specialized adhesives. Used for surfaces exposed to high temperatures or high humidity.
Based on this list, you can choose exactly the glue that is suitable for your type of work.
Recommendations for choosing adhesive
You should immediately take into account that it is advisable to use expensive compounds under specific operating conditions for which these adhesives are intended. For example, on substrates subject to vibration, shrinkage, and large dynamic loads, it is worth using two-component adhesives that are strong and elastic. When tiling the floor in a bathroom, washroom, or swimming pool bowl, waterproof mixtures are required, and in unheated rooms - frost-resistant ones.
If you are tiling a bathroom, you should use an adhesive with increased moisture resistance.
Frost-resistant glue will be useful for repairs on the balcony
The use of special adhesives is also justified when it is necessary to lay tiles not on a concrete floor or screed, but on a wooden or stone floor.
Laying tiles on a wooden floor is done using a special glue
For an ordinary apartment, it is best to use simple cement adhesives: they can withstand household loads, small changes in humidity and temperature, and are suitable for tiles of any type and format. You can take a cement composition with improved characteristics - thanks to various additives, such mixtures are more waterproof and elastic, and the price is not much more expensive.
The tiles are laid on a cement screed using any tile adhesive
Now regarding ready-made and dry adhesives. Ready-made mixtures are not intended for storage, so they need to be worked out at a time. They are applied in a thin layer, which means the surface must be carefully leveled in advance. On the practical side, it is advisable to choose such compositions for small rooms where glue consumption will be low. The advantages of ready-made mixtures include quick drying, excellent adhesion when applied in thin layers and saving time on cladding.
Ready-made tile adhesive cannot be stored for long periods of time after opening the package.
Dry glue is cheaper and can be used as needed, the main thing is to close the bag tightly so that the mixture does not get damp.
It is important to close the bag with the dry mixture well so that it does not become damp.
Using cement adhesive, you can level out small differences in the floor and reduce the cost of leveling screed. The main problem for beginners is preparing the correct consistency of glue, because if you just add a little less or overfill the water, the glue will no longer be so strong. But if you strictly follow the instructions, where all the necessary proportions are precisely indicated, then achieving the desired result is not at all difficult. So, from a practical point of view, it is still more profitable to choose dry mixtures for floor tiles.
When preparing glue, it is important to strictly follow the proportions indicated on the packaging.
How to glue tiles
The technology for laying tiles is simple. Main stages:
- Puttying. Used to increase the adhesion of glue to walls. To proceed to the next step, you must wait until it dries completely. Information about this can be found on the packaging.
- Layout. The stage at which parts are tried on and adjusted, and markings are made on the wall
- Searching for the horizon. Responsible moment. Using a building level, you need to draw a “starting” horizontal line on the wall. The lower it is located to the floor covering, the better.
- Applying glue. The composition is applied with a notched trowel. The width of the application is slightly greater than the height of one tile.
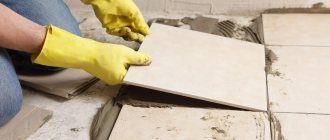
- Laying tiles. The tiles are applied piece by piece to the surface, slightly pressing. Compliance with geometry is checked using a building level. Crosses. They are used to achieve equal gaps between tiles over the entire surface.
Laying process
The accuracy of installation and gluing of the first tile determines how accurately the rest will be laid. It is necessary to control the laying level.
Before gluing the tiles, be sure to apply a primer to the wall with a brush or roller. It is not advisable to use a sprayer; the primer must be rubbed into the surface to ensure good adhesion to the wall.
It is advisable to glue the tiles before the primer is completely dry - then the tile adhesive will adhere to it better. The most effective is double priming - the first layer fills the pores in the concrete or putty and prevents the tile adhesive from drying quickly. Concrete quickly absorbs moisture, which can cause cracking and peeling of the adhesive layer. It is recommended to apply the primer a second time no more than an hour before gluing the tiles, so during the work process, apply the primer as you lay the rows, allowing it to dry.
The gaps between the tiles are established using plastic crosses.
Tile adhesive must be mixed in warm water, preferably using an electric tool. The consistency should be such that the solution is held on a vertical surface without slipping. Different manufacturers use different combinations of components, so carefully read the instructions for use.
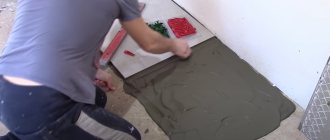
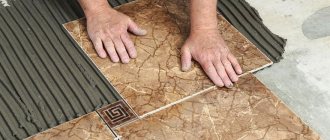
Apply the adhesive solution to the tile so that it can be moved, setting a gap. To do this, scratch a layer 5 - 6 mm thick with a notched trowel; thicker ones should be applied in the form of bumps. This ensures the mobility of the tiles during installation and a more dense shrinkage of the adhesive.
Making your own tile adhesive
Self-prepared raw materials for work are the key to quality repairs.
The first option of raw materials for which you will need:
- foam plastic blocks 20x20x20 mm;
- acetone.
Blocks are laid out on the back side of the tile, on all corners and in the middle, and acetone is carefully dripped on top. After a few seconds, the foam blocks begin to dissolve. The resulting solution firmly adheres the tiles to the wall.
For the second option for preparing the solution, you will need sand, cement, PVA glue, and water. The basis here is sand, it is taken in a fine fraction, purified.
Cement and sand are taken in a ratio of 1 to 3.
The tile solution is prepared before use and must be used within three hours. PVA glue is added after mixing bulk materials. Half a kilo of PVA is spent on a bucket of solution.
The solution is ready for use if it has reached a uniform consistency.
The negative side of this preparation is that all components must be purchased separately. This option is advisable if the components are available.
To improve the quality of your home solution, you can add components that improve its properties: liquid soap, oil paint, liquid glass.
Preparing a concrete wall
Applying any coating to a wall requires preparing its surface - removing grease (if any) and ensuring the required roughness. Old coating (paint, wallpaper, whitewash) must be removed. But if the old oil paint holds firmly, it is enough to mat it with coarse-grained (No. 40 - 60) sandpaper, a wire brush, etc. The greater the depth and number of scratches, the stronger the connection between the coating and the wall will become.
Next, you need to remove (wash off) the dust and begin degreasing the concrete if it contains lubricant. It is in this sequence - when treating a wall with ingrained grease with sandpaper or a brush, oil contaminants are rubbed into the scratches and the applied coating (primer, putty, cement, etc.) will not adhere well.
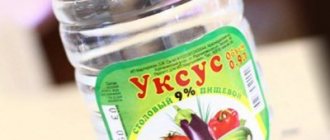
Degreasing is carried out with white spirit, a special degreaser or soda ash. But it is not advisable to work with white spirit indoors - it has a strong odor and its fumes are toxic. This also applies to other solvents.
A degreaser is good if the wall is small - due to the price, this is not the most budget option.
The most accessible is soda ash, sold in household chemicals departments. It must be dissolved in hot water and applied to the wall with a rag. If necessary, repeat the procedure until the grease is removed. You need to wear gloves when working - it is a strong alkali. After degreasing, wash off the sediment with warm water.
How to glue a fallen tile back to the old place
If a tile on the floor or wall has come off or started to wobble, especially if it has fallen off, you need not only to stick it on or replace one tile with another, but also to understand why this happened. Perhaps the previous sticker became loose due to the fact that it was placed poorly or the priming solution was used incorrectly. In any case, wall tiles or floor ceramics can quickly return to their place. In order to fix the problem, it is not necessary to go to the hardware store for new material to glue together the peeling slab with the wall. Look through the inventory left over from previous renovations. Of course, this option is unlikely to work if the problem affects most of the surface.
Before gluing the fallen tiles, it is worth clearing the surface of debris and old adhesive residues.
However, if there is one or more tiles, for gluing you can use:
- Remains of old tile adhesive. Here we are talking exclusively about the dry mixture. Provided that its storage was correct, it will not lose its properties even after a year. If we talk about liquid consistency, then it can be used according to the expiration date. Most often it is no more than two weeks.
- Dry cement. Using cement, you can make the amount of mortar that will be necessary for work. To do this, it is mixed with sand in a ratio of 1 to 3. If you doubt the strength of this composition, add PVA glue.
- Silicone type sealant. This material is used exclusively in cases where a small fragment has fallen off. It is not recommended to use it for large parts, as they will most likely fall off again.
- Liquid Nails. They have proven themselves well in relation to fixing tiles. In order for the part to be firmly attached, nails must be applied using a point method over the entire surface of the material. Once the nails are applied, you should wait about 40 seconds before attaching. This method is not recommended for attaching tiles to the floor, since the reliability of this method comes last.
- Assembly adhesive. Can be used if repairs are urgently needed. Its application is elementary, and strength and durability are ensured. After fastening this way, the tile is unlikely to fall off. The only thing you might not like about this method is the price. Such repairs will be very expensive.
Procedure
Before gluing the fallen tiles to the floor or wall, the facing material and the base must be properly prepared. The process begins with the removal of old masonry mortar. A grinder, a hammer with a chisel, a scraper, and a cord brush may come in handy here.
Often an additional layer of tile adhesive is used to compensate for unevenness on the surface. That is, after removing the remaining unsuitable solution, you need to level the working area. There should be no protrusions or depressions here.
After the site has dried, according to the technology, priming is performed before gluing the fallen tiles. The composition is selected in accordance with the operating conditions and condition of the wall. That is, you can use strengthening, dust-removing, impregnating or moisture-resistant soil with antiseptic additives. Some samples according to the instructions are applied in 2-3 layers.
Primer to increase adhesion Source enzo.ru
Next you can glue the tiles. Adjustment of the position of products is carried out using crosses or improvised means. After the masonry composition has completely dried, the joints are grouted with the material intended for this purpose. There are no alternative options here. The main thing is that the seam should be as deep as the thickness of the tile and filled without gaps.
How to glue fallen tiles?
The choice of a suitable composition depends on the characteristics of the surfaces, weight and size of the products.
Any product must have certain properties:
- Adhesion.
- Compliance with the base material (wood, brick, stone, plastic, concrete, porous types).
- Glue is available for interior and exterior use.
- The mixture is determined by the place where the tiles are laid - horizontal and vertical surfaces.
- Curing time at different temperatures and humidity levels.
- Waterproof for the bathroom.
There are several types of products that will help glue ceramic elements.
Adhesive compositions
For large-sized and floor fragments, an enhanced solution is more suitable.
For wall cladding you can use inexpensive mixtures:
- The most effective solution is Ceresit, intended for installing tiles in the bathroom. It is water resistant, making it suitable for rooms with high humidity. The product protects fragments from sliding, but it cannot be used for underfloor heating systems.
- Knauf is bought for finishing work in bathrooms. It has high adhesion, is able to withstand temperature changes, and protects surfaces from fungus and mold. Suitable for major repairs, minor ongoing restoration can also be done. The composition is used for walls, ceilings and floors from different materials.
- Eunice is a mixture that can withstand a maximum weight of up to 70 kg. In addition to excellent waterproof qualities, it is frost-resistant, which allows it to be used in the bathroom, on the terrace, balcony, loggia. The solution adheres well to almost all types of base.
It is recommended to purchase a leveler, which will facilitate the installation process. If the glue remains after the main finishing, this is the best option, provided that it is suitable and of high quality.
Mastic
An option suitable for all types of finishing, but there are a number of restrictions in use. They are made on a rubber or caoutchouc base, which means they are resistant to moisture.
The product keeps the tiles from sliding, is convenient to use, and has a low cost. But mastic is not able to withstand temperature fluctuations.
When laying on such a composition, it is recommended to monitor the condition of the walls; they must be perfectly smooth. This is due to the need for a very thin layer of application.
An increase in quantity will affect the appearance of the coating. Also, do not allow small debris and dust to get into the solution.
A mixture of cement and sand
The most common method of tile restoration. Among the well-known components are polymer additives that improve adhesion.
Latex impurities increase elasticity and prevent deformation of the frozen film, its drying out and cracking.
If you decide to make the solution yourself, choose a suitable brand of cement, sifted sand without clay inclusions, in order to prevent a decrease in density.
Adding polyvinyl acetate adhesive will provide moisture resistance. Detergents are designed to provide elasticity and improve performance.
Other solutions
In addition to compositions directly intended for gluing tiles, there are solutions that can be used for emergency gluing of tiles.
To restore elements, you can use several types of different compositions:
- The sealant is suitable for gluing broken fragments or small tiles, but it is not durable.
- Epoxy and bitumen resins are suitable to firmly adhere the tiles. It is quite expensive, so it is chosen for the restoration of one or two products. The best option is a mixture of Portland cement, sand and glue.
- Modern paints are not afraid of moisture; they are used in emergency cases when there are no other means at hand.
- Liquid nails should be acrylic based. This is a safe solution designed for quick repairs. This composition is afraid of any liquids; under their influence, it loses its properties.
- Craftsmen have come up with another way to quickly glue ceramics. Place small pieces of foam plastic on the corners of the square, apply two or three drops of acetone and press firmly against the wall. Under the influence of the solvent, the material turns into a viscous, plastic mass that instantly hardens.
Basic requirements for tile adhesive
Regardless of the composition and form of release, tile adhesive must comply with accepted standards and meet the basic requirements:
- it must have high ductility and fit easily onto the work surface;
- have good adhesive properties and reliably fasten the cladding to the base;
- the glue should not shrink significantly (ideally, this indicator should be zero);
- the viability of the solution and the adjustment time must be long enough so that the master has the opportunity to properly fit all the elements and eliminate masonry defects.
Tile adhesive should have good adhesion and slight shrinkage
These conditions apply directly to the solution, but there are also requirements related to the hardened adhesive layer:
- resistance to deformation, that is, the strength of the adhesive in compression and shear;
- resistance to temperature changes;
- resistance to high humidity.
Tile adhesive must be resistant to temperature and humidity changes
The glue packaging indicates the main characteristics of the composition: its strength, specific gravity, pot life and complete drying time, degree of resistance to various types of influences. So before purchasing, you should carefully read the adhesive’s characteristics – this will allow you to choose the optimal mixture for specific conditions.
Information about the adhesive mixture is indicated on the packaging
Masonry materials
On the market of building materials for facing work, manufacturers offer a wide range of ready-made compositions and mixtures with various properties. Let's look at what tiles can be glued to during major or local repairs. Based on consistency, they are divided into dry, liquid and paste-like products. The latter can only be used for tiles with a smooth back surface and a flat base. It is important to choose the rest taking into account the maximum permissible layer. Exceeding the nominal limit will result in low solids quality and poor fixation of any tile.
Let's look at how you can glue loose ceramic tiles to the wall:
- Tile adhesive . Specialized glue is available for sale in varying quantities. If there are residues after large-scale work, it is important to pay attention to the condition of the product and expiration dates. A faulty composition can rarely be used even for a short-term solution to problems.
Sample of dry tile adhesive Source keramicheskaya-plitka.ru
Reasons for tiles peeling off
Before gluing ceramic tiles to wood or concrete, you need to find out what not to do. You often have to deal with the problem of peeling cladding elements not after 5 or 10 years, but much earlier. Let's consider the main reasons for this phenomenon:
- Tile.
For wall cladding, it is important to choose tiles based on weight, since not every base, regardless of the properties of the masonry mixture, can handle, for example, porcelain stoneware. Yes, and the glue here must be chosen correctly.
For a floor, the determining indicator is mechanical strength. That is, thin tiles from budget collections here will definitely quickly crack. Because of this, both the adhesive composition and the base are destroyed, since moisture and abrasive particles penetrate well into the cracks.
- Glue.
Most often, the problem arises due to the wrong choice of modern liquid nails. Errors here relate to peel strength, adhesion to working substrates, and resistance to operating conditions. The same must be taken into account when deciding on any type of masonry material and grout.
Specialized adhesive for heavy and large tiles Source uralmegaprom.ru
- Base.
For any rigid cladding, it is important that the base is motionless, “healthy”, clean, level, with high adhesion to the selected adhesive. The presence of bare metal elements, oily stains, loose and peeling areas, and changes in the humidity situation towards excess are unacceptable here. The old decorative coating must be removed, which will prevent it from peeling off under load from the new finish.
Another point that is often missed is the degree of water absorption. If water leaves the glue too quickly, then quality work will not work due to disruption of the hardening process of the masonry mortar.
If you properly prepare the base, select a suitable cladding and use it to glue the tiles to the wall, then there is a high probability of obtaining the expected result. But this does not guarantee quality, since the low level of skill of the tiler can ruin everything. For example, the mortar is incorrectly prepared or overdried, the masonry is made with voids inside and crookedly, the grout is unevenly distributed with thin layers or gaps.
Violation of technology for gluing floor tiles Source sprb.by
It is important to treat every moment with responsibility and attention. Then the coating will serve for a long time without deformation or peeling.
See also: Catalog of companies that specialize in finishing materials and related work
What to do in this case
What to do if the tiles on the floor or wall still fall off? There is no need to despair, because there is far more than one way out of the situation. The first thing that comes to mind is to glue the old tile back. To do this, you need to clear the space for its installation and clearly install it in its proper place, level with the rest.
Be sure to first clean the grout from both the old tiles and the wall or floor.
This method is acceptable only if the tile remains intact, otherwise it is best to replace it with a new element. Surely after the repair you still have several tiles from the same batch. If not, then try to find the same one on sale. If this is not possible, then you can choose tiles of a different color. You can link this contrast with any interior item. Use a decorative insert with a similar shade of detail or a completely different tile structure, even a colored mosaic. It will look very original and interesting.
If this option is not for you, and the old tiles are not very damaged, try gluing them together. This must be done in such a way that the fragments are joined end to end with minimal seam.
To prevent further destruction of the masonry, try to determine the possible cause of the tiles peeling off. In principle, this is not difficult to do. Voids are immediately noticeable, and their presence under the rest of the tiles can be checked by tapping - by sound. The irregularities are also quite noticeable. If the solution is easy to clean off and crumbles, most likely this is the problem. Analyze all possible reasons. Be sure to check the adjacent elements; they may have come loose when removing the damaged tile or for the same reason that it came off. If you find a large area of defect, you may have to completely redo the cladding and first level the base.
Wall alignment
Considering that the tiles will be glued to a special grout or cement, which allows you to level the surface due to the thickness of the adhesive layer, leveling the walls is sometimes done only in certain areas.
Sludges of concrete can be knocked down with a hammer, a hammer drill, or removed with a concrete solvent. Dips are sealed with putty or cement. There is no need to “smooth” the walls perfectly - the tiles and adhesive layer will complete the leveling. In places where the expected thickness of the leveling compound will be more than 1 cm, you need to make notches with a hammer drill, grinder with a diamond wheel or chisel for better adhesion to the wall.
If the curvatures of the walls and corners are multiple, then they can be leveled by securing a metal plaster mesh over the entire area and installing slats of the same thickness as beacons. If the wall area is large, break it into several sections with beacons - this makes it easier to navigate.
No. 7. How to calculate glue consumption?
Each manufacturer indicates the approximate glue consumption on the packaging, and the exact consumption will depend on many factors . Only an experienced craftsman can accurately calculate the glue consumption rate in kilograms of dry mixture per square meter of surface.
The consumption of the adhesive mixture is influenced by the following factors:
- tile size. The smaller each individual tile element, the thinner the layer of adhesive required to attach it. So, for example, for installing tiles with formats from 2*2 to 10*10 cm, the average consumption will be about 3 kg/m2. For tiles measuring from 10*15 to 20*20 cm, the adhesive layer increases and the consumption is up to 4 kg/m2. On tiles from 20*30 to 30*30 cm, it is necessary to apply an even thicker layer of glue, and the consumption will be about 5 kg/m2. To install tiles larger than 30*30 cm, you will need 6 kg of dry mixture for each m2 of surface;
- tile composition . If the water absorption of the tile is high, then it will absorb part of the glue, and its consumption will increase. For example, most types of ordinary wall tiles have a water absorption rate of 10%, but for porcelain stoneware this figure is only 1%;
- evenness of the base . The smoother the surface at the base, the less glue consumption will be. If you or the craftsmen are too lazy to carefully level the walls or floor, then get ready to overpay for glue. If the unevenness is too large, then the tile may soon come off;
- the skill of the one doing the work for laying tiles, can also affect the consumption of the adhesive. If too much glue is lost, you should doubt the professionalism of the performer;
- There is an opinion that even the tool with which glue is applied affects the consumption of the composition. Some say that a V-shaped spatula will save glue, while a U-shaped spatula applies the compound less economically;
- to some extent, such parameters as humidity and air temperature, ventilation and others also influence.
Many manufacturers of tile adhesives have special calculators on their websites that help calculate how much of a particular composition will be needed for laying a particular tile. When you know the approximate consumption and surface area that needs to be covered, you can easily calculate how many packages of glue will be needed.
Consumables for the dry method
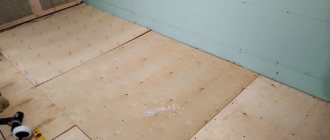
The dry installation method does not require the use of tile adhesive. It consists of forming a sheathing made of high-quality metal with a galvanized coating that protects against corrosion, or dense wood treated with polymer and antibacterial compounds. The resulting frame is secured with fasteners along the area or perimeter of the wall.
To lay decorative concrete tiles using the dry method, the following materials are required :
- Construction cord, a simple pencil, a tape measure, a laser level for marking.
- A formed lathing structure (frame) made of metal (aluminum, stainless steel, steel) or wood.
- Cordless or electric screwdriver.
- Fasteners (brackets, screws, dowels).
- Tile cutter for shaping surfaces in corners.
- Clean rags.
The process may also require:
- construction vacuum cleaner or broom with dustpan;
- bags for cleaning up construction waste;
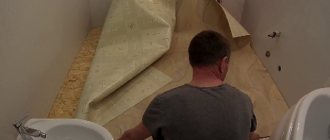
Materials that will prepare the surface for cladding:
- plaster;
- putty;
- primer (2 layers);
- wide paint brushes;
- thermal insulation materials over which the lathing is formed.