Motor connection with 4 wires
How to determine the working and starting windings of a single-phase motor
Single-phase motors are low-power electrical machines. The magnetic circuit of single-phase motors contains a two-phase winding, consisting of a main winding and a starting winding.
Two windings are needed to cause the rotor of a single-phase motor to rotate. The most common motors of this type can be divided into two groups: single-phase motors with a starting winding and motors with a running capacitor.
For engines of the first type, the starting winding is switched on through a capacitor only at the time of start-up and after the engine has developed a normal rotation speed, it is disconnected from the network. The motor continues to operate with one working winding. The size of the capacitor is usually indicated on the motor nameplate and depends on its design.
For single-phase asynchronous AC motors with a running capacitor, the auxiliary winding is permanently connected through a capacitor. The value of the working capacitance of the capacitor is determined by the design of the engine.
That is, if the auxiliary winding of a single-phase motor is starting, its connection will occur only during the start-up, and if the auxiliary winding is a capacitor, then its connection will occur through a capacitor, which remains turned on during engine operation.
It is necessary to know the design of the starting and operating windings of a single-phase motor. The starting and operating windings of single-phase motors differ in both the cross-section of the wire and the number of turns. The working winding of a single-phase motor always has a larger wire cross-section, and therefore its resistance will be less.
Look at the photo and you can clearly see that the wire cross-sections are different. The winding with a smaller cross-section is the starting one. You can measure the resistance of the windings using dial and digital testers, as well as an ohmmeter. The winding with less resistance is the working one.
Rice. 1. Working and starting windings of a single-phase motor
Now here are a few examples you may encounter:
If the motor has 4 terminals, then having found the ends of the windings and after measuring, you can now easily figure out these four wires, less resistance is the working one, more resistance is the starting one. Everything is connected simply, 220V is supplied to the thick wires. And one end of the starting winding, for one of the workers. On which of them there is no difference, the direction of rotation does not depend on it. It also depends on how you insert the plug into the socket. The rotation will change depending on the connection of the starting winding, namely, by changing the ends of the starting winding.
Next example. This is when the motor has 3 terminals. Here the measurements will look like this, for example - 10 ohms, 25 ohms, 15 ohms. After several measurements, find the tip from which the readings, with two others, will be 15 ohms and 10 ohms. This will be one of the network wires. The tip that shows 10 ohms is also the network one and the third 15 ohm will be the starting one, which is connected to the second network one through a capacitor. In this example, the direction of rotation, you will not change what it is and will be. Here, in order to change the rotation, you will need to get to the winding diagram.
Another example when measurements can show 10 ohms, 10 ohms, 20 ohms. This is also one of the types of windings. These came on some models of washing machines, and not only that. In these motors, the working and starting windings are the same (according to the design of three-phase windings). It makes no difference what kind of working winding you have and what kind of starting winding. The starting winding of a single-phase motor is also connected via a capacitor.
Edited by A. Povny
Connecting the motor of an old washing machine is a little more complicated and will require you to find the necessary windings yourself using a multimeter. In order to find the wires, ring the motor windings and find a pair. Finding a pair of wires To do this, switch the multimeter to measuring resistance, touch the first wire with one end, and find its pair with the second in turn. Write down or remember the winding resistance - we will need it. Then, similarly, find the second pair of wires and fix the resistance. We ended up with two windings with different resistances. Now you need to determine which of them is working and which is starting. Everything is simple here, the resistance of the working winding should be less than that of the starting winding. Many people believe that a capacitor is needed to start such an engine. This is a mistake; the capacitor is used in other types of motors without a starting winding. Here it can burn the motor during operation. To start an engine of this type, you will need a button or a start relay. A button is needed with a non-fixed contact and, for example, a doorbell button will do. Now we connect the engine and the button according to the diagram: But the excitation winding (OB) is directly supplied with 220 V. The same voltage must be applied to the starting winding (SW), only to start the engine for a short period of time, and turn it off - this is why the button is needed ( SB). We connect the OB directly to the 220V network, and connect the software to the 220V network via the SB button. Motor connection diagram PO - starting winding. Intended only for starting the engine and is activated at the very beginning until the engine begins to rotate. OB – excitation winding. This is the working winding, which is constantly in operation; it rotates the engine all the time. SB is a button that applies voltage to the starting winding and turns it off after starting the motor. After you have made all the connections, just start the engine from the washing machine. To do this, press the SB button and, as soon as the engine starts to rotate, release it. In order to reverse (motor rotation in the opposite direction), you need to swap the contacts of the software winding. This will cause the motor to start rotating in the other direction. That's it, now the motor from the old washing machine can serve you as a new device.
One stage
Now let's talk about other types of asynchronous electric motors. These are single phase AC capacitor machines. They have two windings, of which only one of them works after starting. Such engines have their own characteristics. Let's look at them using the ABE-071-4C model as an example.
In another way, they are also called split-phase asynchronous motors. They have another winding on the stator, the auxiliary winding is offset relative to the main one. Starting is carried out using a phase-shifting capacitor.
Single-phase asynchronous motor circuit
The diagram shows that ABE electric machines differ from their three-phase counterparts, as well as from single-phase collector units.
Always read carefully what is written on the tag! Just because there are three wires coming out doesn't mean it's for connection
to 380V. Just burn a good thing!
see also
Comments 31
There was a problem: the casing was closed; there was no airflow to the engine. There is a heat sensor on the engine body.
Mine was “buried” in the wiring of the windings.
put the conder (white barrel) at 50 mF (50 microfarads), it will be both starting and working
Can you explain why the air conditioner needs to be changed? Today I just pulled out the thermal relay from the wiring and secured it closer to the fan - I worked the shift without stopping. Although the engine was already very hot.
if it is very hot, the varnish on the wires will come off and there will be a short circuit inside, and this is an engine replacement :(
Can you explain why the air conditioner needs to be changed? Today I just pulled out the thermal relay from the wiring and secured it closer to the fan - I worked the shift without stopping. Although the engine was already very hot.
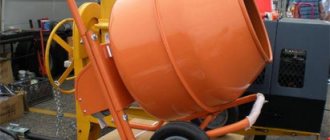
A mobile concrete mixer is a real assistant on a construction site. With its small size, this simple device allows you to obtain the required amount of masonry mortar or concrete of a certain grade in a matter of minutes.
However, a concrete mixer has to work in inhumane conditions: dust, dirt, heat, cold, humidity, precipitation... All this often leads to breakdowns of the unit, which is why labor productivity on the site drops sharply.
One of the most common malfunctions that occur with electric concrete mixers is the failure of the device’s on/off button block.
This problem is very common and manifests itself as follows: when you press the green button, the electric motor starts, but as soon as you release it, the motor “stalls”.
Why does this happen? Everything is very simple. The fact is that the start button of a concrete mixer is not just a button in the classical sense, but a magnetic starter of the KJD17 type.
This is approximately what the diagram of a concrete mixer button looks like:
As can be seen from this diagram, there is a coil inside the starter housing, one of the contacts of which is powered through a thermal relay.
In good condition, it is enough to press the green start button so that the coil holds it in the pressed position.
This coil serves as a kind of fuse that will turn off the unit if the electric motor overheats.
When the motor overheats, the contacts of the thermal relay open, the voltage on the coil disappears, and it stops holding the start button - the concrete mixer shuts down in an emergency. This was done primarily to protect the motor winding from burnout.
Belt
The motor works, tries, buzzes cheerfully (obviously without signs of tearing or biting), but the stirrer does not turn. Let's fix it!
A belt is a consumable item, just like in a car. The SBR-132A is equipped with a 5РJ 610 (five-ribbed belt 610 mm long). Replacing it is simple. We remove the protective cover and disconnect the contacts from the starter so that it does not interfere. Slightly loosen the two bolts that are on the back side and secure the motor. Using your hands, lift the motor up a little and remove the belt. This is if it is still standing there))) Usually, if it buzzes and does not turn, then the stirrer has removed or broken the belt for you, and there is no need to remove anything. It puts on without much effort, first it clings to the small pulley that is on the motor. Then it is pulled onto the top one. Then you need to tighten the belt. It's better to do this with a friend. A friend presses on the box, and you tighten the two bolts that you loosened before removing the belt.
For the “Voltage regulator with indicator” circuit
The device shown in Fig. 1 is designed for smooth voltage regulation in low-power loads. With its help, you can power a second additional radio device from one power source that has power reserves. For example, a 15...20 V power supply powers the required circuit, but you need to additionally power a transistor receiver from it, which has a lower supply voltage (3...9 V). The circuit is made on a field-effect epitaxial-planar transistor with a pn-junction and n-channel KP903. When operating the device, the property of the current-voltage characteristics of this transistor at different voltages between the gate and source is used. The KP903A…B family of characteristics is given in [1]. The input supply voltage of this device is 15…20 V. Resistor R2 type PPB-ZA with a nominal value of 150 Ohms. With its help you can set the required voltage in the load. The disadvantage of the regulator is that the internal resistance of the device rises when the operating voltage decreases. Figure 2 shows the voltage indicator circuit of the above-described regulator, assembled on a field-effect transistor KP103. Thyristor gas lighters circuit The device is designed to control the voltage in the load. Connecting this indicator to the regulator device is carried out according to the diagram shown. Depending on the letter index KP103 of the indicator installed in the circuit (Fig. 2), we will record (by the moment the HL1 LED lights up when the output voltage increases) the operating voltage in the load. The effect of fixing different voltages in the load is obtained as a result of the fact that the KP103 channel transistors have different cut-off voltages depending on the letter index, for example, for the KP103E transistor it is 0.4-1.5 V, for the KP103Zh - 0.5-2, 2 V, for KP103I - 0.8-3 V, etc.[1]. By installing a transistor with the required letter index, we will fix... See description of the circuit...
Online calculation of motor capacitor capacity
Enter data for calculating capacitors - motor power and efficiency
There is a special formula that can be used to calculate the required capacity accurately, but you can easily get by with an online calculator or recommendations that are derived from many experiments:
The working capacitor is taken at the rate of 0.8 μF per 1 kW of engine power; The launcher is selected 2-3 times more.
Capacitors must be non-polar, that is, not electrolytic. The operating voltage of these capacitors must be at least 1.5 times higher than the network voltage, that is, for a 220 V network we take capacitors with an operating voltage of 350 V and higher. To make starting easier, look for a special capacitor in the starting circuit. They have the words Start or Starting in their markings.
Repair - how to connect the start button of a concrete mixer
The first place to start repairs is by inspecting the condition of the start button contacts.
To do this you need:
If the concrete mixer button no longer locks , and cleaning the contacts does not produce results, in most cases it requires a complete replacement. The asking price is 500-600 rubles.
Replacing the concrete mixer button is not particularly difficult, so you can do it yourself. First you need to purchase exactly the same button so that it fits neatly in the housing.
The replacement procedure is as follows:
VIDEO INSTRUCTIONS » alt=»»>
To avoid such breakdowns in the future, you should operate the concrete mixer in strict accordance with the manufacturer’s recommendations.
After each use, the solution container must be washed, since the resulting build-up of hardened concrete increases the load on the engine.
Avoid getting water on electrical equipment (do not use the stirrer during rain). You should also avoid excessive loads on the unit - periodically you need to take breaks from work.
Related Posts
It must have the required pressure. However, it is not always possible to replace elements - some modifications are no longer available for sale. To eliminate this type of malfunction, you can use one of the following methods: clean the surface, which extends the service life by at least 3 months, or repair it by replacing the contacts in the terminal clamps . For a single-phase motor, a volt relay is used, with two groups of connections.
Frequent starting of the motor.
During operation, the indicators formed as a result of the elastic force of tension or compression of the springs and the pressure of the atmosphere pressed by the device are compared. The container membrane is connected to the pressure switch. The contact of this relay supplies power to the computer solenoid valve, which allows cooling water to enter the compressor compartment. The author of the article describes in detail the existing types of pneumatic relays.
Below is a diagram of connecting automation to three phases. In accordance with the rating of the power supply line, the appropriate model of the relay unit is selected. Remember that the compressor should be depressurized no earlier than 5 minutes before soldering. Share your own experience in operating a compressor with a pressure switch, ask questions, post photos on the topic. Working and starting capacitors for teapots.
Rules for caring for an electric meat grinder
After use, immediately wash the meat grinder with dishwashing detergent, rinse and dry. Wipe non-removable parts with a damp cloth. Watch the sharpness of the knives. If there are coarse fibers left in the minced meat or its consistency is mushy, then it’s time to take the knives to the master. It is better to store the meat grinder disassembled, this will protect the metal parts from corrosion. They should be lubricated with vegetable oil 2 times a year.
If you find an old manual meat grinder in your pantry, do not rush to take it to the landfill. Try cleaning rust stains with a solution of citric acid (10 g per liter of water). Then wash the meat grinder in soapy water and rinse with water.
After trying to assemble the meat grinder once, you will be able to do it with your eyes closed. All you have to do is choose the type of meat grinder and surprise your family with delicious dishes.
Is it possible to remove the start button on a concrete mixer?
If there is no new button, and you urgently need to start the concrete mixer, you can connect the concrete mixer without a button .
As a temporary measure, you can close the contacts directly, bypassing the coil, and turn the concrete mixer on/off by plugging/unplugging the plug from the socket, but this is not recommended, as this can lead to failure of the expensive electric motor.
Instead of a button, you can also temporarily install a regular circuit breaker, which will protect the engine from burning out in the event of jamming.
According to some experts, a 10-amp machine is suitable for these purposes.
Concrete mixer motor power
Such concrete mixers are equipped with an electric motor with a power of about 1000 W, the rotation speed of the electric motor rotor without a transmission connection with a gearbox is approximately 2800 rpm.
The rotation speed of the concrete mixer drum is about 27 rpm, that is, the rotation speed of the electric motor rotor is converted through the transmission mechanism of the concrete mixer gearbox.
Electric motor for concrete mixer SBR-100, SBR-120
Concrete mixer malfunctions
The main causes of concrete mixer malfunctions include:
Replacing the electric motor - and connecting it
Let's start with the fact that the stator winding of an asynchronous single-phase electric motor consists of:
How to determine where the starting winding of the stator of an electric motor is based on the wires brought out and where the working winding of the stator is?
— This is also one of the basics when connecting an electric motor.
In the starting winding of the stator of the electric motor, the resistance value will be greater than that of the working winding of the stator of the electric motor.
So, for example, in the starting winding when measured, the resistance will be 30 - 35 ohms, in the working winding the resistance value will be 10 - 13 ohms.
The models produced are different from different manufacturers of such products. The digital designation, for example, of a concrete mixer model such as SBR-120, means the permissible capacity for preparing a liquid solution, that is, this concrete mixer is designed for permissible mixing and preparation of concrete solution with a capacity of 120 liters.
So, for example, we encountered the following problem: the electric motor in a concrete mixer failed. In this case, we can replace the electric motor with a new one or send the electric motor for repair to eliminate its malfunctions and install the same electric motor.
Troubleshooting an electric motor, such as rewinding the stator windings of an electric motor, is a labor-intensive task and practically impossible to do at home. Here you need to consider:
Most often, such work on rewinding the stator of an electric motor is carried out by individual specialists in this specialization.
How to connect the electric motor yourself when replacing it? — This is one of the foundations of the topic presented. After all, if the electric motor is connected incorrectly, the work will be in vain; the electric motor may again burn out.
Source
Connection diagram for a 220 volt concrete mixer
Construction or major renovations require a considerable amount of concrete. To mix it, you can use an ordinary shovel, but you will have to work with tens of kilograms of cement, sand and other components. This is hard work and a lot of time. An automatic concrete mixer greatly facilitates the work and speeds up the process.
An electric concrete mixer or concrete mixer is specialized construction equipment designed for the production of concrete mixtures, mortars for foundation, screed, and plastering work.
Consists of the following elements:
1. Frame that serves as a support for the main components. As a rule, it is equipped with wheels for mobility.
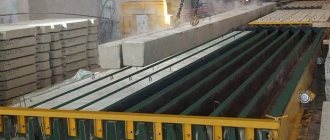
2. The drum is the basic element of the concrete mixer, into which the components are loaded and the solution is mixed. Volumes vary: from 40 to 300 liters. More capacious devices belong to industrial equipment.
3. Power unit that ensures rotation of the tank. Includes electric motor and V-belt transmission kit.
4. Tipping mechanism with a lock, allowing you to quickly unload the finished mixture or clean the container.
The concrete mixer operates from an electrical network with a voltage of 220 or 380 V. The components are loaded only into a rotating drum, the inclination angle of which should be 35 ° relative to the ground. When working with the unit, you should follow safety precautions (non-slip shoes, thick clothing). Its installation is carried out on a flat, dry surface, away from sources of water, flammable liquids, gases, and dust.
It is strongly recommended not to overload the drum. This accelerates wear of parts. Two or three extra kilograms of concrete will not particularly affect the progress of construction, but the working life of the concrete mixer will be significantly reduced.
Stages of choosing a concrete mixer
Having decided on the type of device, you can begin to select the mixing machine itself. And here there are a number of parameters that are definitely worth paying attention to.
Construction of a concrete mixer
First of all, let's understand the design of the product. After all, options are possible here, and it is the choice of design that largely determines the ease of use and the ability to perform the assigned tasks.
One of the most important parameters is the volume of the mixer tank. It all depends on the volume of solution we need.
- A product up to 100 liters is suitable for small-scale construction - pouring a small path, building a garage or gazebo.
- When building a house, you need to choose models from 100 to 150 liters . They are capable of preparing from 60 to 100 liters of solution at a time. Yes, yes, we were not mistaken - a 130-liter concrete mixer is not capable of preparing 130 liters of solution at a time. At best, it will be 100 liters. This is due to the fact that the filling of the product with the mixing solution should not exceed 70 to 85% in various models.
- Products from 150 to 300 liters are practically professional models, which are more suitable for specialized teams. Although, if you do not work alone, then it is quite possible that you will need such a model. After all, it is clear that the larger the volume of the concrete mixer, the greater the amount of solution it can prepare per day.
The next fundamental issue is the type of drive. Not only the design depends on it, but also what kind of electric motor we need to install on the concrete mixer. There are gear and crown concrete mixers.
- Geared concrete mixers are electric and have a motor installed in the lower part of the container. The engine is rigidly fixed to the container through a gearbox. And when the engine rotates, the container itself rotates.
The advantages of this type of product include their higher reliability. At the same time, the cost of spare parts for this type of product is much higher.
And to avoid breakdowns, it requires a higher operating culture. These are: correct installation, strict adherence to the volume of the loaded mixture, and some other aspects.
Repair - how to connect the start button of a concrete mixer
The first place to start repairs is by inspecting the condition of the start button contacts.
To do this you need:
If the concrete mixer button no longer locks , and cleaning the contacts does not produce results, in most cases it requires a complete replacement. The asking price is 500-600 rubles.
Replacing the concrete mixer button is not particularly difficult, so you can do it yourself. First you need to purchase exactly the same button so that it fits neatly in the housing.
The replacement procedure is as follows:
To avoid such breakdowns in the future, you should operate the concrete mixer in strict accordance with the manufacturer’s recommendations.
After each use, the solution container must be washed, since the resulting build-up of hardened concrete increases the load on the engine.
Avoid getting water on electrical equipment (do not use the stirrer during rain). You should also avoid excessive loads on the unit - periodically you need to take breaks from work.
Replacing bearings
There is a feeling that the stirrer has become old and it no longer has that former agility. It seems to turn quickly, but does not start the first time. When it jams, the engine no longer hums cheerfully, but rather hums strainedly. In general, there is a feeling that you need to buy a new stirrer, but everything is not so tragic. This is all due to a pair of bearings that stand on a shaft on which a pulley is attached on one side and a gear on the other. Here he is, our hero! And two old men who have outlived their usefulness)))
This is a 203 bearing, or 6203 according to the international classification. It costs as much as two loaves of sliced bread, so repairs are not very expensive. We remove the box with the motor, as in the case of replacing a pulley. We remove the concrete mixer bulb. I will tell you how to remove it in the next paragraph. Remove the drive gear (see above). And we are left alone with this situation.
On the gear side, squeeze the retaining ring and remove it. Since I don't have a suitable puller, the shaft had to be knocked out with brute force. To prevent the frame from springing, we had to use a high-tech device called a “board sawn to size”))) It looks something like this:
Unfortunately, I don't remember the size. In general, carefully but firmly, placing a piece of wood on the shaft so as not to bend it, we knock out the shaft along with the bearings.
Ultimately, we end up with a shaft in our hands on which two bearings hang, a sleeve between them the size of the outer race of the bearing and a small spacer sleeve. If you have a tool, then further manipulations are quite simple. If not, buy it - it will come in handy more than once!
We put the puller on the side where the gear was (hopefully, the key has already been pulled out) and press on the shaft, pulling out the bearings.
We replace the bearings with new ones, lubricate the shaft with lithol and also use a puller to put on the new bearings. Or you can select a tube that matches the diameter of the shaft, and carefully hammer them into place, knocking strictly on the inner race of the bearing.
Next, we assemble everything in the reverse order, not forgetting about all the spare parts, and enjoy the work of the concrete mixer.
Electric concrete mixers: advantages
Circuit diagram of an electric concrete mixer made from a barrel.
Electric concrete mixers have a number of advantages:
However, the main advantage of electrical equipment is the high speed of preparing the solution, ensuring excellent quality of concrete. And practically no human labor is required. It is enough to pour all the components in the required quantity into the drum and press the button. While mixing the solution, a person can do completely different things. If you work manually, it will take a lot of time and effort to thoroughly mix all the components of the solution. But even in this case, the required quality of concrete is not guaranteed.
Is it possible to remove the start button on a concrete mixer?
If there is no new button, and you urgently need to start the concrete mixer, you can connect the concrete mixer without a button .
As a temporary measure, you can close the contacts directly, bypassing the coil, and turn the concrete mixer on/off by plugging/unplugging the plug from the socket, but this is not recommended, as this can lead to failure of the expensive electric motor.
Instead of a button, you can also temporarily install a regular circuit breaker, which will protect the engine from burning out in the event of jamming.
According to some experts, a 10-amp machine is suitable for these purposes.
How the concrete mixer button works and how to fix it
There are 2 types of single-phase asynchronous motors - bifilar (with a starting winding) and capacitor. Their difference is that in bifilar single-phase motors the starting winding operates only until the motor accelerates. Afterwards it is turned off by a special device - a centrifugal switch or a start-up relay (in refrigerators). This is necessary because after overclocking it reduces efficiency.
In capacitor single-phase motors, the capacitor winding runs all the time. Two windings - the main and auxiliary, they are shifted relative to each other by 90°. Thanks to this, you can change the direction of rotation. The capacitor on such engines is usually attached to the housing and is easy to identify by this feature.
Overhaul (maintenance) of a 130 liter concrete mixer
Hi all! Solving a problem in a new concrete mixer
AgriMotor B 1510. Enjoy your viewing everyone.
First, we divide all six ends along the sides and find an ohmmeter with the stator windings themselves.
Take tape, tape, whatever you have and mark them. This will be useful now and perhaps sometime in the future.
We take a regular battery and connect it to ends a1-a2. An ohmmeter is connected to the other two ends (B1-B2).
At the moment the contact with the battery is broken, the needle of the device will swing in one direction. Remember where it swung and turn on the device at ends c1-c2 without changing the battery polarity. We do it all again.
If the needle deviates to the other side, then we replace the wires in places: c1 mark c2 and c2 as c1. The point is that the deviation is the same.
Now we connect the battery with polarity to the ends c1-c2, and an ohmmeter. to al-a2.
We guarantee that the needle deflection on any reel is the same. Check again. Now one bundle of wires (for example, number 1) will have a beginning, and the other. end.
We take three ends, for example a2, b2, c2, and combine and isolate. This is a conjunction star. Alternatively, we can bring them into the burr to the terminal block, mark them. On the cover we follow the connection (or draw with a marker).
Switching triangle. this is a star. You can connect to the network and work.
We prepare everything necessary for assembling a concrete mixer
The design of equipment for mixing concrete, powered by a washing machine engine, does not have any particular difficulties. It includes three main elements - a container for mixing concrete, a base on which the concrete mixer is mounted, and an electric motor.
When choosing suitable materials and components, you should know what size concrete mixer you need. A large concrete mixer will have a spacious capacity for mixing concrete, but its operation will require a motor with a large power rating, and you will not find such from washing machines. And you can’t put such an installation in the trunk of a car; to transport it you will have to rent a small truck, which will require additional costs. Therefore, it is recommended to install a concrete mixer with a small capacity using a Malyutka washing machine.
The first stage is preparing the necessary tools. To work, you will need an electric drill and a step drill, a grinder with a cutting wheel for metal, a welding machine, sets of screwdrivers, files and wrenches, and pliers.
Now you should prepare all the materials:
Connection diagram for a three-phase motor via a capacitor
Here, the voltage of 220 volts is distributed into 2 series-connected windings, where each is designed for this voltage. Therefore, the power is lost almost twice, but such an engine can be used in many low-power devices.
The maximum power of a 380 V motor in a 220 V network can be achieved using a delta connection. In addition to minimal power losses, the engine speed also remains unchanged. Here, each winding is used for its own operating voltage, hence the power.
It is important to remember: three-phase electric motors have higher efficiency than single-phase 220 V motors . Therefore, if there is a 380 V input, be sure to connect to it - this will ensure more stable and economical operation of the devices. To start the motor, you will not need various starters and windings, because a rotating magnetic field appears in the stator immediately after connecting to a 380 V network.
Voltage increase
Let's say the tag says: Δ / Ỵ220 / 380. This means we need to include a triangle, since most often
The default connection is 380 volts. How to do it? If the electric motor has a terminal box at the back, then this is easy. There are jumpers and all you need to do is switch them to the desired position.
But what if you only remove three wires? Then you need to disassemble the device. On the stator you need to find three ends that are soldered together. This is a conjunction star. The wires must be disconnected and connected to the delta.
In this situation it does not cause complications. The main thing to remember is that there is a beginning and an end to the coils. For example, take the beginning of the ends that were brought to the bur of an electric motor. So, what is soldering, these are the ends. Now it's important not to get confused.
We connect this path: we connect the beginning of one coil to the end of another, etc.
As you can see, the diagram
simple. Now the motor connected to 380 can be connected to a 220 V network.