A cushion is always placed under paving slabs. This ensures stability, reliability and sufficient mobility of the coating, which helps prevent its destruction due to soil heaving. There are different types of bases: sand-gravel, sand-cement. When constructing a parking lot or road for cars, a more durable coating is created - made of concrete.
On the left is a sand cushion, on the right is a concrete base for the sidewalk.
Preparatory excavation work
Further actions depend on what type of base is chosen:
- sand coating;
- sand-cement;
- concrete.
In the first case, the sand is compacted without the use of auxiliary materials. Sand-cement mixture is a more durable coating. After connecting the main components, the trench is backfilled.
Cement mortar is not prepared in this case, but a dry mixture is used. Filling with water is carried out after laying the base. To create a concrete coating, cement mortar is mixed. In this case, formwork is created; the sequence of actions in preparation for excavation work will be different.
The general stage for the formation of any foundation is the excavation of soil in the area where it is planned to lay the tiles. The work is done with your own hands, because in this case there is no need to dig a deep pit, like for a foundation.
The thickness of the soil layer that needs to be removed is determined by the type of base: sand, sand-cement or concrete. The more materials used in its construction, the thicker the layer of soil removed.
The main criteria that should be taken into account when excavating soil are:
- the platform formed from tiles must be flush with the surface of the ground, and so many materials are used so that after shrinkage this requirement is met;
- if the top layer of soil is loose, it is permissible to arrange the covering so that it is 2-4 cm below the ground surface.
In both cases, it is important to take into account the shrinkage of the bulk materials and soil used. When garden paths and sidewalks are laid out, in most cases the thickness of the soil layer that is removed is 20 cm.
To make the covering of the area allocated for parking more durable, another 8-10 cm is removed. As a result, the depth of a small pit reaches 30 cm. Material consumption will increase, because in this case it is necessary to create a reliable foundation that can support cars and trucks cars.
Construction of a sand and gravel cushion.
At the stage of removing the soil layer, debris, stones, and weeds are removed. If the surface layer of soil is fertile, it is not recommended to scatter it along the site where construction work is being carried out. Weeds will grow here. This soil is best used for arranging beds and flower beds.
After removing debris and stones, a slope is formed in the direction away from the buildings (no more than 3%). The bottom of the trench is compacted. This will make the future coating more durable, since the risk of soil shrinkage under the weight of the materials used is reduced. The curb stone is being installed.
Advantages and disadvantages
When installing small areas of paving slabs, the base is sand, which does not swell under the influence of precipitation (melt and storm water pass through the sand cushion and are absorbed into the ground soil). After rain, water stains do not remain on the surface if the material is laid professionally, and the path does not “crack” when the soil moves.
The disadvantages of sand cushions for paving slabs include:
- Exceeding the permissible loads on the coating. Vehicles on a tiled walkway can damage the pavement.
- Ants carry away sand from under paving stones in large quantities. The better the sand cushion is compacted, the more difficult it is for insects to knock out grains of sand from the soil, thereby the higher the wear resistance of the paving surface.
- Washing the area with water if high-quality laying of the sand cushion is not ensured.
- Weathering of sand grains from the seams between tiles. This leads to loosening of the stone.
Washed sand (obtained by sifting and washing), river and seeded sand is the most successful option for laying paving slabs.
An alternative to the sand layer is artificial screening from crushed stone, gravel and slate. The low cost of building material processed from rocks does not provide high performance characteristics of the paving slab (the screening layer does not tolerate moisture well). Compacting the screening layer, preferably in several approaches, helps improve the wear resistance of paving slabs.
Materials and tools
To lay paving slabs yourself, you need to purchase a cord (string), and pegs for marking the territory, a building level, a mallet, trowels, a grinder with a diamond wheel, an automatic or manual tamper, plastic crosses, cement M 500 and buy sand of different fractions.
On the World Wide Web you can find video master classes or advice from experts on forums on paving sidewalks.
Important! If the soil is swampy and clayey, it is necessary to carry out drainage work (forming a slope and installing drainage pipes for water drainage). On dry soils, it is enough to lay the tiles at a slope of 2 or 3% towards the curb.
Coverage area calculation
When measuring complex laying of paving slabs, it is recommended to first calculate small fragments of the coating, taking into account an error of + - 5% (laying, undercuts). And then they add it up. When laying a complex pattern configuration, the error will be from 10 to 20%.
The sand layer under the tiles is usually from 3 to 5 centimeters. When using crushed stone, multiply the area of paths and platforms by the thickness of the substrate layer (5–10 cm).
The amount of border framing is calculated based on the length of the perimeter of the site minus the places where the tiles join.
Curb stones are calculated according to the length of the path. The value is multiplied by two, and after the resulting amount the total is divided by the length of one border. Sold individually. The result is the value required to purchase the required number of enclosing elements.
Gravel drainage pad
The stage of preparing the bottom of the trench is completed. Geotextiles can be laid on top of it. Its main task is to prevent shrinkage of the bulk materials used. In addition, geotextiles inhibit the growth of weeds in the trench, the bottom of which it covers.
Crushed stone is used for laying paving slabs and sections of the road that are not subject to significant load. The average size of material fractions is 5-20 mm. The recommended layer thickness is 15 cm. This is sufficient when installing a sidewalk covering.
When arranging a drainage cushion, use material with a fraction of 5-20 mm.
If you are setting up a site for a car, it is important not only to thoroughly compact and level the soil, you also need to use a sufficient amount of bulk materials. In this case, the crushed stone layer will be 30 cm. Its average size is up to 40 mm.
A thinner layer of fine-grained crushed stone no more than 5 cm thick is formed on top. The average size of the fractions in this case is 5-20 mm. You cannot use only fine-grained or coarse-grained crushed stone. This may cause shrinkage or impair drainage.
A layer of sand is placed on top. Its thickness varies from 4 to 15 cm, depending on the parameters of the base. To make the sand layer durable, it needs to be filled with water in moderation. After this, compaction is carried out.
Features of pouring liquid solution
If you want to prepare a reliable parking space and have chosen a concrete monolith as the basis, then you need to take into account several nuances:
- The height of the concrete base should be 5-10 cm higher than the cement-sand mixture.
- For a monolith you will also need a “pillow”, but in this case you will need less sand (layer height of about 2-3 cm).
- Since the concrete monolith will not allow moisture to pass through, a drainage system will have to be provided. For holes that drain water, pipes about 20 cm long are suitable (the length depends on the height of the base). For each m2 you will need one piece of pipe.
- The liquid solution consists of sand, cement (M 150-200), plasticizers or slaked lime and water. The finished solution must be liquid enough so that it can be leveled with a rule.
- If heavy vehicles will drive on paving slabs, then the base must be reinforced. In this case, the height of the monolith will increase by 3-5 cm.
Waterproofing the base
In areas with high groundwater, waterproofing is laid between gravel and sand.
Geotextiles can be laid on top of the sand layer. This is an environmentally friendly material that not only protects the base from weeds and the coating from subsidence, but also allows you to properly organize the waterproofing of the top covering. Geotextiles are laid in one overlapping layer.
The advantages of this material:
- resistance to rotting and decomposition;
- long service period;
- high strength.
In addition, thanks to geotextiles, the likelihood of water accumulation under the paving stones is reduced. If it is not possible to use such material, use polyethylene film.
It is folded in half, but even this will not provide reliable protection of the coating from water. The film quickly deforms.
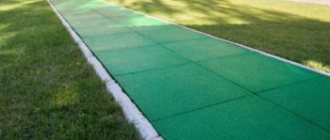
Laying paving stones
After installing the sand cushion, they begin laying the paving stones. Paving slabs are laid in the “toward” direction with a gap between the products of 2-3 mm. A trowel and a rubber mallet are used to lay the paving stones and adjust them in place. Trimming tiles is also done with your own hands using a grinder with a dry cutting disc, which allows you not only to cut concrete, but also to undermine it with its side surface.
Scheme for laying paving stones
When laying paving slabs, every linear meter of masonry is checked for compliance with the slope and cross-sectional profile of the coating. The correct convexity of the track profile can be formed by periodically applying a self-made plywood template to the coating.
sand cushion
There are many ways to arrange the foundation, each of them uses sand. A layer of this material can be formed under the crushed stone cushion, on top of it. In addition, sand is also used in the process of laying tiles. It acts as a sealing material. If you lay paving stones directly on geotextiles or crushed stone, the reliability of the coating will decrease.
The final sand layer is formed after waterproofing is completed. The material must be sifted. Moreover, the best option is river sand. The thickness of the supporting layer depends on the parameters of the base; in most cases it is 7 cm. During the laying process, the tiles are partially immersed in the sandy base.
The material must be constantly compacted. Special equipment is used for this. You can do the work yourself; in this case, the sand is moistened with water. Before installing the paving stones, the layer of this material is leveled using a plastering rule.
What fraction of sand is needed for laying paving slabs
Most people are familiar with the idea that paving stones should be laid on top of a layer of sand. Ideally, this sand should be coarse and grainy. Compaction will sand the edges together, locking the layer of sand in place, which helps prevent erosion or movement.
Concrete sand works very well, but rock sand is sometimes used instead. However, none of these types of sand are suitable for filling the joints of paving slabs. Loose sand is washed away over time or during heavy rains. Because of this, polymer sand was developed for pavement seams to maintain its shape and eliminate movement.
Paving slabs should be laid on sand. It should be rough and grainy.
In recent years, a new type of sidewalk sand has been developed that softens when wet. Although this is thought to provide greater flexibility, it can also cause erosion problems and may require re-sanding.
Polymer sand is simply a granular sand material that is placed into the cracks and joints between stone pavers to hold the blocks in place and maintain the beauty and integrity of the pavers. A water-activated polymer is injected into the sand.
After applying the material to the paved surface, the sand is sprayed with water, which causes the polymers to harden. This secures the sand in place. Polymer sand does not need to be replaced, even when exposed to extreme weather conditions.
Polymer sand is a sandy material that is placed into the cracks and joints between stone pavers.
Sand-cement base
The principle of forming the finishing layer in this case is the same as in the case of a sand base. Only instead of pure sand, a mixture of components is prepared. This will make the coating monolithic. Mix sand and cement in a ratio of 3:1. After the finishing layer is formed, it is leveled. It is not necessary to compact the sand-cement mixture.
If the preparatory work for laying the crushed stone-sand cushion is carried out correctly, the surface layer of bulk materials can simply be formed on the surface of the geotextile.
Tamping is performed during the installation of paving stones. When using a cement-sand mixture, it is important to carry out the work in dry weather, provided that the air humidity does not exceed normal levels. Upon contact with moisture, cement begins to harden. This leads to a decrease in the quality of the coating.
How to do it
Let's look at how to make a cushion under paving slabs in the highest quality possible way. Sand is taken, it must be clean, sifted, without impurities. The surface is leveled, its evenness is checked using a level. Sand is poured in an even layer. A string level is pulled, along which the coating is leveled.
Can be leveled using a regular rake.
The smoother it is, the better. Then the first layer is moistened with a hose or watering can. Don't apply too much force or apply too much pressure, otherwise everything may wash out.
When the material is laid, crushed stone is laid out, laid according to almost the same principle. It is also leveled as evenly as possible, the layout is even. It needs to be compacted a little, otherwise the desired horizontalness cannot be achieved. When the crushed stone is brought to the desired level, wait a little until the surface dries. Next, lay out the paving stones. Its installation is carried out in the usual way, just as it would have been installed without the protective gap.
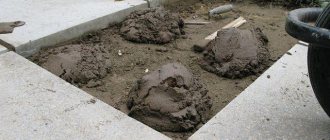
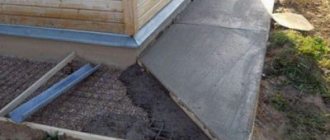
Concrete base
This option is chosen when installing a parking area or a section of road that will be subject to increased load.
The tiles are laid on top of such a coating using an adhesive composition. Before pouring concrete, a drainage pad is formed.
An example of a concrete base for laying paving slabs.
The base needs to be strengthened, for which reinforcing rods are used. The basis of this tile backing is waterproofing.
Thanks to the use of moisture-proof material, concrete is protected from moisture, which will increase the service life of the coating.
Formwork
A diagram of the future site is being drawn up. Its dimensions and parameters of each layer of bulk materials are determined. Once concrete is poured, it will be impossible to change them, so it is important to install the formwork correctly. It allows you to give the desired shape to the solution if the surface of the path is above the soil level.
When installing formwork, wood is used: panels, boards. Panel plastic and chipboard are also suitable. One side of the products must be flat. They are secured using pre-installed stakes.
Reinforcement
A sand and gravel cushion is formed at the bottom of the trench. The above-described principle of performing such work can be taken as a basis when laying tiles on concrete. A reinforcing frame is placed on top of the crushed stone layer.
In this case, metal rods with a diameter of 6 mm or a finished mesh are used, the cell size of which is 10x10 cm. When rods are used, they must be fastened together at right angles using wire. The welding method cannot be used.
Lighthouses
Before pouring concrete, it is important to determine the boundary beyond which you cannot go. This will create an even coating. Metal profiles are used as beacons. It is located along the entire site. You can use drywall profiles.
They are made of galvanized metal and have a significant length. Beacons are attached using a small amount of cement mortar. The profiles are placed parallel to each other at a certain distance (no more than the length of the plaster rule).
Pouring concrete
Cement M400 or M500 is used. Before pouring the edge, sheet material of any kind is installed; its thickness should not exceed 4 mm. When the cement mortar hardens, the sheets are removed, resulting in expansion joints, thanks to which the coating does not deform due to temperature changes.
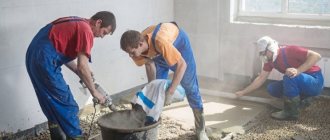
The solution is prepared using a construction mixer. First mix the dry ingredients. After obtaining a uniform mixture, water is gradually added. It is necessary to ensure that there are no voids in the concrete mass when pouring the trench.
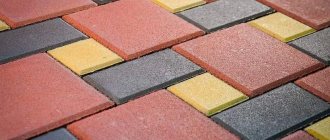
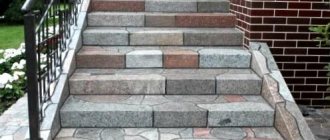
Why paving stones are gaining popularity
Paving stones are gaining popularity every year. This is a beautiful and durable way to pave a path or create an elegant staircase. Pavers also transform patios. Pavers bring richness to an ordinary space and add immeasurable value to a property.
In the modern world, homeowners are increasingly choosing to use paving stones. Its types can be much more economical and can withstand the high pressures placed on them by modern machines. This makes them popular for driveways, driveways and sidewalks.
You can make a path from paving stones or decorate the area with unusual patterns.
Pros and cons of paving stones
The main advantages of paving stones:
- Most cost effective. Asphalt tiles are manufactured either domestically or from anywhere in the world, hence there is no extra charge for export.
- Increased pressure tolerance. Unlike conventional bricks, asphalt slabs have exceptional pressure resistance, making them suitable for specialized applications.
- Variety of options. When homeowners decide to install a sidewalk, they have a wide variety of options to choose from. Some types look like regular red brick, while others resemble granite.
- Uniform production. Because paving slabs are mass-produced, replacement components are easier to find when needed.
- Better drainage. Most paving slabs are manufactured in such a way that they can promote more efficient drainage.
The advantages of paving stones are that they are economical and beautiful, withstand a lot of pressure unlike bricks, and there is a huge selection of design options and materials.
The main disadvantages of paving stones:
- The process of laying paving slabs on sand will take longer than with conventional tiles.
- This may be more expensive than other options. The initial cost of installing paving stones may be higher than other options, but you will save money in the long run thanks to easier and less expensive maintenance methods.
- Over time, weeds grow next to such tiles.
Disadvantages of paving stones: the installation process takes a long time, the cost may be higher than in other options, and over time, weeds grow between the tiles.
Installation of curbs
Installation of curbs occurs according to pre-made markings. Then a cement-sand mortar is mixed in a ratio of 1:3 and applied to the surface along the laying of the blocks. The curbs are placed on the bonding mixture and adjusted to the level. The finished slabs are left for 1 day so that the solution holds the elements together. In some design solutions, blocks are laid without a border.
Geotextile layer
Preparation for installation of tiles includes laying a waterproofing layer, which is placed above the drainage as a substrate. This prevents moisture from reaching the top load-bearing layer and improves the quality and integrity of the coating. A layer of geotextile is lined on the bottom and walls of the earthen structure. The artificial material does not rot from prolonged exposure to water, does not decompose even with prolonged use, and provides the road with protection from water.
Briefly about the main thing
So, we told you about how to lay paving stones with your own hands from the very beginning. Let's face it, it all seems easy. But in reality, the process of installing road material is not easy. Experience and skills in working with construction tools are required. But for those who decide to try their hand, we recommend starting in a small area somewhere in the back of the yard. If the end result does not satisfy you, then you should invite the masters.
Source
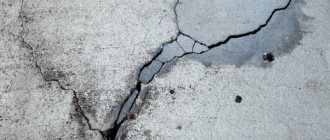
Common mistakes
The size and shape of the tiles influence the quality of installation. Large elements in small areas leave a large amount of “trimming”, that is, waste.
It is recommended to use water when compacting the foundation under the sidewalk deck during a dry period of time (depending on climatic conditions). The technology ensures quick drying and fastening of the building material.
During the rainy season, laying paving is not recommended. Sandy flooring will be damaged by moisture.
Safety precautions
When decorating areas with tiles, if you are not a professional builder, you should adhere to a number of safety measures:
- When working with a grinder, it is not safe to cut tiles on your knees. It is better to place it on a hard surface.
- To protect against chips, protect the respiratory system with a mask.
- Actions not related to water are carried out with cloth gloves, this will protect your hands from injuries.
When laying paving slabs, do not neglect basic construction techniques. Compliance with the rules will ensure the durability and aesthetic appeal of the proposed paving areas.