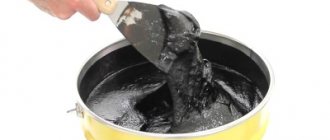
Puttying concrete walls has now established itself as the most common method of leveling surfaces, in particular: walls, floors and ceilings made of concrete.
Concrete is a very specific material. Its main feature is its low degree of hygroscopicity. Concrete almost does not absorb moisture, which interferes with its adhesion to other building mortars.
Plaster or putty penetrates the pores and crevices on the surface to be finished, thereby providing adhesion, but in concrete there are very few such irregularities, so adhesion is quite difficult to achieve.
Is it necessary to putty the walls under wallpaper?
This should be done for several reasons:
- Plastered walls have many defects that will be visible when wallpapering. They can especially stand out when gluing striped wallpaper or thin, light colors.
- After plastering, when drying, the walls may have cracks. They definitely need to be sealed. Because the reasons for the appearance of this deficiency are unknown - they expand due to soil movement, but if the solution is not made correctly, they can remain unchanged.
- After puttying, the walls become more protected from external factors.
- Puttying a plasterboard wall is necessary because craftsmen do not recommend gluing wallpaper onto “bare” plasterboard for many reasons - from loss of the appearance of the wallpaper to unpleasant surprises when removing it.
Surface filling is carried out in several stages:
- Determining the unevenness of the wall and its preparation.
- Applying the starting mixture.
- Finishing coating and bringing the surface to perfection.
If the putty work is carried out correctly, the surface will be ready for wallpapering.
Correct work will prevent the putty layers from peeling off and the wallpaper falling off.
What you need to know about working with mixtures
So that no one is deceived, we will say right away that puttying is a rather long and labor-intensive process that requires strict adherence to the sequence of actions, patience, diligence and attentiveness.
It also requires not only the moral and physical preparation of the master, but also very specific actions with the surfaces being treated, which we will definitely talk about today. So, first of all, we need to look at the walls we will be working with. In most cases, these will be plastered surfaces, as well as those made of plasterboard and similar materials. If in front of you is just a brick wall without plaster, then you won’t be able to putty it, since the applied layer is measured in millimeters, and for normal leveling it may require much more.
Puttying the wall
It’s a different matter if you have to work with monolithic slab surfaces, in panel houses - here it’s quite possible to do without leveling, if they are installed well, vertically. Since, in fact, both surfaces will be concrete, and in the case of plaster, gypsum is also possible, the work will be carried out in the same way.
The easiest way to work is with plasterboard surfaces. Here the procedure will be slightly different, so we will describe it separately.
Puttying the walls and ceiling of the attic
The next point we pay attention to is the purpose of the room itself. This parameter will affect the selection of the type of putty. Let's look at the most common and popular ones.
Types of ready-made putty for walls: which one is better
A well-putty surface is the result of the master’s final work and an indicator of the materials used.
Ready-made putty mixtures allow you to reduce the time of the master for mixing putty.
The most used types of ready-made putties:
- Latex acrylic - applied to any surface, including drywall. Its most widespread use is in finishing surface coating. The elastic solution allows you to make a layer of putty of 1-3 mm.
- Oil-adhesive and adhesive - has a high density, so professionals work with it. It is difficult to apply to the surface, but when dried it has a certain strength.
- Putty with PVA. It has antifungal components, so it is applicable in damp areas.
It is better for a novice master to work with a ready-made solution. It is more plastic, fits well on plaster and retains its qualities after drying.
Starting: the best choice
In addition to ready-made mixtures, dry putty solutions are sold on the market.
The starting putty is applied to prepared plastered walls. The most commonly used putties are:
- cement mortars;
- gypsum mixtures;
- polymer putties.
Cement putty is used in damp rooms. It is coarse-grained, with a gray tint.
Gypsum mixtures are used in a dry room that is heated in winter. It contains quicklime.
Polymer - used in both wet and dry rooms. Has high elasticity.
Manufacturers of starting putty:
- Knauf starting putty is intended for indoor work. It has a plaster base. Due to its environmentally friendly composition, the mixture is used in children's rooms. The disadvantage of putty is that it hardens quickly. The maximum layer of applied solution is 1.5 cm.
- Volma-Standard. Consists of gypsum and mineral compounds. After puttying, you can start gluing. The surface is smooth and durable. The downside is that it sets quickly.
- Osnovit-Ekonsilk is a gypsum base. Designed for dry rooms. Plastic, does not shrink. The thickness of the applied layer is 1 mm, if more, then cracks appear when drying.
By observing the correct preparation of the solution, filling the wall will have a good result.
Finish: how to choose according to the best rating
After the starting putty has dried and the work has been completed, the finishing mixture is applied. The most popular are:
- Prospectors - Finish. The composition includes gypsum and additives. Used in rooms with high humidity. Shrink-resistant, flexible, quick-drying. The downside is the low strength of the surface after drying.
- WEBER LR+. The applied layer is 1-5 mm. the working solution does not harden within 2 days. After drying, a flat, smooth white surface is obtained. Putty is applied both manually and mechanically.
- Sheetrock Superfinish - contains vinyl additives, so the putty has high ductility. A layer of 2 mm dries in 5 hours. However, the master recommends carrying out all subsequent work one day after application. Has shrinkage.
For beginners, experts recommend choosing putty with high plasticity, which will easily transfer from dry to wet layer.
How to choose a good coarse grain
Coarse putty is needed for the initial treatment of the wall after plastering. The most popular are:
- Unis Blik - the composition includes natural materials. Do not use in rooms with high humidity. To putty the surface, a reinforcing mesh is used. There is no shrinkage. Has plasticity, after drying there are no cracks;
- Vgt acrylic universal – based on acrylic. Layer thickness 1-7 mm. Has little shrinkage and good adhesion.
Coarse putties are all types of cement-based mixtures.
Which is better for deep leveling?
Starting putties.
With their help, it is possible to eliminate all errors in plastering work and cracks. It is coarse-grained, applied to surfaces up to 20 mm. Leading manufacturers:
- Knauf NR putty (starter) – gypsum putty, applied in a layer from 4 mm to 15 mm. The main direction is leveling the surface before finishing coating. After mixing, the solution quickly hardens; after 15 minutes, work stops. Does not shrink.
- Ceresit CT 29 starting – performing work on a concrete, brick, cement-sand wall. It is used to seal cracks and recesses left after plastering. The maximum applied layer is 20 mm. Not suitable for use in rooms with high humidity. After mixing, the solution can be used for 50 minutes. It takes 10-15 hours to completely dry on the surface. High strength.
- Kreisel 662 is universal - it contains cement and lime. Apply a thin layer to the surface covered with plaster, as well as without coating. Has high adhesion. Use the mixture in rooms with high humidity. The maximum layer is 3 mm, there is shrinkage.
When cracks are detected, in addition to putty, reinforcing tape must be used. It will prevent the crack from getting bigger.
Which putty to choose for drywall
The plasterboard surface is treated several times. Initially, putty is used for joints together with reinforced tape. The second stage is coating with starting putty.
Craftsmen do not recommend using putty materials from different manufacturers. Knauf is the most popular.
The next stage is covering the surface with finishing putty. Only after one layer has completely dried should we proceed to the next work.
Under the wallpaper, the plasterboard surface is covered with layers of putty for greater strength of the entire structure.
For a neat appearance, because if thin wallpaper is pasted onto sheets without treatment, the color of the wall will appear on the wallpaper.
How to putty on wooden surfaces before wallpapering
Puttying a wooden surface is different from concrete and brick. There are factors influencing the choice of putty mixture for wood:
- high adhesion - the service life of the putty under the wallpaper depends on this;
- the solution must be elastic;
- drying speed.
Types of mortar used for wood surfaces:
- Gypsum based mixture.
- Latex putty.
- A mixture with the addition of acrylic.
- Oil mixture.
- Putty with PVA.
Basically, craftsmen use gypsum mixtures that do not shrink and have good ductility.
Which putty is better to putty on untreated concrete?
A concrete wall generally does not have large differences in plane.
Therefore, having skipped plastering, they immediately proceed to puttying with the starting composition. The base coat consists of several layers. Moreover, the second layer is applied only after the first has completely dried. Cement mixtures are mixed for coating. They shrink, so the layer should not be thick.
The finishing layer should be thin. It is difficult to hide the gray color of the starting material underneath, however, a thin layer makes the surface smooth, ready for wallpapering.
Universal putties are also used. But, apply them in a thin layer 2 times. They are plastic and do not shrink. If the walls are smooth, the differences are 2-5 mm, then the use of mixtures is permissible.
How many coats should be applied to bare concrete walls?
Apply 1 layer of starting putty to a practically flat concrete surface. The layer thickness does not exceed 15 mm. Beginners should use a perforated beacon profile to level the wall. It is fixed to the mixture and the level is adjusted for evenness. Work begins only after the solution under the profile has completely dried.
Attention. If there are wooden slats, they are used as beacons. But, the rail should not be high and jagged, otherwise there will be a ribbed surface.
Can putty be applied to concrete surfaces?
Advice
If the concrete surface does not require preliminary leveling, then it can be puttied without prior plastering.
It is recommended to lay reinforcing material (fiberglass). It will increase adhesion and prevent cracking of the putty. This is true for porous concrete.
Walls
Puttying of concrete walls is not much different from the standard one .
It is important to pay attention to the compositions used and the type of room. Concrete must be dust free and degreased. Depending on the type of finish, the final coat may need to be sanded with fine sandpaper. For dry rooms (bedrooms, living rooms, hallways) you need gypsum putty; for wet rooms, it would be correct to use cement or acrylic putty. Porous substrates that do not require leveling can be puttied with thixotropic non-shrinking compounds. Fiberglass is pre-laid. Cracks and seams are filled with starting solution. If the defects are minor, then 2-3 layers of finish are allowed without laying the start.
Attention
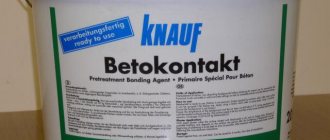
Instead of soil, concrete contact is used on concrete walls, since it does not reduce moisture absorption.
Ceiling under wallpaper or paneling
Fiberglass is laid on the ceiling before puttying, especially plasterboard . It can be cut into several fragments and overlapped. Installation is carried out on a layer of starting putty. It will take 3-4 layers to cover the web. When puttying under wallpaper or paneling, you don’t have to eliminate significant defects and don’t make the background white.
If a concrete ceiling needs restoration, then it is better to use acrylic mixtures.
Floor
Floor putty must have increased strength, as it will be subjected to heavy loads every day. Here you need a cement or special composition. For further sanding of floors, a waterproofing mixture is used. The surface is cleaned with a construction vacuum cleaner. The mixture is poured onto the floor, then leveled with a brush or spatula.
For painting
The peculiarity of preparation for painting is the creation of a uniform, perfectly flat surface without defects . Acrylic putty is recommended, since polymer compositions can be tinted in the mass. This technique is used to add color saturation.
Other features of puttying for painting:
- mandatory grinding of the finishing putty coating;
- applying at least 4 layers of composition to cover fiberglass;
- the use of white mixtures - putty and primer;
- laying fiberglass end-to-end with overlapping seams on the base.
Attention
Each layer for painting can be applied up to 1 mm thick. The maximum coating density is 10 mm.
A covering primer is necessary if the solution produces a yellow or grayish tint. Otherwise, a universal penetrating one is used. The concrete is directly processed using concrete contact.
What technologies exist
Masters use 4 methods that are suitable for beginners:
- Mechanical method of applying the solution.
- Semi-mechanical - applying the mixture, and then leveling it with a spatula.
- Beacon - used for starting putty.
For the mechanical method, a machine is used that sprays putty in a thin layer. After applying the layer, use a spatula with a wide spatula to level the surface.
Semi-mechanical - the machine throws large drops onto the wall, which must be spread evenly over the entire wall.
Beacon is applicable for starting plastering. Suitable for beginners. The use of beacon profiles will speed up and facilitate work.
How to properly putty walls with your own hands for beginners without experience: a step-by-step guide
Beginning craftsmen need to know the nuances and correctness of the work.
The stages of preparing the solution and applying the material to the surface include:
- to prepare the solution, you must carefully read the instructions and know exactly how much water is needed for mixing;
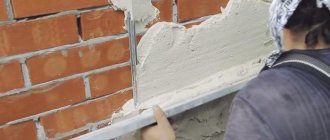
- the starting solution is applied to the surface horizontally and vertically. To avoid bumps, you do not need to apply the solution from the floor itself. It catches garbage. Corner - here you need to use a spatula perpendicular to the corner, horizontal to the floor. This way there will be no “washboard”;
- For productive work, the solution is prepared in small portions. During production, it will not have time to harden;
- the finishing layer is applied to the primed surface with a layer of 2 mm;
- when puttingty, the tool must be held at an angle of 30 degrees;
- After applying the mortar to the walls, putty the corner with an angle trowel.
After all the recommendations, leveling the surface for wallpaper will not be difficult even for a person who is doing this for the first time.
Surface preparation
In order for the surface to be perfectly flat and smooth, the surface must be prepared. This process consists of several steps:
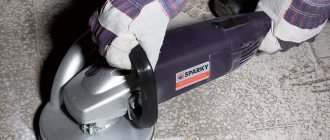
- Cleaning walls from dust, excess stones, frozen drops of plaster. For cleaning, mechanical means are used - grinders, brushes, spatulas.
- Surface priming. This must be done to degrease, and almost all primers contain antiseptic agents that protect the surface from mold.
After processing the wall, proceed to subsequent work.
Selecting the required tool
To properly putty with your own hands, you need to have the following tool:
- construction mixer;
- set of spatulas - wide spatula, small, angled;
- brush, roller for priming;
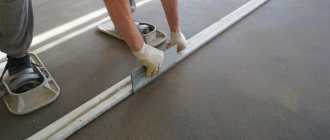
- the rule for creating a flat wall is 2 meters;
- level to control the evenness of the wall;
- sandpaper for rubbing the surface;
- skinner;
- container for the mixture.
All tools and containers must be clean. This will speed up the process and prevent the solution from hardening quickly. Because frozen particles in the container and on the spatulas accelerate the hardening of the mixture.
How to putty uneven surfaces with starting putty for a beginner
To apply the starting mixture to a dry, clean wall, beginners are recommended to use metal beacon profiles. They are installed along the wall so that the maximum distance from one profile to another is 1.5 meters.
Beacons are placed on the holes with putty. Evenness is determined by level. The excess solution that comes out is removed. The mixture must be completely dry before starting work.
The putty is applied in dots to the wall and stretched over the surface, without going beyond the installed beacons. The evenness of the surface is determined by the rule. With its help, the solution is tightened and the excess is removed from the instrument. If necessary, apply a second layer of solution.
The second layer is applied only after the first has dried.
If the putty shrinks, then 20 minutes after application it must be tightened according to the rule.
How many times do you apply the mixture before it hardens?
The starting mixture is applied in a layer of 20 mm.
If you need to level the wall with a large layer, then apply a second layer.
But this happens in rare cases, because after plastering work the unevenness is on average up to 1 cm.
Puttying of bare walls is carried out if the unevenness is 2 cm. The plaster layer is applied once, maybe with an overlap.
How and what is the best way to check the readiness of the surface for subsequent stages of work
After puttingtying the wall, the work must be left for a while. It all depends on the composition. Cement mortars shrink: after 20 minutes, the treated wall must be tightened according to the rule. After 1 hour, you need to run your palm over the surface, it should give “milk”, while the solution is already hardened. This milk is carefully removed with a spatula. They do the washing. The cement mortar hardens in about a day. Check with your palm, the solution should not stick.
Gypsum and polymer mixtures do not shrink. After application, they do not need to be touched for at least 10 hours. After this, use a dry palm to rub the surface. It should be dry and smooth. If dampness or sticking is felt, then the surface is left for some time.
The manufacturer's packaging indicates the exact time for the mixture to dry on the surface. We must wait for this time.
Do I need a primer for finishing putty: which one to use?
All primers differ in their composition and purpose. Primer mixtures must be applied before finishing putty for the following reasons:
- The primer increases the adhesion of the applied materials. That is, the topcoat will fit better on a primed surface;
- if, after the starting mixture has dried, a “cobweb” of microcracks appears on the surface, then the primer clogs them, preventing moisture from penetrating there;
- The primer creates a thin film on the surface, protecting it from the absorption of moisture and components of the finishing layer in the starting layer. Thanks to this, the finishing solution applies evenly. Material consumption is reduced.
The compatibility of the primer with putty is indicated in the table:
How to apply the finish yourself and putty correctly
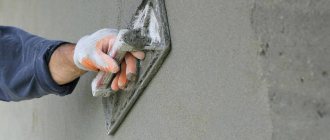
To correctly apply the material to the surface, you must follow the principle of applying the material from dry to wet. You need to step back 30-40 cm from the ceiling and apply a layer of mortar. From the ceiling, the putty is applied with vertical movements.
It is better to apply putty under side light. To do this, use a diode lamp or spotlight. Uncertain movement with a spatula and too thick putty leave a ribbed mark on the surface, visible under the light of a lamp.
Vertical movements with a spatula near corners are unacceptable. The tool touches the adjacent wall - a “washboard” appears. The tool is led from the corner to the opposite wall.
The finishing putty is applied in a layer of 1-3 mm, so the mixture should not be thick.
What to do after finishing putty: grouting
After the walls have dried, they are sanded and rubbed.
To work you need:
- painting block;
- respirator;
- diode lamp;
- diamond mesh or sandpaper.
There are 2 ways to sand walls:
- Grout the walls with a diamond mesh or sandpaper (it gets clogged quickly) under the wallpaper.
- Grout under the lamp with fine-grained sandpaper.
In the first method, a block is used, on which the mesh fraction is 300-400. There are irregularities on the wall that are invisible without a lamp. You need to put on a mask and walk in a circular motion along the entire wall. Use a vacuum cleaner to collect dust on the floor from time to time.
When performing work, a lot of dust appears, so you will need an old vacuum cleaner, as well as good ventilation.
In the second case, the lamp is installed on the side so that the light goes along the wall. Then you can see all the imperfections after the finishing layer. A mesh with a fine fraction of 600 and above is put on the block. Starting from the corner, scan the wall. For all small recesses, bumps, and stripes, grout in a circular motion.
The second method is applicable for surfaces for painting, for gluing thin wallpaper that follows the structure of the surface.
How to putty drywall
Puttying the main area of drywall is carried out in the same way as we described above. The difference lies in the surface preparation. If you have seen walls covered with plasterboard, you should know about the existence of seams and open screw heads that must first be hidden.
For this, a special putty is used. One of the affordable and high-quality materials with the necessary properties is Knauf Fugen.
Knauf Fugen
Step 1 – gluing the seams with serpyanka. We glue all seams on the surface with fiberglass mesh. Perforated corners are installed on the outer corners, which can be reinforced with the same putty, self-tapping screws or staples through a stapler.
Step 1 – gluing the seams with serpyanka
Step 2 – sealing the seams. The diluted putty is driven into the seams directly through the serpentine with perpendicular movements, after which the excess is removed with a wide spatula. The task is to achieve the closure of the grid and not go beyond the plane.
After the first layer has dried, a second one is made, which aligns the seams in the same plane with the drywall.
Step 2 - sealing the seams
Important! Embroidered end seams will protrude beyond the plane of the drywall due to the lack of a cavity, so it is important to make the least noticeable transitions in these places.
Step 3 – sealing the screws on the drywall. The screw heads are sealed with the same putty. Everything here is simple and extremely clear.
Next, the walls are cleaned, after which the main layers of putty can be applied. The procedure will be similar, so we will not repeat it.
Step 3 – sealing screws on drywall
When can you start gluing?
After sanding the surface, you need to clean the walls from dust with a brush and dry rag.
This is done with a vacuum cleaner at first speed. After cleaning the wall, it must be coated with a primer. After drying, it will leave a thin film that will protect the glue from being absorbed into the surface. When the primer is completely dry, start working on the wallpaper.
Having studied all the subtleties of choosing a putty, the surface will be perfectly smooth and durable. You should not miss small nuances from the work; they play an important role in the formation of a solid wall for wallpaper.
Walls with putty and wallpaper have an attractive appearance and a long warranty period.
Necessary materials
Read also: Paint for walls in an apartment: overview of available types, advantages and disadvantages, useful information for choosing (Photo & Video) + Reviews
Tools for work
For puttying work you will need the following tools:
- Spatulas. Their design is the same as that of plaster ones, but the blades are thinner. It is better to use both straight and angular (profile) varieties
- Drill with mixer attachment for mixing the composition
- Container for diluting dry mixtures (a bucket or a spacious plastic basin will do)
- Construction rule. Required for significant surface curvatures
- Level to control even application
- Grouting mesh or fine sandpaper for finishing the surface
Mixer attachment for electric drill
In some cases it is worth preparing:
- rollers and brushes for work in hard-to-reach places or additional priming of surfaces
- serpyanka mesh for sealing joints between sheets of drywall
- repair composition based on quick-drying polymers for prompt repair of identified chips and major defects
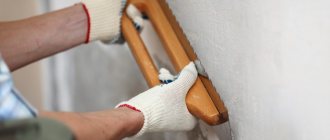
A wide and clean spatula is the main tool when leveling walls
How does putty differ from plaster?
What material to use to level the walls depends on their condition. If the surface is quite problematic, with large differences, then you will have to apply a thick layer of leveling mixture. In this case, plaster is suitable, as it has a coarse-grained, loose consistency, has thermal insulation properties, and is intended for application to the base in a thick layer.
The putty contains small fractions in its composition, so it is more suitable for fairly smooth walls. After setting and grouting, a finishing material is applied to the putty layer, providing a perfectly smooth surface.
Smooth walls with minor defects, differences of up to 1 cm, are sufficient to putty. At the same time, starting putties have a coarser grain structure, while finishing putties have a fine-grained structure.
Finishing layer
To create it you will need more effort and accuracy. The layer is thin and will serve a decorative function. Before applying the finishing putty to the wall, you need to check whether the starting putty has dried. The principle of application is no different, all the same movements from bottom to top. The only thing is that to create a thin layer you need to stretch the mixture. The pressure is light, the layer is made no more than 2 mm thick. The excess is stretched by re-working the surface.
Good lighting will help to immediately detect and eliminate irregularities and defects. The finishing putty is usually applied in two layers, it all depends on the quality of the starting surface. Next, the walls are grouted after puttying. Without it, applying a second layer is not recommended. The corners of the room are treated with special care, since imperfections there will be most visible. At the end, the final sanding of the walls after puttying is performed.
Now everything is ready to apply the selected decorative material. Some people prefer to leave everything as is, simply painting the surface. In any case, before applying the decorative layer, you need to re-prime. The mesh for puttying the walls is not needed for the finishing layer. All that remains is to wash the puttying tools used and dry them, so they can be used again.