Beton-House.com
Website about concrete: construction, characteristics, design. We combine the experience of professionals and private craftsmen in one place
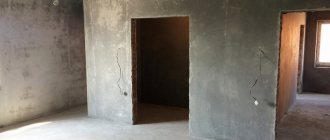
Any concrete surface requires leveling before further finishing work.
Finishing work is the final and most beautiful stage of any renovation. Regardless of how you decide to decorate the walls: paste wallpaper, lay tiles or simply paint, you need to prepare a flat surface.
In this article we will tell you how to level concrete walls, what materials and technologies to use, and we will pay attention to one very important point - even corners. Despite the apparent complexity of finishing work, it is quite possible to level concrete walls with your own hands. So let's get started.
- Work on beacons Installation of permanent beacons
- Basic rules for puttying
- Working with gypsum boards
Leveling technologies
Before deciding on the leveling method and material, it is necessary to assess the scale of the work.
In this case, you should carefully study the level of unevenness:
- depressions of more than 5 cm are the best way to level drywall;
- difference less than 5 cm - plaster is suitable;
- Small irregularities up to 5 mm can be removed with putty.
In practice, puttying is almost always used, even if the walls were previously covered with plasterboard or covered with plaster mixture. The joints between the sheets are sealed with putty and small roughnesses of the plaster are smoothed out.
Important! Any leveling technology will increase the thickness of the concrete wall, so before starting work it is recommended to dismantle all layers of the old decorative finish.
Finishing gypsum plasterboard
Before final finishing, for example, wallpapering, the final preparation of the plasterboard surface is carried out:
- The seams are glued with reinforcing mesh and sealed with putty.
- After it dries, grouting is carried out using fine sandpaper.
- At the final stage, the surface is primed in two layers, applying the second after the first has completely dried.
- Then the entire surface is puttied. This must be done before painting; it is highly desirable for wallpaper; however, putty is not required before gluing tiles or decorative stones.
Drywall
If the walls have significant flaws on the surface, the easiest way is to create a smooth surface using sheets of plasterboard using a frame or frameless method.
Separate sheets for finishing walls and ceilings, as well as moisture-resistant material
In a situation with deep potholes, the following correction:
- most effective;
- least time-consuming;
- economically beneficial.
The frameless method is technically not entirely correct, but amateur builders use it very often. With this finish, sheets of plasterboard are glued directly to the wall. If the surface has significant flaws, it is unlikely to be done efficiently.
Frame device
The surest way to level out significant defects is to construct a frame to which the sheets will be attached. The frame is assembled from aluminum rack profiles and guides or wooden beams.
Accordingly, wooden structures should not be used in rooms with high humidity. This frame is less durable, susceptible to microorganisms and prone to deformation.
The rack profiles are rotated to the surface of the concrete wall, taking into account the vertical and horizontal levels. The distance between the profiles is set depending on the size of the sheet. The guides are attached every 50 - 60 cm, depending on the size of the gypsum board (plasterboard sheet).
The pitch of the profiles should be selected based on the sheet size
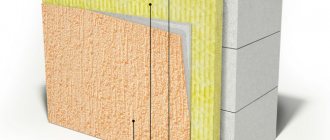
On a note! After the frame is installed, measures can be taken to install thermal insulation using mineral wool or polystyrene foam.
Drywall sheets are attached to the frame using self-tapping screws. It is better to use screws made of oxidized metal. The fastening pitch is 15-18 centimeters - the screws rotate into the profile. The head of the screw must be flat; during installation, it is slightly recessed into the sheet.
The structure of the frame allows you not only to create a perfectly flat surface for decorative material, but also to hide communication cables. Wiring in a concrete wall requires channeling, a very noisy and messy process. The structure of the frame allows you to lay communications at minimal cost, while all wires will be completely hidden.
On a note! Using a similar technology, you can cover the walls with sheets of plywood or plastic. But with these materials, taking into account their physical properties, it is better to use wooden beams to assemble the frame.
All necessary communications can be laid in the chamber of the frame device
How can I level a wall?
Although technologies in construction are developing rapidly, leveling walls is still done in two ways: plaster and plasterboard. Another thing is that there are different compositions of plaster - based on gypsum and cement, and you can install gypsum boards in two ways: on a frame and with glue. But that's all.
Smooth walls are a modern requirement
Plaster
The use of plaster mixtures for leveling concrete surfaces involves the following preparatory measures:
- In order for the new plaster to adhere perfectly, it is necessary to clean the wall down to the concrete.
- You should get rid of all layers of old finish, and then carefully inspect the surface for defects.
- Delaminations and cracks must be eliminated.
- For better adhesion, the concrete wall is treated with a deep penetration primer.
Before starting work, it is necessary to dismantle the old decorative coating
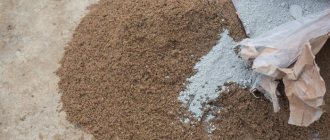
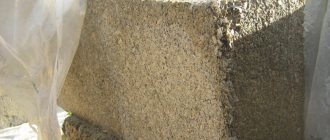
Depending on the room in which the work is carried out, a plaster mixture based on cement or gypsum is selected:
| Binding material of the mixture | Main characteristics |
| Cement | The surface will require putty and will be rough. The price of the cement composition is lower than that of the gypsum mixture. It is permissible to apply the solution in a thick layer, which is sometimes of decisive importance. If you need to apply a layer more than 20 mm thick, you should use a plaster mesh. |
| Gypsum | The final surface is quite smooth. Should not be used in rooms with high humidity levels. A polymer mesh is suitable for reinforcing a thick layer. |
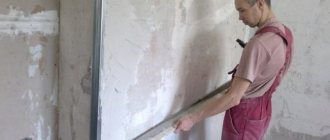
Work on lighthouses
Before applying plaster to reinforced concrete walls, beacons should be installed on the surface - guides or limit strips that serve to control the surface level of the liquid mortar. Typically, a metal perforated profile is used for plastering work.
On a note! Metal beacons must subsequently be removed from the walls, but plastic ones can be left, since they do not corrode.
It is better for a non-specialist to use a system of non-removable beacons
Installation of permanent beacons
Installing volume limiters is a very important part of the job. The smoothness and quality of plastering work depends on the correct installation of the beacons.
Beacon perforated profile
Step-by-step instructions for installing limit bars:
- Using a building level, mark vertical lines for holes for fastenings.
- The first line is marked at a distance of no more than 20 cm from the corner.
- The distance between vertical marks is chosen based on the size of the rule.
- Holes are drilled in the wall along the marking lines and chokes are driven in.
- The planks are secured into the prepared holes using self-tapping screws.
- It is better to screw in the screws with a screwdriver, controlling the vertical level of the bar.
- Before attaching the vertical planks, it is recommended to stretch a horizontal thread along the wall to control the level of the surface as a whole.
- For final fixation of the planks, a plaster solution is used, which is applied in a small amount to the profile.
After the solution under the beacons has set, you can begin plastering the surface. The rule regulates the level of plaster, the volume of which should not exceed their boundaries. You can learn more about the process of installing restrictive profiles for plastering work by watching the video in this article.
Applying plaster
Plaster mortar is poured onto the surface of the wall between the profiles - marking. The mortar is applied using a trowel and a falcon. Working with a falcon allows you to significantly speed up the process and reduce costs.
Important! The volume of the marking exceeds the required amount of plaster mixture to level a certain area.
After the required amount of the mixture is applied to the wall, work begins as a rule. With zigzag movements of small amplitude, the solution is distributed over the surface in the direction from bottom to top.
To simplify and speed up the process, first cast a rough layer of basting, below the level of the beacons. Then, after setting, a finishing mark is applied. If necessary, the plaster layer is reinforced with mesh.
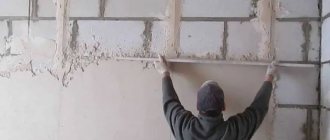
In the photo, leveling the surface with plaster mortar using the rule from bottom to top
Preparing the base
To perform plastering efficiently, the following preparatory work is carried out:
- Elements of the previous finishing are removed from the base plane: wallpaper, poorly fixed areas of old plaster, knocking down protrusions.
- De-energize and then disassemble the sockets. The wires are hidden in grooves or enclosed in cable channels.
- All elements used to fasten suspended structures are removed from the wall: nails, screws, hooks.
- Deep cracks are widened using a chisel, filled with cement mortar, and then sealed with putty.
- The entire surface of the wall is cleaned of dirt and dust.
Puttying
As an independent method of leveling, puttying is used very rarely. Typically, leveling with putty is the final stage of a multi-step process. As in the situation with plaster, the surface is primed before applying the putty.
To work with the putty mixture, use a flat-bottomed ditch and spatulas of various widths.
On a note! The readiness of the mixture for use can be checked using the cone method. Stir the mixture in the cuvette with a stick and remove it. The stirring cone should remain intact when the stick is removed.
When working, cover the cuvette with a wet rag to increase the life of the solution. At the same time, the thickened putty is periodically diluted with a primer or water. The correct putty holds well in a vertical position without falling off the spatula.
Basic rules for puttying
Leveling the surface with putty with your own hands is not difficult, but it is worth considering that this process requires skills, without which the work will proceed very slowly.
Place a small amount of solution on a spatula
Beginners should note that:
- The putty is applied to the surface with small strokes.
- The composition is distributed over the wall surface with confident horizontal and vertical movements.
- The thickness of the putty layer should not exceed 2 mm.
- The spatula is held at an angle to the wall surface. The larger the angle, the smaller the thickness of the putty layer.
On a note! When starting work, you can help hold the spatula blade with your second hand.
After the surface has been treated with putty, it is left to set. The dried layer is “dispersed” with water or a primer using a brush. This allows you to get rid of small irregularities and remove smudges. After drying, the putty is smoothed with sandpaper or a zero mesh.
On a note! If necessary, a second coat can be applied. In this case, before starting work, the surface is primed again to avoid delamination.
Displaying beacons
It is recommended to plaster walls using beacons. Their role is most often played by a metal profile with a T-shaped section. You can also use wooden slats. This is the simplest method that does not cause any particular difficulties even for beginners.
The beacons are mounted on the wall by pressing them into scattered “cakes” made of cement or gypsum mortar. Until it sets, level the profiles using a level so that they are in the same plane.
It is important to choose the right distance between the beacons: the rule should move freely in the vertical direction, resting its edges on two adjacent profiles.
For the convenience of leveling the mixture, the outer beacons are not attached to the corners of the room, but retreat from them at least 30 cm.
Aligning corners
Once you have decided on the surface leveling method, it is worth understanding how to level the corner of a concrete wall. Even if, as a result, you get perfectly smooth wall surfaces, but the corners will collapse - the overall impression of the renovation will be ruined. It is worth noting that this process requires the presence of certain skills and abilities and it will be quite difficult to complete it yourself without experience.
There are various ways to align angles; you should decide on the method before starting work. Usually the same material is used as when processing straight surfaces. Depending on the method, you should prepare materials and tools.
Basic methods:
- alignment of corners with plasterboard;
- drawing out corners with plaster using a plumb line or level;
- the use of a counter-shultz - a perforated corner aluminum profile.
Working with gypsum boards
As in the situation with walls, in practice there are 2 methods of leveling corners using sheets of plasterboard: framed and frameless. Again, we'll cover both, but we highly recommend using a frame device.
The frameless method can be used if the difference in wall unevenness is no more than 7 mm. GKL sheets are glued overlapping, i.e. First, the sheet is glued onto one plane, end-to-end against the wall. Then, a perpendicular sheet is glued close to the sheet at the end. The evenness of the angle is checked with a square. The joining seam is glued with a special reinforcing mesh.
On a note! While arranging internal corners using this method has its advantages, external corners formed using the frameless method are quite fragile and quickly lose their evenness when the room is used.
When constructing a frame, the angle is determined using profiles. At the corner itself, a special perforated corner post is mounted, which simultaneously sets the level of the corner and performs a reinforcing function. Sheets of plasterboard are rolled onto this profile, and the joining seam is also glued with mesh.
Installation can be carried out end to end
When installed in a butt joint, the sheets do not require additional processing
Or the T-shaped method.
When constructing a corner from gypsum plasterboard using a T-shaped connection, it is recommended to cut a chamfer from the sheet
Important! When constructing a corner from gypsum plasterboard using any possible method, the formation of cross seams should not be allowed. Sheets must be mounted offset from the center.
Plaster with plumb line
To level the corners of concrete walls with plaster mortar, it is necessary to install limiting strips. In this case, fastening the beacons with self-tapping screws is not necessary; the profiles are fixed to the solution and leveled.
On a note! If the levels are observed when leveling the walls, then the angle will be ideal without additional alignment.
Plastering corners with a plumb line is recommended when forming internal corners.
The stages of work in this case are as follows:
- We inspect the unevenness of the adjacent walls and make marks in the area of the corner using a building level.
- We prime the corner.
- Preparing the plaster solution.
- According to the established marks, carefully apply a layer of plaster mixture.
- Using a spatula and a trowel, distribute the solution over the surface of the wall, in the area of the corner.
- After drying, repeat similar steps on the adjacent wall.
It is recommended to plaster nearby corners in one step
On a note! Aligning angles using a plumb line or marks is a very labor-intensive process and in the absence of experience, the result is unlikely to be satisfactory.
What is a contraschultz?
The method of leveling corners using a perforated corner - a counter-shoulder - is suitable for beginners in finishing. Such a corner can be installed on gypsum board sheets as a reinforcing element and on plaster corners as a method of leveling.
Kontraschultz - aluminum corner with reinforcing mesh
Working with a profile is quite simple:
- Profile pieces of the required length are cut.
- The adhesive or plaster solution is mixed.
- The prepared mixture is applied to the entire surface of the corner.
- The contra-shultz is attached and pressed down, strictly observing the vertical level.
- Use a spatula to remove excess solution.
- After setting, the corner is puttied and leveled with the wall surface.
How to make straight corners
When using gypsum board sheets, the corners are perfectly even. When applying plaster or putty, it may be necessary to level the corners in order to give the corners (internal, external) an angle of 90°. How to align the corners of the walls for wallpaper is decided taking into account the base material and the location of the corner (external, internal).
Aligning the outer corner
For these purposes, a metal corner with perforation is used. Further:
- putty (starting) is applied to both walls making up the corner;
- the corner is pressed into it;
- Excess material is removed, the surface of the corner is cleaned.
The angle is leveled and strengthened at the same time.
Aligning an inside corner
Starting putty is also used for leveling. Work algorithm:
- the angle is formed by the rule by which first one wall is leveled, then the second;
- the applied layer is sanded.
Then the finishing putty is applied. This allows you to eliminate the smallest defects.
Door installation
Another aspect of finishing work, which is very closely related to the evenness of surfaces, is attaching the door frame to the concrete wall. In this article, we will not consider in detail the process of installing doors in concrete walls, but we will note the importance of leveling the frame, which means the need to level the area of the doorway.
It is necessary to level the surfaces of the doorway
To ensure that the door leaf does not sag over time, and also to ensure that the locking mechanisms work correctly, it is very important that the door frame is positioned strictly vertically. And here, it would seem, there is no obvious connection, because you can position the box correctly even in a crooked opening, why is it so important to level the walls?
The fact is that if you install the door correctly, but at the same time block the corners or do not level the wall, you will get the visual chaos of Salvador Dali’s paintings. A straight door, due to irregular angles and surfaces, will appear blocked or mounted crookedly.
In order for the door to serve for a long time, the frame must be level
Plastering process
Having taken the necessary tool, perform the plastering operations step by step:
- The mixture is diluted in a container, following the manufacturer’s recommendations. For mixing, use a construction mixer or a drill with a special attachment.
Plaster, especially gypsum, hardens quite quickly. Therefore, you should not mix a large volume at once: it is difficult to work with a thickened solution, and some of it may simply disappear.
- Using a spatula or trowel, spread the plaster between two beacons so that it protrudes slightly above their surface.
USEFUL INFORMATION: Mold in the bathroom: getting rid of the scourge at home
- The most important and time-consuming stage: the rule is to level the plaster from the bottom up, pressing it tightly with your hands to the beacons. At the same time, smooth turns of the tool are made to the right and left, evenly distributing the mixture throughout the entire filled volume.
- If there are small depressions left on the surface, carefully add the solution to them and smooth them out with a spatula.
- So, step by step, all the niches between the beacons are filled with plaster.
- After allowing the solution to set, remove the profiles or slats that serve as beacons. Then the holes from them are leveled and smoothed with a grater.
Some craftsmen prefer to leave beacons in the wall, covering them with a thin layer of mixture on top.
All stages of applying plaster are shown in detail in the training video.
A complete step-by-step guide can be found here.
Gallery
To give you a clear idea of how to level the walls with your own hands, a selection of photographs has been made for you. You can consider how craftsmen perform plastering work, how to hold tools correctly, and what the surface should look like during the processing process.
Leveling walls with putty without beacons
Leveling the wall using mechanically applied plaster
Leveling a wall with plaster without beacons
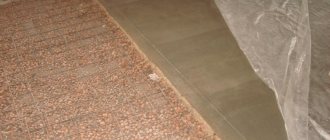
Before and after plastering
Fastening drywall without frame
Applying the final layer of plaster
Plastered part of the wall
Partial alignment of walls according to the rule at the joint between slabs
Plasterboard putty
The most important thing in the process of leveling walls with your own hands is to perform operations consistently, without haste, achieving quality at every stage. In the future, you will be able to use your experience more than once when renovating or building a new home.