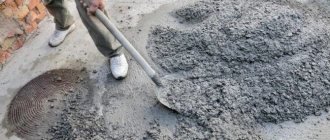
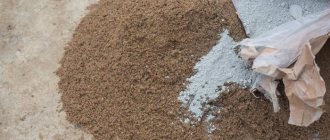
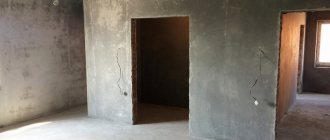
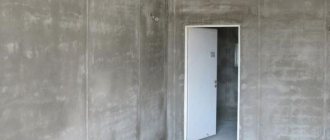
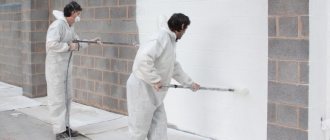
Lime plaster is a popular and simple surface finishing material. The main component is lime, which does not dry quickly; both a master and a beginner can handle it. Lime mortars are universal plasters (for indoor and outdoor use, as a starting and finishing coating). She handles outdoor and exterior work. After all, lime has a number of advantages: easy to use, available to buy, low price, reliable. The only negative is that the finished walls are afraid of moisture.
Therefore, use is not recommended for rooms such as a bathroom, kitchen, balcony, basement. If necessary, I make a combination for these rooms: lime is mixed with cement, the result is a complex solution that dries faster, but is waterproof and heat-resistant. Manufacturers basis, ilmax, knauf, rotband, baumit, vetonit, produce the mixture in bags of different weights, from 5 to 50
Features and composition of lime plaster
The purpose of such mixtures is simple: to level the surface and prepare it for subsequent finishing work. This will help protect the wall from negative influences, and the process of applying a decorative layer will be simplified significantly.
Lime mortar for plaster must be prepared immediately before finishing. There is an option to buy ready-made plaster and dilute it according to the instructions on the package. For example, a good and proven option is cement-lime plaster Knauf UP 210. The proportion of components is indicated.
If you want to save money and make the composition yourself, then you need to know the composition. The solution consists of the following components:
- Lime;
- Sand;
- Water.
Added lime to the composition makes the plaster more flexible and protected from cracks. It is easier for beginners to work with; it goes well with wooden surfaces. However, lime plaster is intended for interior work, as it does not withstand moisture.
Cement-lime plaster, technical characteristics:
- The color of the mixture is light gray.
- Consumption is approximately 1.5 kg/m2 with a layer thickness of 1 mm. Consumption depends on the type of surfaces and their curvature. The thickness of the starting plaster layer is not less than 5 mm.
- Water consumption is from 0.17 to 0.2 liters of water per kilogram of mixture.
- For 2–3 hours, the prepared plaster will not lose its suitability. This is a plus for beginners.
- Adhesion to the surface after a day is 0.3 MPa, after a month – 0.5 MPa no less.
- Optimal conditions for application are from 5 to 30 degrees above zero.
- Vapor permeability indicators from 0.1 mg/mchPa.
- The number of freezing and thawing cycles (frost resistance) is 50 cycles.
- Compressive strength 7 MPa.
- Sold in paper bags. Average weight – 25 kg.
The characteristics of the prepared mixture are excellent. That’s why I use it so often when leveling walls.
Production technology
On an industrial scale, lime is made in 2 main stages:
- Extraction and preparation of carbonate-bearing rocks.
Rocks suitable for making lime are in most cases mined by open-pit mining. Quarries are often developed in an explosive way. This makes it possible to select and prepare blanks with the same properties.
On an industrial scale, raw materials for lime production are mined in open pits Source wikimapia.org
Advantages and disadvantages
List of advantages that the mixture has:
- Versatile, can be applied to concrete, brick, plasterboard and wood.
- It is light in weight and will not load the structure like cement plaster.
- Plastic, easy to work with, long shelf life after mixing.
- It is vapor permeable, moisture passes through the walls, and the optimal microclimate inside is not disturbed.
- Lime mortar has good thermal insulation characteristics.
- If the application technology is followed, there will be no cracks.
- Alkali prevents the development of fungus and mold on the surface.
- Does not burn and does not support combustion.
As for the disadvantages, they are:
- Insufficient strength.
- Before making a lime mortar for plaster, it is important to know the proportions and slak the lime in advance. This is a long process, taking approximately two weeks.
- The material is afraid of moisture.
- It takes quite a long time to dry.
Area of use
Depending on the type and composition of the lime mortar for plaster, it is used for finishing surfaces inside and outside. These are agricultural buildings, industrial buildings, residential and public premises.
However, when working with lime, you need to take into account several nuances:
- A layer of plaster will not work if you plan to fix furniture or household appliances to the wall.
- It is not recommended to use mixtures for rooms with high humidity levels: kitchen, bathroom, basement.
Help with burns
A lime burn is a chemical damage to the skin that is fraught with the most unpleasant consequences. Quicklime is an alkali that emulsifies and dissolves sebum, penetrating into the deep layers of the epidermis. Externally, the burn looks like complex necrosis of off-white tissue with the formation of loose scabs. When it comes into contact with the skin and mucous membranes, the alkali penetrates in all directions, so the lesion is much larger than the area of contact with lime. Damaged tissues partially lose their ability to regenerate and wounds take a very long time to heal.
In case of injury, medical assistance should be provided immediately. It is necessary to promptly call a doctor, and while she is on her way to try to improve the victim’s condition. If slaked lime gets on your skin, you should rinse the affected areas with cold water for at least 15 minutes, and then treat with chamomile infusion or anti-inflammatory ointment.
But if a burn occurs with quicklime, then rinsing the skin with water is strictly prohibited, because this can aggravate the situation and cause irreparable damage to health. Most of the substance will come out along with tears, and its remnants should be removed with a cotton cloth and lubricated with oil or grease. By the way, this is the only type of chemical damage when their use is allowed. For any other types of damage, such reagents are strictly prohibited. The wound should be covered with a sterile cloth and then immediately taken to the hospital.
The situation is more complicated if lime gets into the eyes. It causes quite dangerous consequences, including partial or complete loss of vision. Small and medium fractions are not so dangerous; they can only cause conjunctivitis. Large parts literally stick to the mucous membrane of the eye and actually corrode them, penetrating inside and causing sharp pain, burning and spasm of the eyelids.
First aid includes:
- instillation of disodium salt, which binds metal ions;
- use of painkillers, including local ones.
For treatment, the eyelid is inverted, the lump of lime is removed mechanically, after which the patient is treated with antibiotics. The treatment period takes at least 2 weeks.
Types of mixtures, depending on additional components
Lime mortar can be strengthened and given better characteristics by adding sand, cement, gypsum and clay to the composition. Each of the plaster options has its own characteristics.
Lime-sand mixture
Typically used for treating garages and utility rooms where appearance is not so important. Inexpensive analogue of cement mixture. Lime-sand plaster can be prepared in different proportions:
- To make a soil solution, use a 1:2 ratio (lime/sand).
- To make the spray mixture, the proportion is the same - 1:2.
- The limestone-sand covering layer is made with a ratio of 1:5.
Preparation features: the components are mixed dry, after which water is gradually added to them. Ideally, use clean river sand. It is sifted through a sieve to avoid lumps and impurities. Hardening occurs slowly, so the layer can be covered with plastic wrap and work continued the next day. Properties will not be lost.
Limestone-cement mixture
The advantages are its strength and protection from moisture. Scope of application: facades and indoor spaces. Cement-lime plaster is made according to different proportions, it all depends on the type of solution:
- Spraying is carried out with a solution with proportions of 1: 0.4: 4, where 1 is cement, 0.4 is lime, 4 is sand.
- The primer is mixed in a ratio of 1:1:4.
- For covering, cement-lime plaster has a proportion of 1:1.5:1.5.
To simplify the task, you can buy a ready-made dry mixture. For example, Knauf UP 210 30 kg plaster. With its help you can create a water-repellent layer on any surface. Can be applied manually or mechanically. Color grey. The consumption will be 23.1 kg/m2 with a layer thickness of 15 mm.
Lime-gypsum mixture
The advantage of using gypsum is that it allows you to create a more flexible and smooth structure. It is smooth, durable and dries faster. Ideal for stone and wooden surfaces.
Such decorative lime plaster can be prepared with the following proportions:
- Spraying – 1:0.5:2, where 1 is lime, 0.5 is sand, 2 is gypsum.
- Primer – 1:1:2.
- As a decorative covering layer – 1:1.5:2.
It is more difficult for beginners to work with such plaster, as it dries faster and loses its shelf life. Therefore, the batch is made small. Also, gypsum is afraid of moisture, so it is used for dry rooms.
Lime-clay
Less popular option. The scope of use is limited to finishing mud huts, fireplaces and stoves. After all, the mixture is stable at high temperatures, does not crack or fall off. Options for how much lime to add to the plaster solution:
- To make a primer layer, the proportion is 2:1.5:2, where 2 is lime, 1.5 is clay, 2 is sand.
- Plaster for spraying is prepared in a ratio of 2:1:3.
- The coating has a ratio of 2:1:3.5.
Requirements for clay: medium fat content, no impurities. If you take thin clay, the plaster will not stick to the trowel, so its quantity needs to be increased. If you choose clay that is too oily, you will have to increase the sand content.
Briefly about the main thing
Fluff is a white powder of inorganic nature. It is made by adding water to quicklime, which in turn is produced by burning carbonate rocks. The fluff consists mainly of calcium hydroxide, magnesium oxide and other minor impurities. Its main advantages are low price, water resistance, antiseptic properties, durability, and versatility.
Lime production is carried out in accordance with special requirements regarding conditions, composition of raw materials and temperature conditions. The manufacturing technology proceeds in two stages - extraction and preparation and firing. The scope of application of lime is determined by technical parameters and type modification. There are the following main varieties:
- Fluffy.
- Hydraulic.
- Komovaya.
- Sadovaya.
- Sodium.
- Chlorine.
Each of them has its own characteristics of composition, properties and scope of application. Lime slaking must be carried out strictly in accordance with special instructions.
Making your own solution
First you need to slak the lime for the plaster so that it is suitable for work. This requires a metal container, since the reaction is accompanied by a large release of heat and an increase in volume by 3 times. The lime packaging indicates the slaking speed: slow (25 minutes or less), fast (8 to 10 minutes), medium, 15 to 20 minutes. It is better to mix the mixture with a shovel or oar. Slaking is carried out for at least a day, however, ideally use lime that has been standing for a month.
The note ! The sand also needs to be prepared before preparing the plaster: remove impurities, clean it by passing it through a sieve.
Instructions for creating a limestone-sand mortar:
- Sand is mixed with lime paste in the selected proportion. This is done dry and mixed thoroughly.
- After which water is gradually added to the container. There is no need to pour in the entire volume at once; it is poured in in a thin stream, and the solution is constantly stirred.
Now that the preparation is complete, you can begin plastering the surface.
Application instructions
All work is done gradually. You need to create three layers, each of which has its own functional purpose. This is the only way to achieve optimal results.
The technology is as follows:
- Creating the first layer, spraying. Its purpose is to improve the adhesion of the first layer to the wall, as well as to fill all the voids and cracks to avoid the formation of voids. The optimal consistency is creamy, not too thick. The plaster is spread over the entire wall with a trowel. There is no need to level the layer. This process can be mechanized with a special spraying device. The layer thickness is small.
- The second layer is soil. He's the main one. Its thickness is up to 50 mm. The solution is doughy, thicker than for spraying. Application occurs using trowels or trowels. Excess solution will be removed by the rule. They also check the evenness of the surface.
- The final layer is the covering. It eliminates all defects, chips and creates a smoother and more uniform surface. The thickness of the mixture resembles a spray solution. Application occurs on a damp wall, the layer thickness is several millimeters. At the end, you need to treat the layer with a float to remove defects and make the wall smoother.
This was a technical process of applying limestone plaster. If you practice, you can do work inside or outside quickly and efficiently. This mixture has many advantages, including versatility, vapor permeability, plasticity and ease of application. And if everything is done correctly, the finish will last for decades.
