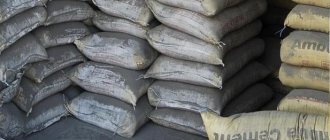
Despite the fact that cement and PVA have been combined for a long time, many people are interested in why they add PVA glue to cement mortar? The main goal of this procedure is to make the concrete solution as effective as possible. The fact is that the resulting adhesive composition gives the concrete plasticity, allowing it to set in a short period of time.
Properties of PVA glue
PVA glue is a sticky mass of a snow-white hue, the consistency of sour cream, without a strong odor. This mass is created on the basis of polyvinyl acetate emulsion.
Classification of adhesive composition by purpose:
- Office;
- Furniture products;
- Construction products.
Depending on the purpose, each type of glue contains its own additives. The adhesive is not waterproof, but can withstand low temperatures and is not toxic. From an environmental point of view it is absolutely safe.
The adhesive is not waterproof, but can withstand low temperatures and is not toxic.
Self-sealing cracks in concrete floors
In order to bridge cracks in concrete surfaces, prepare the following necessary tools:
- grinding machine;
- metal iron;
- wire;
- wooden slats;
- trowel;
- paint brush;
- putty knife;
- special gloves;
- brush;
- chisel;
- hammer.
Please note: Whatever the composition, the technology of the sealing process is identical - only the materials change.
Sealing cracks with cement and lime
A few instructions to help you deal with sealing cracks:
- Prepare your workspace. Inspect not only the crack itself, but also the areas adjacent to it. Otherwise, the places near the crack may eventually turn into depressions that will disrupt the integrity and symmetry of the floor.
- Using a hammer and chisel, work into the defective space and widen the cracks. If, when inspecting the floor, you find a hidden chipped part, remove the damaged surface completely. Cracks can be deepened using diamond wheels for cutting reinforced concrete.
- Treat the floor near the defect. A vacuum cleaner will help clean the surface from dust, also clean it with a brush and soapy water. Next, rinse the floor with water and proceed to the next step.
- Make a deepening in the crack so that the new solution can penetrate firmly and deeply into all fragile places. In this case, the restored part will last a long time and without problems.
- Now start preparing the solution. Its components should be as follows: sand and water (3:1) with the addition of PVA glue. The resulting mixture should not be too thick, or, on the contrary, too runny.
- Using a trowel, place the prepared mixture into the recess and fill the resulting mass with water. If you purchased a mixture of polymer compounds, wetting with water is not required.
- If the cracks are large, the components of the reinforcement can be visible through them. In this case, you need to clean the surface with a vacuum cleaner and soapy water, and then pour a specialized liquid into the damaged elements to prevent corrosion. In addition, small pieces of wire can be placed in the recesses.
- Prepare the adhesive compound and distribute it evenly over the damaged floor surface. The layer of adhesive solution should not be too thick (about 3 millimeters).
- Continue filling the cracks until the liquid begins to dry. Fill the surface gradually, without rushing: in this case, the liquid will fall more evenly on the surface.
- Level off the top of the applied compound. Use a rack to skim off excess mixture.
In the case when you want to know how to repair a hole in a large concrete floor, the answer is simple - distribute the layers gradually one after another, periodically moistening them with water between applying a new layer.
When laying the mortar, you need to know the following rule: the layer that you apply on top of the damage should be slightly higher than the floor level, which is why you should not overuse “trimming” the surface.
The fact is that when the solution dries, it settles a little and becomes flush with the rest of the surface. Using a sanding machine will help you adjust the floor more accurately.
After completing the floor preparation, you can begin laying the laminate. This can be done 24 hours after completion of work, however, laying ceramic tiles usually requires more drying time for the composition. The video in this article will tell you in more detail about the reproduction of crack sealing work.
Application of PVA in construction and repair work
PVA glue is used in the following works:
- As a primer before plastering and wallpapering;
- For gluing wallpaper;
- In the form of an elasticizing ingredient with strengthening characteristics in the composition of plaster based on cement, gypsum, etc.;
- As an adhesive with universal functionality.
PVA glue is used as an adhesive with universal functionality.
Cracks in screeds
Please, if I'm in the wrong place, move it to the appropriate topic. The problem is this. We poured a damp screed with reinforcement. A month passed and the screed began to crack. There are 15 cracks per 10 m2 of different lengths from 20 cm to a meter. The width of the cracks also varies. Apply the widest ones using a tape measure. Tell me what to do?
wolff-87, I treated such cracks like this: I took PV glue and watered the cracks. The glue gradually flows down, where it flows too quickly (several minutes) - repeated; then, when it has absorbed and dried (after half an hour to an hour), wash it off with water and wipe off the film of glue that has formed on the surface with a rag, and fill the cracks with cement putty. If necessary, repeat the puttying. sand, etc. - standard procedure for sealing cracks, grooves, etc.
Gray wrote: etc. - standard procedure for sealing cracks, grooves, etc.
The standard crack repair procedure involves, at a minimum, crack priming and transverse reinforcement. Watering non-dusted, non-primed cracks with different gap sizes with PVA glue, which has a high shrinkage. Well, what can I say - patent it, because no known technology for repairing cracks knows such a method
BV, I don’t know a special SNIP for repairing cracks in floors, so I relied on plastering SNIP 3-04-01-87. Now there are newer ones, but that’s not the point... according to 3-04-01-87, cracks need to be opened, puttied and sealed with a bandage or paper, if under wallpaper. If it’s for painting, then it’s not necessary (a paradox, but it’s true..). So, you are right about the jointing, but about the transverse reinforcement - this is, as it were, good, but not entirely necessary. About priming: my experience shows that priming is not always good, because the moisture contained in the primer causes the screed to expand. and bends. Fragments of the screed may rise and the floor will become uneven, the “picture” will be spoiled. So I ditched the primer and vacuumed it up. My experience shows that PVA, or finishing “leveler”, which I also used, have sufficient wettability to solve the adhesion issue. .
Gray wrote: About priming: my experience shows that priming is not always good, because the moisture contained in the primer causes the screed to expand. and bends.
When repairing screeds, epoxy primers are used. In turn, the question is - if you pour liters of PVA into the cracks, will there be no moisture?
Gray wrote: because the moisture contained in the primer causes the screed to expand. and bends. Fragments of the screed may rise and the floor will become uneven, the “picture” will be spoiled
When priming a split crack, do not pour in liters, there is little moisture, there is no talk of any significant moisture
Gray wrote: My experience is that PVA,
PVA is not able to fill a gap without voids and glue it together; if the gap is very thin, it will not leak; if it is thicker, it will leak, but will not be able to fill the entire gap. Why use the wrong material?
Gray wrote: So, you are right about the jointing, but about the transverse reinforcement - this is kind of good, but not entirely necessary.
It is not correct to compare screed with plaster. It is your opinion. There are technologies for repairing screeds, which provide for transverse reinforcement. Prevents further rupture of the crack if there are such efforts
BV, Just so you understand, this screed, which is in the photo, is already reinforced, and one more reinforcement will be like a dog’s fifth leg. Like a third ski for a skier.
BV wrote: There are technologies for repairing screeds, it is provided there.
I don’t like this word “technology”, because under this word you can hide any home-grown method. Write an article, publish it on a blog and present it as the only true “technology”. Like a well-known photographer in our circles (I won’t point fingers). There is a good Russian word “Standard”. So, if you know the standard, please provide a link to it. Let's see how my proposal contradicts this standard.
Gray wrote: BV, Just so you understand, this screed, which is in the photo, is already reinforced, and one more reinforcement will be like a dog’s fifth leg. Like a third ski for a skier.
If they don’t cut it when cutting, there’s no need to do it again.
Gray wrote: I don’t like this word “technology”, because under this word you can hide any home-grown method. Write an article, publish it on a blog and present it as the only true “technology”. Like a well-known photographer in our circles (I won’t point fingers). There is a good Russian word “Standard”. So, if you know the standard, please provide a link to it. Let's see how my proposal contradicts this standard.
I’ll say it differently - of the several technologies that I’ve encountered, there is something in common, but the difference is in the nuances and materials. As for links - you don’t give a link to pouring PVA, do you?
watch from 57:40 The seminar is led by Yuri Grachev - on the gans gr forum
Well, I knew that you didn’t know the standard. All your “technology” has the goal of simply selling your services. is it really so bad that you have fallen so low?
Gray wrote: Well, I knew that you didn’t know the standard. All your “technology” has the goal of simply selling your services. is it really so bad that you have fallen so low?
I do not sell Forbo and have nothing to do with this brand.
- I respect Yuri Grachev as a Professional with a Capital P. There are many people on the forum who thanked him very much for his help and good advice. I'm not an exception.
- Now I’m waiting for at least some links from you on repairing screed cracks, where PVA is poured into the cracks.
BV wrote: Now I'm waiting from you for at least some links on repairing screed cracks where PVA filling is used
I said from the very beginning that this was my personal way, and then I repeated it three more times. And you started talking about “violation of technology”, and you have a flag in your hands - prove it. . By the way. I’m still waiting for links from you to the Snip on “proper soundproofing of bathrooms.”
What kind of PVA glue can be added to cement mortar?
In order to improve the quality of concrete, it is important to choose the right adhesive. Since this kind of work requires a lot of mortar, when planning to add PVA adhesive to the cement mortar, it is necessary to take into account that quite a lot of glue will be required. The best solution would be to buy the mixture in a 1 kg plastic container, so that unused glue can be closed and stored until it is needed again.
Having decided to mix cement with PVA, which has a wide range of applications, it is worth using a universal adhesive composition marked MB, because its structure is homogeneous and its viscosity is moderate. Most often, PVA is added to concrete to create a putty or primer mixture. Since there are containers of 1-30 kg, the glue is selected taking into account the scale of the planned work.
Most often, PVA is added to concrete to create a putty or primer mixture.
Types and characteristics
The adhesive mixture is available in several types. The universal adhesive composition is very popular. Main function: improve the characteristics of concrete mixtures (water-based). Feature: has excellent binding characteristics and a high adhesion rate. Before purchasing, you need to pay attention to the characteristics that dictate the scope of application. The dispersion can be frost-resistant and plasticized (afraid of sub-zero temperatures).
Help: if the region experiences sudden temperature changes and severe frosts, it is recommended to buy glue with improved technical characteristics.
The composition of plasticizer additives depends on the specific purpose. PVA dispersions do an excellent job as a binding element and are used with putties and plasters. An additional advantage is its versatility: suitable for indoor and outdoor work.
How to properly add PVA to cement mortar. Proportions, rules and nuances, mixture recipes
Many people are interested in how much PVA is needed for concrete? There are no exact calculations, only approximate ones regarding the required proportions. The maximum permissible limit of adhesive agent in the composition is 20%.
For tiles you will need a ratio of 1 to 5 (adhesive mixture and cement), but for screed you will need 5-12% glue. The question remains, how much PVA to add to the plaster solution?
Plaster recipe:
- The recommended cement powder M400 is mixed with sand 1 to 3.
- Then water is poured into the concrete composition so that a creamy mass is formed. Since the glue has a viscous consistency, when pouring it into the prepared mixture, it will be difficult to mix the composition, so you must first add water.
- After this, glue is added to the resulting mass, in a ratio of no more than 70 g of gluing agent per 10 liters of sand and cement.
- For a ten-liter solution, 200 g of plasticizer is added, thereby providing the solution with high moisture resistance, which will allow it to be used in wet rooms.
Basic proportions:
- The usual addition is 0.5 liters of adhesive per 2-3 buckets of diluted mixture;
- Concrete mortar for floor screed involves the use of: Portland cement - 100 kg, sand - 200 kg, small crushed stone - 300 kg, alkali-resistant dye - 5 kg, adhesive agent - 20 kg. Water is added 0.45-0.55 W/C;
- The cement mixture intended for laying tiles on walls looks like this: cement in powder form and sand 1 to 5 without the use of water;
- You can tidy up old concrete screeds with a mixture of cement, sand and polyvinyl acetate emulsion, the proportion of which will be 1: 3: 0.5 plus 4% epoxy resin with a hardener. Adding water is necessary so that the solution acquires the consistency of a thin dough;
- For plaster you will need Portland cement with sand 1 to 3, then PVA is poured into the finished mass. For 10 l. solution 50-70 g. glue.
The maximum permissible limit of adhesive agent in the composition is 20%.
When to add
Ready-made cement-adhesive mixtures are sold in stores. You can mix them yourself. This is a durable, but at the same time inexpensive composition. The use of PVA in cement mortars is required if you need to prepare tile or plaster adhesive, adhesive compound for screed, etc.
Tile adhesive
When mixing the mixture for laying tiles, proceed according to the instructions. This composition perfectly holds tiles and ceramic products.
If you mix the solution yourself, adhere to the following rules:
- Take a large container, preferably one that you won’t mind throwing away after work.
- Pour dry ingredients into container and mix thoroughly.
- Add glue (about 20% of the total mass of the mixture). The adhesive mass is introduced into a mixture of 1 part cement and 5 parts sand. These proportions of cement and PVA result in a highly adhesive composition suitable for fixing objects on vertical planes.
- To prepare a liquid substance, cement, adhesive mass and water are mixed.
- The finished tile adhesive is applied to the walls with a notched trowel.
- If the tiles are small, the cement mixture is applied only to the walls. When working with heavy products, the solution is spread on the walls and additionally on each tile.
- It is not recommended to use tile adhesive at temperatures between +5°C and -30°C. Ideal conditions: temperature +20°C and air humidity not higher than 60%. With such indicators, the glue sets instantly.
- After application, allow the solution to dry for half a day.
- A composition containing PVA glue and cement holds the tiles for up to 20 years, provided that 1 part of cement, 4 parts of quarry sand and 1/20 of the total volume of glue are used.
- The quality of the mixture will improve if, before mixing in the glue, you first dilute it with water (one part water to two parts glue).
You can add PVA glue to the cement mortar for laying tiles in the following ratio:
- 1 liter of cement;
- 0.75 l of clean water;
- 0.25 l PVA;
All this is adjusted to the required consistency, depending on the specific situation.
Plaster
A plaster solution containing PVA glue is a popular means for high-quality finishing of ceilings and walls, as it slowly absorbs moisture. The cement composition dries slowly, which allows craftsmen to work more carefully with surfaces. In plaster glue, about 150 ml of PVA is enough for a volume of 10 liters.
Experts assure that even one tablespoon of PVA significantly increases the properties of plaster . The structure acquires increased plasticity, and the appearance of the composition also changes.
Screed
PVA cement is used not only for laying a new screed, but also for repairing the old coating. Craftsmen claim that fresh concrete does not adhere to old concrete, but when PVA glue is added, the fresh screed adheres to the old mixture without any hassle.
- Mix 100 kg of Portland cement with 200 kg of quarry sand.
- Add 5-10 kg of alkali-resistant ingredients.
- Add 20 kg of glue and mix well.
- To prepare a thinner solution, add water.
When purchasing a ready-made mixture for screed, it is important to pay attention to its type. There are adhesives for paper containing starch and for wood containing a high percentage of CMC. For the screed, polyvinyl acetate containing at least 50% polymers is used.
What properties does adding PVA to the solution give to concrete?
PVA is often added to the concrete mass; this procedure can improve the characteristics of leveling solutions. In the concrete mass, PVA and a plasticizer that fills the voids eliminate the formation of cracks during the hardening time period, reduces the setting time with brick and concrete, making the surface more durable.
Thanks to the use of PVA, the solution acquires the following properties:
- Viscosity and elasticity;
- Becomes more durable when hardened;
- The strength of the surface as a whole increases;
- Adhesive qualities are enhanced;
- The application process is simplified.
The use of PVA in damp rooms is prohibited, especially in the presence of hot steam, for example, in a bathhouse, sauna, bathtub, swimming pool.
In the concrete mass, PVA and a plasticizer filling the voids prevent the formation of cracks during the hardening time period.
Causes of cracks in the floor
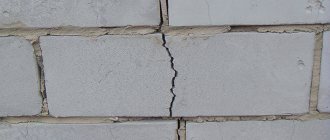
Even if the concrete surface laying technique has been followed, cracks and chips may appear on it over time. The depth of such defects may indicate errors made during curing of the decked mortar. Thus, small cracks between two tiles most often appear due to temperature changes.
When, in addition to a crack, there is a difference in levels between the slabs, the problem is hidden in the “frame” of the floor, namely, incorrectly laid reinforcement. If a crack along its length is accompanied by changes in level, restoration of the damaged area may be more difficult than if the cracks occurred as a result of a sharp change in temperature in the room.
A clear classification of the causes of cracks in the floor will help you understand this issue in more detail.
Error in recipe when pouring
The reason that most often leads to the appearance of unevenness on a concrete surface is a violation of the ratio of the number of components included in the concrete solution. Namely, excess water content.
Yes, the mixture became more plastic, but during hydration, the evaporation of excess moisture caused defects. Typically, such cracks are shallow and have a capillary nature.
Note! Cracks in a concrete floor can, of course, be sealed, but it is worth keeping in mind that the brand of mortar will not correspond to the planned one.
Inaccuracies during concrete formwork can also lead to unevenness and chipping. We must not forget about the characteristics of the soil that covers your area: incorrect calculations of this factor also lead to a violation of the integrity of the floor. Pouring mortar without precise calculation can lead to a difference in surface height.
Incorrect location of reinforcing elements
It is necessary to correctly carry out calculations for laying concrete in a certain area. When making calculations, rely on SNiP standards. Excessive load on the coating and the lack of reinforcement that underlies it also have a detrimental effect on this solution.
When the reinforcement in a concrete solution rusts, the volume of metal components increases, as a result of which they break through the floor surface. This in turn leads to the formation of deep cracks.
Violation of concrete curing technology
Concrete, like any other substance, needs the right curing conditions. This helps maintain the normal consistency of the solution. Thus, laying the mixture in very hot weather is fraught with negative consequences for the floor, because the remaining moisture on its surface evaporates too quickly.
This leads to overdrying of the coating, the appearance of defects and excess dust, characteristic of an excessive increase in room temperature. Therefore, it is recommended to water the freshly laid base with plenty of water every day for 5-7 days from the moment of pouring.
If the concrete was in conditions of high humidity, or waterproofing was not done, the material may also become covered with cracks and begin to “dust.”
Features of using cement mortar with the addition of glue
When purchasing a product, first of all you need to make sure that the glue is intended for construction work, because it is forbidden to add stationery or furniture products to concrete. It's all about the additives that make the glue suitable for specific materials.
Thus, a construction product with 50% polymer additives is ideal for cement mixtures. However, this is not the only nuance; it is also necessary to take into account the ratio of cement to emulsion, and the ratio depends directly on the purpose. For example, for a mortar when installing tiles and screeds, the amount of emulsion will be different, because the required properties of the composition are very different.
Another feature of using this adhesive mixture is that the gluing process should not occur in damp rooms, because this gluing agent perfectly absorbs moisture, which can lead to destruction of the layer. Despite the fact that PVA can withstand temperature changes, experts advise not to use it when the room temperature is below +7°C.
Before adding PVA to the concrete mixture, the emulsion must be mixed with water 2 to 1. Moreover, under no circumstances should water be poured into the glue; it is the emulsion that must be added to the water.
The gluing process should not take place in damp areas.
A simple way to make concrete mortar stronger and more reliable
Concrete mortar is the basis of construction. The strength and durability of the foundation and masonry depends on how strong it is.
It is used for floor screeding , filling steps of stairs, making paths on the site. You can make your own concrete solution.
To do this, you do not need to have special professional construction skills. Knowing a few nuances of the process, you can make super durable concrete.
A simple way to increase the strength of concrete
In stores you can find a huge number of additives with which you can easily improve the quality of cement mortar. Ready-made mixtures are popular with many, but their prices are often very high. As a result, such repairs can cost a pretty penny. And during repairs it is very painful. Therefore, saving on materials is always nice.
There is an additive that was known back in the Soviet period. It not only reduces financial costs, but also improves the quality of the mixture. The additive is ideal for any type of mixture, in addition, it is very cheap.
It all started with the fact that during the USSR it was impossible to purchase ready-made solutions or mixtures. Therefore, builders resorted to various tricks and came up with ways to prepare good solutions on their own. It was at this time that PVA glue began to be added to the cement mortar.
After this, the mixture was excellent for both plastering and concreting floors, pouring foundations, and laying tiles. Ceramics placed on such a surface were difficult to tear off the wall even after several decades.
When adding PVA is not recommended
According to experts, the use of gluing agents in building masses is not always advisable. In what cases should you stop using PVA:
- Working process outdoors at temperatures less than +10°C;
- Add to gypsum mixtures as it is not necessary;
- Carry out work in rooms with high humidity, in the presence of warm steam, for example, in a sauna, dining room, bathroom, swimming pool. This is due to the fact that these premises will require waterproofing and appropriate finishing, based on polymers, which cannot activate the process of a chemical reaction with water pre-mixed with the cement composition.
It is not recommended to add PVA to gypsum mixtures, since this is not necessary.
Features and Benefits
The dispersion improves the technical characteristics of the building mixture several times. Increasing the elasticity of the solution is just one of the many benefits. The material serves as a component, a component that guarantees a long service life and eliminates the possibility of shedding.
Advantages:
- The mixture, which has hardened, is characterized by increased bending strength.
- The strength of the structure is improved: the presence of glue allows it to withstand high tensile loads.
- Adhesive properties are enhanced.
- Makes it easier to apply the solution.
The popularity of the additive is explained by its non-toxicity and availability: the cost of PVA construction adhesive is several times lower than the cost of other types of construction additives with similar characteristics. The absence of toxins and specific odor are additional advantages.
Note! The use of glue is not allowed in buildings where high humidity and dampness are regularly observed. This explains the fact that glue is not recommended for use in bathhouse and swimming pool complexes.
Cons of adding PVA
Considering the many advantages associated with the use of PVA in the construction and repair sector, however, glue also has its moments. The main disadvantages of using an adhesive:
- Restrictions in use due to high reaction speed;
- High consumption level;
- The use of the product when added to concrete can reach 20%, in contrast to modern plasticizing mixtures, which, despite minimal consumption, give no less effective results.
To minimize disadvantages, experts recommend:
- Make sure that the product’s expiration date has not expired;
- When starting work, you need to thoroughly stir the adhesive;
- It is necessary to avoid working with adhesive when the room temperature drops to +10°C or below;
- It is allowed to use only PVA-MB or a dispersion of the same adhesive;
- Be sure to adhere to the ratio of glue and other ingredients in the solution.
It is allowed to use only PVA-MB or a dispersion of the same adhesive.
Additives for concrete
The amount of additives in concrete can reach 20%. Modern plasticizing additives show themselves to be more effective, while requiring lower concentrations. Such additives include Plastix. It greatly reduces labor costs when laying concrete, increasing its strength and elasticity.
Useful recommendations from professional builders. Need to:
- check the shelf life of the glue;
- strictly observe the proportions of the mixture components, guided by the table above;
- before purchasing glue, make sure that certain markings are present;
- When mixing components, take into account the operating temperature (it is desirable that the ambient temperature is not lower than +10 degrees Celsius).
Can I use a different glue?
Undoubtedly, the most preferable option for construction work is the use of universal PVA, which is marked MB. In this case, it is prohibited to use adhesive for household office purposes.
The following adhesive products can be used in addition to PVA when creating cement mortars:
- Latexcol;
- Inter Plast AT.
These drugs belong to specialized additives based on polymers.
Latexkol is a product made from latex. The main area of application is the creation of an adhesive composition for tiles. The product must be diluted 1 to 1 with water. It has properties absolutely identical to PVA.
The main area of application is the creation of an adhesive composition for tiles.
The inter Plast AT plasticizer consists of modified water-based surfactants. This tool allows you to significantly save on cement in the solution, while the strength and reliability of the foundation only increases.
This product allows you to significantly save on cement in the solution.
PVA glue has qualities that allow it to be used as one of the key additives to building mixtures for a variety of purposes. At the same time, this mixture, thanks to its characteristics, improves the surface, making the structure more durable for a long time.
Cracks in concrete - leave or repair?
Filling potholes in concrete floors, and even small cracks, requires additional labor and financial costs. It’s especially unfortunate to waste time on such work when deadlines are tight. And such a period in construction, even if it is done on its own, rarely passes.
Therefore, a reasonable question arises: is it generally necessary to seal holes in a concrete floor? This is not a finishing layer, but just a rough one, which will still be covered with several layers of coating.
Important: Moisture is the worst enemy of any material, and especially concrete. It “kills” it slowly but surely, penetrating into every crack and corroding the reinforcement. Even if these changes are not noticeable in a year or two, in the future you can pay heavily for the days saved during construction.
Therefore, any normal master will not only advise you to get rid of any defects on the base, but will also tell you how to repair a crack in a concrete floor of any complexity with your own hands.
Preparation of mastics
Diagram of a brick kiln.
Bitumen-latex mastic. Construction bitumen must be melted to a temperature of 160°C, then limestone flour is added to it and mixed. The resulting mass must be cooled to 70°C and a solution of latex and gasoline must be added to it and mixed thoroughly. You can use the mastic after it reaches room temperature. The percentage composition of the mastic is: construction bitumen - 49%, limestone flour - 24%, latex - 6%, gasoline - 21%.
Bitumen-turpentine mastic. The bitumen needs to be melted and Portland cement M500 added to it, mixed thoroughly until a homogeneous consistency is obtained. Cool to 70°C and add a mixture of latex, white spirit and turpentine, stirring carefully. The mastic is ready. Percentage composition of ingredients: construction bitumen - 65%, Portland cement - 5%, white spirit - 17%, turpentine - 8%, latex - 5%.
The use of cement in various industries and construction
Material rating
final grade
Cement is used not only in construction and repair work. If you need to make something solid and strong, you cannot do without cement. Cement is not one material, but a powdery mixture consisting of several substances.
Application of cement
Cement occupies the most important place among building materials. Cement and materials obtained from it successfully replace brick, lime, scarce wood, and other traditional materials. Cement mortars are one of the most durable building materials; they quickly harden in air.
PVA with cement
To improve the composition of cement mixtures, PVA construction glue is added to them. Such solutions have excellent waterproofing and enhanced adhesion, making them ideal for plastering work. PVA glue slows down the absorption of moisture, as a result of which the plaster becomes much stronger.
Plaster mixtures
Cement-based plaster mixtures are used for finishing walls and ceilings and for exterior decoration of facades. Plaster dry mixtures made from cement have many undeniable advantages. They allow you to perfectly align the walls. Even when wet, coatings made from them retain their properties. There are many different ready-made cement-based plasters available.
So, using a special machine, a plaster mixture with cement is applied:
For the pool
For internal waterproofing of the pool, it is concreted. First, the base is made of “lean” concrete made from the M 100 cement brand. It has a good level of quality and a low price. To fill the walls and bottom, cement grade M 400 is used. The solution may contain various mastics with water-repellent properties, they allow you to achieve a high level of waterproofing.
For furnaces
Cement mortars are used for laying stoves. To prepare the masonry mortar, cement and sand are sifted through a sieve. Then they are mixed until a homogeneous mixture is obtained and filled with water to the desired thickness.
This solution is used for laying the foundation of the furnace and for pipes located above the roof. You can prepare a complex solution by adding lime paste to it. It will turn out more plastic than simple, but its strength will be lower.
For wells
To prevent groundwater from entering the well, a blind area made of cement mortar is built around it. To do this, prepare a thick cement-sand mixture with PVA glue. Tar or bitumen mastic is applied to the walls of the well. A roll of waterproofing material is glued onto it in three or four layers and then a layer of cement mortar is applied with a gun. To prevent the solution from cracking, it is watered several times a day.
For waterproofing
For waterproofing, you can prepare a one-component rigid cement mortar or a flexible two-component one. A rigid solution is made with water, and an aqueous polymer emulsion is added to a flexible solution. Polymer cement coatings have very good elasticity, but they are much more expensive.
For a flower bed made of stones
The stone flower beds look original and very beautiful. When arranging them, you also cannot do without cement. It helps to securely fix the stones. The cement mortar is applied only from the inside so that the stones look naturally laid on the outside. Drainage holes necessary for water drainage are made in the cement of the lower level.
Several ideas for decorating a flower bed made of stones using cement
Flowerbed No.1 Flowerbed No.2 Flowerbed No.3 Flowerbed No.4 Flowerbed No.5 Flowerbed No.6
For paving slabs
To make paving slabs you will need Portland cement grade M500 D0. It is advisable that all the cement be produced by one manufacturer, so that you do not end up with tiles with different colors. To prepare concrete, in addition to Portland cement, you will need water, sand, crushed granite grade, superplasticizer type C-3, reinforcement from which the frame and pillars will be made. To make the solution homogeneous, you will need a concrete mixer.
For tracks
With the help of cement, you can create unpretentious, stylish and very cheap paths, since the modern process of obtaining cement can significantly reduce the cost of production itself.
To create tracks with your own hands:
- dig a trench
- cover its bottom with sand,
- pour plenty of water,
- lay the reinforcing mesh;
- filled with cement mortar.
After some time, while the concrete has not yet hardened, the surface is cut so that the path appears to be made of stones. Such paths are not afraid of intensive use.
The video will tell you more about how to make a path from cement mortar:
For blind area
The concrete blind area helps to drain rain and melt water from the perimeter of the building. For its arrangement, cement M 400 or M500 and filler are used, which occupies 70 percent of the volume of cement. The filler is sand, expanded clay, crushed stone, broken bricks, and slag.
Ironing with cement
To strengthen concrete surfaces and increase their waterproofing properties, cement reinforcement is carried out. To do this, the surface is smoothed with cement.
There are two methods of ironing:
- Wet
- Dry
In the first method, liquid cement mortar is applied, and in the second method, dry sifted sand, 3 mm thick, is applied. After hardening, the surface is rubbed.
Finished goods
You can make many useful, beautiful and very cheap products from cement, including:
Sawdust and cement blocks
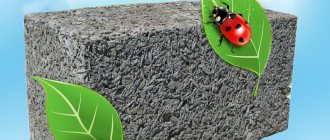
For low-rise construction, blocks can be made from sawdust and cement. They are light in weight, have low thermal conductivity, are quite durable, and are not afraid of rotting and fire. They are easy to work with. Their main advantage is elasticity, so houses built from sawdust-cement blocks - wood concrete - are not afraid of shrinkage and soil vibrations. The blocks are made from cement M 400 and sawdust.
Solid block of sawdust and cement
Concrete from screenings and cement
To produce concrete from screenings and cement, the following is required:
- cement;
- coarse fillers (gravel or crushed stone);
- fine-grained fillers (sand or screenings);
- water.
At home, according to state standards, such concrete is very difficult to produce, since it is almost impossible to maintain the required proportions.
DIY cement sculptures
Cement makes very beautiful sculptures. Cement mortar is more plastic, unlike stone, so working with it is quite simple. Such sculptures are not afraid of the negative influences of nature, and they can constantly decorate the site. Of course, you will have to update the coating occasionally. The weight of these sculptures is very decent, so you don’t have to worry about them being stolen.
To create figures from cement, a metal frame is first made, onto which cement mortar is applied or the mortar is poured into a special mold. This work is very labor-intensive and complex, but anyone can make decorative boulders from cement, which can then be further painted to make them more natural.
This is what figures made from cement might look like
Cement sculpture No. 1 Cement sculpture No. 2 Cement sculpture No. 3 Cement sculpture No. 4 Cement sculpture No. 5 Cement sculpture No. 6 Cement sculpture No. 7
Pots made of peat and cement
Cement-peat pots are not at all difficult to make. To do this, take three parts peat and one part cement, mix, add water and knead like dough. After this, take any utensils, you can use a large basin or bucket if you decide to make a vase, or a smaller one - a jar, mug, glass - to create a pot. Line the container with film and begin to sculpt the flowerpot. Where the bottom meets the walls, you need to put more solution. You need to make a hole at the bottom to drain the water.
