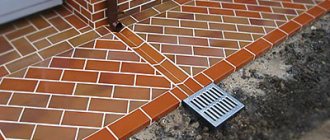
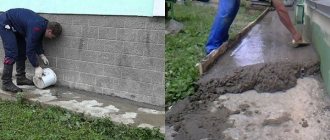
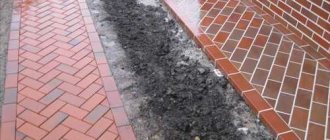
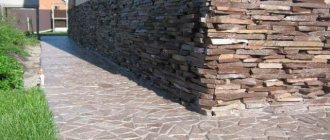
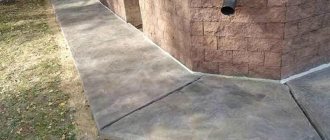
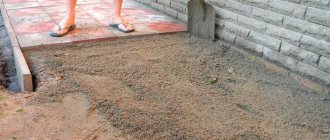
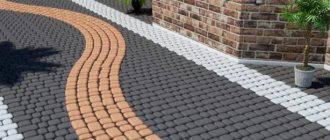
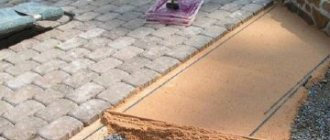
The topic of the article is laying paving slabs on a concrete blind area. The topic raised is very relevant today. After all, the main functional purpose of the blind area is to prevent precipitation from penetrating the foundation. But today the concrete structure does not meet modern trends in the design of a suburban area. Therefore, owners of private houses try to cover the blind area with various materials, where paving slabs are one of the popular options. So, in the article we will talk about the technology of paving a concrete blind area with paving slabs.
Blind areas made of paving slabs Source udachnyi.ru
Masonry on a concrete blind area
Laying paving slabs on a concrete blind area is found in many private areas.
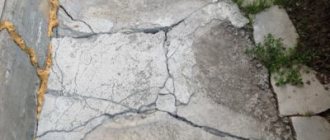
However, such a coating is characterized by instability to negative environmental influences. It also becomes fragile if installation technology is not followed. Any such problems lead to cracking or crumbling of the material, which entails unnecessary costs. As an affordable and cost-effective alternative, you can use tiling on the concrete base.
Concrete acts as a bed and is used to construct a hydraulic lock
It also helps to strengthen the blind area, which is especially important when moving vehicles along the surface. To figure out how to lay tiles, you should adhere to the following technology:
- We get the soil to the required depth.
- We arrange the formwork.
- We install polystyrene foam on the foundation, which will act as insulation.
- Pour out a layer of sand and crushed stone.
- We lay the reinforced layer and secure wooden spacers to compensate for the expansion joint.
- Pour the concrete mixture.
When pouring the mixture, it is important to adhere to the specified slope, since it will be impossible to achieve it in the future. When mixing concrete, maintain the correct proportions - otherwise the mixture will not be strong enough
The next stage involves removing the formwork and installing the curb. The finishing layer can be created only after the concrete has completely hardened.
Decorative tiles are fixed on top of the material, and the voids and seams are filled with mortar. The presence of an insulating layer will protect the basement from severe frosts.
Waterproofing works
The installation of the waterproofing layer itself does not take much time.
As a waterproofing material, you can lay roofing material, gilroizol or durable polyethylene film. Waterproofing and roofing felt are durable and reliable, but polyethylene costs less and is easier to install. But, despite the cheapness of polyethylene and the fact that many people use it, a choice must be made between good quality, durability and low price. You just need to roll out the rolls over the surface, cutting off the required length. The edge adjacent to the wall is bent with a slight rise along the surface.
Base for blind area
When figuring out how to make a blind area from paving slabs, it is necessary to provide a good foundation for the future structure. It is laid in several layers, following installation technology.
In cross-section, the bed looks like a layer cake, which is due to its design. To achieve savings on materials, it is recommended to reduce the layer thickness.
Creating a hydraulic lock
When arranging the blind area, you should maintain a slight slope along which excess liquid will drain. It can be done while pouring clay or when laying the last layer. After thoroughly compacting the bottom, it is covered with a 5-centimeter layer of clay. Sometimes it is replaced with concrete mixture. In this case, the thickness is increased to 15 cm. This layer drains water well.
To reduce the lateral load on the foundation, it is recommended to leave a gap between the base and the blind area. Then it is covered with sand or laid out with roofing felt. It is also possible to use polystyrene foam, which also compensates for the load and provides good insulation.
The hydraulic lock is created on the basis of PVC film, geotextile and roofing felt. When laying the canvas, it must not be stretched. Otherwise, there will be a risk of film rupture when the soil freezes.
When setting up a stormwater system, you need to place a pipe on the edge of the film and cover it with a layer of crushed stone. Such a measure is necessary to protect the structure from clogging with all kinds of debris. It is also necessary to provide for the presence of a storm drain and a storm drain pipe. The technology is in demand due to its extreme simplicity and minimal costs.
Backfilling with sand
The optimal thickness of the sand layer is 5 cm. When compacting the surface, it should be watered with liquid using special nozzles. They are used as tips from watering cans for watering a garden or vegetable garden, as well as special sprayers.
Watering continues until small puddles form.
It is important to wait until they dry and start compacting. Such a base will provide good protection for the blind area from moisture penetration and damage from crushed stone.
Installing a curb
When arranging a blind area around the house with your own hands, it is important to pay attention to the installation of the border. It is fixed along a stretched cord using pegs and leveled with a building level. The outer side is covered with cement, which is an important standard for protecting the tiles from spreading
As an alternative to the classic concrete curb, you can use a plastic option
The outer side is covered with cement, which is an important standard for protecting the tiles from spreading. As an alternative to the classic concrete curb, you can use a plastic option
Crushed stone
The optimal thickness of gravel backfill is 50-100 mm. The exact indicators are determined by the level of precipitation in your area.
After placing the crushed stone, it is allowed to remove the wooden pegs holding the curb. Then you should tamp the gravel and fill it with sand.
If the room has a ground floor or basement, the blind area is subject to additional insulation. To do this, lay out a sand layer 50 mm thick and compact it. Only after completing the above steps can the finishing layer be laid.
Laying tiles
To understand how to lay paving stones correctly, you should study the step-by-step instructions and technology for laying tiles for the blind area. Experts recommend starting work from the foundation side, fixing the tiles away from you to prevent destruction of the cushion layer. Each structure must be placed in the selected location and hammered with a rubber hammer.
To level the surface, a building level is used, and any blows to the paving stones are carried out only with the help of a plank. In this case, you will be able to avoid deformation of the tiles.
A distance of 2 mm is maintained between each tile. Such a gap is formed due to the presence of a special lock, which is present on different types of tile products
If there is no border, it is important to take care of the edging tiles
Sealing seams
To seal the seams, the same composition is used as for the final layer of the blind area. When arranging a cement-sand cushion, use a dry mixture, maintaining a 4:1 ratio. It is placed on the tile and distributed using a broom. Next, the surface is watered so that the cement sets and provides optimal reinforcement.
Preparing the site
Laying paving slabs on a blind area begins with preliminary site preparation. The builders call it a bed. If there is an old coating, it will have to be dismantled. You should also remove part of the foundation hidden under the pillow. If the house is new, the soil layer should be removed. If you want to install a storm sewer system, you should take care of the recess on the side opposite to the foundation.
To eliminate the risk of voids in the soil and allow it to compact, it is recommended to wait 12 months after laying the foundation. If such a pause lasts longer, precipitation can destroy the foundation.
The width of the bed depends on the characteristics of the curb. It is advisable to compare it with the dimensions of the tiles so that you do not have to trim the material in the future. In this case, the process will be less expensive.
The depth of the blind area is chosen taking into account the height of the foundation layers. Most often it is 150 mm, but when installing a stock, a parameter of 400 mm is used. If the soil layer consists predominantly of clay, there is no need to build a clay castle.
When land is removed, large soil piles appear. It is necessary to foresee in advance where they can be placed. Otherwise, the embankment will create a number of problems when moving around the site. The bottom layer is pre-compacted until it becomes as dense as possible and stops moving.
Technology for constructing a blind area from paving slabs
It is important to decide at what stage to implement a waterproof structure around the perimeter of the building. It all depends on the type of substrate
After the foundation is laid out, clay soil accumulates near the building, which makes it difficult to finish the walls and deliver materials.
On the other hand, installing a blind area made of paving slabs entirely around the house is fraught with damage from falling building materials or mixtures. If you treat the adjacent tape to the level of the bedding, the work will be significantly easier.
When choosing a hard method, the only problem will be accurately determining the zero mark. Usually, they immediately try to bring the blind area to the same level as the plane of the yard, which remains undefined until the completion of construction. A rational solution would be to organize concrete preparation immediately after removing the formwork from the foundation, after which the required level is removed with a layer of concrete.
With a soft blind area everything is simpler. You can pour gravel at any time and in any layer, without worrying about the accuracy of reaching the level. However, you will need to make a continuous waterproofing by laying a simple polyethylene film under the gravel with a preliminary addition of 30 mm layer of sand from below and from above.
Excavation
The depth of soil removal near the base of the building is determined by the desired level of the final coating. Usually it is 150-200 mm. We should also talk about the width of the strip; it should be 200 mm greater than the width of the blind area. The width itself depends on the depth of the support:
- The minimum width of the blind area should be at least 800 mm, because moving along it will be uncomfortable. This corresponds to a plinth depth of 1000 mm.
- For every 200 mm increase in the depth of the base, the blind area should be expanded by 50 mm.
Excavation begins from the lowest point. The work is done so that the bottom of the ditch is 200-250 mm below the planned level of the finishing coating when constructing a blind area from paving slabs using soft technology, and 150-200 mm using hard technology.
Bedding
Under both types of blind area, coarse sand of a fraction of 0.6-1.5 mm and gravel of 20-25 mm are used. Gravel is poured first. They use it to level the ditch to a line that is 150 mm below the finishing level. Further steps for organizing the embankment are different for each installation method:
- For a rigid concrete blind area, formwork is installed 100-120 mm narrower than the actual width of the pit. The wide part of the ditch is filled with a mixture of sand and gravel to such a level that the final concrete thickness is at least 70 mm.
- For a soft blind area, a layer of gravel is planned towards the base, thereby providing a slope in a ratio of 15:1. Subsequent layers of material are filled and compacted in compliance with this proportion. Next, pour 20 mm sand and m. A hydraulic barrier with a width up to the middle of the drainage ditch is laid on this layer, the other edge is fixed to the base.
After organizing the hydraulic barrier, a bedding should be formed under the paving stones themselves. To prevent siltation, geotextiles are laid at the boundary of the layers, and a geomembrane is placed on the hydraulic barrier. Subsequently, layer-by-layer backfilling is carried out - 100 mm gravel, then sand until the line is reached, just below the level of the slab thickness.
Material selection
To create a path around the house, you can use piece blocks, solutions and ready-made mixtures. The choice is determined by the aesthetic priorities of property owners, their financial capabilities, skills and abilities. Making a blind area with your own hands is an interesting and creative process that requires patience and care. The material selection criteria are as follows:
- presentable appearance;
- monolithic structure without pores or voids;
- long service life;
- environmental Safety;
- strong surface;
- resistance to moisture, temperature changes and ultraviolet radiation.
To make the right choice, you need to familiarize yourself with the characteristics of the materials used in construction.
Concrete products
The industry produces slabs with a thickness of 40-100 mm, sizes from 50x50 cm to 200x100 cm. The edges of the slabs can be smooth, chamfered or with protrusions for joints. Products reinforced with steel rods or mesh are considered stronger and more durable. Various casting models have a natural gray color or pigmentation. Products with different colors are used to create a beautiful and original pattern. The production of plates is carried out using vibration casting technology followed by processing in an autoclave.
Clinker tiles
This type of coating is made from purified clay. The blanks are fired in a kiln. High temperature promotes crystallization of the substance and changes in its structure. The outer layer of clinker tiles is treated with pigment. The products are produced in a wide range of colors, which allows you to assemble colorful ornaments from them. In most cases, general clinker finishing of the blind area and basement floor is carried out. The material is durable, has low thermal conductivity, is resistant to temperature changes and is waterproof. The tiles are thin and require careful preparation of the base to install them. The best solution is to glue the clinker to the concrete slab.
Made from natural or artificial stone
The blind area made of paving stones looks luxurious and rich. Fragments are made of granite, basalt or acrylic stone. All types of materials are distinguished by strength, durability and abrasion resistance. When making a decision in favor of paving stones, it should be taken into account that the load on the blind area will be small; using durable and expensive material for its construction is not economically feasible. It is more practical to use colored cement, clinker or polymer tiles, the price of which is much lower, and the performance characteristics are high enough to make the house look beautiful and be protected from dampness.
How to make a soft blind area around the house: step-by-step instructions
Laying a soft blind area around the house with your own hands is quite simple. Especially if you have step-by-step instructions at hand. An ideal option if it is possible to create a blind area at the stage of building the foundation of the house. This will make it easier to excavate the soil.
When laying the hydrobarrier, it is important to place it under the house about 40 cm
Preparatory stage of work
The process of creating a soft blind area around the house begins with excavation work - by digging a trench under the hydraulic barrier. To do this, at the smallest level of the site, it is necessary to remove a rectangular layer of earth about 40-45 cm deep. If you decide to use insulation when creating a soft blind area, the depth should be increased by another 10 cm.
The bottom of the trench must be level. It is advisable to control this process with a level or a special building level. It should also be well compacted - fine gravel is perfect for this.
Along the edges of the trench you need to dig a small groove about 4 cm wide - this will be a hidden stormwater system. Then the bottom should be covered with clean, damp clay. The thickness of the layer is about 20 cm. During the leveling process, the layer is given a slight slope in the direction away from the house. Once the clay is laid, it is allowed to dry, slightly moistening it from time to time to prevent it from cracking.
Important! The process of laying layers can be continued only when the clay loses its viscosity.
Laying the drainage system
The system is created with the expectation that the flow will be directed to the drainage. The drain should not be directed directly into the ground, as excessive moisture may result in erosion and subsidence of the soil.
Drainage pipes 10 cm in diameter are perfect for draining. They must be wrapped in geotextile in advance to insulate them. All corners and intersections must be equipped with tee manifolds, whose function is to connect the channels with the upper outlet. It is best to create a 1 m deep trench for drainage, and then fill it with earth and gravel in a ratio of 3 to 7.
Layering
When the clay dries, medium-sized crushed stone can be poured onto it. The thickness of the layer is about 10 cm, also with a slope in the direction from the house. Subsequently, the slope can be leveled with sand. Each layer must be tightly compacted and moistened. It wouldn’t hurt to add geotextiles between crushed stone, clay and sand.
After compaction, a geomembrane must be laid on top of the sand. It is laid at the bottom of the trench, then pipes and collectors are installed. The membrane should be covered with a layer of drainage so as not to retain moisture.
Afterwards a leveling layer of gravel and sand is laid. Its maximum thickness is 4 cm. Then there is a layer of geotextile. Everything that will be installed in the future will relate to the external decor. And for a soft blind area, many other options are offered.
Insulation
The insulation must be laid at the very bottom of the waterproofing, and covered with exactly the same layer on top. It is necessary to insulate the structure if the house has or is planned to have a basement. This layer will protect other materials from the cold, increasing the service life of the soft blind area.
Waterproofing
The remaining layers of the hydrobarrier are laid on top of the waterproofing. This stage involves laying the material over the insulation. It would be better to choose a profiled type membrane.
The waterproofing is laid with an overlap. The textile must be separated from the tenons of the fabric, secured onto four tenons and pressed tightly into the grooves, and the resulting joints must be covered with adhesive tape.
Protective outer coating
At the end of the work, the barrier is covered with crushed stone with a fraction size of about 2 cm. The layer should be even and dense, thickness - 6 cm. Since all the lower layers are delimited, the top one will be dense, and the legs will not get stuck in it. If the edges of the blind area are moved about 10 cm, you can sprinkle it with a small amount of turf and bring the lawn closer to the house.
Instead of turf, the barrier can be decorated with colored crushed stone of various sizes or pebbles.
Installation of curb stones
When the plane of the sand and gravel backfill is carefully leveled and compacted, you need to draw the estimated width of the blind area from the base, using a wooden plank with a nail as a surface planer. Along this line, a layer of sand is cut through with a spatula and the unnecessary residue is thrown onto an adjacent section of soil. The result will be a groove 100–150 mm deep into which curb stones will be installed.
It is preferable that this stage of work takes place in dry weather. When installing curb stones, it is advisable not to walk on the bedding, so as not to collapse the undercut of the groove. Curb stones are installed along a common cord, indicating both the distance from the building and the installation height. Usually the stones are placed like a sidewalk, that is, flush with the main surface.
To level the height, you need to pour fine gravel into the curb groove and compact it thoroughly. The width of the gap should be such that there is a gap of 15–20 mm between the cut edge of the bedding and the body of the curb.
Paved surfaces are not completely waterproof; some water inevitably seeps through them. To drain it, it is necessary to install stones with the laying of sleeves from a PVC sewer pipe with a diameter of 50 mm. At the junction of stones, their edges should be trimmed with an abrasive wheel; when inserting, the sleeve is fixed in place with cement mortar. The installation sites for sleeves are optimally located below the level of the adjacent soil.
Why do you need a blind area?
We have long been accustomed to the fact that there should be a path around the house: it gives the entire layout a finished look. Especially if combined with the finishing materials used to decorate the building. In addition, it is practical: you can walk along the path. And the fact that the path is a blind area, and its main purpose is to drain water, is a successful combination of the properties and qualities of materials and a well-thought-out design.
The main function of the foundation blind area is to remove sediment from it
If you look at it from a utilitarian point of view, the blind area drains rain and melt water from the foundation. The second very important practical task that can be solved with its help is to insulate the foundation. If you put insulation under the walkway, it will protect the house from freezing, which will greatly reduce heating costs.
When should a blind area be done? Immediately after finishing the external walls, but before finishing the basement. Why is that? Because a compensation gap must be left between the finishing of the blind area and the wall of the house. This is an excellent path for water that flows down the wall of the house (falls on the walls during slanting rain, for example). But it is impossible not to make this gap - the foundation will collapse. It is also unrealistic to seal the gap hermetically. The solution is to make sure that water does not get into the gap in any case. This can only be achieved if the base trim hangs over the seam. Then the water will flow a few centimeters further from the seam, and then fall into the drainage grooves. This can only be done if you first organize the blind area and then finish the base.
Why do you need a foundation blind area, when to do it, we figured it out, now it remains to understand how to do it correctly.
Concrete production
For the base under the tiles, it is recommended to use class B15 concrete. When paving an area with a high level of ground sources, you can use a brand of concrete of higher strength (B22.5), increasing the shelf life of the coating by 1.5-2 times.
Required Components
In the manufacture of concrete composition, sand is used for construction work of 1 or 2 classes. You will need a stone aggregate (crushed gravel, granite materials). The use of lime compounds, which reduce frost resistance and increase the water permeability of the coating, is not recommended.
Mixture recipe
To prepare a concrete coating of class B20, the following percentage of components is required:
- cement (about 300 kg);
- sifted sand (600-750 kg);
- fine gravel or crushed stone (about 1100 kg);
- water (up to 180 l);
- a plasticizer that increases the elasticity of the composition.
Treatment of seams and remaining voids
After the base is securely fixed and the paving slabs are in place, you need to proceed to processing the seams. To do this, you need to remove any plastic crosses or slivers that were installed to smooth out the uneven edges.
Various materials and methods can be used to fill seams.
Then the blind area will always remain dry, and the water will be drained away from the foundation. The disadvantage of this option is that the sand will weather over time and need to be replenished.
Another option involves grouting the joints with cement mortar in the same proportion as was used during laying. As a result, the surface of the blind area will become perfectly smooth, but a general monolith will be formed, in which the thermal expansion of materials is not taken into account. It is possible to use this filling method only when the width of the blind area does not exceed 800 mm.
After grouting the joints with cement mortar, you need to wait a couple more days and rinse it well with a brush and water. Now it will finally take its proper form. Next, you are offered step-by-step instructions on how to make a blind area around a house from paving slabs with your own hands in the video.
Preparatory work
Marking with pegs.
For quality installation, it is very important to properly prepare the base. To do this, first of all, you need to remove the surface soil over the entire area occupied by the blind area of the house, which means that it is necessary to mark out the area of the future protective coating.
The width of the covering should be at least 60 cm, but it is recommended to make the flooring from one meter to one and a half. The fact is that the wider the strip, the more convenient it is to walk along it, and the effectiveness of protection from water is proportional to the width of the blind area. But you need to remember that excessive width will lead to additional financial costs.
Stages of constructing a blind area from paving slabs
Preparing the perimeter around the house
Considering that installing a blind area from paving slabs is a pleasant and easy job, it won’t be difficult to do it. Only here you need to have some skill and the necessary construction tools.
But high-quality protection of foundations from rainwater will only be possible if you strictly adhere to all stages.
- Preparatory work. This stage includes digging a pit, leveling the bottom and walls of the trench, and preparing the drainage system. It is recommended to make an artificial slope in several directions at once to ensure accelerated drainage of water.
- Laying paving slabs. There are several options for blind areas, they differ in area and width of installation. Therefore, if the area is large enough, then this stage should be divided into several more and all work should be carried out in stages. First of all, this is the development of the future design and the purchase of the required number of slabs. Then the dug trench must be covered with sand, compacted and then the tiles must be laid on the finished pad. In such cases, it is better to use a wooden hammer, which does not deform materials and is well suited for vertical and horizontal adjustment of tiles.
- Preparation of concrete mortar. As a rule, it is quite liquid, the proportions are 1 part cement to 4 parts sand. Then the tiles are laid on the poured mortar, starting from the foundation and moving to the edge of the structure. For fixation and horizontality, you can use crosses for ceramic tiles; they create the necessary gap between the slabs. When installing materials, we must not forget about creating a slight slope to the side. A wooden spacer can be used instead of crosses, but the boards must be quite thin and follow the profile of the slabs. It can only be used for several plates at the same time.
- After installing the first tiles, you need to remove the gasket and install it on the next ones. This is how the entire top layer of the blind area is gradually formed. The finished structure should be left to dry for several weeks, and the surface should be covered with construction film. Walking on the surface is prohibited during this time.
- Filling joints between slabs. It is made using fine sand or pre-prepared concrete mortar. Using a brush, fill the space between the tiles, then use a garden hose under strong water pressure to wash off the remaining mortar from the surface of the tile. After this procedure, the blind area should dry for several more days and gain strength. This procedure is also optimal. If, as a result of operation, damage to individual segments occurs, they can be easily replaced with new ones.
- Waterproofing the junction of tiles and foundation. Silicone or sealant, which are resistant to frost, is better suited here. You can use regular polyurethane foam, but although it costs less, it also lasts less and crumbles over time.
Excavation
After marking, it is necessary to remove the soil from the work site. The depth of the excavation consists of the thickness of the tiles and 30 centimeters for arranging the base for laying. As a result, it turns out that you actually need to remove the soil almost to the bayonet of a shovel.
The first layer in the dug trench is a layer of clay, 8-10 cm thick.
When laying it, it is advisable to make a slope away from the house. This will ensure better water drainage to the side. The clay must be compacted well. This can be done using a special construction mechanism or manually - with a tamper or shovel.
A layer of sand at least 5 cm thick is poured on top of the clay and compacted in the same way as clay - at a slope from the building.
Guide to pouring a blind area
The blind area makes a big contribution to the durability of the foundation, so its creation must be approached with maximum responsibility.
Design of the blind area
Design of the blind area
The structure consists of an underlying and a top layer. The first is responsible for creating an even, compacted base for the next layer. It is created from sand and small gravel. The total thickness of the layer is about 2 cm. You can also use clay. When choosing a specific bedding material, focus on the material of the top layer.
The top layer is designed to create water resistance and increase the resistance of the structure to water. Can be created from small cobblestones, clay, concrete and other materials. The thickness of such a layer is about 10 cm.
The instructions will discuss the procedure for arranging the most popular type of blind area - concrete. Having dealt with its construction, you can make a blind area from any other materials suitable for this purpose without any problems.
How to make a blind area with your own hands. Digging trenches and erecting formwork
- Remove the top layer of soil. Select the thickness taking into account the characteristics of the underlying and top layers described above. In the case of a concrete blind area, about 20-25 cm of soil is traditionally removed.
- Prepare a level and neat trench around the entire perimeter of the house. The bottom of the trench should be compacted.
- Proceed to assemble the formwork. To create this structure, wooden boards about 2 cm thick are perfect. Place a thin layer of clay in the trench, level it and compact it. Fill in about a 10-centimeter layer of sand and also compact it thoroughly. Usually, this is simply done by moistening the sand with some water. Do not overdo it with water, remember that there is clay underneath and it does not need excessive moisture.
- Finally, fill in about a 6-7 cm layer of crushed stone.
Reinforcement of the blind area
The technology for arranging a blind area around the house requires mandatory reinforcement. Thanks to the reinforcing mesh, the rigidity and durability of the concrete structure will be increased. As noted, you can buy a ready-made mesh or assemble it yourself from metal rods. Cells with a side of 10 cm are considered optimal.
Reinforcement of the blind area
Expansion joint
Special attention must be paid to the expansion joint. It is created at the junction of the basement of the house with the blind area
Due to such a seam, the said structures will be protected during the process of soil subsidence. That is, the blind area will be able to sink along the seam without causing damage to the base of the house. The standard seam width is 1-1.5 cm. The seam must be filled with roofing felt, sand-gravel mixture or bitumen of your choice.
Expansion joint
You can also use a special rope for filling, the manufacture of which uses foamed polyethylene.
The technology for constructing a blind area requires that seams be present across the concrete structure, approximately every 200-300 cm. They will protect the blind area from ruptures during frosts. It is most convenient to make transverse seams using wooden slats. It is enough just to install the slats so that their top is located at the same level with the upper border of the concrete pour. Also, expansion joints must be present in the corners of the building. Don't forget to take into account the slope of the blind area.
What you need
To properly install paving slabs around your home, you will need some tools and materials.
You will need:
- The required number of tiles (you need to measure the area in advance and calculate the required number of tiles),
- Waterproofing material,
- Geotextile (equal in size to waterproofing),
- Sand, curb stone (required amount),
- Cement not less than 300,
- Crushed stone,
- Clay and drainage sewers.
The tools you will need are: a measuring tape (minimum 5 meters), a building level, pegs and a nylon cord, a trowel, a rubber hammer, shovels (bayonet and shovel).
Reinforcement
Reinforcement of floor screed with steel mesh.
A concrete floor has high strength, but in order to maintain this quality for many years, it should be strengthened and a reinforcing layer should be laid. Reinforcement begins with preparing the working surface, removing debris and dirt. Next, a primer is applied to the cleaned surface and metal or wooden beacons are installed on which the reinforcing mesh is attached. A cement-sand mortar is laid on the reinforcing layer and a mesh is installed, the actions are alternated the required number of times. The reinforcement is completed, they begin laying the concrete solution.
When is a major overhaul needed?
The decision on the need to repair the protective strip is made after a detailed study and establishment of the technical condition of the strip and foundation.
Major restoration is carried out in the event of almost complete destruction of the blind area.
This type of restoration includes:
- slab renewal;
- replacement or restoration of the drainage system;
- repair of the reinforcing frame;
- waterproofing renewal;
- cleaning from moss and lichen;
- dismantling the old tape or replacing its new parts.
Small cracks existing in one area are combined into one zone, expanded, and then crushed stone is poured into the resulting depression and filled with polymer concrete.
During major repairs, a layer of concrete is poured above the level of the previous protective strip - this ensures better adhesion of the new one to the old one.

