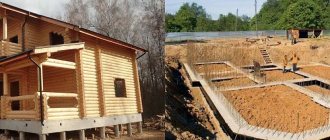
The foundation base of a country house is the basis and support for load-bearing walls. Its main purpose is to protect the inside of the building from water leakage and cold air penetration. Carefully selected bricks for the foundation plinth eliminate problems in subsequent operation.
Basement brick should not only be beautiful: strength and moisture resistance are equally important characteristics Source it.decorexpro.com
Choosing the right brick for the plinth
First of all, when figuring out which brick is best for a plinth, it is worth remembering that it must combine high levels of strength, durability and decorativeness.
These three main parameters are not the only ones. In addition, it is necessary to pay attention to the frost resistance of the brick, its minimum water absorption capacity and resistance to deformation. And, of course, it is advisable to fit all this into a small budget.
Don’t forget that the chosen brick must match the design of the house and look beautiful.
Requirements for bricks and tips for choosing them
Since the base structure is in direct contact with the soil composition, the brick must meet certain requirements for aesthetic appearance and strength.
In addition, the material must perfectly withstand the effects of a humid environment, have a sufficient level of frost resistance, and be environmentally friendly. In addition, it must have an acceptable cost.
Before choosing a brick for the plinth, you should study some general requirements. First of all, the stone must have the same parameters and shapes. The surface of the building material must be even, free from chips and cracks, and have the same color scheme.
It is mandatory to check the brand of brick material according to the quality certificate, the date of its manufacture, and technical characteristics. If the basement material is chosen correctly, more heat will be retained in the rooms, and the building will receive better protection from the penetration of cold air masses from the street.
When selecting a brick stone for arranging a basement, the aesthetic component is also taken into account - the masonry should fit perfectly with the constructed walls. For example, ceramic bricks look great with walls made of smooth materials. If you have sufficient skills, you can use figured masonry to arrange the basement rows. In this case, the brick serves as an unusual decoration.
Arrangement of the basement
When arranging the basement, it is very important to choose high-quality material, this reduces the risk of shortening the life of the building. If the physical properties and technical characteristics of the brick are appropriate, more than one generation will live in the built house.
The layout of the plinth is shown in the following figure:
Classic base on a strip foundation Source rekvartira.ru
For its reliable subsequent operation, the following recommendations must be observed during installation:
- The thickness of the plinth is determined based on the wall materials. For brickwork, you need a base with a base of at least 51 cm. If the walls of the house are made of timber, then a width of 25 cm is quite sufficient.
- When laying a brick plinth, properly selected cement mortar is very important. A mixture with the following composition optimally meets all requirements: cement M200, sand and lime. The proportions should be 1:6.7:6.7. The mixture is brought to a dough-like consistency.
- The existing system for calculating materials allows you to prepare the required quantity for arranging a brick plinth. For 1 m? the ground floor needs 400 bricks (size 250? 120? 65 mm) and 30 cm? cement-sand mixture
General construction scheme
Procedure for laying a brick plinth:
- Preparation of the surface of the tape, waterproofing, installation of the mooring cord.
- Laying the first row of bricks.
- Raising corner areas.
- Filling gaps between corners.
- Laying the top row, waterproofing the surface of the plinth.
Depending on the design features of the house, some additional actions may be required, for example, laying out curved sections of the base, etc.
Such work is carried out according to a special technique adopted for similar elements.
Preparing the solution
First of all, you need to choose a brand of solution. It should be 2 times lower than the grade of brick, this will prevent the appearance of cracks .
If solid ceramic bricks of the M200 brand are used, then the mortar needs to be of the M100 brand.
If it is manufactured independently on site, then it is necessary to maintain the proportions:
- 1 part cement.
- 4-5 parts of sand.
The proportions are indicated for cement grades M400-500. If the solution is purchased ready-made, then it is necessary to organize delivery and prepare everything by the time the solution appears, since its viability period is limited and does not tolerate long delays .
Preparing the base
The surface of the tape must be carefully prepared for laying bricks. If there are unevenness, differences or other flaws, a leveling layer of cement mortar is applied to it .
It is necessary to ensure that it forms as level and horizontal a platform as possible.
This will create smooth and durable brickwork with seams of equal thickness, which is important for evenly distributing loads and obtaining maximum load-bearing capacity of the base .
Waterproofing
The surface of the tape, prepared and leveled, is subject to high-quality waterproofing .
This procedure is designed to eliminate the possibility of moisture being absorbed from the concrete into the brick, which is dangerous and threatens the rapid destruction of the base.
A double layer of high-quality roofing felt is traditionally used as waterproofing , with an intermediate application of bitumen mastic.
There are many other options, but roofing felt is the cheapest, most durable and easiest to work material, so it is usually preferred .
Laying the first row
The first row of bricks is installed in a butted (transverse) position along the length of the base.
There are often recommendations to lay it without a solution, motivated by the fact that the solution will not stick to the surface of the roofing material.
This is an incorrect proposal. The solution has sufficient adhesion to roofing felt .
In addition, a layer of mortar will allow you to straighten a row of bricks that are not always the ideal size.
Vertical joints also require a bond, which is difficult to create without the use of mortar . The layer of solution will lie as tightly as possible on the surface, which will distribute the load in an optimal way and avoid the appearance of weak “hanging” areas.
Finally, the presence of the mortar will allow you to close the reinforcing mesh, creating a strong and even base for the brickwork .
Facing
Procedure:
- The bricks are evenly laid out in stacks along the entire length of the belt to reduce the time it takes to deliver the material during masonry.
- The prepared solution is placed in a container convenient for moving with the mason.
- All necessary tools are prepared (or purchased) - trowel, trowel, pick, ordering, etc.
- Brick laying is carried out according to the planned pattern.
IMPORTANT!
To obtain high-quality masonry, you must be careful and constantly monitor the process using a tensioned cord.
How to get around corners
Brick laying begins with laying out the corners. Usually they are raised several rows (4-6), after which spaces are laid out .
First, the corners are laid without mortar in order to check the accuracy of right angles, determine the horizontal and other parameters (try-on layout). After this, control cords are installed and the corners are laid out using mortar .
All bricks at the corners must be tied together; two vertical seams on top of each other are not allowed.
It is important to check the uniformity of the diagonals of the plinth, which indicates the accuracy of the right angles of the structure.
Arrangement of the blind area
The blind area is a concrete casting, poured over the ground, adjacent to the outer wall of the strip or plinth.
It is up to 60 cm wide (or slightly larger than the roof overhang). Typically, formwork is installed, which is a series of vertically installed boards.
A reinforcing mesh is placed between the wall and the formwork , strengthening the formwork and protecting it from the formation of cracks.
To prevent concrete from drying out, it is recommended to lay a layer of geotextile on the ground.
A properly made blind area protects the sinuses of the backfilled trench from the penetration of rain or melt water, eliminating the contact of the tape with moisture.
Final stages
After laying the top row of the plinth, the surface is covered with a final layer of mortar and carefully leveled.
When it dries , a layer of waterproofing is laid on the surface, the same as on the surface of the tape before laying the brick.
In addition, insulation procedures and installation of protective cladding of the base are carried out. Wherever necessary, vents, technological openings for supplying communications, canopies for moisture drainage, etc. are installed.
Properties that a brick for a plinth should have
Considering all of the above, it is clear that the brick for building a basement must have the following properties:
- increased compressive strength (from 200 MPa);
- standard dimensions - 250x120x65 mm;
- high environmental friendliness;
- moisture resistance;
- relief surface.
The strength of the brick ensures the reliability and durability of the base and the entire structure as a whole. Standard sizes will ensure a smooth and attractive appearance of the base and the entire building in particular.
The beauty of the base speaks about the thoroughness and thoroughness of the work done Source kirpichmaster.ru
In addition, the construction of the basement will be less labor-intensive. The absence of harmful impurities in the brick will prevent harm to the residents of the house. The embossed surface of the brick adheres remarkably well to the mortar and prevents the formation of cracks and cracks and, accordingly, cold bridges.
Types of brick plinth
A brick base can be equipped in three different ways:
- sinking;
- protruding;
- same level as the walls.
When arranging a sinking base, its walls are slightly thinner than the main walls of the building. A base of this type is made if there is a need to protect the structure from sedimentary water coming from above. Most often used in regions with high rainfall.
This is what a sinking base looks like - rainwater flowing down the walls goes straight to the blind area Source plita.guru
See also: Catalog of companies that specialize in foundation repair and design.
The protruding base is built with greater wall thickness compared to the walls of the building. In most cases, such a base is equipped with additional protection from precipitation, for example, metal canopies covering the protrusion.
The protruding base is additionally protected by a low tide, which can simultaneously perform decorative functions Source www.pinterest.ru
What to look for when purchasing
When choosing bricks for the foundation, you need to pay attention to the accompanying documentation. The grade of stone must be higher than M150, frost resistance from F25, geometric dimensions must comply with GOST.
During transportation, unloading and storage, edges often break off, which is not a significant defect. In most cases, plaster waterproofing is used for brick foundations. Unevenness will only increase the adhesion of the protective layer.
When you tap a ceramic brick with a metal object, there should be a clear ringing sound, not a muffled dull sound. The ringing indicates the quality of the raw materials used, the correctness of the firing technology, and the absence of microcracks and voids.
Which brick is suitable for the plinth
If you follow the standards prescribed in clause 6.65 of SNiP, then ordinary solid red brick is universal for many regions; it is also called well-fired plastic-pressed ceramic brick. It is manufactured in accordance with GOST 7484-78 and TU and GOST 530-2007.
Solid brick with high density has a mass of 3-4 kg. Its volumetric weight is 1500 – 1900 kg/m3. It is used when it is necessary to organize high levels of structural strength, sound insulation, thermal conductivity and heat capacity.
Standard solid red brick Source terracot.ua
Ceramic
If we compare silicate, red and ceramic bricks, the latter can boast of maximum durability. Today, ceramic plinth bricks are offered by many manufacturers, so it’s easy to get confused about its types. Materials of this type include clinker bricks, from which you can make both the basement of a house and other structures in any climatic conditions.
Clinker brick is made from special types of clay, which is baked at high temperatures. The material is practically inert to moisture. At the same time, it has good strength characteristics.
You can also use ceramic bricks to lay other structures on your site. For example, gazebos, baths, saunas and extensions built from it look very good, which, among other things, will have excellent performance characteristics.
Regardless of what type of brick you choose for the basement (red, silicate or ceramic), you must definitely consult with specialists about waterproofing and thermal insulation of the basement of the house, as well as other structures of the building. It is very important that the floor of the basement of the house (whatever it may be) is also well insulated, otherwise the base will be subject to additional influence from below.
Which brick should not be used for the plinth?
Due to its high hygroscopicity, sand-lime brick is absolutely not suitable for arranging a basement. The base built from it will gradually collapse, since silicate perfectly absorbs moisture from the soil and is destroyed by temperature changes.
In just a couple of years, the basement will need a major overhaul. A collapsing base will, in turn, lead to the destruction of the foundation and, accordingly, the building as a whole.
Sand-lime brick: beautiful, but not suitable for a plinth Source bricknews.ru
Clay red
If you decide to make the ground floor of a house from red clay bricks, then you have chosen the best option. In technological terms, this material is most suitable for constructing foundations and plinths. The brick plinth can be used for a long time without fear of exposure to environmental factors.
However, even high-quality red brick will absorb moisture, so when choosing, be sure to check the brand of material. For example, the M-150 brand can withstand no more than 60 freezing cycles, so it is recommended to look on the market for types with higher frost resistance. If the area experiences high humidity and constant precipitation, then attention should be paid to the M-250 brand.
Why are strength and moisture resistance so important for red and sand-lime bricks? First of all, this is due to the fact that water, getting into the cracks and pores of the material, expands when freezing and begins to destroy it from the inside. Accordingly, the entire basement floor directly suffers from this.
Even if you are building the house itself from silicate (in a dry climate), it is still recommended to lay the base with traditional clay bricks.
The most popular option.
The use of red brick on a plinth can often be determined by many economic considerations: it is a traditional inexpensive material that is sold everywhere.
When purchasing a material, no matter how beautiful it may be, you must ask the seller for the relevant documents that will confirm its quality. Making a plinth from red brick (no matter what type) is the right and rational decision.
Laying the plinth in stages
The process of arranging a basement is quite complex and responsible, requiring the participation of professionals. The brick base plan is as follows:
- from the 1st to the 4th row - masonry;
- 5th row – transverse wall;
- 6th row – brick layout;
- Row 7 – filling the space with insulation.
Before starting laying, it is necessary to correctly set the corners for the subsequent laying of the base. At the preliminary stage, the solution is not used. This row is set purely according to level, since subsequent rows can no longer be moved. After the first row is set, measure all sides, two diagonals and make sure the structure is even. The evenness of the masonry must be perfect.
The largest permissible discrepancy should not exceed 2 cm. In this case, the discrepancy can still be corrected during further laying.
After completing the measurements, they begin to equip the ground floor. It is laid out with bricks with cement-sand mortar having the following proportions 3:1:1 (purified sand, cement, water).
Laying out the base Source superarch.ru
Minimum plinth width 380 mm. If the plinth wall involves only brick laying without insulation, the thickness is at least 500 mm. If the insulation is supposed to be polystyrene foam, the thickness of the base is 380 mm.
When arranging the base, the foundation should be 30-40 cm. This width provides a beautiful base, of sufficient height, allowing you to equip a large room that can be equipped as a boiler room or utility room.
Checking the foundation for horizontal compliance
After pouring the foundation, a water level should be used. One side of it is fixed at any corner of the building, and the second is moved between the other corners. If the surface is smooth in all areas, it is suitable for masonry. If there is a discrepancy in the indicators, the error should be measured and the level adjusted.
For large discrepancies, leveling is carried out with a solution; the area with the highest point is taken as the base. If the error is within 1-2 cm, you can level the base by applying a larger initial seam. A drier solution is used for it, otherwise the concrete will spread under the weight of the brick.
Initially, the corners should be set correctly; to do this, pegs are driven into the corners. A cord is pulled diagonally between them. The length of each segment is compared; if the structure has an ideal angle, the length should be equal. If there is a difference in size, a conclusion is drawn about a violation of the geometry of the structure. An error of up to 2 cm is eliminated during the laying process.