Beton-House.com
Website about concrete: construction, characteristics, design. We combine the experience of professionals and private craftsmen in one place
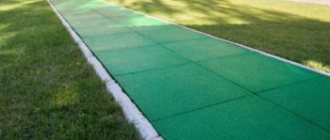
The process of laying tiles on concrete
Concrete surfaces are an excellent basis for almost any finishing, as they have high strength, adhesion and a rough structure. This is especially good for materials laid using the adhesive method.
However, the surface of concrete can be different, depending on what type of concrete we are dealing with in a particular case. Let's figure out today how tiles are laid on a concrete base. We will mention both working with ceramics and other options.
Surface preparation
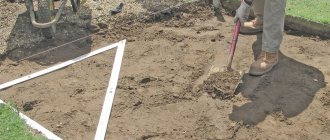
Ideally, the floor on which the tiles are laid should be level. It is advisable not to have defects in the form of depressions or bulges. This condition must also be observed before laying coverings for gyms. Unfortunately, in practice the surface often looks far from ideal. And therefore, before laying tiles or roll coverings, it is necessary to clean and level the floor. If necessary, work must be carried out in order to reduce the number of defects.
If the surface is concrete, then it is cleaned and prepared. All existing sagging is eliminated and the surface is leveled. Plaster coatings are cut with an ax or chisel. And wooden ones require a special approach in the form of reinforcement with metal mesh. If the floor is heterogeneous and consists of several materials, then the joint can be covered with a mesh. In this case, a crack will never form on the seam. And you won’t have to worry about the safety of the coating. The solution will not lie on a loose surface. Therefore, it needs to be beaten to a solid state and leveled with a screed.
Materials and necessary tools
Of course, to carry out all the work, a large number of tools and special clothing may be required. All work clothes should be comfortable and not restrict movement. Additional pockets and knee pads will, of course, serve as an indispensable convenience. The material can be dense so that the solution does not get through the fabric onto the skin. In addition to the robe, you will need the following tool for the job:
- screws or nails;
- wire cutters, chisel, hammer, chisel, knife, pliers;
- level 120 or wooden slats;
- cutter and grinder;
- pencil, tape measure, corner;
- electric drill;
- several types of spatulas (comb, flat);
- whisk for mixing;
- ballerina;
- metal hacksaw and extension cord.
In addition, respiratory protection may be required with special clothing and tools. It is especially important to wear a respirator when using an angle grinder. A simple baby cream will help protect the skin of your hands from drying out and cracking. You may need a damp cloth in case you need to wipe the surface or your hands. By choosing the right crosses, you can ensure the surface has a beautiful and even seam.
Crosses vary in size and the larger they are, the larger the seam will be. This is how you can adjust the width between tiles.
Laying tiles on the floor requires careful sorting and placement. This saves a lot of time in the future and makes the job easier. Codes, patterns, roughness, etc. are checked. If there are defects, they are either replaced at the place of purchase. Or they are placed in the most inconspicuous places. All boxes with material are placed in the far corner closer to the exit. This will protect it from breakage and mechanical damage and make it easier to work with.
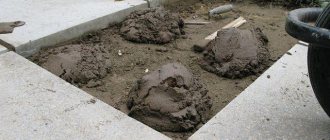
Making your own solution
If you are planning to lay tiles on the floor, then preparing the mortar is an important point in which maximum detail must be observed. Usually a dry mixture is used, which is diluted in a ten or fifteen liter bucket. Only three liters of liquid are required for such a container; this is where the mixture is diluted. Stir the water and mixture until smooth using a whisk and electric drill. Stir for 5-7 minutes, add water or glue if necessary. Then we re-mix.
How to prepare mortar for laying tiles? Use the instructions included on each bag of dry mix. You can additionally add cement mixture to the solution in order to make the solution more viscous. In addition, this can help significantly save expensive glue. The consistency of the solution should not be too liquid, but not too thick. Of course, liquid glue is more difficult to work with. Since it reduces the quality of installation and leads to the formation of defects and dirt. Over time, you need to stir the solution and add water to it. Otherwise, it may become more viscous and thick. All this can be done manually. If dust is generated during work, you can wear protective equipment, such as a respirator.
Prepare the glue
- Pour water into a basin or bucket and add the required amount of adhesive in strict accordance with the instructions on the package.
- Stir well until smooth using a hammer drill or drill at low speed.
- After 10 minutes, stir the solution again for a more uniform consistency and complete saturation of the settled mixture.
- Do not prepare a large amount of solution at once. If you don’t have time to use it, it will dry out and lose its properties.
- You cannot add water to already prepared glue: this will impair the strength.
What markings are needed to lay tiles on the floor?
So, first you need to measure all the floor parameters in length and width. Why do this? To ensure that the markup is as correct as possible. This will allow you to comply with the tile laying technology. The angles from which you are supposed to start are marked separately. All tiles that will be cut should be in corners or in the most inconspicuous places. Such places are usually covered with furniture or are not visible from the entrance. If there is a joint with another type of tile, then metal thresholds are used.
The cut tiles are located in the place where it is covered by the door casing. In all other places, from the floor and in horizontal rows, a solid one is placed. Correct marking helps to avoid unwanted displacements and defects. By following it, you can lay tiles (or other coverings) as beautifully and efficiently as possible. Therefore, it is better to devote enough time to marking.
Average prices for work
ordering tile installation work to professionals . Masters provide guarantees for:
- completed work;
- have consumables and their own tools;
- perform installation quickly and professionally;
- Almost always work under a contract.
Construction companies indicate the cost of all types of services in the price list, which can be found on the official website.
In the Russian Federation, the leading cities in terms of high prices for installation of tiles, together with preparatory work on the wall surface: Moscow, St. Petersburg, Novosibirsk, and a number of northern regions. The cost of their work is 2,000 (RUB/m2).
In other regions, installation of tiles averages from 1,200-1,500 (RUB/m2). Contractors and self-employed citizens charge 500-700 rubles/m2 for their work, but do not provide a guarantee for it.
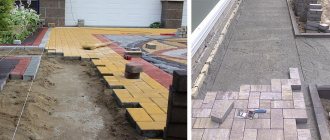
How to lay tiles on the floor if the surfaces are different
Depending on the surface on which the tiles are supposed to be laid, we will consider the basic recommendations:
- screed Laying tiles on a concrete screed is the simplest. Why, you ask? Because the prepared surface has everything necessary for this. Thanks to it, the coating will retain its properties and qualities for as long as possible. Apply glue to the prepared surface in small portions. And then, distribute it evenly over a small area, onto which the tiles are quickly laid. The tools needed for this are the same as for other surfaces. Let's look at some types of surface installation:
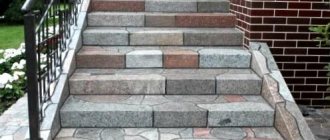
If you have asked this question, the answer is quite simple. Finishing is the same as with any other surface. With the only consideration that there will be more small details. And the cuts should face the inside of the stairs. Laying occurs from top to bottom, taking into account all instructions and safety precautions. The outer corner requires the installation of a metal corner or a finishing profile; installation of a plastic corner is excluded here;
how to lay tiles on stairs?- how to lay tiles on wood flooring? Of course, laying tiles on a wooden floor will not work. Therefore, in order to do this, you must first prepare the surface. Namely, replace rotten or damaged boards. Then create good ventilation to ensure the safety of the floors. Then gypsum fiber sheets are installed, preferably in 2 layers. It is on them that the tiles will be laid using regular glue. The technique is exactly the same as when laying it on another surface.
How to lay tiles on the floor with your own hands: technology
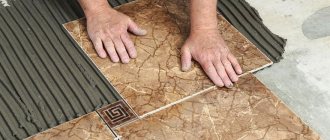
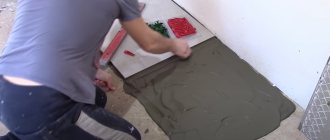
After all the necessary preparatory work has been carried out, you can begin the cladding itself. Use a notched trowel, which is held at an angle of 40-45 degrees. It is used to apply glue to the surface.
The surface itself should be small. Since the glue dries quickly, and the layer is uniform and not thick. This area is covered with tiles as quickly as possible. If there are difficulties in correctly applying the adhesive to the floor, the solution is applied directly to the tiles. The pressure on the tile should not be strong. Because if you press hard, the location of the tile may shift. It is constantly necessary to check the correct installation using a level or angle. To increase strength and adhesion, tap the tiles with a rubber or wooden mallet. The joint between the tiles is filled with crosses; they help determine the same size of the seam and the uniformity of the tiles. We do the same with the remaining rows. If you need to trim the material, then measure the dimensions with a tape measure and draw cutting lines using a corner.
We cut the tiles with a tile cutter and spread them. Glue the remaining pieces. After an hour, the crosspieces can be removed. And after 24 hours, the seams can be dried and treated with sealant. Remains of glue and jointing can be removed with a damp cloth. You can do this more often to ensure that the surface is beautiful and the installation is of better quality.
Place the trimmings
Lastly, tiles are laid around the perimeter of the walls, as well as those adjacent to pipes and external corners. Such tiles must first be cut to the required size using a tile cutter or an angle grinder with a diamond disc. And then lay it on the glue in the same way as whole tiles: using crosses and checking the flatness with a level.
How to cut with a tile cutter
- Measure the required length of the tiles, taking into account the seams.
- Place marks on each side with a pencil and draw a line.
- Place the tile on the tile cutter table according to the mark and press it against the edge of the bed.
- In one movement, move the roller along the cutting line.
- Apply light pressure to the handle to separate the tiles.
How to cut with an angle grinder
- Mark the cutting line on the tile and secure it with improvised means.
- Put on your glasses and grab a grinder with a solid diamond blade.
- Without applying pressure, gradually cut through the tiles, without going deep into the entire thickness at once.
- To avoid raising dust, you can moisten the tile and cut through only the top layer, and then place a nail under the tile and break it as if using a tile cutter.
Laying tiles at the joint with laminate
Sometimes difficulty can arise in how to properly connect the joint between laminate and tiles. How to lay tiles in this case? It is sometimes difficult to make a joint visually attractive and beautiful, but it cannot be said that it is impossible. The finishing of this point is usually done using a wooden or laminated threshold. Plastic and metal are rarely used.
The joint between laminate and tile requires not only the choice of threshold, but also its high-quality fastening. There is an open method and a hidden method, when the screws are not visible. Everyone chooses independently, depending on their individual needs.
After laying the tiles, its surface must be treated with a damp cloth with a detergent solution. This will help maintain its attractive appearance and remove any remaining glue or jointing from the surface. Completion of work also involves cleaning tools and clothing from dirt and trapped material. Insufficient attention to this issue will lead to rapid wear of not only clothing, but also tools. Because after drying, the glue and jointing are quite difficult, if not impossible, to remove. So, we discussed the question: how to lay tiles yourself? As you can see from this article, laying tiles is actually not such a scary task. If you follow the instructions and take your time when performing the work, you can quickly gain experience. Then laying tiles will become a habit for you.
We look forward to your comments, questions and comments. We are ready not only to transfer knowledge, but also want to learn ourselves, from you. Share your experience, because tiling is an area of work with many facets.
Final stage
While working, you need to periodically wipe the already completed area of masonry with a rag. This is necessary to wipe off any remaining adhesive before it hardens. And after laying the entire flooring, you cannot walk on it for at least two days.
Grouting floor tiles
After the glue has hardened, you can begin grouting the joints. For this, a special moisture-resistant putty is used. This work can be done using a rubber spatula. But first you need to clean the seams from construction debris and dust.
After all the seams have been rubbed, you need to clean the entire floor of debris with a rag. Then the grout is given a day to dry and you can begin wet cleaning.
This completes the tile laying work. You can learn some tricks and installation techniques by watching videos and photos.