In this article we will deal with a process that interests many, how to make paving slabs with your own hands. Let us consider step by step not only the production process itself, but also some of the subtleties of making the solution, pouring and pressing. This will help you save some money without compromising the quality of the final product.
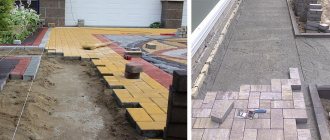
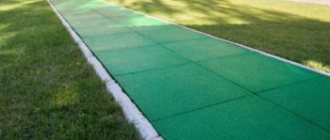
Paving slabs of different sizes and colors
Stages of paving slab production
Since we are talking about independent production, most often the producers of the work, who are also the owners of the land, try to save money. This opportunity presents itself to them, especially in the process of purchasing building materials.
So, the stages of paving slab production:
- Purchase of required building materials. What paving slabs are made from: cement, sand, crushed stone, steel wire 4-6 mm thick.
- Making molds, for which you can use, for example, used boards left over from building a house.
- Making concrete mortar.
- Pouring the latter into molds with pressing to achieve uniformity of the poured mixture.
- Drying paving slabs in molds.
- Removing tiles from molds.
- Final drying in air under a canopy.
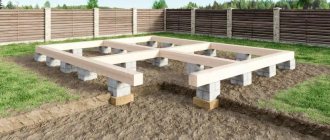
Before you start making paving slabs at home, you need to choose a site where all operations will be carried out. Its dimensions depend on how many tiles need to be produced per day. The greater the number of the latter, the larger the site should be. Because here the concrete solution will be mixed, poured into molds, and finished building materials will be dried.
Cement, sand and crushed stone are the ingredients of a solution for paving slabs
Purchase of building materials
The amount of cement, crushed stone and sand depends on the selected recipe and the amount of paving slabs. Typically, for concrete building materials that will be used outdoors, a classic recipe is used in production. Namely:
- one part cement;
- two parts sand;
- three pieces of crushed stone.
For example, if paving slabs are made with a thickness of 4 cm and a square shape with dimensions of 30x30 cm. Its volume is equal to: 4x30x30 = 3600 cm³ or 0.0036 m³. It is necessary to make 100 tiles, which means that you need 100x0.0036 = 0.36 m³ - this is the volume of all the tiles.
To make the solution, as mentioned above, three components consisting of six parts are required. This means that one part in volume will be equal to: 0.36/6 = 0.06 m³. This will be the amount of cement. The amount of sand is two parts, that is, 0.06x2=0.12 m³. Accordingly, there are three parts of crushed stone: 0.06x3 = 0.18 m³.
All this can be measured, for example, with a ten-liter bucket, the volume of which in cubes is equal to: 10 l is 10 dm³ or 0.01 m³. That is, 6 buckets of cement are enough to produce 100 paving slabs above the designated size.
To avoid mistakes, it is recommended to increase the quantity of purchased building materials by 10%.
Ruffle mesh made of galvanized wire
As for the wire, it is best not to buy it. The best option is a rowan mesh with cell sizes of 5x5 cm or a regular steel plaster mesh. It’s better to make it from galvanized wire, you can use it second-hand. Its quantity is easy to calculate, because the area of one tile is: 30x30 = 900 cm² or 0.09 m².
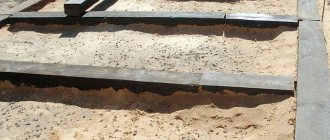
Before making paving slabs at home, you need to prepare forms for it. They can be of different sizes and configurations, but the simplest ones have square cells. We will take them as the basis for the subsequent analysis of the topic.
Making molds
Let's move on to the question of how to make a mold for paving slabs with your own hands. The simplest option is boards 4 cm wide. They are cut with a saw into lamellas 30 cm long and into segments 1 m long.
They are assembled into a rectangle, one side of which is 1 m, the other 30 cm. The elements are connected to each other with self-tapping screws and metal corners. The latter are installed on the outer sides of the form. Then two more boards, 30 cm long, are inserted inside at equal distances from the edges of the form and between each other. The main thing is that these distances are equal to 30 cm. Fastening is done with self-tapping screws 60-70 mm long, which are screwed from the outside, two at a time, into each board inserted inside.
One cell form
See also: Catalog of companies that specialize in landscape design of sites.
In principle, there are no strict restrictions on the size of forms. That is, they can include more than just three cells. There may be two, four, five, and so on. Simply, the longer the mold, the more difficult it is to free it from the finished tiles. When pulled out, the frame may break.
Multi-cell form
Making concrete mortar
If a small number of molds are made, then a small amount of solution will be required to fill them. Therefore, it can be kneaded in some container, for example, in a trough or in an open area.
Mixing concrete with shovels in an open area
There are several kneading technologies:
- Mix all the ingredients, then add water with further mixing until a homogeneous mass is obtained.
- Water is added to the cement, the solution is mixed until cement laitance is formed. Then sand and crushed stone are added to it in portions.
- Dry mixing of sand and crushed stone is carried out. An aqueous cement mortar is prepared in a separate container, which, after preparation, is poured into the dry mixture. The latter is completely mixed.
If there are many forms, then it is better to use a concrete mixer for mixing. First you need to pour cement into it, turn the drum on rotation, add water. As soon as cement laitance appears, you can fill it with sand and crushed stone in portions.
Small concrete mixer for mixing concrete
Pouring concrete into molds
Let's go directly to the answer to the question of how to make paving slabs:
- First of all, the inside of the molds must be treated with waste technical oil so that the dried tiles can be easily separated from the boards.
- Then half of the solution is poured into it with shovels. The mixture must be compacted using the same shovels. The main task is to release air, which, when the mixture hardens inside, forms pores. The latter reduce the strength of the concrete product.
- A mesh cut to size is laid. It performs the functions of a reinforced frame.
- The mold cells are filled to the brim with concrete and compacted again.
- The upper plane is leveled and the cementation process is carried out. That is, sprinkle with dry cement and smooth with a trowel or trowel.
Paving slabs should remain in shape for a day. After which it is pulled out and laid on its edge somewhere in a shady place. It must undergo a natural drying process.
Step-by-step process for making paving slabs
How to make concrete solution
To prevent the solution from staining the surface of the area (asphalt, concrete, other tiles), you need to use polyethylene, a large container or other available devices. You can mix the components in different ways. Options available for making your own concrete:
- combine the dry ingredients in one container, add water (in small portions) until the solution reaches the desired consistency;
- prepare cement laitance: pour water, add cement, then combine the resulting solution with sand and crushed stone;
- First, dry solid fraction components (crushed stone, sand) are mixed, cement mortar is prepared separately, and then the mixtures are combined in one container.
INTERESTING: DIY wooden staircase to the second floor in a private house
A concrete mixer is used if it is necessary to immediately produce a large amount of paving slabs. Instructions for making concrete in this case:
- The concrete mixer turns on.
- While the drum is rotating, water is poured.
- Cement is poured in dry form.
- When laitance appears, the remaining components are added.
Making paving slabs on a vibrating table
The most important operation in the process of making paving slabs is compacting the poured concrete solution. It is clear that shovels and other tools will not be able to remove all the air from the concrete mixture. Therefore, special devices and tools were developed for this purpose - vibrators, vibrating tables and others.
For the production of thin reinforced concrete products, which include tiles, vibrating tables are used. What is it and how to make a vibrating table for paving slabs with your own hands - the conversation will go further.
Vibrating table for the production of paving slabs
DIY vibration table
It cannot be said that a vibrating table is a very simple device. To make it, you need to have the skills of a welder and mechanic. There are a huge number of variations of this equipment. But its operating principle is the same: a frame made of metal profiles, on which a tabletop is mounted on hinges or springs. The latter is connected to a vibrator, which is connected to the power supply.
The vibrator transmits vibrations to the tabletop, on which forms with concrete mortar poured into them are installed. Small vibrations are transmitted to the concrete, which begins to compact, displacing small air bubbles.
Attention! The larger the countertop area, the more molds will fit on it. But at the same time, you will have to increase the power of the vibrator, or rather, its electric motor. The latter characteristic can start from 250 W. The optimal dimensions of the machine itself: 1800x800 mm.
Finish coatings
Waterproofing coatings are an abrasion-resistant polymer film. Do-it-yourself paving stones at the dacha, its front surface, inevitably has small shells. Silicone sealant will hide these defects.
Impregnation of paving stones with hydrophobic compounds. It should be carried out immediately after installation. In this case, the surface does not have to be cleaned of dirt, grease stains and vegetation. A special organosilicon-based liquid for cement-containing products penetrates the pores and repels water.
Carrying out such an operation will allow you not to worry about efflorescence, fading of painted elements, or the appearance of vegetation. The service life of waterproofing liquids varies. More reliable products are expensive due to additional additives. Domestic GKZh-11K is not durable, but is inexpensive.
What can you save on?
If paving slabs are used to cover garden paths or alleys, they can be made thinner. Plus, you don’t have to use a mesh reinforcing frame in the design.
The strength of garden path tiles can also be reduced. This is achieved by reducing the amount of cement used. For example, by increasing the portions of crushed stone or sand. That is, the solution recipe will be: 1:2:4 or 1:3:3. You can avoid crushed stone altogether by using coarse sand as a filler. Although this is not the best option.
Alternative technology
Today, construction stores sell ready-made through molds for paving slabs made of silicone or plastic. They have different shapes and sizes, and they are used using a simplified technology, where in addition to the manufacture of tiles, they are laid.
Mold for making paving slabs
How to make paving slabs using this new technology:
- First of all, it is necessary to prepare paths or areas on which the tiles will be laid. It’s simple here - backfilling with coarse sand, which is compacted with water and immediately leveled.
- The concrete mixture is being mixed.
- The form is laid at the place where the paving slabs are poured.
- The mixture is poured into it, which is leveled along the edges of the mold. You can tap the last one with a mallet to achieve compaction.
- In this state, the form must stand for one hour for the concrete to set. After which it can be removed. The tile will be ready in the right place. Between the coating elements, sand is subsequently backfilled or cement mortar is poured.
Production and laying of paving slabs
Closed silicone and plastic molds are available for sale. That is, they have a bottom, which is usually covered with a pattern. This form is covered with used oil (not always) and the prepared solution is poured into it. After an hour, it can be easily removed, leaving a tile with a pattern on the front side.
Conclusion
Compared to tiles made directly on the ground, which is also quite popular among home craftsmen, vibration-pressed tiles are stronger and more durable. If the base is properly prepared, it can also be laid on paths with high traffic and load. And they prefer homemade products to purchased ones, not only because of savings, but also because they do not violate their own technology, which cannot be reliably said about small handicraft enterprises.
Details of the production of tiles from Kostya9 are in the topic on FORUMHOUSE. And in the thread where the Commander posted his technology, there are not only details of making tiles, but also various variations of homemade vibrating tables.
The original topic that prompted the topic starter to make tiles himself is located in the forum section about materials and shapes for tiles. More and more new participants are joining the author’s arguments about the superiority of home-baked goods, bringing their own experience. How to lay paving slabs, homemade or ready-made, in the article about the variety of garden paths. Our video shows an interesting recreation area with a swimming pool, paths and rock gardens, which can become a decoration for your site.
Subscribe to our Telegram channel Exclusive posts every week
Video description
The video shows the process of making paving slabs in plastic molds:
Attention! Before you make paving slabs with your own hands at home, decide for yourself whether this building material will be gray or another color. If the second option is chosen, then add a color of your choice to the concrete solution being prepared.
There are many variations on the theme of decorative design of paving slabs. Here are just a few options:
- river pebbles, which are laid on top of the finished tile product;
- crushed stone, which is laid flat sides up;
- paint that is applied not to the surface of the tile, but to the mortar, which is laid as the top layer of a building material.
Pebble paving slabs
Filling the form
Fill out the form as follows:
- install the product on a vibration table leveled to the building level - factory or homemade;
- use a brush to coat the inside of the mold with lubricant;
- fill the solution halfway and turn on the vibrating table. The total duration of vibration laying is 5-10 minutes:
- after half the vibratory laying cycle has passed, a steel or polymer mesh (reinforcement) is placed on the solution and the solution is added to the top.
After this, the forms are removed from the vibrating table onto the rack.
It is not necessary to paint the entire tile. You can prepare two portions of the solution: tinted and regular gray. First, the mold is filled one third with colored solution, then with regular solution. By pouring two different colored layers, you can imitate marble.
Briefly about the main thing
So, the topic of how to make paving slabs yourself was discussed. This process is actually not the easiest. It is still possible to make molds yourself from boards, but assembling a vibrating table can be done by a specialist who has the skills of an electric welder and mechanic. As for the manufacturing process itself, if you correctly follow the concrete mortar recipe, if you accurately follow all the operations outlined above, you can guarantee the high quality of the final result.
| A little more attention! I would like to hear from you your story of making paving slabs with your own hands. What is the final result, did it satisfy you, were you disappointed that you took the steps to make paving slabs yourself. What difficulties did you encounter or, conversely, was everything easy and simple? |
Freezing
The water in the solution reacts with the cement, so it is important to minimize its evaporation. For this purpose, the filled forms are placed under polyethylene, and in hot weather they are also periodically watered.
After two days, the castings are removed from the molds, but continue to be kept under polyethylene and moistened, if necessary, for another 10 days.
Full maturity occurs after 28 days . When the solution has hardened slightly, you can press a design into the tile using a stamp made of hard wire.