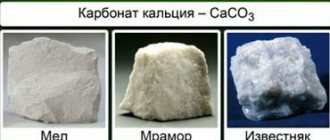
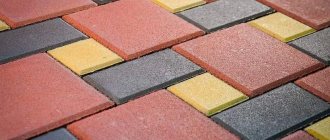
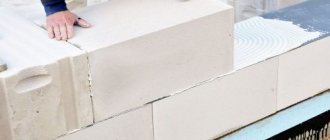
Tile flooring is one of the most popular solutions for finishing rooms for a wide variety of purposes. Decent appearance, a wide range of standard sizes, geometric shapes, textures and shades, ease of cleaning, absence of dust and dirt, high strength, and most importantly - complete waterproofness only add to the popularity of this floor covering. As for residential premises, tiles are laid, as a rule, in wet areas - in bathrooms and in the kitchen, as well as in those parts of the apartment where increased pollution is possible - in the hallway, corridor, on the balcony.
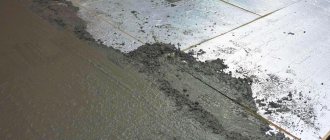
Rice. 1. Laying tiles on top of a cement-sand screed
In order to lay tiles, you need to contact a professional, since this work is a wet process and requires special skills. Also, you need to understand how long it takes to lay tiles on the screed without compromising the further operation of the coating.
How long before you can lay tiles on the screed?
Tile flooring is one of the most popular solutions for finishing rooms for a wide variety of purposes. Decent appearance, a wide range of standard sizes, geometric shapes, textures and shades, ease of cleaning, absence of dust and dirt, high strength, and most importantly - complete waterproofness only add to the popularity of this floor covering. As for residential premises, tiles are laid, as a rule, in wet areas - in bathrooms and in the kitchen, as well as in those parts of the apartment where increased pollution is possible - in the hallway, corridor, on the balcony.
Rice. 1. Laying tiles on top of a cement-sand screed
conclusions
When choosing which screed to make under a floor with tiles, each master will determine from his preferences and the availability of materials. It is only worth noting that drying wet, flooded floors is exactly the case when “you can’t spoil the porridge with oil.” If you have time to wait until the mixture dries completely, then it is better to do this. The dry surface still needs to be treated with primer, and it will be better absorbed if there is no excess dampness in the materials. In addition, on completely dried layers of building mixtures, possible cracks will be visible, which can be repaired before laying the tiles. And if the screed is weak somewhere, it will be possible to lay a metal mesh on these areas when gluing the tiles to give additional rigidity to the floor.
vote
Article rating
What types of screeds are there?
The drying and hardening time of the leveling screed directly depends on its type in accordance with the selected materials included in its composition. Therefore, in order to understand how many days or hours later tiles can be installed on the subfloor, you need to know exactly what kind of screed was installed in the room. All subfloors are divided into the following categories:
Rice. 2. Wet floor preparation
Rice. 3. Semi-dry screed
Rice. 4. Installation of self-leveling floor
Cement stone hydration process
To find out how long it takes for a cement floor screed to dry before covering it with various decorative materials, you need to clearly understand what processes occur inside the concrete. The main nuances of hydration (formation of high-strength cement stone in a poured volume) are:
- hardening is impossible without a sufficient amount of water, at the same time, 25% of liquid by weight of dry cement is sufficient for hydration;
- first, needle-shaped crystals (aluminate structure) are formed in concrete, clinker minerals C2S, C3S (silicate structure) are formed between them;
- then the clinkers are strengthened, on the second day they displace aluminates, on the 28th day the structure consists of 90% silicates;
- It is this time that is considered to be the set of strength of cement stone, since its further hardening lasts for decades.
- the rate of hydration depends on the presence of additives, air temperature, water-cement ratio W/C, cement grinding and the mineral composition of the clinker included in its composition
In the future, the indicator of how long the floor screed should dry is influenced by the concreting technology:
- to increase workability, 60–75% water by weight of cement is added to wet screeds (W/C = 0.6–0.75, respectively);
- during the formation of cement stone, only 25% of the liquid is bound, the rest is distributed in the pores of the structural material, during the transformation of the silicate gel into solid stone, shrinkage of the surface occurs;
- chemical reactions inside concrete are accompanied by the release of heat, leading to intense drying of moisture;
- therefore, the surface is additionally moistened in the first 3 days so that the screed does not become covered with shrinkage cracks;
- slaked lime in cement prevents corrosion of reinforcement, gypsum slows down the hydration process, normalizes the structure of cement stone.
Thus, all of these factors should be taken into account in combination to obtain maximum adhesion of the tile adhesive to the concrete base of the floor slab.
Laying tiles over wet screed
Wet screed is the most convenient and cheapest way to install a subfloor in an apartment or private residential building. Its installation does not require expensive equipment or high professionalism of workers. As a rule, such a screed is made directly at the site of its installation and has the following distinctive properties:
Rice. 5. Wet screed thickness
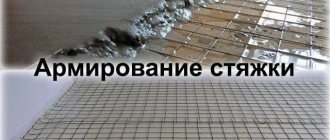
Rice. 6. Reinforcement of wet screed with mesh
Features of installing a clean floor made of ceramic tiles over a semi-dry screed
The very name of this type of coating speaks about the technology of its construction. This design is completed much faster than any wet screed, since installation occurs using a special plastering station with a pump. This method of rough flooring has the following advantages and disadvantages:
Rice. 7. Hard floor preparation using professional equipment
Rice. 8. Installation of ceramic tiles on top of a dried semi-dry screed
Ceramic tiles over self-leveling floor
A relatively new technology for self-leveling preparation under a clean floor has been practiced in our country for about the last 20 years. After the self-leveling floor layer gains strength, an ideal smooth surface is formed, without any flaws. This subfloor design has the following features:
Rice. 9. The process of installing a self-leveling floor in a living room
Additional nuances that affect the drying speed of the screed
It must be said that, in addition to the type of screed, the rate of strength gain of the laid mixture can be influenced by various external factors and environmental conditions. In order to fully understand how long it takes to lay tiles on the screed, the following conditions must be taken into account:
Rice. 10. Floor screed 10 cm over uneven floors
Rice. 11. Floor screed that has gained strength
How to determine that the screed is ready for laying tiles
The drying process of the screed occurs automatically when favorable conditions for strength gain are created. The following signs indicate that the preparation surface for a clean floor has dried and the technician can begin laying tiles:
Rice. 12. Caring for freshly laid floor screed.
Rice. 13. Determination of the strength of a wet screed 7 days after completion of installation
Why you can't speed up drying
Setting, allowing movement along the screed, occurs on the first or third day after its installation.
The customer often wants to reduce the hardening time, but this is strictly prohibited. Turned on radiators, heat guns and other heating devices dry the air, resulting in a crust forming on the surface. Under the influence of moisture and steam rising from within, the layer cracks, so work on leveling the floor and preparing it for further finishing must be planned for spring-summer or early autumn, when central heating is not working.
If the upper layers dry too quickly, then moisture may remain in the lower ones. It will be sealed from below with waterproofing, and from above with a dense dried crust. Over time, water can not only tear apart the leveling layer, but also lead to mold.
Summarizing
Based on the results of considering all the factors influencing the rate of hardening of the screed, some average indicators can be identified - laying tiles can begin 1 week after installing the screed, 3 days after installing the self-leveling floor and approximately 5 days after laying the rigid cement-sand mixture.
Rice. 14. Laying tiles over a subfloor by professional workers
Source
How long before you can lay tiles on the screed after pouring - semi-dry, wet and self-leveling
We will send the material by email
One day he took on an assistant as an apprentice. And once they poured screed to lay tiles in the bathroom, and when I arrived at the site I saw that he was already laying tiles. He said that he had read somewhere that this would be better for adhesion, and decided to take the initiative. For those like him, next I will tell you reliable information about when you can lay tiles on the screed after pouring.
First steps. Slab countertops
Sano published a blog entry in Furniture made from slabs, solids, and various differences, October 6, 2022, blog entry
The first attempts to make something from the brought slabs. Although there may be some attempts, the material costs money and the right to make mistakes is as much as there is money in your pocket. Train at your own expense, as they say.
Therefore, each board is carefully inspected and tried on; the proverb about measure seven times is in action.
The work itself is not tricky, creative, there are several boards and they need to be selected so that they look beautiful and there is no overspending. All sizing and trimming is done with the minimum possible removal of material, simply sawed off a little here, cut a little there with a chisel.
How long before you can lay tiles on the screed?
When you can lay tiles on a screed is of interest to almost everyone who wants to do their own home repairs. All this interest can be explained by the desire to complete the repair and construction process as soon as possible and quickly enjoy the fruits of their labor.
However, this desire can result in even bigger problems, since if you lay the tiles on a fresh screed, this will lead to the gradual destruction of the floors. But how long after pouring the tiles should be laid directly depends on what the base is filled with and what it is like. Next there will be a review of each type of screed in turn, including:
However, installation of the tiles occurs only after work has been done to clean the base, determine the nature of the unevenness, and set up the beacons. Only after these processes can you decide on the surface leveling method.
Semi-dry screed
The semi-dry screed method is considered the simplest and fastest of all.
To perform this method, you need to waterproof the base before pouring. As a rule, polyethylene is used for this work, the seams of which are glued with tape, and the overlap of the material strips should be at least 20 centimeters. The stripes are made longer than the floor, about 30 centimeters. This is done so that there is an overlap of 15 centimeters on the walls. After laying the tiles, excess polyethylene can be cut off.
To make a semi-dry type of screed, the following materials should be used:
You can lay tiles on such a screed only after 1.5-2 weeks. If you lay it before this time, it can lead to poor adhesion, tiles peeling off from the base and cracking of the floor.
Wet screed
The thickness of the wet screed should be at least 4 centimeters. If the thickness of the filling layer is less than 4 centimeters, then there is a possibility that the laid layer may be pressed together with the tile under load.
The standard method of pouring a screed, for which a cement-sand mixture is used, which is mixed with a large amount of water. The method has been known for a long time, is in demand among professional builders, as it better levels the surface due to its physical properties, and is considered a classic method for leveling the subfloor.
Laying tiles or tiles using this pouring method should be no earlier than 3 weeks after pouring.
Although many “masters” lay the tiles already on the second or third day after pouring, do not do this. This technology is considered incorrect. It takes much longer for the layer to dry completely. Professional builders do not allow the installation of tiles even on the 10th day after pouring; they do it after a few weeks, depending on the type of screed.
Do not listen to non-professionals who lay tiles on a base that has not yet completely hardened and explain this by better adhesion. This method is wrong. Don't do this unless you want to ruin the floor.
For a layer of cement-sand mixture whose thickness is 4-5 centimeters, the optimal drying period is considered to be three weeks. Therefore, only after this time can you lay your tiles or tiles. However, the composition will reach maximum strength only on the 28th day.
However, no one will tell you the exact time when it will be possible to lay the tiles, because everything depends on the thickness of the layer, as well as the amount of water added to the mixture. Therefore, adding more water when preparing the solution to make it “easier to mix” will not be a good solution, especially if laying the tiles needs to be done quickly.
Since tile adhesive and grout from a cement-sand mixture are substances of different chemical composition, and they practically do not interact with each other, a tile laid on a base that has not completely hardened can be easily peeled off and the situation corrected by putting it back when the base will dry out.
Self-leveling mixture
The concept of self-leveling flooring appeared relatively recently in the CIS, but the technology itself has already proven itself positively and is widely used during the finishing of premises. There are even several varieties that are combined under one term. By self-leveling floor I mean a mixture for pouring screed for laying tiles and tiles.
Among the advantages of this mixture is that, thanks to its chemical and physical properties, after complete drying, the filling layer turns into a perfectly flat surface that has no flaws (any chips, cracks, potholes) and retains its strength. Although the method is expensive, it is becoming more and more popular and in demand when preparing floors for tiles.
Installation of tiles is carried out depending on the characteristics of the chemical composition of the mixture used. For most models of the mixture, the installation process can begin 3 days after pouring. However, you can look at the back of the package for more accurate information, where the proportions of water, the method and conditions of use, and the drying period itself are indicated.
The peculiarity of this method is that there is no need for beacons, unlike other methods. The composition is very liquid after preparation, so it easily spreads independently over the entire floor.
I recommend the following video, in which the author explains when to lay tiles on a screed:
Warm floors cannot be turned on immediately after installation.
One of the key points of proper operation of heated floors is strict adherence to the timing of the first switch-on. Depending on the type of heating element, its installation is usually carried out either in a screed or in a layer of tile adhesive. In both cases, the heated floor cannot be turned on immediately after installation.
Warm floor under tiles
Thermomat heating mats are used to install heated floors under tiles or ceramic tiles. They are laid in a layer of tile adhesive, onto which the tiles are mounted. In this case, the time it takes for the mixture to dry completely can be found on the packaging of the glue used. As a rule, for most adhesive compositions this period is about 14 days. Only after this can the heated floor under the tiles be put into operation.
The consequence of failure to comply with these deadlines will be excessively rapid evaporation of moisture, which in turn will not allow the adhesive mixture to gain normal strength, as a result of which the laid tiles will peel off.
Warm floor in screed
For example, let's take the Thermocable SVK 20 electric heating cable. It is mounted in a layer of screed, the thickness of which varies from 3 to 5 centimeters. As a material for pouring the screed, it is recommended to use sand-cement mixtures of grade M-150 with the addition of plasticizers or microfiber. Their composition is optimal for installing heated floors. This mixture conducts heat well and hardens in just a day.
It should be emphasized that there is a significant difference between the initial setting of the screed and its complete drying. That is, if the screed has already hardened and you can start laying the floor covering, this does not mean that the screed has completely dried and the heated floor can be turned on.
After filling the cable with the mixture, it is not recommended to turn on the heated floor for 30 days until the screed has completely dried. At the same time, the room must maintain optimal temperature and humidity within 20-25°C and 60-70%, respectively. These conditions are optimal for screed maturation.
If this requirement is ignored, the moisture in the screed will evaporate excessively quickly as a result of heating. The cement will not gain the required strength, which will lead to the destruction of the screed itself and peeling of the floor covering; the formation of voids is also possible, which can lead to local overheating of the heating cable and its failure.
Warm floor under laminate
When using laminate flooring, you should choose the Thermomat LP heating mat, which is designed for installation under laminate or parquet. Its installation is fundamentally different from the heating elements described above, since it is installed under the floor covering without any mixtures. As a result, you can start using the heated floor immediately after installation without any expectations.
As a result.
In short, you can lay the tiles on the screed 3 weeks after pouring, but if it is a self-leveling mixture, then three days is enough. Decide for yourself which base leveling option to use for a particular room. Just take into account the factors of the drying period, the chemical composition of the mixture being poured, the possibility of laying your tiles or tiles and the price. After all, although the last method seems like an excellent option, it is significantly more expensive than the other two.
Write in the comments what do you think, will self-leveling mixtures replace classic solutions in the future?
Source
Overview of screed types
Before talking about how many days after pouring the screed you can lay the tiles, you need to know that the period directly depends on the type of base.
Its installation is carried out immediately after the base has been cleaned, the nature of the unevenness has been determined and the beacons have been installed. Only after this work can you decide on the method of leveling the surface on which the tiles are laid.
Semi-dry
The simplest and fastest method is dry screed.
To complete this, you need to waterproof the base; for this, polyethylene is used, the seams of which are glued together with tape. The overlap of adjacent strips should be at least 20 cm. An overlap of 15 cm is made on the walls, which can be cut off after laying the tiles. The following materials can be used for manufacturing:
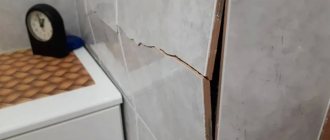
However, despite the simplicity and ease of installation, it should be taken into account that tiles can only be laid on such a screed after 1.5 - 2 weeks. Installing tiles before this time will lead to poor adhesion, peeling or cracking of the base along with the top decorative layer.
Wet
The classic type of screed pouring using a cement-sand mixture mixed with the addition of a large amount of water has been known for a long time and is considered the classic method of leveling the base.
During installation, it must be taken into account that the thickness of the layer must be at least 4 cm, otherwise there is a possibility that under load the layer may be pressed through along with the tile.
It is advisable to start laying tiles no earlier than after 3 weeks
Despite the fact that many craftsmen lay tiles 2–3 days after pouring, this technology is considered incorrect. Complete drying will require a much longer period of time, so installing tiles on such a base is not allowed even for 10 days.
The optimal drying period for a layer of cement-sand mixture 5 cm thick is considered to be a three-week period. It is after this exposure that the tiles can be laid. Although the composition gains maximum strength only on the 28th day.
The exact amount of time depends on the thickness of the layer and the amount of water added to the solution, so a lot of liquid to facilitate stirring in this situation is not always positive. Especially if you need to do the installation as quickly as possible.
Installing tiles on a base that is not completely hardened, which some people practice, explaining their effect by better adhesion, is erroneous.
In fact, tile adhesive and cement-sand mixture are different in chemical composition, so they practically do not interact with each other. Thus, tiles laid on such a base can be peeled off without much effort. To learn how not to lay tiles, watch this useful video:
Self-leveling mixture
The concept of self-leveling flooring appeared in Russia not so long ago. However, the technology has already proven itself on the positive side and is widely used in interior decoration. There are several varieties united by one term. In our case, “self-leveling floor” means pouring screed for laying tiles and tiles.
After complete drying, the base turns into a perfectly flat and durable surface, free from flaws in the form of cracks, chips and potholes. Thus, the use of self-leveling mixtures is the most popular method of preparing floors for tiles.
If we touch upon the main question of interest to us, after how many days can tiles be laid, then everything depends on the characteristics of the chemical composition of the mixture used.
On average, exposure is allowed for 3 days, but exact information can be found on the back of the package, which indicates the proportions of adding water, application conditions and drying period.
The uniqueness of this method is that there is no need to use beacons. The liquid composition itself is distributed over the area in a strictly horizontal position.
The owner decides which base leveling option will be chosen for a particular room. This depends on several factors: the drying period of the composition and the possibility of laying tiles.
In addition, it should be emphasized that the cost of self-leveling mixtures significantly exceeds the price of cement-sand screed. However, the latter wins in terms of characteristics, timing and ease of filling.
Source
What factors determine the drying time of the rough base?
When can I start laying a finished floor on a sub-base? The longest stage is ripening. The base must dry completely. You can walk on it within 24 hours after laying it, but you can’t lay the finished floor yet. The time it takes to completely dry depends on several reasons. They are:
- humidity;
- temperature;
- layer thickness;
- their number;
- are there any fillers in the solution;
- quality of waterproofing.
If you lay tiles on a screed that is not dry, it will detach from the base or crack. A large amount of water remains in the pores of the solution, which requires release. With good waterproofing, all moisture tends only upward. Due to this dampness, the early laid finishing coating warps and becomes unusable. For cement, the drying time of the screed is considered to be 28 days. But this happens under normal conditions.
Normal conditions are considered to be 60-70% indoor humidity. At low rates, moisture leaves the solution quickly and forms cracks in the screed. If the humidity is high, the drying time of the screed increases. At humidity levels below 60%, the evaporation process can be controlled within certain limits. For this, polyethylene film is used, which is used to cover the solution after it has set. The screed must dry correctly.
The optimal indoor air temperature is +20...25˚С. At higher temperatures, the base becomes covered with cracks; at low temperatures, the complete drying time increases. Temperature and humidity must be maintained throughout the drying of the solution. It is necessary to protect the room from fresh air flows, direct sunlight, and do not heat it with heating devices. But the screed layers must not be allowed to freeze. Therefore, it is recommended to carry out work on laying the rough foundation in the summer.
The normal thickness of the screed reaches 40 mm. An extra layer of cement 1 cm thick dries out in another 10-15 days. With plasticizer additives, the period increases. A total layer of 80 mm thickness will take 2-3 months to dry. This must be taken into account when building a house so as not to lay the flooring on a fresh screed.
You can reduce the maturation time by using various building materials and mixtures.
Laying tiles on a semi-dry screed
Our greatest friends are tilers. No wonder. The usual norm for laying porcelain stoneware or ceramic tiles is 8-10 square meters. for an 8-hour working day for one person. After our screed is made using a semi-dry method, the surface becomes smooth and rough. This is an excellent base for laying floor tiles. The average tiler is able to lay 18-25 square meters on such a surface. tiles in one working day without wasting tile adhesive! Hint: The customer can monetize this fact for himself.
Two days after installing the screed, you can begin laying the tiles. To do this, the surface of the screed must first be treated with a deep penetration primer using a roller. This primer provides dust removal from the surface and promotes the adhesion of tile adhesive to the surface of the screed. It is not at all necessary to use expensive primers such as Betonokontakt. It is important that after applying the primer to the surface of the screed and until the completion of laying the tiles, the primed surface remains clean. It is advisable to stop any dusty work indoors. In practice, this is almost impossible to achieve. It is clear that work continues in other rooms, and the ever-present, penetrating dust will in any case leak out and settle on the primed screed. But if you manage to bring everything to the point of priming the screed on Friday evening, laying the floor tiles on Saturday and Sunday, and bringing everyone back to work on Monday, this will be your small victory and an example of the rational use of working time, taking into account technology. This is what we should strive for!
If you are the manager of your construction project, if you think “without husks”, the fast, smooth surface that we will provide you with will become a reliable foundation for you!
Screed warranty 2 years!
Call and order!
+7
We accept orders daily from 9.00 to 20.00.
Source
Semi-dry floor screed.
The technology of semi-dry screed appeared here recently, along with all the new construction technologies of the West. Before this, no one knew about the unusual way to make a screed.
The main idea of a semi-dry mixture is to add only the required minimum amount of water to the mixture, but before the cement is completely hydrated. This minimum or ratio is approximately 0.4, and depends on the moisture content of the sand, the base and subsequent maintenance. According to this rule, 18-23 liters of water must be added to 50 kg of cement. The exact figure depends on the moisture content of the sand.
MAIN POINTS OF SEMI-DRY SCREED.
The main advantages of semi-dry screed:
Semi-dry screed laying technology.
The main points of how a semi-dry screed is made are shown in the English video:
The method of leveling the semi-dry mixture can be different. Both with and without beacons. The most common is the formation of beacons from the same mixture, according to the level - the rule. And then, leveling the mixture according to the created beacons.
What about this technology causes a wary attitude:
The method of leveling the semi-dry mixture in the second roller is more progressive. The speed of the process is noticeable. And we used only flexible tapes 10 cm wide. They can be successfully replaced with CD profiles from plasterboard systems.
Reviews of semi-dry screed and its disadvantages.
Reviews about semi-dry screed can be heard diametrically opposite.
Let's figure out (as far as possible) what was abnormal in that screed.
One can only guess what was missed during its construction. Perhaps compaction and smoothing with trowels were not carried out. Because of this, it crumbled. Perhaps they were not covered with film and not additionally moistened. The base was not wet (the presence of a film ruled this out), the cement in the lower layers did not “set”, has a looser structure and is easily separated from the base. When properly moistened, even completely dry paving slabs under paving slabs gain strength throughout their entire thickness. Maybe they saved on cement or used cement after a year of storage.
This dry screed is not always the case. The main reason here is a violation of technology and “crazy hands.” But nothing seriously negative has happened there yet. That screed could quite easily absorb all minor loads in residential premises.
The video below shows the correct moisture content of the mixture and abundant moistening of the base. With this technology, the lower layers firmly adhere to the base and all the cement reacts. Most likely, the screed is prepared for laying ceramic tiles on the same day. This method will be discussed below.
Laying tiles on a semi-dry screed
Some Western masters are even greater reinsurers when it comes to the lower layer. For reliable fixation, the base is coated with glue or spilled with a liquid solution.
Similar recommendations are given by MAPEI when working with its product – Topcem Pronto semi-dry screed. The mixture should have a moisture content similar to wet soil . In order not to be mistaken with the loose concept, specific numbers are indicated - 1.7 liters of water per bag of mixture:
MAPEI ready-mix for semi-dry screed.
Another opinion about semi-dry screed:
If the screed is done by “normal hands,” such problems do not arise. Throughout this article I am trying to be an advocate for the new screed method. The next video, I think, will help me with this. It is from a master who makes screeds using the semi-dry method.
There, the strength of the dried screed is comparable to the strength of some concrete. In addition, stationary beacons were used during the construction. What is right for the development of this type of work. The strength of the top layer is impressive. In this case, additional compaction was probably carried out or the proportion of water was slightly increased.
Where semi-dry screed is indispensable.
The first video shows (they didn’t expect it) one of the advantages of the semi-dry mixture - its loose structure. The distance between the grains of sand is greater than in a conventional solution. Such a screed on the street does not burst from frost when saturated with water. If the base of such a screed is made of coarse crushed stone, this will prevent moisture from suction from the ground and will help remove precipitation.
Semi-dry screed on the street.
This method of preparing the base is not suitable for laying tiles. It is necessary to accurately construct the “slope” with the help of beacons.
Laying ceramic tiles on a semi-dry screed.
What else can be used from the experience accumulated in this direction by the West?
An interesting idea is to lay ceramic tiles directly onto a newly prepared screed using a semi-dry method. The screed is watered from a watering can and sprinkled with cement (I think glue, but cement is also possible).
Next, the tiles are nailed onto the wet glue. The mixture is semi-dry and has not yet set - there is room for compaction. The tiles settle down to the required level, and not the neighboring ones are squeezed out as when laying them on a mortar. At the same time, the mixture is compacted and strengthened.
You can replace sprinkling the dry mixture on the surface by spreading tile adhesive on the tiles. Apply glue to the “zdir” or with a fine comb. And spill the surface with liquid cement laitance. This is how one Japanese master practices. The speed of work decreases, but the guarantee of strength increases.
The photo shows the back side of the torn tiles, which were just laid. The separation occurred along a layer of semi-dry mixture. Which indicates the reliability of the clutch.
And another positive property of laying tiles on a semi-dry screed is that moisture does not evaporate. There is no need to cover the screed with film. If at the last stage (after leveling the tiles) you also rinse the tiles and seams with water, this will further strengthen the semi-dry mixture. Moisture no longer enters the structure of the solution, but only improves the conditions for ripening.
Why do you need to know these, at first glance, “crazy technologies”?
The problem of durability of outdoor cladding has not been solved. Particularly for porcelain stoneware floors, where there are significant temperature fluctuations. Leading construction brands continue to look for solutions:
1. It is proposed to lay the tiles on the steps on a drainage mat and drainage solution:
Tiles on drainage mat.
- The same thing, but on the balcony. On top of everything else, the tiles are laid on “bumps” . The last solution should not be shown to smart tilers under any circumstances - they will get very excited. Thinking about the correct 60% or 90% filling will begin.
What is the conclusion from the information collected?
“Tiles on the prance” can be considered as a possible method of tiled cladding on the street. The result can only be known in 10 years. But if such attempts are not made today, then in 10 years everything will remain at the level of theory.
The specific design must be technologically higher than is customary today in the East, but cheaper than Quick-Mix.
Prepare a semi-dry mixture based on washed screenings (waste from crushing crushed stone). This composition is well selected by manufacturers of paving slabs. And in different parts of the world.
- Composition cement: screening 1:3 (not less). Better 1:2.
- Instead of watering with cement paste, use class C2 tile adhesive on the tiles.
- And watering the base with cement laitance is a very good solution.