Uneven surfaces, cracks, chips, holes, etc. - something that almost every person who has started renovation work in a room faces. In order to correct such defects, putty is used. It is suitable for leveling both concrete and wooden surfaces, both drywall and plastered walls. However, there is one caveat: in order for the work to be done efficiently, you must not make a mistake in choosing the type of putty and its correct quantity. It is especially important to make the correct calculation if the repairs are carried out not by the owner, but by hired workers.
How to calculate?
To calculate the exact amount of material that will be used during the repair process, do the following:
- find out the exact area of the room;
- measure the height and sum of the lengths of the walls;
- calculate the thickness of the walls, taking into account all surface defects;
- determine the thickness and number of putty layers (taking into account surface defects).
It is important to remember that the amount of mixture used also depends on other less important factors. It often happens that a fairly large amount of unclaimed material remains while working on tools; the composition hardens before it is used
It also happens the other way around: you have to redo some areas during the work, which will require additional mixture. In general, inevitable losses can reach up to 10% of the total amount of material, so it is worth taking this point into account when preparing the mixture. In addition, the putty consumption rates also depend on the base of the mixture used.
The basis can be:
- cement;
- plaster;
- adhesive.
Plaster
Before starting work, you need to understand how plaster differs from putty.
Both are used for finishing and serve for leveling, but there are important differences between them:
- Plaster, unlike putty, is used in much larger volumes. With the help of putty, as a rule, only small defects are masked, while plaster levels out larger damaged areas.
- The price of putty is significantly higher than the price of plaster due to differences in composition.
To calculate the required amount of putty for a plastered surface, you need to take into account climatic indicators and carry out work only in the range specified by the manufacturer.
Taking into account all the recommendations given by the manufacturer, per sq. m area usually requires one and a half kilograms of putty. However, the thickness of the applied layer and the quality of the wall, as well as the area to be puttied, should be taken into account.
For walls without significant defects, it is enough to apply a layer of 1 mm (the calculation is equal to a kilogram per 1 m2) of starting putty and 0.5 mm (0.6 kg/m2) of finishing putty. An increase in layer thickness entails a proportional increase in flow rate. Don’t forget about re-puttying, which is best included in the calculation before starting work. Consumption is approximately equal to one kilogram per square meter.
Drywall
Currently, drywall is one of the most common options for finishing a room. There is an opinion that there is no need to putty the coating if there is drywall, because it already has a flat surface. However, this opinion is wrong. Be sure to use a finishing putty to prevent paint or adhesive from soaking into the drywall.
The exact consumption directly depends on the surface area that needs to be treated. There is a little trick that allows you to reduce the amount of mixture: before puttying, the sheets of drywall need to be treated with a primer.
The amount of material for work depends on the composition.
The consumption table looks like this:
- When mixing cement-based putty, the calculation is 1.2 kg per square meter.
- The polymer-based mixture is consumed less than others - only 0.6 kg per 1 m2, however this type of composition is the most expensive.
- Gypsum mixture is the most economical option. Consumption is 1 kg per 1 m2.
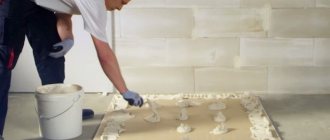
Drywall is quite easy to work with. If the sheets were initially installed correctly, then you can do without careful alignment. Before the finishing coat, it will be necessary to properly seal the fastening joints and screw heads.
Other surfaces
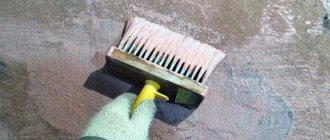
When working on other types of surfaces, the walls must be coated with a layer of primer. In general, the amount of putty for concrete differs only slightly from the costs for the above types of surfaces. For a smooth concrete wall, you will need a first layer no thicker than 5 mm, and a second layer no thicker than 3 mm. Taking into account the thickness of the layer, the consumption per square meter is calculated.
You can also putty wood surfaces. But the layer of applied material should not exceed 2 mm.
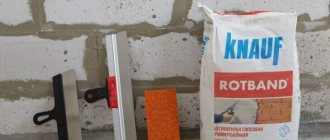
Properties and applications of Sheetrock APJC
Sheetrock APJC mixture is used for continuous filling of walls and ceilings, as well as for structuring surfaces. It can also be used to seal cracks, seams between sheets of drywall, gluing sheets of drywall to each other, and finishing corners. However, experts do not recommend using Sheetrock for these purposes, due to its relatively high cost compared to the KnaufUniflott composition, specifically intended for these purposes.
As mentioned above, the surface treated with Shitrok putty immediately looks dense and smooth, in contrast to the surface treated with its closest analogue, Vetonit. The drying time of the last layer of Shitrok is 3-4 hours, and with subsequent careful sanding it is possible to obtain an almost ideal surface. The grinding process is a little more difficult compared to Vetonit; it is recommended to use abrasive paper with a grain size of no more than No. 180.
When applying continuous putty, it is recommended to apply the composition in at least two layers on a regular surface and in at least three layers on a surface covered with fiberglass. In this case, it is not allowed to apply Sheetrock over Vetonit or any other less dense putty, since the layers are small in thickness, and when sanding there is a risk of the formation of “gaps”. You should also observe the temperature regime - the temperature in the room where Shitrok is used must be at least 13 degrees Celsius.
Ready-made putties
Everything that was discussed above applied to mixtures that are sold in dry form. But there are materials that do not need this. They can be used immediately after purchase. They are very diverse in their composition. It is thanks to this that they are much more economical in terms of consumption than their dry counterparts. But the high cost is their main drawback.
Calculating the putty consumption per 1 m2 is not an easy task even for a professional. Many different factors affecting the amount of material must be taken into account. Any calculations are purely individual; there are no general indicators that can be used with confidence. Therefore, it is advisable to include an error. Only then will indicators be obtained that will be close to the actual consumption of putty per square meter. And the answer will be received: how much material is needed.
Sheetrock, Knauf “Rotband paste” or Vetonit LR - which is better
The materials listed are the most popular among finishers. But there are features that must be taken into account when choosing. Thus, Shitrok creates the smoothest surface even without sanding. After sanding, it must be primed, but without sanding this step can be skipped. Shitrok is ideal for painting, the most durable.
Primer must be applied on top of Vetonit; this material is best suited for subsequent wallpapering. The disadvantage of Vetonit in comparison with Shitrok is less plasticity, but the color is perfectly white. Another disadvantage of Vetonit is the need for dilution, while Shitrok is a ready-made mass.
What influences the amount of material
Putty mixtures, in terms of their required quantity, largely depend on the moment reflecting their purpose. The task of finishing putties is to perform the final finishing, so they are applied in a thin layer. Hence, the costs for such putties are not high.
Depending on the type of surface that is being processed, the difference can be seen in the standards. Walls require more putty, ceilings require less.
The type of surface being finished also plays a role. When a wall contains many depressions, cracks, and numerous height differences, then, naturally, such a surface will require significantly more leveling and, accordingly, a larger volume of material than with an even coating with no defects or with their insignificant presence.
Such factors can be seen more clearly from photos of putty consumption provided in illustrated reference books or on the Internet, on construction sites.
Product range
There are three products available in the Ready-Mixed category. Among them, users can find one that is useful in a given situation, depending on the purpose of use.
Danogips SuperFinish
Putty of the Superfinish category is a finishing material for the final finishing of the wall. Super finish is a ready-made polymer mass with high adhesion quality, which is suitable for the following surfaces:
- fiberglass;
- drywall;
- painted walls.
The product is not suitable for sealing large cracks and seams. Superfinish gives a perfectly smooth surface.
Danogips Fill&Finish Light
Fill Light putty is also used as a finishing coat. It is suitable for laminating the base and smoothing out small defects. The composition contains latex, which gives the material special strength, scratch resistance, and moisture resistance.
Danogips ProSpray
Danogypsum Pro spray is a multifunctional (universal) product that is suitable for every surface and any type of finish. They can be used to make decorative surfaces, be used to seal seams and cracks, and level the joints of brickwork.
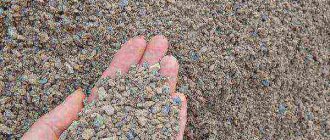
Vetonit
To obtain this product, ingredients such as sand, cement, limestone, polymer glue and mineral additives are used. The main advantages of the material are its environmental friendliness and moisture resistance. The product can be used for finishing internal surfaces where the air temperature is above 10 degrees. The process of hardening and strengthening ends after 7 days. The maximum layer thickness will be 2 – 10 mm. If putty is applied in a layer of 1 mm, its consumption per 1 m2 will be 1.2 kg.
The video describes the consumption of putty per 1 m2 of plaster:
The puttying process is a very important point when performing repair work.
Here it is very important to choose the right composition and calculate its consumption. In this case, it is necessary to take into account many factors, so sometimes the consumption indicated on the packaging differs from the amount of mixture that was actually used
Maybe,
Where are they used?
Cement putty is considered universal; it is suitable for work inside and outside the building. Despite its good technical characteristics, which provide reliable protection on the surface from natural factors, the composition is safe, so it can be safely used for indoor work.
The same properties allow you to choose a composition for rooms with a dry microclimate and a humid one. A bathroom, toilet, or kitchen can be covered with a putty composition; moisture will not destroy the coating.
If we talk about the base on which it is better to apply it, then we note concrete, brick and plaster layer.
Cement putty is considered universal; it is suitable for work inside and outside the building.
How much does putty cost?
Having found out all the nuances of calculating mixture consumption, we came to one of the main questions: how much does a square meter of putty cost? Below are the average prices for some types of putties from the most popular manufacturers (per package). Dividing the weight by the number of kg, we find the desired value.
| Starting, Prospectors | Finish (Finland) | Gypsum Foundation | Oil-adhesive Vetonit (St. Petersburg) |
| RUR 325 (20 kg) | 565 rub. (25 kg) | 290 rub. (20 kg) | RUR 430 (25 kg) |
In order to calculate how much putty costs for finishing the walls in a room, you need to know the area of the walls and the average consumption rate of the mixture, as well as its average cost. Using the instructions above, making such a calculation is easy and simple.
These gaps, reinforced with serpyanka mesh (reinforcement moisture-resistant material made from lavsan fibers), seams are well sealed with starting gypsum putty, having previously primed all seams, corners, and screw locations. Ready-made putties already contain binders (glue, oils, plasticizers), so their consumption will be greater than the consumption of dry mixtures. However, dry mixtures diluted with water tend to set faster: some of them will remain on the walls of the container, on the spatula, and the consumption will be slightly higher than expected.
The starting material is one that contains gypsum. And they use it when leveling the walls inside the house. If you apply putties on a flat surface, the material consumption will be 0.8-1 kg per m3.
To treat 1 m2 of surface, you need to stock up on 0.4-0.5 kg of gypsum material. All calculations must be carried out taking into account the presented standards. As a result, it turns out that up to 20% of the material should be added to the declared values. This is quite enough for even an inexperienced person to complete the finishing work without fear that the putty will run out at the wrong moment. When choosing a suitable mixture, the technical condition of the working base must be taken into account.
It is not recommended to neglect the application technology and speed up the polymerization process of the composition. With significant deviations in technology, partial or complete peeling of the applied composition is possible.
Depending on layer thickness
You definitely need to pay attention to this aspect, because it affects the quality of the putty layer. Its value should not be less than 0.2 mm. If you apply the solution more than once, then you should start applying the second layer only after the previous one has completely dried.
The thickness also depends on the material from which the putty was made.
For example, if it is an alkyd, this indicator should not be more than 0.4 mm. Also remember about the optimal number of layers - it’s good if it is three or less.
Even if the walls are very uneven, experts do not recommend puttingty in four or five passes.
As an alternative, you can use quick-hardening polyester putties; it is not necessary to work with it in several approaches; it is enough to maintain the optimal thickness of 0.2 mm.
Tips for preparing a putty mixture solution
Preparing the composition is not difficult if you know how. Initially, we advise you to read the manufacturer's recommendations indicated on the label. The correct proportions of water and powder are indicated there.
If you take dry powder, do not dilute it more than necessary. Make small portions so that it does not have time to dry out. The dried composition is not suitable for further use, even after dilution with water, because it has lost its properties.
If the composition begins to dry out a little, it is also not recommended to dilute it with water, or mix it. Continue finishing until no more mortar is applied.
- How to sew curtain tape to a curtain or tulle: step-by-step instructions, 80 best photos
- How to choose an orthopedic mattress for a bed according to all the rules
- How to choose lamps for a suspended ceiling - suitable types, recommendations for their installation and selection tips (120 photos)
Ready-made mixtures contain more binders than dry mixtures. And they are more expensive, but easier to apply. Powder options are more economical, but can quickly dry out on the walls of the container and spatula, so they will not be used until the “last drop,” which is not pleasant if you overdo it with the diluted amount.
How much starting putty is needed per 1 m2?
On a pre-plastered wall without strong defects, the composition is applied with a size of no more than 10 mm, and the maximum thickness of all layers is 30 mm. This is done to prevent peeling and cracking.
Smooth walls are covered with a layer of 1 mm, which requires 0.8-0.9 kg. per 1 m2. If there are many irregularities, then the volume will increase up to 10 times.
How much finishing putty is needed per 1 m2?
For shallow surface defects on drywall or when finally leveling walls and ceilings, you can use polymer or gypsum putty with final sanding.
Gypsum always has a small consumption, because it completes the preparation of the wall and is applied in a thin layer. Approximate requirement for façade mortar: 0.5-1 kg. per 1m2, with an application thickness of 0.5-1mm.
Polymer is used to create a perfectly even last layer. Approximate costs per 1 m2 are 0.5-0.6 kg, with a layer of 0.15 - 1.00 mm.
How much universal putty is needed per 1 m2?
Universal putty is an average between façade and starting putty. And the consumption of putty per 1 m2 of wall is much higher, approximately 0.9-1 kg.
Example
Let's say you need to treat four walls 2.7 m high in a room whose dimensions are 4.5 by 5.3 meters.
For this you are going to use a universal Fugenfüller compound, gypsum type. The average layer thickness will be 4.5 mm. We multiply the figure 0.9 by 4.5 (coating thickness) - we get 4.05 kg. We calculate the area of the room - we multiply both size indicators separately by the height, plus both numbers, the result is 52, 92. Now we multiply this value by 4.05 - 214.326 kg. This is the required size.
All that remains is to calculate how many bags are needed - for example, if one bag weighs 25 kg, then dividing the sum of 214.326 by this number will result in 9 bags.
First you need to figure out which putty consumption for the wall needs to be calculated. If the external walls are to be finished with putty, then the material consumption will be greater than for internal work.
For example, Vetonit putty is used for finishing rooms with a high level of importance, and is applied with a middle layer. The same layer is applied to adhesive putty, because it involves applying a special adhesive paint, which is thick in structure and adds extra volume to the surface.
Gypsum and finishing types of putty are designed to be applied to surfaces in a thin layer; their consumption will be significantly less than that of other types of material.
The approximate consumption of putty per 1m2, according to the material, is given below.
- Vetonit putty, its consumption per 1 m2 is 1 kg 200 g;
- Adhesive putty is used on walls with a consumption of up to 500g per 1m2;
- Finishing putty consumption for walls per 1m2 is 450g;
- Gypsum putty is used on walls with a consumption of 900 g per 1 m2.
Before you begin finishing the walls outside and inside, you need to take into account the material on which the putty is applied. The starting external putty is applied to cinder block, brick, wood (with mesh) and covers significant flaws and unevenness in the walls.
How much putty needs to be applied to the walls and in how many layers depends directly on the walls of the building. On the outside of a brick and cinder block building, the first, rough layer is applied using starting putty. Starter putty can be applied up to 2-3 layers. Then the starting layer of putty is covered with finishing putty once or twice, depending on the type of putty.
It turns out that the first layer of such putty serves as a start, and the second layer of putty completes the finishing of the wall and serves as the finish. Acrylic and silicone putty is applied in one layer, it is quite convenient to use, in the sense that the required volume can be laid out in one layer.
In order to purchase the required amount of putty for repairs, you need to know the exact area of the room along the perimeter and height of the walls. The expense can be made manually, knowing the following data: the sum of the length of all walls in the room, the height of the walls, the length and height of the wall above and below the door. The width and length of the walls, the thickness of the material applied taking into account unevenness are taken into account.
Calculation using the formula:
- Multiply the rate of material consumption per 1 m2 by the thickness of the irregularities, which we took into account in the calculations;
- Add up the length of all the walls in the room;
- Multiply the length of the wall above the doorway by the height of this section, and add the sum of the height of the walls to the indicator;
- To action 1 add the amount of action 2. Multiply the resulting amount by the number of action 3.
How much putty is needed for a facade?
It is advantageous to buy façade mixture in bags, since façade putty is distributed at high consumption. According to standards, facade putty consumption per 1 meter of area is approximately 1.5-1.8 kg.
The following features correspond to the use of this type of material:
- thermal effects;
- increased moisture resistance;
- significant irregularities and defects.
There must be an exact balance between need and material.
The consumption of the façade mixture is determined as follows:
- The area of the outer side of the walls is calculated. Lp is calculated taking into account protrusions and recesses on the verticals.
- The outer layer can reach approximately 1-2 centimeters. This thickness should be multiplied by the area obtained in the first point.
- Add the resulting numbers in the first and second paragraphs and multiply by the rate of distribution of the building mixture per area of 1 square.
The layer of façade putty should not be too thick, as peeling or deformation may occur. But even a thin layer will not correct the situation. Often this application leads to cracking and peeling of the surface.
How accurately the amount of material is determined depends on the builder’s ability to efficiently distribute resources. For such large-scale work, it is better to buy the product in dry form rather than ready-made.
Putty of different packaging (30 photos)
Reference data
For further calculations we will need reference data. As we remember, each composition has its own rate of putty consumption per 1 m2.
What are the specific meanings?
- For average consumption is 1.2 - 1.5 kg/m2. We are talking about the minimum thickness of the layer, determined by the size of the filler (sand): it is clear that as the thickness of the coating increases, the consumption will increase.
- Vetonit putties are consumed in an amount of approximately 1.2 kg/m2.
- are sold completely ready for use. In addition, both the base and the filler have a fairly high density. This inevitably affects costs: the consumption rate of putty per 1 m2 is about 3 kilograms.
- Dry adhesive putty, on the contrary, has a low density and is applied in an extremely thin layer. Its consumption for concrete and cement plaster is 0.45 kg/m2 for walls and 0.6 kg/m2 for ceilings. For wooden surfaces (including plywood, hardboard and chipboard) the consumption is slightly less: 0.33 and 0.5 kg/m2, respectively.
The photo shows Alinex adhesive finishing putty.
- Universal gypsum putty is applied to a smooth plaster base or drywall in a layer about a millimeter thick. With such a thickness, it will require about 0.9 kilograms per square.
- Gypsum-based finishing putties differ from universal putties in the finer grinding of gypsum. When puttying “to scratch” (that is, with the thinnest possible layer), the layer thickness is no more than half a millimeter, the consumption is about 0.45 kg/m2.
- Shitrok finishing putties with vinyl reinforcing fibers are supplied ready-made, which in general should increase their consumption. However, the fine fraction and, accordingly, the minimum layer thickness during application makes it quite modest: 1 kg/m2.
Varieties
Astringent
- What types of binders are used to prepare finishing putties?
When finishing mineral bases the following are used:
- Dry mixtures based on gypsum and cement binders;
- Ready-made acrylic putty.
Acrylic resins are used as a binder.
Less popular are adhesive, latex, epoxy, polyvinyl acetate and polyurethane finishing materials.
Putty on an oil-adhesive basis.
- Which binder is more suitable for facades and wet rooms?
Cement. Facade acrylic putties also serve well in high humidity, but the relatively high price (from 50 rubles per kilogram) forces them to be used mainly for minor repairs.
The external slopes of the window are finished with acrylic putty.
A caveat is worth making here. Gypsum binder mixtures cannot be used for exterior decoration of houses, but they are often used when renovating bathrooms, kitchens and toilets.
Their use in rooms with high humidity has only a couple of limitations:
For trouble-free operation of the finish, the room must be ventilated. Constant dampness is detrimental to any mineral-based finishing materials - simply because mineral filler is a tasty food for fungus;
The hood in the ventilation duct can provide effective ventilation of the room.
The final finish must be waterproof. It can be used, for example, tiles with epoxy or silicone grout, thick vinyl wallpaper or waterproofing paint.
Rubber waterproofing paint made in Sevastopol.
- Which putty to choose for finishing walls and ceilings in living rooms?
Unconditionally plaster. It is extremely easy to apply and sand, inexpensive (about 300 rubles for a 25-kilogram bag) and compatible with any mineral bases.
Dry gypsum mixture from Knauf.
Color
- How practical is white finishing putty?
In my opinion, this is an excellent solution that allows you to significantly reduce the time and money spent on finishing. White color allows you to get by with one or two layers of paint, while a dark base often shows through even after 3-4 layers. White acrylic putty is very convenient for repairing minor cosmetic defects in flows and whitewashed walls.
White color will make painting much easier.
Shrinkage
- What are the benefits of non-shrink finishing putty?
The fact that when it dries it does not crack, regardless of the thickness of the layer. In addition, the seams between finishing elements (for example, when leveling walls with plasterboard) can be filled in one pass.
Conventional gypsum mixtures require at least double filling: during the first pass, the joint cavity is filled, and during the second, the reinforcing material (sickle or fiberglass) is covered.
Non-shrinking gypsum mixture.
Basic recommendations
The preparation of putty from a dry mixture should be carried out strictly according to the recommendations prescribed in the instructions:
- add water in the indicated proportions;
- mix thoroughly;
- take breaks so that the composition has time to brew.
You can only use clean containers, preventing foreign objects, dirt and other bulk materials from getting into the solution. A poor quality mixture can affect the final result. If it is necessary to eliminate significant defects, it is recommended to achieve a thicker consistency of the composition. In this case, the material consumption will be slightly higher.
The consumption of putty mixture is also determined by the quality of its application. Builders often use putty uneconomically and overspend, which is extremely undesirable.
In general, DIY repairs are much cheaper than hiring professionals. In this case, purchasing additional packaging will not be an invoice. However, overspending is fraught with a decrease in the quality of work performed.
It is possible to prevent such an outcome by adhering to the basic principles that construction company specialists observe with particular care: perform the work in order and in accordance with technology.
Subscribe to our channel in Yandex Zen:
Post Views: View statistics 264
Basic calculation
The main material for initial putty is gypsum. The rate of putty consumption per 1 m² on perfectly smooth walls is 0.9 kg/m². If we see obvious curvature, the norm will be 8 kg/m2
It is important to understand that the initial finishing should be carried out in a thickness of no more than ten millimeters to avoid destruction. The consumption of finishing putty per 1 m² of plaster, which is applied at the end, is up to 1 kg/m², the layer is thin up to one millimeter
Please note that before purchasing, you need to familiarize yourself with the details and nuances from the manufacturer. It is quite possible that all the information of interest will be in the instructions, where you can find the properties of the product and its application. Be sure to review before use.
In order not to make mistakes in the calculations, it is necessary to carry out the following calculations: multiply the numbers from the packaging by the surface area and add another ten percent. The sequence looks like:
- find out the data of the factory box;
- We calculate the area of the walls (multiplying the length by the width);
- add 10% to the result obtained.
In the specialized literature, as well as on the Internet on various resources, there are tables with types of putties and their average consumption per 1 m². One more rule should be observed: the initial and final putties should be applied in a ratio of approximately 2:1. If the initial value is 6 mm, then the finishing value will be 3 mm.
Undoubtedly, the option with ready-made putty is very convenient. This is a diluted substance that does not require additional effort to dilute. It is worth noting that this mixture is better than all kinds of other dry building materials, being a good way to avoid cracking.
Final processing
The consumption of finishing putty from different manufacturers is approximately the same, but in an effort to reduce it, craftsmen use vinyl-based compounds more often than others. Finishing wall putty is a composition with which the process of applying a minimum layer of mixture to a prepared, flat surface is carried out. Such putties are needed to make walls smooth and are usually used when preparing walls for painting.
You can calculate the amount of finishing putty if you know what composition will be used to create the final layer on the surface. Most mixtures are applied in a layer of no more than 1 mm, but there are also compositions that are applied to the surface in a layer not reaching a thickness of 1 mm. They are produced and sold in the form of dry mixtures or ready-made formulations, packaged in buckets of various sizes.
Using a special tool, a “shitrok,” allows you to create a smooth, even layer, the thickness of which does not exceed 0.2-0.8 mm.
Finishing putty is an elastic homogenized mixture, which includes binding elements no larger than 0.3 mm in size. When applied correctly, the consumption of finishing putty per 1 sq.m. walls will be from 0.8 to 1.2 kg of the finished mixture. The consumption of a composition prepared from dry matter may be slightly higher, since water is added to it independently, and the consistency of the solution depends on the amount of liquid.
You can more accurately calculate the amount of composition consumed by multiplying the standards established by the manufacturer by the total area of the surface being treated, and adding 15% of the standard to the result obtained.
A small amount of water will not make the mixture sufficiently elastic; the solution on the surface of the wall with the base putty applied to it will dry too quickly, since the water from it is absorbed into the previous layer of finishing material. Video instructions will help you make the correct calculations, based on the characteristics of the base of the walls and the finishing mixtures themselves.
By correctly calculating the consumption of finishing putty, you can control the thickness of the applied layer. Using more material indicates exceeding the permissible coating thickness.
Putty consumption rates
Information on optimal standards is provided by the manufacturer. Typically, the consumption is indicated based on a layer thickness of 1 cm for starting putties and 1 mm for finishing putties.
The starting putty is applied to a pre-plastered wall that has no significant defects. The thickness of each layer should not exceed 10 mm, and the total thickness should not exceed 30 mm, otherwise the coating may crack and peel off.
For a smooth wall, a layer 1 mm thick is sufficient - then 0.8-0.9 kg/m2 will be required, but if the cracks and irregularities are significant (up to 10 mm), the consumption can increase tenfold.
As an example, consider the Knauf NR Start starting putty. Recommended consumption for a layer thickness of 10 mm is up to 10 kg/m2. A standard 30 kg bag is therefore enough for 3-3.5 m2 of surface. The surface turns out to be quite grainy (grain size up to 1.3 mm) and dries up to 7 days. After this, you can begin final processing.
Finishing putty is a homogenized mixture with a very fine structure (up to 0.3 mm), intended for final leveling of walls.
It is applied in a thin layer so that it does not float when wet and does not crack as it dries. The optimal layer thickness is 0.5-1 mm.
The consumption for putties from different companies is almost the same. For example, for Vetonit Finish Plus putty with a layer thickness of 1 mm, the recommended consumption is approximately 1.2 kg/m2, a 25 kg bag should be enough for 20-25 m2.
Finished putty - the so-called putty surface. It is used to level ceilings, relatively smooth walls or minor damage to carpentry. The additives included in its composition (plasticizers and vinyl substances) significantly improve the quality of the surface.
These mixtures have a number of advantages over dry formulations:
- ready to work immediately;
- dry faster;
- do not crack after drying.
One of the most economical is the Sheetrock mixture: with a layer thickness of 1 mm, only 0.5 kg/m2 is needed. The consumption of other putties (Knauf, Pufas) can range from 1.5 to 1.7 kg/m2.
Peculiarities
The most important feature of Sheetrock putty is its versatility. It can be used both for finishing and for decoration if it contains, for example, marble chips or vinyl filler.
Craftsmen appreciate this mixture for its long service life. The polymers contained in the finished mixture make the material reliable and protect the putty from cracking.
This brand of putty can be purchased ready-made or you can buy a dry mixture to prepare the solution yourself. The difference will be in price (the first option is more expensive) and in the shelf life of the product (it is longer for the dry mixture).
The ready-made mixture can also save the master’s time, which would have been spent on kneading the dry mixture, which helps reduce finishing time.
The next important feature of this putty is the drying speed of the material and the conditions under which it can be worked. Depending on the thickness of the layer and the temperature in the room, the drying time of the material will be from three to five hours
After which the walls are sanded. This putty can be used in rooms with high humidity. The quality of the coating will be achieved by the high degree of adhesion of the putty.
One of the advantages of Sheetrock products is its resistance to cold. This brand of putty can withstand up to ten cycles of freezing and thawing, provided the mixture is defrosted only at room temperature.
The versatility of using putty adds to its advantages. It is used to level walls for painting, and it is also perfect for any type of wallpaper.
Ways to solve the problem
Most often, finishers use the time-tested method of laying a trial plot. Select one small part of the wall, which is conventionally taken as the standard. A full range of work is carried out on it. Primer, plaster and subsequent putty. The exact consumption of materials per 1 m2 is calculated and compared with the data provided by a standard calculator.
By drawing up a simple mathematical proportion, an error coefficient is derived, which is subsequently used to work on leveling all other walls. This method makes it possible not to exceed an error of 2-3% in further calculations. Thus, the consumption of plaster becomes more predictable when purchasing materials.
If the wall plastering is done efficiently, the calculation of putty consumption should practically not differ from the data provided by the calculator. Increased consumption of putty occurs mainly when the walls are not leveled enough and it is necessary to level this out with putty. In such cases, the consumption of putty per 1 m2 can reach the most unexpected levels.
The optimal option is when plastering and putty are carried out by one person or one team. Then responsibility for the final result cannot be shifted to the mistakes of the previous performer. This is another point, already organizational, but the consumption of plaster also depends on it.
High-quality leveling of walls and preparing them for further painting or wallpapering is the most important condition for performing all subsequent stages of construction or repair.
It is very difficult to stick wallpaper well to uneven walls: the edges of the sheets may not match due to the geometric curvature of the surface. The lighting in the room will be uneven, as the bumps and depressions will create shadows. Highlights and partial shadows form on the ceilings. Installation of furniture and wall equipment becomes more difficult.
In addition, the consumption of plaster is significantly affected by the selection and quality of materials used in the work, and their storage conditions.
For example, cement mixtures give, although small, but noticeable shrinkage, a greater number of roughnesses and cellular formations on the surface of the wall. This, in turn, leads to the fact that the consumption of putty per 1 m2 of plaster will be overestimated.
Such mixtures are used mainly for plastering the external walls of buildings, as well as in rooms with high humidity. There is absolutely no need to cover the walls of interior and living spaces with cement plaster.
Plasters based on gypsum, chalk or lime are smoother and do not shrink. They are produced in the form of dry mixtures and are convenient for transportation. They are well polished and processed to the required condition. In addition, many of the manufacturing companies add synthetic plasticizers to such mixtures, which makes these mixtures more elastic and resistant to mechanical damage.
Using tables or a calculator to calculate the consumption of plaster and putty when using such materials is more justified and appropriate.
And finally, the consumption of plaster directly depends on the professionalism of the craftsmen performing the work.
A scrupulous customer should always remember that a good master is more expensive than a beginner. But in the end, betting on skill always pays off handsomely. Confirmation of this will be the consumption of plaster.
Preparatory work
In order to get a high-quality result at the end of the putty work, you need to carefully prepare for this process.
- Preparation of the base (ceiling or wall):
- must be durable;
- dry;
- clean;
- without peeling.
It is necessary to remove dirt, plaque, plaster residues, wallpaper, looseness, oily inclusions, etc.
The wall or ceiling should not be wet or frozen. Before puttying, be sure to dry the base.
- Preparation of the workplace. Since the process of leveling walls is a dusty and dirty job, it is necessary:
- cover the floors with newspapers or special film,
- It is better to remove decorative items and furniture; if this is not possible, then also cover with film (it is sold in the store).
- Preparing tools. You will need a drill with a special attachment (or something you will use to mix the dry mixture manually), spatulas, a container for the composition and a level (if you have to work on leveling the walls/ceiling). All equipment must be clean and dry.
The tool must be washed thoroughly immediately after use, otherwise it may only end up in the trash.
- Preparation of the building mixture (read more about this below).
Subtleties of application
Tools for applying Sheetrock putty:
- spatulas (width – 12.20-25 cm);
- Sheetrock Joint Tape;
- sponge;
- sandpaper.
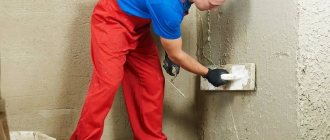
The finishing coat must be applied to a prepared surface that has been previously treated with putty for leveling, plastered or sanded. The surface should not have unevenness or cracks. The first layer of putty must be applied to completely dry plaster, otherwise mold will form over time. A small amount of putty is scooped onto a wide spatula, then spread in an even layer over the entire area of the wall or ceiling.
Next, you need to let the first layer dry. The next layer is applied only on the completely dry previous layer. To obtain an ideal surface condition, experts recommend grinding each layer of putty using an abrasive mesh with a grain size of 180-240 units. The maximum number of layers is 3-4. After all work, the treated area is cleared of dirt and dust.
If necessary, you can dilute the composition with water, but you need to add it in 50 ml portions, followed by stirring. A large amount of water will only worsen the adhesion of the solution to the surface, but the resulting result will not give the desired effect. It is prohibited to mix the putty mixture with other materials. The frozen putty mixture must be stirred to a uniform consistency without lumps or air bubbles.
To prevent the applied finishing material on the walls from freezing, it is recommended to cover it with a thermal insulation coating (foam plastic). At the end of finishing, the putty remaining in the container must be tightly closed with a lid. Store at room temperature.
Sealing seams with Sheetrock putty:
- seal the seams (trowel width – 12 cm);
- install a tape in the center that needs to be pressed into the wall;
- excess putty mixture must be removed and applied in a thin layer to the tape;
- puttying screw heads;
- after the first layer has completely hardened, you can proceed to the second. For this, a spatula 20 centimeters wide is used;
- give time for the second layer of putty to dry;
- Apply a thin layer of finishing putty (trowel 25 cm wide). The same layer is applied to the screws;
- If necessary, smooth the seams with a sponge soaked in water.
Finishing internal corners:
- cover all sides of the tape material with putty;
- the tape is folded lengthwise in the middle, pressed against the corner;
- get rid of excess mixture and apply a thin layer to the tape;
- give time to harden;
- applying a second layer to one side;
- drying;
- applying 3 layers on the second side;
- give time to dry.
Finishing external corners:
- fixing a metal corner profile;
- applying three layers of putty with pre-drying. The width of the second layer should be 10-15 cm larger than the previous one (the width of the spatula is 25 cm), the third layer should slightly extend beyond the previous one.
Texturing:
- Apply Sheetrck putty to the required area with a paint brush;
- texturing technology using special tools (paint roller, sponge and paper);
- Drying time is about 24 hours at air humidity of 50% and temperature + 18 degrees.
Sanding putty:
- To carry out the sanding work you will need a sponge and sandpaper.
- A sponge moistened with water is wrapped in paper. This is necessary to ensure that less dust is generated.
- Sanding is carried out with light movements along the resulting irregularities.