When are gypsum board adhesives used?
Gluing drywall is permissible if at least one of the following conditions is present:
- The slopes need to be trimmed. Their lining is also important.
- Connection to the ceiling. But here it is worth remembering about self-tapping screws.
- Irregularities on the walls up to 5 centimeters.
- Small rooms in which it is important to save literally every free centimeter of space.
The frameless method should be abandoned if we are talking about serious areas and uneven areas. Otherwise, gypsum board glue will not help.
Frame method of wall mounting
This technology involves installation on a pre-prepared structure assembled from either wooden beams or galvanized profiles.
The frame type of assembly has the following strengths:
- Accurate geometry of surfaces and the room as a whole. With the right approach, the walls will be perfectly smooth and the junction angles will be perpendicular (unless the project provides for another option).
- Ability to implement complex design solutions.
- The frame method allows you to hide communications without additional preparation of the walls.
- Possibility of laying a thermal insulation layer.
There are 2 significant disadvantages: the frame takes up free space in the room, on average 3-4 cm per side; requires additional costs (profile, fasteners) and time for assembly.
What adhesive for drywall should I choose?
Many craftsmen prefer to experiment when gluing drywall. It includes the use of starting and finishing putties together with tile adhesive based on a cement binder. Other repairmen learn to connect sheets even with metal and wood bases, using polyurethane gypsum glue for this purpose.
| Material | Descriptions |
| Primer composition | The walls are treated with it before starting work to strengthen the base and better adhesion to the leveling sheets. |
| Glue | As a rule, a gypsum adhesive composition is selected. The main criteria that you need to pay attention to when purchasing will be discussed below. |
| Plasterboard sheets | They are selected depending on the purpose - wall (12.5 mm) or ceiling (9.5 mm). Products are also available in regular (gray on the front side), moisture-resistant (green) or fire-resistant (pink). |
On the modern market it is easy to find a fairly reliable and inexpensive variety of compositions made from gypsum and more. Regular and moisture-resistant cardboard go well with dry gypsum mixtures.
They can be used in different places indoors, with the exception of swimming pools and other similar objects. Including when creating a good partition.
Putty can be chosen in the case of a flat base. The main thing is to figure out in advance how to glue drywall to the wall.
A deep-penetrating composition is required in the case of priming highly absorbent materials. A smooth, hard surface requires primers with acrylic resins and quartz sand. Drywall sits on glue quite quickly.
Is it possible to attach GVL directly to a concrete wall without profiles?
The concrete wall does not have large differences, so the gypsum boards are fixed with glue.
Gypsum compositions are not used for concrete due to the incompatibility of the included elements. It is better to use acrylic glue.
Before gluing the material, the surface is prepared. Namely:
- notches are made on the concrete for greater adhesion;
- The entire wall is covered with primer.
After that:
- The gypsum board sheet is laid on flat wooden slats in front of the fixation point.
- Glue is applied to it with a notched trowel.
- The sheet is lifted, a piece of drywall is placed under it so that there is a gap from the floor and it is leveled.
- Press it to the base and secure it with a “mop” until the glue dries.
- The second sheet is fixed after the first has dried.
If the wall has a curvature, beacons made of wooden slats or cut strips of plasterboard are used.
How to glue drywall to brick, gas and foam concrete
In this case, several main options remain relevant:
- Dowel-nails.
- Self-tapping screws.
- Polyurethane foam.
- Glue installation.
Humidity and the curvature of the walls affect how to glue drywall in a particular case.
Concrete walls are in most cases smooth, so they use compounds with a cement base. Special notches are created on the wall to increase adhesion. Fixation of the gypsum board occurs after the primer is distributed over the surface. Any master can easily figure out how to glue and how to attach materials.
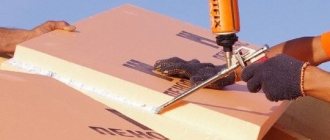
Another thing is on a brick wall. The facing material is usually fixed to the wall with your own hands using polyurethane foam. It is easier to control the amount of product applied if you choose a “snake” pattern. You should wait a few minutes after applying the first coat. When expansion begins, a sheet is applied to the wall. All that remains is to level it out. The mounting adhesive holds everything in place well.
Foam for installing polystyrene foam will be an excellent solution in the case of brick walls. Its main difference from its analogues is that it is not such a serious expansion. Anyone can figure out how to glue drywall.
The process of gluing drywall
How to glue sheets with your own hands so that the work turns out to be of high quality? First of all, the surface is carefully prepared, that is, defective sides are eliminated as much as possible using:
- Foam (mounting foam);
- Gypsum-based solution;
- Mixtures of sand and cement with water.
After this, dust deposits are removed and priming is carried out in one or two passes. The sheets are prepared, cut somewhere, and additional holes are made somewhere for switches and sockets.
- When starting to knead the adhesive mass, remember that it hardens quite quickly, which is why you should do it in relatively small portions.
- Excess material is removed and the surface on the floor is freed up so that you can work without interference. If the walls look perfect, then you should use a spatula with teeth ranging in size from eight to ten millimeters.
- This makes it possible to use glue economically and to carry out gluing evenly and efficiently.
- Having laid the blocks, a sheet is placed on top, face down, after which it must be quickly and carefully coated with glue. Now he is rising. Electrical wires are threaded into the holes made.
- All that's left to do is to put it on it and press it. Now testing is carried out for the formation of uneven places, which are corrected by lightly tapping with your hands.
If there are uneven places up to two centimeters on the walls, then the glue will need to be applied using a different technology - in the form of individual dots. At the same time, material consumption increases, that is, more mixture will be required.
Basically, it is worth adhering to a simple rule - you do not need to make excessively large intervals without adhesive mass in order to ensure proper reliability of the structure.
What adhesive compositions are required for concrete floors?
It is rare to find monolithic walls with obvious and serious deficiencies that occupy a significant area. The sticker does not cause problems in most cases.
You can choose any variety of materials to install drywall with glue:
- Polyurethane foam.
- Polyurethane adhesive.
- Cement adhesive that helps to adhere tiles.
- Acrylic types of putties.
- Plaster putties.
- Gypsum adhesive, which is originally intended for plasterboard sheets.
For all these compositions, the size of the seams will be minimal, while the connection between the materials will be as strong as possible. Installing drywall with glue is as simple as possible.
“Betonkontakt” also has good characteristics. This is a type of primer with acrylic polymers and quartz filler. The presence of special additives and additives in the composition guarantees reliable adhesion to any surfaces, even the most difficult and dusty ones. You can glue drywall with another type of glue.
Step-by-step instructions for attaching gypsum boards to an uneven surface
The method of attaching gypsum plasterboard to a concrete or brick wall, the unevenness of which varies from 5 to 20 mm, is practically no different from that described above. You just need to change the adhesive composition and the method of applying it.
- For large uneven areas, use Perflix. Apply it in the form of cakes with a diameter of 1-1.5 cm at a distance of 30-35 cm from each other, first along the perimeter, and then in the center of the plasterboard.
- Once the adhesive has been applied, lift the canvas and place it on the pads on the floor. Align the plasterboard along the lines drawn on the ceiling and floor.
- There should be no glue in the seam; remove excess glue with a spatula.
Wall cladding with plasterboard
The existing large bumps and depressions on the surface of the walls greatly complicate the procedure for gluing gypsum boards. To get the job done efficiently, use beacons.
- Cut the sheet into strips 10 cm wide and glue them with Perflix vertically. There should be a gap of 40-60 cm between them.
- Align the stripes - they should be placed in the same plane. This will form a frame on the wall, let it dry. It is at this stage that the wall is leveled.
- After 2-3 days, when the frame has dried and reliable adhesion to the wall surface has been achieved, attach the gypsum board to it using Fugenfüller or liquid nails.
Glue on drywall
The smaller the distance between the strips, the more reliable the gluing will be.
When the base is polystyrene foam
These materials are great for protecting your home from the cold. But they require the use of drywall to prevent the appearance of defects during operation. The use of polystyrene foam is selected from 5 and even 10% of the usable area of the room. An additional metal profile with plasterboard increases the loss of space. Therefore, gypsum board becomes the optimal solution.
Acrylic putties and adhesive foam do an excellent job with their assigned functions. The instructions help you figure out how to properly glue the material.
To the ceiling on the frame
Unlike wall plasterboard, ceiling plasterboard is thinner, its thickness is 8.5 cm. This is due to relatively lower impact loads and the need to lighten the structure. Wall sheets can be used, but only if there is no other option, since in this case the sheathing will have to be strengthened.
Sequencing:
- Marking. A laser or water level on the walls marks the perimeter of the ceiling.
Either its lowest point or the value determined by the project is taken as the basis. Also at this stage it is better to note the location of the frame profile and the fastening of the brackets. The guides are installed on two opposite walls. The frame profile should be located at the edges of each sheet and two strips in the middle (when installed lengthwise). The jumpers are marked perpendicularly, every 50 cm, taking into account the size of the sheets (so that they fall on the joint). - Installation of guides. Guides (UD-27) are attached according to the markings. Fixation to the walls is done with dowel screws.
- Installation of frame profile. The CD-60 profile is inserted into the guides and secured to them with small metal screws.
It is additionally fixed to the ceiling with strip brackets in increments of 30 cm. - Jumpers. They are made from CD-60 (sawed at the joints with a grinder or scissors), attached to the main profile with small metal screws (flea).
If you plan to hang a chandelier for it, you need to prepare a place in advance. You can install a mortgage from a wooden block, but it is better to make everything from metal, especially since there are ready-made solutions for such situations on sale.
GCL and gypsum fiber
Sometimes it is necessary to glue plasterboard onto sheets of almost the same similar material. Such bases are completely devoid of irregularities, therefore it is permissible to use any compositions in which the seam size is minimal. For example, silicone sealants, liquid nails or acrylic putties are suitable for gluing drywall.
You can replace them with gypsum and cement compounds for gluing, or foam. But when using them, the thickness of the seam increases, and the free space of the room decreases.
Existing installation techniques
To fix gypsum boards without lathing, you can use the following methods:
- Gluing the material to the rough base using mastic or glue. To do this, a solution is applied at the place of curvature, and it is also applied in a checkerboard pattern to the sheet. The plasterboard is applied to the wall, aligned and pressed, additionally installing a holder. There should be 10-12 mm from the floor to the gypsum board. To do this, you can put a small piece of sheathing material.
- The use of self-tapping screws and foam rubber. This method is used for large curvatures. Fixation is carried out as follows:
- make markings for the material;
- 9-12 holes are drilled on the gypsum board. Their location is transferred to the rough base;
- pieces of foam rubber are glued near these holes on the back side;
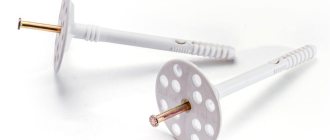
- The sleeve from the dowel-nail (plastic part) is inserted into the base according to the marks;
- The sheet is screwed to the wall with self-tapping screws.
- Combined method. Beacons are installed from below and above. The middle is filled with glue.
All methods of fixing a sheet to a rough base are applicable for various surface unevennesses.
Technology for installing gypsum boards on glue
You can begin installation immediately after selecting the optimal type of composition. There are three main methods that are suitable for those who are interested in how to glue drywall to a wall.
Option 1 for flat walls
The method is combined with surfaces that do not have significant differences. Usually we are talking about plastered or concrete surfaces on which gypsum boards are installed.
- Wall chipping.
- Cables are secured in the resulting grooves.
- Create holes where sockets and switches will be placed.
- The primer is distributed over a surface that is completely free of dust. If the composition does not stick and the wall is painted, you can solve the problem of gluing drywall by choosing options with quartz fillers.
- All that remains is to cut holes to accommodate the electrical equipment.
Tools
Speaking about the set of tools required for work, it is worth noting that it is much smaller when choosing the option of gluing gypsum cardboard to wall panels.
For frame plantings, much more is required.
So, you will need:
- Drill to speed up the process of kneading the adhesive mass with a mixing attachment. Thanks to it, the composition is much more homogeneous with better characteristics. Although, if you wish, you can even do without it;
- Long construction level. You can also use the rule, which is very convenient to control the overall plane along with how straight the sheets are located along the walls or ceiling;
- The list is completed by a small-sized trowel (spatula), adapted for uniform application of the adhesive mass to the surface, along with a well-cleaned container where the adhesive mass will be mixed.
Additional tips from experts
Puttying of joints usually begins 2-3 days after applying the adhesive composition to the surface. Then you can be completely sure that everything is dry. For leveling, putty is used, then reinforcing tapes are pressed into it.
After drying, use another layer of putty on the joints and on protruding nail heads, if they were used during the repair. Anyone can quickly figure out how to properly glue drywall to a wall.
Gaps along the floor may be sealed with any type of suitable sealant. Finishing work begins only when the joints are completely dry.
It is better to complete all work with electrical wiring before the walls are leveled. What kind of work will be done is decided separately in each case.
Drywall is prohibited from being glued to lime plaster. It is easy to find the answer to the question of whether this can be done.
The sheets are glued only to a supporting base, which does not crumble or delaminate.
Dowels increase strength if necessary. Use 4-5 pieces per slab. This is the right kind of proportions.
It is better to gluing when the ambient temperature reaches +10 degrees.
Drywall is left in the room for two to three days in advance. This makes acclimatization easier. Materials will be fixed better, even if the base is uneven.
GKL sheets are cut in such a way that there is a gap of about 10 mm at the bottom. Then the material will have additional protection from absorbing moisture from the floor.
Even on the same wall, you can use several different mounting options at the same time. Leveling walls with plasterboard using glue is the simplest process possible.
What else should you pay attention to?
It is recommended to dilute the glue for 30-40 minutes of work, because all residues tend to harden. After dilution, the material is allowed to sit for at least 3-5 minutes. If you apply everything at once, the quality of work will be much worse. The question of how to glue drywall together deserves special consideration.
There are mixtures that are prepared independently. Here's an example recipe:
- 4 parts plaster.
- A solution of any construction adhesive. 1 liter of water is used per 25 grams of dry mixture.
- 1 part sawdust.
It takes an hour to an hour and a half to glue the plasterboard onto the wall, depending on the thickness. Then everything comes together after a while.
Special compositions for gypsum boards and surfaces with small differences in height are produced in finished form. They are packaged in cans of up to 0.75 liters. One of these is enough for about 15 square meters of room area. The gluing proceeds evenly.
When preparing it yourself, sometimes you use PVA glue and gypsum putty. The main thing is that its consistency is similar to sour cream. Mix such plasterboard compositions until completely homogeneous. Leave it for at least five minutes before use.
The most popular material is definitely the series from the manufacturer KNAUF. They are easy to use for interior finishing of most surfaces. When glued, this material provides many advantages. For example, use for uneven surfaces and the presence of only environmentally friendly components.
You can often find the type of adhesive composition “VOLMA-Montazh”. This is gypsum, with which mineral additives are used. The manufacturer guarantees adhesion and simplified preparation of the final product. Finishing walls with plasterboard will delight you for a long time.
Step-by-step instructions for gluing drywall to a flat wall
GKL adhere perfectly to surfaces whose unevenness is no more than 4 mm. Drywall is attached to such bases as follows:
- Start finishing from the corner.
- Make the solution according to the instructions on the package (Fugenfüller putty is most often used). Do not dilute a lot of adhesive at once, as it has a short shelf life.
- Apply glue to the gypsum board along the perimeter (along the edges) using a notched trowel. Make one or two stripes in the middle of the sheet. The application must be continuous if you plan to subsequently hang shelves on the wall. The glue should not come out at the joint.
- Place 2-3 pads on the floor along the wall, which will provide a 10 mm gap between the floor and the edge of the gypsum board. The support should not be solid, since air access is necessary for the adhesive to dry.
- Lift the plasterboard and press it against the wall, placing it on the spacers. It will be more convenient to take the sheet if it lies on the floor on 2-3 wooden blocks.
- Using a fist or mallet, align the gypsum board vertically, using the lines previously drawn on the floor as a guide.
- Install all the sheets in the room in a similar manner. Periodically check the evenness of the gypsum boards relative to each other using the rule. The seams should be tight and even.
- Don't forget about the holes for sockets and switches.
- The adhesive composition dries in approximately 3-4 days. After the glue has completely dried, remove the spacers and seal the cracks with sealant.
Installing drywall on the wall using glue
If gypsum board is used to level a wooden wall, then nails with wide heads can be used.
Safety regulations
Despite the fact that it would seem that there may be threats during ordinary tile laying, they still exist.
Let's study the basic rules that need to be followed:
- Protect the skin of your hands and face - such substances contain many chemical elements. When dry mixtures are mixed with water, alkali is formed. In case of contact with human skin, there is a risk of burns.
- Use a respirator - dust emanating from dry mixtures can enter the respiratory tract, which can also cause permanent harm to a person.
- Wear glasses - if dust and grains of chemical elements get on the mucous membranes of your eyes, they can cause burns.
If dust does get in somewhere, follow these instructions:
- Rinse the area where the pollen has landed. If you find deep damage, immediately seek medical help from specialists.
- If you swallow dust, you should immediately leave the room for fresh air and try to cough. Be sure to rinse your nose.
If you start to feel unwell or experience pain in your lungs, immediately call an ambulance and seek help from specialists.
