- Manual wall chaser
- Marking walls and preparing them for work
Aerated concrete has already firmly occupied its niche in the building materials market. More and more people are purchasing this material in order to quickly and efficiently build their own comfortable and energy-efficient home. As in other buildings, according to the project, electrical wiring is installed in aerated concrete houses, which can be laid hidden here. In the course of this publication, the reader will get a complete understanding of how to tap aerated concrete for wiring, and how to do it correctly.
How and how to cut aerated concrete for wiring
Aerated concrete is a fairly soft but durable material that is easy to process, which means it is quite easy to lay communications in it even with the use of hand tools. It is better to use special-purpose tools, for example, a wall chaser or a hammerless drill. Grooving aerated concrete is usually carried out according to the same principle as when working with walls made of other materials. So, the grooves must be positioned strictly horizontally or vertically.
- Why do you need to cut aerated concrete?
- Requirements, norms and rules
- Types of wall chasers for aerated concrete
- Equipment for cutting aerated concrete
- Electric wall chaser
- Manual wall chaser
- How to use a manual wall chaser on aerated concrete. Video
- DIY wall chaser
- Manual
- Electric
- Step-by-step instructions for gating
- Possible errors and useful tips
Using a hammer drill and grinder in repairs
First you need to determine where in the room the sockets will be located. After this, you should mark the path along which you want to lay the electrical wire. After marking the walls, you need to take a hammer drill and drill holes strictly along the line. The step between them should be from 1 to 2 cm.
When the holes are ready, they should be connected. To do this, the hammer drill must be switched to a special mode called “hammer”. Partitions between 2 holes are best removed by holding the tool at an angle of 90°C.
In the work, you can use a drill or a special wedge-shaped tool that works on the impact principle.
Having chosen to apply grooves using a hammer drill, you need to remember a number of disadvantages of this method. Among them the following are worth mentioning:
You can replace the traditional method by choosing to groove with a grinder equipped with a diamond blade. This method will produce good quality edges. First, you need to make 1 furrow along the marking. Then, stepping back 3 cm from it, make a second furrow. After this, you need to take a hammer drill, switch it to a “hammer” and remove the material that is between the previously outlined grooves.
The result will be grooves with fairly high-quality edges, but with an uneven surface. It can damage the insulation of the electrical wire. In addition, this method has several other disadvantages, the main one being a large amount of construction dust.
Basic Rules
Strict adherence to safety measures, which includes the following rules:
Scheme of correct and incorrect wall scraping
- work can only be carried out with working power tools;
- Before gating, it is necessary to check the treated surfaces for the presence of connected electrical wiring;
- availability of protective devices for the respiratory system, eyes and hands - glasses, respirator and gloves;
- stable support when working at upper levels.
The parameters for laying the grooves require maintaining the following parameters:
- the width and depth of the grooves laid should not exceed 25 mm;
- channels in the walls are laid only in the vertical or horizontal direction;
- the length of one groove should be no more than 3 m;
- You can cut a wall at a distance of at least 150 mm from walls, doors, windows and at least 400 mm from gas pipelines;
- aerated concrete is a fragile material, it is advisable to strengthen it with reinforcement every 2 rows (and in the case of laying large blocks - each row).
Preparing for work:
- Careful design and marking of treated surfaces.
- Isolation of other rooms from dust, which will be released abundantly during work.
- Availability of a specific electrical wiring project in the house.
- Preparing a set of necessary tools and accessories.
After studying the safety measures, the rules for repairs or construction, you can sit down to do the calculations. It is necessary to take into account that you need to purchase aerated concrete 10-15% more than the calculated quantity, taking into account its cutting during laying and possible damage. Before deciding to purchase tools, you need to familiarize yourself with the features of working with aerated concrete.
Aerated concrete can be tapped manually or mechanically.
Non-autoclaved gas block combines high strength and low density. Thanks to this, not only the construction of houses made of aerated concrete blocks, but also the laying of internal utility networks in them is accelerated and cheaper.
Through drilling, milling or gating of gas blocks is carried out without extra effort with a minimum set of simple tools.
Wiring in aerated concrete is laid in grooves, which are cut with electric wall chasers and cutters. The advantage of aerated concrete blocks is the ability to cut such grooves with your own hands, without the presence of expensive electrical equipment.
Cutting grooves in aerated concrete for wiring is possible with a manual wall chaser. This inexpensive tool, compared to its electric counterpart, does not require much effort or skill from the master. Consecutive longitudinal cuts from the surface of the aerated block lead to the formation of an even channel of rectangular cross-section.
The advantages of aerated concrete blocks have made this building material a leader in popularity among private and large developers. The production of aerated concrete has become one of the most promising areas of the construction industry in Russia and the CIS countries, including Kazakhstan and Uzbekistan.
What structures are prohibited from ditching?
If you familiarize yourself with the groove technology and prepare the appropriate tools, you may think that grooves can be laid in any place where it is convenient for the owner. In fact, there are strict rules for carrying out the work. It is necessary to comply with the conditions set out in SNiP 3.05.06-85.
To better understand what restrictions exist, it is worth understanding what kind of walls there are in a brick or panel house. As you know, load-bearing structures are highly durable. They can be external or internal. In the first case, it is allowed to make grooves, in the second - not. If you obtain permission from the controlling municipal authority, then the work is permitted.
You cannot make grooves in the floor of a panel house. When it is necessary to install wires, then a place is provided for them in the concrete screed. The ceiling can be tapped only in one case - in a straight line to the lighting fixture. Do not make grooves near pipes.
Attention! If the apartment has reinforced concrete partitions, it is not recommended to make grooves in them, as this will lead to cracking of the monolith. Only grooves of extremely shallow depth are made, provided that the reinforcing rods are not affected.
In wooden walls, to hide the wires, the walls are sawn to the required depth. This process is complex, so they prefer to place the wires outside. There are no grooves in plasterboard walls. The wires are laid between the profiles.
Making a wall chaser for aerated concrete blocks yourself
Technology for drilling a concrete wall without a hammer drill
How to make a brick wall from plaster
How to properly paint a plastered wall with water-based paint
Source
Types of wall chasers for aerated concrete walls
After laying communications into the grooves, the excavation is sealed with ordinary mortar. And the smoother the grooves in aerated concrete are, the less mixture will be needed for repairs, and the more accurate the work will be.
Note. Autoclaved aerated concrete blocks have good geometry; their walls are smooth and require a minimal layer of putty for leveling. Due to carelessly made grooves, this advantage can be lost.
Of course, you can use a hammer drill, a grinder, or a hammer and chisel. But all these devices create a significant shock or vibration effect on the surface, which can result in chips and cracks.
How to disguise grooves with wiring
Work on laying hidden channels is usually carried out before applying plaster, so that after wiring the communications, the entire surface of the wall can be leveled for applying the finishing coating. But if the wiring is replaced after the rough finishing of the walls, you need to act carefully so that the grooves do not turn a spot repair into a major one.
The smoothest channels are made using a grinder or wall chaser, but if you work only with a hammer drill or chisel, you won’t be able to avoid chips
The simplest option for treating canals is gypsum plaster. It must be applied after the grooves have been cleaned of dust and primed, and all the wires have been installed according to the diagram.
To reduce shrinkage, it is recommended to moisten the wall near the grooves with water. Then you need to prepare a thick solution of gypsum plaster mixture and fill the channel using a spatula/trowel.
Image gallery
Photo from
Step 1: Developing a fine tool
Step 2: Priming the bottom and walls of the groove
Step 3: Fastening the wiring in the prepared grooves
Step 4: Seal the grooves with laid wiring
To prevent the plaster layer from collapsing over time and sagging, you can use a special mesh for reinforcement. Then smooth the mixture perpendicular to the groove (working the vertical groove from bottom to top) and remove excess solution with a smoothing iron.
Strobe in aerated concrete
Cellular concrete, even of durable grades, is a rather fragile building material. It must be processed in compliance with special rules. This also applies to cutting aerated concrete. Otherwise, the gas block may crack or even break apart. Often this does not happen immediately, but during the operation of the house, when constant static loads will act on aerated concrete blocks with channels cut into them.
Such requirements relate to the depth and width of grooves in aerated concrete, as well as their location relative to the edges of aerated concrete blocks. The length of channels for electrical networks and pipelines also has safety limits.
To quickly groove a wall near the ceiling, use stable stands. It can be a stepladder, but it is difficult to put strong emphasis on it.
Open the windows to allow fresh air into the room, regardless of the amount of dust generated. Safety glasses and a respirator mask will also help protect yourself.
After you have grooved the wall for the wiring, and have not yet completed the finishing work, mark with a pencil the distances from the corners of the walls and ceiling to the grooves. Take a photo that will show you where to lay the cables in the future. This is useful, for example, if you need to drive a nail into the wall, which should not get into the laid wires.
Security measures
When carrying out gating, it is important to follow all safety precautions:
- Start by wearing protective clothing. Be sure to wear gloves, goggles, a hat and headphones. At first it’s unusual to work in all this, but you get used to it quickly. And when the protection saves you from getting injured, which will happen sooner or later, you feel genuine respect for it.
- If a vacuum cleaner is used in conjunction with a wall chaser, you do not need to wear a respirator. Otherwise, there is no way to do without it, since a large amount of dust rises into the air.
- When replacing old wiring with new wiring, it is necessary to de-energize all wires running in the working wall. You don't have to remove the old wires as long as they stay out of the way and don't get in the way.
Grooving grooves in aerated concrete
For aerated block walls, the simplest and most effective way to install hidden utility lines is gating. The grooves made in the wall must ensure reliable installation of electrical wiring or plumbing without compromising the strength and stability of the structure. When planning a routing, several mandatory requirements must be met:
- grooves must be laid only in a vertical or horizontal direction, diagonal laying is not allowed;
- the length of the channel should be no more than 3 m;
- the width and depth of the grooves must ensure tight laying of the cable or pipe, without unnecessary gaps, and their size should not exceed 25 mm;
- the distance of the channels from doors, windows, ceilings must be at least 15 cm.
Before starting work, you need to develop a plan for routing hidden communications taking into account the specified requirements, mark it for gating on the walls and save the plan for repairs if necessary.
In addition to hidden communication wiring, gating is also performed when installing walls made of aerated concrete blocks to install an armored belt between the tiers of the wall. These works are mandatory, so when building a house made of aerated concrete it is impossible to do without gating, and its implementation requires special tools.
Requirements, norms and rules
Before you start gating walls made of aerated concrete, you need to familiarize yourself with the basic rules and restrictions. For example, the grooves should have a maximum depth and width of 25 mm. The length of the route cannot be more than 3 m. Before depicting a new wiring diagram for electrical communications, you should retreat 150 mm from the openings and walls.
When there is a gas pipeline in the room, the distance from it should be 400 mm. If gating is carried out for inter-row reinforcement, it should be taken into account that aerated concrete is a rather fragile material, which means that grooves for laying metal rods should be made in the blocks every two rows.
Shooting brick walls
If we are talking about laying wiring in a house where finishing work has not yet been carried out, then usually grooves are not made on brick walls. A flat cable with conductors of the required cross-section is fixed over the wall, which is then covered with plaster. Usually it has a thickness of at least 3 cm, which is more than enough for laying 3*2.5 or 3*4 cables. Large ones are rarely used anyway.
It’s easier to make fines in brick
If for some reason you are not satisfied with this option or want to lay cables in a corrugated hose, gating the walls for wiring is done in exactly the same way, using the same tools as for concrete. The only difference is that cutting brick is easier and faster.
How to prevent dust from spreading
When you decide to do the repairs yourself, it is important to make sure that dust does not get into other rooms. The most affordable way is to generously wet the working surface with water. You can use a home vacuum cleaner to catch fine dust.
The following steps will help reduce the spread of dust:
After repairs, you need to do some cleaning. After the grooves are completely made, they should be cleaned. Dust can be swept away with a broom, and then passed through the channels with a vacuum cleaner. Before laying the electrical wire, the channel is primed. Then the cable is placed in it and carefully secured. The surface is sealed with plaster or plaster.
A wall chaser differs from a grinder in that the material is cut using 2 diamond wheels. They are insulated with a casing that covers the point of contact with the surface. Increasing or decreasing the degree of overlap makes it possible to make furrows of different depths.
The suction pipe of an industrial vacuum cleaner can be installed in a special outlet, which is made in a casing. As a result, the cuts and the bottom of the channel are smooth. The electrical cable will not be damaged during installation.
This tool has a disadvantage: it is the high cost of the equipment. You shouldn’t buy it for home use, but professional builders can’t do without it.
Types of wall chasers for aerated concrete
The density of the material is 4-5 times less than that of ordinary concrete, it is porous, and therefore does not require the use of powerful tools. It is quite possible to get by with manual options. Any model is suitable for cutting grooves with a power tool. When processing an aerated concrete block, the groove can be made with hand tools, which compare favorably with:
- Reasonable price;
- Ease of use;
- Light weight;
- The device is simple;
- Low noise and minimal dust formation;
- Durability;
- Does not depend on electricity, which can be crucial when building outside the city.
Processing gas silicate does not raise any questions. After the work is completed, the groove is covered with ordinary mortar, which allows you to hide all communications in the wall. For gating can be used:
- Hammer and also chisel;
- A hammer drill with a special attachment;
- Grinder (when using a disc on concrete).
But these devices lead to the formation of dust, vibration loads, a lot of noise, cracks or chips, and considerable labor and time costs. Purchasing a special electric wall chaser is not always advisable. It is suitable for professionals who carry out work on an ongoing basis.
In appearance, the electric tool resembles an ordinary grinder. To obtain a deep groove, the discs must enter the material to the required depth. Hand tools will require a lot of effort. Another advantage of the power tool is that you can connect a dust extractor to it. In this case, dust formation is reduced to zero.
How to choose a power tool?
When choosing a power tool, you need to pay attention to certain points:
- The largest and smallest distance for installing disks;
- Maximum permissible disc diameter;
- Number of revolutions of the unit.
It is not recommended to save on equipment and components for it. It is best to purchase a tool in a specialized store. Diamond blades perform well, but they can wear out over time. That is why it is best to choose high-quality devices.
Manual wall chaser
As already mentioned, for home use it is preferable to choose manual devices. They require a lot of effort and time, but have a competitive price. The manual mechanism is suitable exclusively for aerated concrete; it is not used for denser materials.
The mechanism is very simple. This is part of the pipe. Handles and an element for cutting are welded to it. A manual furrower can be used for:
- Work carried out for laying wiring (vertical type);
- Horizontal planes.
Possible errors and useful tips
- If you have a small amount of work to do, it is better to use a manual wall chaser, but it is important to take into account that on sale today there are single-, double-, multi-disc, milling tools at a price of 4,000 rubles. Aerated concrete does not require powerful equipment, since the density of this material is 5 times less than that of conventional concrete.
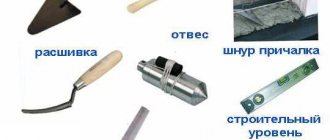
- In order to ensure perfect compliance of the new route with the horizontal and vertical, you should use a building level and plumb line. This will not only save money, but also eliminate possible problems.
It is better not to do the work by eye, as the groove may turn out to be uneven, which not only violates all the rules for carrying out such manipulations, but also increases the risk of overheating of the cable, which will be laid with creases. The grooves cannot be placed at an angle. They should only be made parallel to the walls and ceiling. Diagonal grooves are permissible only on attic floors.
Grilling walls made of aerated concrete and brick
Aerated concrete is very durable, so using a chisel and hammer to work with it can hardly be called a reasonable solution. To the question - how to groove a concrete wall - we can answer: it is best to use a wall chaser. It will allow you to cut a groove in the wall for wiring without dust, with minimal time and labor costs. But if you, like most ordinary owners, do not have such an opportunity, use a hammer drill or grinder.
Brick is the most convenient material for this work. The mixture of cement and sand, which is used to connect the elements of a brick wall, can be easily knocked out even with a chisel and a hammer, so arranging a horizontal groove does not take much time. But punching a vertical groove will be more difficult, since in this case you will have to work directly with the bricks.
DIY wall chaser
If the amount of work in front of you is quite small, you can even do without purchasing a manual wall chaser, which is also called a furrow maker. It will be based on a strong pipe. You can also do the electric tool yourself. To do this, you will need a regular angle grinder, which will only need to be slightly modified.
Manual
Depending on what you have on hand - fittings or pipe, you can make your own model of furrow maker. If we are talking about reinforcement, its diameter can be approximately 2 cm. The workpiece is sawn on one side with an angle grinder at an angle of 45 degrees. To do this, you should retreat approximately 6 cm from the end. The upper part is bent so as to form an angle. At this point we can assume that the furrower is ready.
If you want to modify the device, you should make sure you have a welding machine. The design will be more perfect. To do this, you should use two pieces of reinforcement, which are connected to each other in such a way that the elements resemble the letter T. The part that will act as a handle can be thicker, which will be convenient to use. The working part is a reinforcement 2 cm in diameter. The length of this segment can be approximately 10 cm.
Electric
Many home craftsmen believe that converting a grinder into a wall chaser is impractical. This is due to the fact that the productivity of the equipment will be low.
Attention! Before you start reworking, you should take into account that by adjusting the distance between the discs, you will not get the exact parameters of the furrow. The result is not always of high quality, unlike a factory wall chaser.
Another reason you shouldn’t do conversions from an angle grinder is that new equipment can be dangerous. From all this we can conclude that when doing small-scale work, you should not engage in alterations; it is better to use a mechanical method - a chisel and a hammer.
But if you still decide to upgrade your angle grinder, you need to install one disk on it in the usual way and tighten it with a nut. The second cutting element is installed on top of the first and tightened well. Instead of a nut, you can use a metal ring, with which you can adjust the width of the groove.
Another disadvantage of such equipment is the inability to provide high-quality dust removal. This worsens working conditions and makes them almost impossible if repairs have already been made in neighboring rooms. But home craftsmen found a way out of this situation. They make the casing from:
- bottles;
- plastic containers;
- metal sheets.
Another stage of work will be the installation of a tube for connecting a vacuum cleaner.
Step-by-step description of gating
When the new wiring diagram is drawn up, you can move on to the process itself. The drawing is transferred to the surface of the walls, the electricity is turned off, the door openings are tightly curtained to prevent the spread of dust, and gating begins.
- Based on the material from which the walls are made, a suitable tool is used to cut grooves.
- All grooves are subject to cleaning and deep penetration primer.
- Distribution boxes, sockets, switches are installed in designated places, connecting them with wires laid in a corrugated sleeve.
- All voids are covered with plaster or a mixture of cement and sand and leveled with the surface of the walls.
Before using a power tool, it is better to go over the plastered surface with a regular chisel and hammer.
You don’t need to have a professional tool at home to chisel walls. You can often get by with the equipment that a common man has in his home workshop. This is an angle grinder, a hammer drill, a screwdriver, a hammer and a chisel. Using them and your ingenuity, it is quite possible to solve the problem of how to groove a wall without a wall chaser.
Korovin Sergey Dmitrievich
Master of Architecture, graduated from Samara State University of Architecture and Civil Engineering. 11 years of experience in design and construction.
I can argue with the author about the horizontal and vertical grooves. In my house, already at the stage of casting the slabs, the distribution box was placed in the center of the slab in its upper part, and the grooves for the wiring were cast diagonally.
1. Not “grooves”, but channels in the thickness of the slab. 2. Not diagonally, but along the shortest path. 3. The channel in the floor slab is also located along the shortest path. On the chandelier and the opposite wall. Sorry I can't attach photos.
Holes are made with a puncher, I don’t know where..... Holes, ska!
Horizontal grooves in concrete load-bearing walls are not allowed! If you look at the channels cast in production in the slabs, these are only vertical channels and channels at 45 degrees. At one time I found a snip in which it was said that it seems that it is possible to groove horizontally, but it seems to be no more than 1 meter in length and the most obvious thing is that in no case should the reinforcement be damaged with any type of groove.
I completely agree with Denis. Read SNIP! Some people try to ditch the ceiling and floor, which is absolutely not allowed.
In such a wall you can cut a groove with your fingernail))
Techies call “holes” holes. A mechanic uses a chisel, and an electrician uses a scarpel.
Can several power cables be laid in a groove at once? It seems that this is impossible
“... Wiring is divided into 2 types: internal and external...” – You should at least open the PUE sometimes: “2.1.4. Electrical wiring is divided into the following types: 1. Open electrical wiring - laid along the surface of walls, ceilings, along trusses and other structural elements of buildings and structures, along supports, etc. With open electrical wiring, the following methods of laying wires and cables are used: directly on the surface of the walls , ceilings, etc., on strings, cables, rollers, insulators, in pipes, boxes, flexible metal sleeves, on trays, in electrical skirting boards and platbands, free suspension, etc. Open electrical wiring can be stationary, mobile and portable. 2. Hidden electrical wiring - laid inside the structural elements of buildings and structures (in walls, floors, foundations, ceilings), as well as over ceilings in floor preparation, directly under a removable floor, etc. For hidden electrical wiring, the following methods of laying wires and cables are used : in pipes, flexible metal hoses, boxes, closed channels and voids of building structures, in plastered grooves, under plaster, as well as embedded in building structures during their manufacture. 2.1.5. External electrical wiring is electrical wiring laid along the outer walls of buildings and structures, under canopies, etc., as well as between buildings on supports (no more than four spans up to 25 m long each) outside streets, roads, etc. External electrical wiring can be open and hidden. “You don’t even know the terms yourself, but you try to give advice! Yes, your “advice” is worthless!