- How to build a house from aerated concrete
- How to calculate the amount of building materials
- Foundation structure
- Base design
- Walling
- Reinforcement
- Construction of internal walls
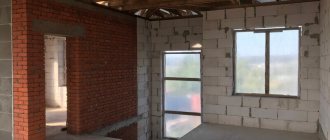
- Formation of window and door openings
- Interfloor ceilings
- Roof construction
- Finishing
- How quickly can you build a house from aerated concrete?
Cellular concrete has been increasingly used in construction in recent years, and of all varieties, aerated concrete is the most popular.
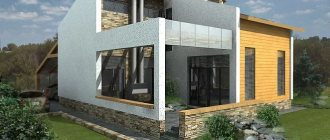
Its characteristics, cost and durability are optimal for the construction of private residential buildings and new high-rise buildings. Aerated concrete blocks are an inexpensive building material; construction from them is much cheaper than from other materials. A reliable house made of aerated concrete has been in use for decades, and the planned period of use is at least one hundred years. Buildings are strong and reliable if they are erected in accordance with norms, standards and technology.
How to build a house from aerated concrete
You can build from aerated blocks without having any experience in construction work. The main thing is to work according to instructions developed taking into account real experience. We provide all the necessary materials and recommendations, including if you contact us to develop a project.
To build a house from concrete blocks you will need the following building materials:
- gas blocks
- fittings of different diameters
- solutions
- foundation material
- joinery materials for rafters and formwork
- floor slabs
- roofing materials
Before starting work, you must prepare the following tools:
- measuring instruments - plumb line, level, square;
- saw;
- wall chaser;
- trowel and spatula;
- mallet or rubber mallet;
- brush;
- plane, grater;
- mixer for solution.
Features of the material
For the construction of houses, aerated concrete blocks are used, made from:
- cement mixtures,
- quartz sand,
- quicklime,
- water,
in which, during the hardening process, a chemical reaction of lime with a blowing agent occurs, releasing hydrogen.
Aluminum powder is usually used as a blowing agent . The released gas forms numerous pores inside the block. Thanks to its porous structure, the material acquires specific properties.
According to the manufacturing method, there are 2 main types of aerated concrete - autoclave and natural hardening. In the latter case, the formation of blocks occurs gradually, under natural conditions.
Autoclaved aerated concrete is baked in special ovens at high pressure and temperature, as a result of which it acquires high strength characteristics.
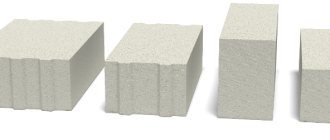
The blocks can be given different shapes: standard (rectangular), U-shaped or arched.
How to calculate the amount of building materials
The most important question: how many gas blocks are needed and what size they should be. The number of blocks depends on the thickness of the walls of the house. The thickness of the walls is determined when designing the house and depends on the climate, operating conditions, planned system and heating power. When designing, the thickness and density of the blocks and the type of exterior finishing are also taken into account. For the Moscow region, the recommended thickness of walls made of aerated blocks is 500 mm.
To find out the number of blocks, you need to determine the area of the walls, for which you multiply the length and height of each wall, subtract the area of door and window openings from the resulting result, and add up the areas of all load-bearing walls. The resulting wall area must be divided by the area of one block and multiplied by the coefficient of waste generated during construction. This waste is generated when blocks are cut.
If the house has a simple layout, then it is necessary to allocate at least 5 percent for waste, and for a complex shape - 15 percent. The result of the calculations is the number of blocks provided they are laid in one block. If the walls are built in two blocks, then the resulting result must be doubled. The number of blocks for interior partitions is calculated using the same principle.
To calculate the number of reinforcing bars, you need to multiply the length of the wall by the height and by 2, divide the resulting result by the height of the aerated concrete block multiplied by 4. So you need to calculate the amount of reinforcement for all walls.
The amount of mortar for masonry is determined based on the fact that 1 cubic meter of blocks requires 25 kg of glue.
Preparation of masonry mortar
To prepare YTONG® mortar for thin joint masonry, simple tools are required: an electric drill with a mixing blade installed, a plastic container for stirring the mortar and water.
Pour the required amount of water into a clean container in accordance with the instructions on the package.
Add the YTONG® dry mortar mixture and stir until smooth.
It is recommended to cover the entire bag of solution with water at once. This amount of ready-made mixture is enough to construct approximately 1.5 m3 of masonry aerated concrete blocks.
The consistency of the solution should be plastic, i.e. so that when applying the solution with a notched trowel, the grooves retain their shape and do not spread. At the same time, the solution should not be too thick.
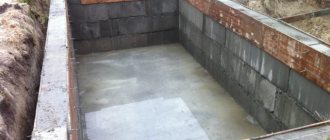
Base design
Aerated concrete is a porous and hygroscopic material, so it must be protected from moisture. It is believed that the optimal height of the plinth when building from aerated blocks is 500 mm for a soft blind area and 800 mm for a hard blind area. The soft blind area is made of tiles, the hard one is made of concrete.
Please note that the blind area needs to be done no earlier than a year after the completion of construction work - during this period the house will have time to settle.
Basement in a house made of aerated concrete
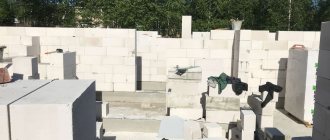
Walling
Aerated blocks are laid on a special glue or on a solution of sand and cement, and polyurethane foam is also used. The best option is glue. It allows you to form smooth and thin seams, which is important for the thermal conductivity of the walls. The first row of blocks is placed on the base and waterproofing layer using a sand-cement mixture - it allows you to level the surface and then carry out even laying.
The first blocks to be installed are in the corners of the building. A rope is pulled between the corner blocks to guide the row when laying the row. The first row of blocks should protrude 50 mm above the base. When laying gas blocks, they can be cut with a regular handsaw to obtain blocks of the desired size. The first row must be perfectly level, so it is necessary to check its level when laying each new block.
Laying gas silicate walls
You can proceed to laying the second row no earlier than 4 hours after laying the first. During this time, the sand-cement mixture will harden and the row will become strong. It is better to lay subsequent blocks using glue. Before applying the glue, the gas blocks are moistened with water. The glue is applied with a spatula or trowel and leveled with a notched trowel. Then a concrete block is placed on the layer of glue; to level the masonry, you can tap it with a rubber hammer.
The second row is laid offset relative to the first; the optimal block offset is 50 percent relative to the block of the previous row. This is called ligation and is necessary for the strength of the walls.
Set of tools for construction
Before you start building a house from aerated concrete with your own hands, you should prepare all the necessary tools and building materials. For each construction stage you will need your own set:
- cord for marking the trench, tape measure;
- shovels, crowbar, pickaxe necessary for excavation work;
- hacksaw for cutting blocks, dosing carriage with glue, scoops, trowels, grater, brush, polishing, building level, rubber hammer, corner. They are used when laying gas blocks;
- plastering spatula and float, cuttings, rustications, brushes, spatulas, buckets - used for plastering and finishing work;
- The wall chaser is designed for cutting grooves for laying fittings and wiring;
- electric milling machine is used for cutting deeper grooves;
- electric drill with a crown for drilling holes for switches and sockets.
Aerated concrete can be processed well with simple tools. As a result, using simple devices, you can quickly and efficiently lay the blocks yourself. You can also easily make decorative trim using a regular chisel.
Site marking
Before the start of construction work on the site, it is necessary to strew the access road with large crushed stone so that in the future there will be no problems with the delivery of building materials and special equipment. The site for the future home is cleared of unnecessary materials and debris.
A plan is drawn up taking into account the boundaries of neighboring plots, on which a house and places for outbuildings are outlined. Using a tape measure, pegs and a cord, the site for the construction of the building is marked. Pegs are driven into the ground at the corners of the perimeter, and a rope is stretched between them. Markings for the outer foundation of the house are made by stepping back from the stretched cord to the width of the future foundation, and stretching a rope parallel to it. To check the evenness of the perimeter, pull the cords diagonally.
Preparing the trenches
Before digging a trench, it is necessary to determine the type of soil at the site of the future house. The soil may be very rocky, which will make digging a trench difficult, or, conversely, sandy, in which case there is a risk of it crumbling. It is necessary to calculate to what depth and width the trench will be dug. If there are stumps or bushes with trees that interfere with construction, they are uprooted, or the upcoming construction is moved. Removing a large tree can be a very expensive and time-consuming undertaking.
Digging a trench
You can dig a trench yourself - with a shovel, or dig with an excavator. When soil falls to the bottom of the ditch, it is removed, since even when compacted it will remain loose. The depth of the trench depends on the level of freezing, the width is 70-80 cm, or it is equal to the width of the concrete base (a hole for a monolithic slab). If the soil is loose and crumbling occurs, then install boards. At the bottom of the trench, make a foundation cushion of sand, 15-20 cm thick, and compact it well.
Making the foundation
A strip or monolithic foundation is made for an aerated concrete house. The choice of the right foundation depends on the technical characteristics of the soil and financial capabilities. The work process can be divided into stages:
- we make formwork;
- we lay the fittings;
- pour concrete.
Installation of formwork
Formwork is a structure made of boards, panels, block elements for pouring concrete. There are two types: removable - dismantled after the solution dries, and non-removable - remains as additional thermal insulation.
Permanent formwork is erected from extruded polystyrene foam, wood concrete or expanded clay concrete. Each material has its own positive and negative properties.
Before laying the formwork blocks, waterproofing material or reinforced film is laid at the bottom of the trench. The work of laying the formwork is done from the corner, moving along the perimeter, laying them in a checkerboard pattern. If the blocks have connecting grooves, they should be on top. The evenness of the installation is checked by the tension of the cord and the level.
Laying the reinforcement
Before installing the first row of strip formwork, iron rods are tied into grooves inside it and secured together with wire. Vertical reinforcement bars are installed and attached to the horizontal ones. After the required height of the formwork has been built, the excess reinforcement is cut off.
Pouring concrete
It is better to pour concrete in dry and cool weather to avoid excessive waterlogging or evaporation of moisture from the solution. To prepare concrete mortar, it is necessary to use high-quality cement grades M400 or M500. Sand is used without any admixture of earth and clay, preferably river sand. The water must be clean, not chlorinated. Crushed stone is suitable for large fillers.
The ratio of cement to sand is 1:4, to crushed stone is 1:2, to water is 1:0.5. If wet sand is used, the amount of water is reduced.
At sub-zero temperatures, a plasticizer is added to prevent the solution from freezing. If you are building a small house, you can use a concrete mixer to mix the concrete, but for a larger area of pouring the foundation, it is better to use a ready-made concrete mixture. It must be ordered in such a volume that it is enough to fill the entire area at one time. The poured concrete must be processed with a vibrating rammer to remove voids and distribute the mixture evenly.
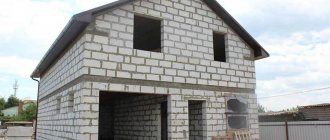
Building walls
The use of aerated concrete as a material for building walls allows one to achieve good strength and thermal protection of the building. The blocks are light and large in size, which allows you to build the walls of a house with an area of 150-200 m2 in just 1-1.5 months. Construction work can be divided into several stages:
- lay out the first row;
- put the 2nd and 3rd rows;
- preparation for window sills and windows;
- lintels for windows and window sills;
- interfloor armored belt.
Laying the first row
We remove debris, dust from the top of the foundation and lay waterproofing. We lay it along the entire perimeter and interior walls. It is better to lay the insulation not by joining, but by overlapping.
Cement mortar is used to lay out the first row, since the top of the foundation is not level enough. Using the mixture will help level out all the unevenness and lay the aerated concrete blocks more evenly.
The minimum thickness of the cement mortar layer is 1 cm, so it is necessary to use a level to determine the highest angle on the foundation. From there they begin laying gas blocks, constantly checking the level readings. They do this after each placed block.
The masonry is carried out along the entire perimeter of the house and along the walls inside it, not forgetting to adjust the evenness according to the level. It is convenient to use gas blocks with a tongue-and-groove fastening - they are easier to lay and carry. Also, for convenience and to save time, pallets with blocks are placed inside the building.
Making the 2nd and 3rd rows
Before laying a new row of gas blocks, the surface of the previous one must be polished. This is done for better adhesion of the glue between the blocks, since it is applied only 0.5-0.7 cm at a time.
The second row is laid from the corner with a shift of half a block (at least 8 cm) so that the seam from the laid gas blocks does not coincide with the previous rows. The glue is applied using a dosing carriage or a special ladle with teeth. The gas blocks are placed as close to each other as possible; if necessary, use a rubber hammer. The work must be done as quickly as possible, since the glue sets within 15 minutes. At sub-zero temperatures down to −15°C, glue with special additives is used.
The blocks of the third and subsequent rows are also placed. It is necessary to regularly monitor the evenness of the laid gas blocks. Having added aerated concrete to the location of future doors or windows, it is not always possible to lay them so that they do not protrude into the openings. This problem can be easily dealt with using a regular hacksaw with long teeth. For an even cut, a special corner is used.
Preparing walls for window sills and windows
Reinforcement of window openings should be done one row below the future window sill. This is necessary to strengthen the walls where the window opening will be. To do this, use a wall chaser to make 2 longitudinal grooves along the length of the wall. The furrows should be larger on each side by 30 cm of the width of the window. The reinforcement is laid and filled with cement mortar. Further installation of aerated concrete blocks is done with glue, in the required order, taking into account window and door openings.
We make lintels for windows and doors
It is necessary to install lintels over door and window openings to prevent wall collapse. You can do this in several ways:
- A simple option is to purchase ready-made ones.
- You can use U-shaped aerated concrete blocks. A support is made from boards above the door or window opening. The required number of U-shaped gas blocks are glued together and placed in the right place. Reinforcement is placed inside the blocks and filled with cement mortar.
- Simple aerated concrete blocks are glued together and 3 longitudinal grooves are made into them. They lay the reinforcement and fill it with a cement-sand mixture. Allow to dry for approximately 24 hours. Such lintels are placed on openings no wider than 1 meter and with the reinforcement facing down.
The gaps between the wall and the lintels are filled with gas blocks of the required size.
Interfloor armored belt
An armored belt is a layer of reinforced concrete poured between blocks. Necessary for imparting strength to the entire wall structure and installation of the Mauerlat.
Gas blocks 10 cm wide are placed along the edges of the external walls, forming formwork. Reinforcement is placed in the resulting space between the blocks and filled with mortar.
To attach the Mauerlat to the armored belt, reinforcement bars with threads cut into them are vertically concreted. The studs are placed at a distance of 1-1.5 m from each other.
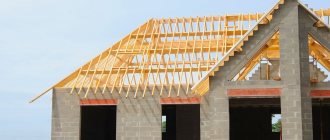
Roof
Waterproofing material is laid on the reinforced belt of the walls and the mauerlat (support beam) is laid. It is attached to the studs using nuts. At the corners of the structure, the support beams are fastened together with steel brackets. Tightening is done, that is, transverse beams are laid along the width of the building. Further along the length of the house, 2 rows of beams (beams) are attached so that they are at the same distance from each other and from the edges. So, for example, if the width of the house is 10 m, then this distance will be equal to 3.3 m.
Vertical wooden posts are attached to the beds using staples, corners or nails at a distance of 2-2.5 m. They are installed opposite each other on both sides. For better fastening, tie downs are placed on top of the posts parallel to the width of the roof. Then longitudinal beams are laid on wooden posts on both sides along the length of the roof - a purlin. They are needed to support the rafters.
The installation of the rafters begins from the edge of the roof, making an equal distance between them. Their lower part is attached to the mauerlat, and the top is attached to the rafter beam standing opposite. To ensure the strength of the entire attic structure, the rafters are fastened to purlins.
Before laying the roofing material, a sheathing is made. The roof is placed on it, doing it from right to left and from bottom to top. Each type of material requires its own fasteners.
Finishing work
Aerated concrete walls are lined with siding or sandwich panels on the outside. When installing them, it is necessary to leave a gap between the gas blocks and the finishing material. It is needed to remove moisture that can enter through various cracks.
Interior finishing of aerated concrete walls is carried out at a temperature not lower than +10°C. If there are chips, broken edges, or holes on the surface of the blocks, they are filled with masonry mixture. Protruding parts on the walls are rubbed with a sanding float.
Inside, aerated concrete walls are finished with plaster or plasterboard. After which they can be painted, wallpapered or covered with other material.
The walls are plastered with a special mixture for aerated blocks, which is diluted in accordance with the manufacturer’s instructions.
Reinforcement
Walls made of aerated concrete blocks need to be strengthened - for this purpose they make reinforcement. The masonry is reinforced with rods with a diameter of 6-8 mm. With a standard height of an aerated block of 250 mm, every fourth row is reinforced; with a different height, they are guided by the need for reinforcement every meter.
With a block thickness of less than 250 mm, the masonry can be reinforced with one rod; with a thickness from 250 to 500 mm, double reinforcement is required, and with a thickness of more than 500 mm, triple reinforcement is required.
To lay the reinforcement bars, you need to make grooves for them in aerated concrete. A wall chaser is used to cut one, two or three recesses in gas blocks laid in a row. The depth of the grooves is 2.5 cm; they are cut in the center of the block (if the thickness is less than 250 mm) or at a distance of 5 cm from the inner and outer sides of the block. Glue is poured into the resulting recesses and the reinforcement is laid with an overlap. Then the next row of blocks is laid.
Nowadays, metal reinforcement is increasingly being replaced with reinforcing tape. It is laid on top of the blocks without gating.
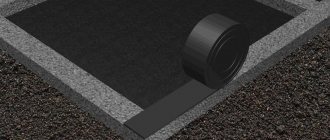
Foundation waterproofing
Before starting to lay walls, it is necessary to check the horizontalness of the foundation (slab, strip foundations), as well as, if necessary, leveling. The permissible deviation is 30 mm.
Before you begin laying walls, you should waterproof the foundation. Clean the surface of the foundation with a brush, lay down the rolled waterproofing material. The strips are connected with an overlap of at least 150 mm.
Take accurate measurements of the contours of future external walls in accordance with the project!
Formation of window and door openings
The row of aerated concrete under the window openings must be additionally reinforced, and the arch above the opening must also be correctly formed. To do this, it is better to use not metal corners, but special U-blocks - with a deep recess for reinforcement. Multi-row reinforcement is placed into the cavity of the U-block and filled with mortar.
U-block of aerated concrete to create a lintel over a window
Interfloor ceilings
In houses made of aerated concrete, monolithic or wooden floors are made. To build a wooden floor, an armored belt is formed from U-blocks, into which wooden beams are inserted 250 mm deep. You can take aerated concrete or reinforced concrete floor slabs - they do not require an armored belt, the slabs are simply laid between the rows.
Interfloor covering arrangement
Laying partitions
In accordance with the house design, we mark on the load-bearing wall a place for the future partition. The markings must be strictly perpendicular to the foundation.
In the place where the partition will be, a flexible connection made of stainless steel is inserted into the adhesive seam. The anchors are mounted at one end into the load-bearing wall, and at the other end into the seam of the partition.
Flexible masonry connections are secured in the seam with nails. The first row of blocks is placed on a cement-sand mortar.
During further laying, it is necessary to ensure that the mortar is laid across its entire width. Flexible masonry connections are inserted into every second row of load-bearing wall blocks.
Flexible masonry connections can be installed into the mortar layer without nails - by pressing.
Anchoring of an additionally erected partition. Flexible connections are attached to the supporting masonry with a dowel. To attach partitions to ceilings, flexible masonry connections or polyurethane foam are used.
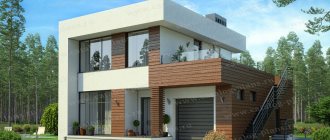
Finishing
Aerated concrete resists weathering well, but it is advisable to prevent wet aerated concrete from freezing - in this case it may crack. That is why it makes sense to clad the outside of a house with aerated concrete blocks. Also, the exterior decoration of the house increases its thermal protection.
Exterior finishing is most often done in the following ways:
- plastering;
- siding;
- installation of ventilated facades;
- facing with brick or decorative stone.
In the latter case, it is important to provide for strengthening the foundation, because the load on it increases significantly.
After the exterior finishing, they move on to the installation of communications and interior decoration of the house.
What is aerated concrete: characteristics, production technology
Aerated concrete, like other cellular concrete, has a porous structure, due to which it has characteristics that distinguish it from other building materials.
Aerated concrete blocks
Advantages of aerated concrete:
- Ease. Thanks to this, buildings made of aerated concrete do not require powerful foundations.
- Construction is carried out in a short time.
- Frost resistance.
- Fire safety.
- Durability.
- Resistant to mold and mildew.
- Noise insulation.
- Good thermal insulation characteristics.
- Environmentally friendly.
- Easy to process and install.
Along with the advantages, the material also has disadvantages:
- Poor flexural and compressive strength. This is an obstacle to the use of aerated concrete in the construction of buildings above 3 floors.
- Blocks absorb moisture. This drawback is eliminated with the help of finishing work.
- Difficulty installing fasteners. The solution is to use special fasteners.
Depending on their purpose, aerated concrete blocks are divided into:
- structural (blocks D900-D1200);
This material is used to build walls that bear serious loads.
- Structurally - heat-insulating (D400-D900);
With their help, the construction of aerated concrete houses is most often carried out in the private sector.
- thermal insulation (D300);
Not used as load-bearing structures. Such blocks are used to insulate buildings.
The thickness of aerated concrete walls (regulated by SNiP 23-02-2003 “THERMAL PROTECTION OF BUILDINGS”), depending on the purpose of the building, is:
- garage - from 20 cm;
- one-story residential building - from 38 cm;
- two-story residential building - from 40 cm;
- three-story building - 46-54 cm.
Technology for the production of aerated concrete blocks:
The production of blocks is regulated by: GOST 31360-2007 "Non-reinforced wall products made of autoclaved cellular concrete", GOST 21520-89 "Small wall blocks made of cellular concrete", GOST 25485-89 "Cellular concrete", SN 277-80 "Instructions for the manufacture of products from cellular concrete."
To make gas blocks you need:
- Cement. It must comply with GOST 30515-2013 “Cements”, GOST R 57293-2016 “General construction cement”, GOST 25328-82 “Cement for mortars”, GOST 10178-85 “Portland cement and Portland slag cement”. Experts advise using cement grades M400 and M500.
Cement for aerated blocks
- Sand. Must meet the requirements of GOST 8736-2014 “Sand for construction work.”
Sand for aerated blocks
- Water. Its quality is regulated by GOST 23732-2011 “Water for concrete and mortars”.
Water for solution production
- The gas generator is aluminum powder of the PAP-1 or PAP-2 brands. The requirement for the ingredient is compliance with GOST 5494-95 “Aluminum powder”.
Aluminum powder
- Mixer
Mobile mixer
- Forms
Block forms
Making blocks is a simple matter: after stirring the prepared mixture for 10 minutes, it is poured into molds to half the height. After 6 hours, after increasing the volume, the excess is removed.
The solution is kept in molds for 16 hours until it hardens, then the block is removed and the gas blocks gain tempering strength in 2-3 days. Then they are transported to a warehouse. The block gains final strength within 4 weeks. This is how the blocks dry under natural conditions.
An autoclave is used to speed up the process. The blocks are steamed in it for 12 hours. This method is quite expensive.
Aerated concrete block with excellent geometry
When choosing a building material manufacturer, you should definitely study its production technology to ensure compliance with standards. The construction of houses from aerated concrete blocks should not be marred by the use of low-quality material.
How quickly can you build a house from aerated concrete?
On average, the construction of an aerated concrete cottage takes six months. A team of experienced builders will build a house of average complexity in two months. The longest stage is usually the construction of the box and the installation of the roof.
The price of construction depends on the complexity of the project, the size of the house, the price of materials and the cost of renting equipment.
In general, construction with aerated concrete is economical, cost-effective and time-efficient. With proper preparation, you can handle it yourself.