Every owner of a plot of land sooner or later faces the issue of organizing convenient access to their territory and comfortable movement around it. For example, make a parking area in front of your house or pave paths so as not to stain your shoes with mud in rainy weather. The construction market today offers a wide range of coatings that can be used to solve any similar problem. One of these coatings is asphalt as the most popular and affordable.
p, blockquote 1,0,0,0,0 —>
In this article we have prepared recommendations for laying asphalt and applying markings.
p, blockquote 2,0,0,0,0 —>
What is asphalt made of?
Before talking about installation, you need to understand what the asphalt pavement consists of. Asphalt is a mixture of bitumen with bulk materials: sand, crushed stone or gravel. Depending on the purpose of the road surface, the percentage of components may vary. For example, there is no point in using crushed stone for a parking area near a house, since it can withstand high pressure, which is necessary for covering public roads and highways. For ordinary paths and car areas, it is recommended to use up to 10% crushed stone due to the absence of a large load on the coating.
p, blockquote 3,0,0,0,0 —>
Bitumen
Bitumen refers to tar-like products that are obtained as a result of oil refining. It is a binding component of the asphalt mixture. The amount varies from 2 to 11% depending on the purpose of the road surface. The higher the load, the more bitumen is contained in the asphalt.
p, blockquote 4,0,0,0,0 —>
Sand
Sand acts as a fine filler and allows you to evenly distribute the external load on the canvas. When preparing asphalt, only clean sand is used, since the final strength of the asphalt depends on this.
p, blockquote 5,0,1,0,0 —>
Crushed stone or gravel
As mentioned above, crushed stone is used to increase the strength of asphalt to external loads. If you plan to move equipment over 5 tons around the site, for example, when organizing the access of trucks to a construction site, then the presence of crushed stone up to 15 mm in the asphalt is a necessary condition. This asphalt will cope well with high tire pressure.
p, blockquote 6,0,0,0,0 —>
Asphalt for pedestrian paths uses gravel up to 3-5 mm, which is an excellent shock absorber and filler.
p, blockquote 7,0,0,0,0 —>
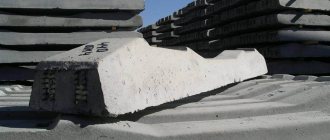
About the construction of asphalt roads and paths
Asphalt pavement includes different materials, but its quality directly depends on what materials were used, as well as how correctly the base was made. For the places where the highway will be built, research and preparation of the site are carried out, calculations are made, and design is carried out.
For highways (more about paths in the garden later), a standard set of materials is used:
- ground bed;
- geotextile covering;
- layer of sand;
- layer of crushed stone;
- asphalt.
Separately, it should be noted that the crushed stone layer can include its different fractions, and the asphalt concrete itself is laid in several layers, and the fastening composition is bitumen or bitumen emulsion.
For paths in the garden or near the house, such a set of materials is not always necessary. After all, the loads are small, but you still need to prepare the surface for asphalt.
Hot and cold paving of asphalt
The most common method is hot laying, since this method provides a reliable and durable coating that can withstand loads of up to 15 tons without deformation, which cannot be guaranteed by other types of road surfaces. This method is also considered the most cost-effective, if large volumes are taken into account.
p, blockquote 8,0,0,0,0 —>
It is worth noting that hot styling technology involves working with a mixture of high temperatures up to 120 ° C, which is quite dangerous in domestic conditions!
High temperature is necessary to prepare a homogeneous mixture, otherwise the reliability of such a coating will be of poor quality. Among the advantages, durability should be noted, due to the high degree of resistance to environmental influences. Among the disadvantages is that in extreme heat, asphalt can become deformed and become environmentally hazardous.
p, blockquote 10,0,0,0,0 —>
Cold asphalt, which is a mixture based on polymer-rubber bitumen, is gaining popularity. Mainly used for repairing holes, cracks and potholes on roads, as well as for improving garden plots. It is an environmentally friendly material as it does not contain solvents or plasticizers. The wide temperature range allows its use in extreme heat up to +40 ºС and severe frost down to -20 ºС.
p, blockquote 11,1,0,0,0 —>
Below we will look at how to properly lay asphalt with your own hands.
p, blockquote 12,0,0,0,0 —>
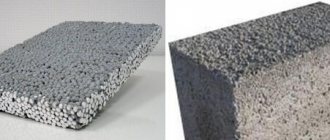
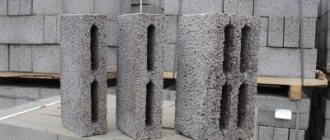
Production of polystyrene concrete
First, a little about production technology. For the manufacture of any building blocks, polystyrene foam is no exception, it is better to use the pressing method, or even better, vibrocompression of the material. This greatly increases its stability, and hence its service life.
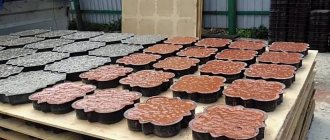
The production of polystyrene foam blocks can be done in two main ways:
- Casting the solution into cassette molds.
- Volumetric vibrocompression of rigid mixtures.
In both cases, the stages of polystyrene concrete production are similar, but there are some technological differences.
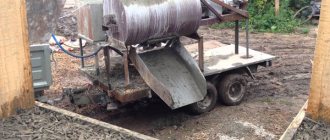
Injection molding method
The most common method of producing masonry material is casting into movable, plastic forms. At the filling site, the molds must be lubricated from the inside with a special lubricant. When there is a need to pour the mixture into the formwork, it is installed directly in the place where it is advisable to use polystyrene concrete.
Typically, the cassette method for producing polystyrene blocks involves the use of stable solutions of medium and low density. When producing a large number of blocks, it is advisable to use a foam generator.
This device can continuously supply foam solutions to the concrete mixing tank. You also need to add the required amount of PSV granules there. Finished blocks of medium and low density have a rather low thermal conductivity coefficient.
The disadvantages of the technological process include only 2 facts:
- Good cassettes are expensive.
- It is quite difficult to remove finished blocks from molds, which increases labor costs.
However, with a well-established process for manufacturing a large number of polystyrene blocks, these disadvantages are offset by production volumes.
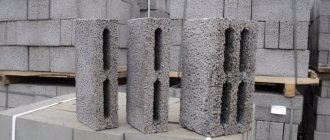
Vibration pressing
For this method, it is only possible to use polystyrene mixtures with low water content and high cement content. The production of blocks is possible only with the help of vibrocompression equipment.
It happens like this:
- The prepared mixture is fed in portions into the molding machine.
- On the molding trays, which are changed, the process of vibration compaction occurs to a semi-dry state.
- Semi-finished products on pallets are sent to a drying chamber, where they are kept for a certain time.
Finished polystyrene blocks have the stiffest density. The advantages of this technological process:
- The quality of the blocks is the highest.
- There is no need to use cassette forms.
The video will tell and show how the production of polystyrene concrete blocks into molds is carried out:
Hot asphalt laying technology
p, blockquote 13,0,0,0,0 —>
p, blockquote 14,0,0,0,0 —>
- Asphalt must be laid in dry weather. The surface for installation must be prepared in advance. The top layer of earth needs to be removed, about 4-5 cm. In its place, pour and compact first a layer of sand, then fine-grained crushed stone to create a stable cushion.
- Next, you need to melt the bitumen by placing a metal barrel on a stone base in which the fire will burn. The bitumen needs to be chopped into pieces with an axe. The smaller the pieces, the faster they will melt. It is best to mix with an old shovel, since after laying the asphalt it will become unusable. It is best to carry out all work directly near the laying site so that the asphalt does not have time to cool down during transportation.
- When the bitumen melts and boils, you need to start adding sand and gravel. You need to add it gradually, then it will be easier to mix this mixture.
- Then, using a shovel, you need to start spreading the mixture onto the prepared surface. A shovel is perfect for these purposes. To level the asphalt layer, you need to use a wooden mop. To increase the plane of contact, you can nail a board to it.
- After leveling, you need to use a manual roller for compacting. The drum must be moistened with water! If you don’t have a roller, you can use a vibrating plate or a hand tamper. After finishing the work, the coating must be allowed to sit for at least 6 hours.
The result is a durable coating that can easily withstand a passenger car.
p, blockquote 15,0,0,0,0 —>
Disadvantages of polystyrene-based concrete, surface strengthening
There is one minus, but in some situations it plays a significant role. No matter what supporters of polystyrene concrete say, the material’s compressive strength is not very good. The same goes for abrasion resistance. Therefore, surfaces need to be protected and strengthened. When it comes to the walls of a building, in any case, a finishing layer or cladding is assumed, both on the outside and on the inside.
Expanded polystyrene can only be used for filling in residential and public premises
As for the base of the floor. Expanded polystyrene can only be used for filling in residential and public premises. The material is not suitable for technical buildings, especially outdoor work. Even inside buildings, it is worth considering additional reinforcement of the top layer, or topping.
If we are talking about a public building with high traffic and, accordingly, load on the floor surface, the topping is done with special ready-made mixtures intended for this purpose. When making a screed with your own hands for further laying of linoleum, laminate or parquet in living rooms, after pouring and partial setting of polystyrene concrete, it is enough to do iron grinding, which will give two positive aspects:
- strengthening lightweight concrete;
- final leveling of the surface, meeting the requirements for laying modern floor coverings.
Making your own topping mixture is very easy. Take three parts of sifted river or washed sand and part of Portland cement M 400. Prepare a solution with a consistency slightly thinner than for masonry. The prepared solution is applied to the surface of the subfloor, leveled and rubbed with a plaster float. The grinding layer is laid continuously. This kind of reinforcement is quite sufficient for living rooms.
Do-it-yourself cold paving of asphalt
p, blockquote 16,0,0,1,0 —>
The technology for laying cold asphalt is much lighter and simpler than hot asphalt. The mixture is already sold ready-made in convenient bags and buckets. For installation you will need the following tools: hand roller, vibrating plate or hand tamper, mop.
p, blockquote 17,0,0,0,0 —>
- First you need to prepare the surface. Remove the top layer of soil 4-5 cm and add a layer of sand, then crushed stone and compact everything well.
- Pour the first layer of the mixture, level it with a mop and roll it with a hand roller or vibrating plate. If you don’t have these tools, you can get by with a manual tamper. Then you need to pause for 10-15 minutes and lay the second layer in this way. Three layers of asphalt show good strength indicators.
- After 24 hours the coating is ready for use.
When laying cold asphalt, it is important to compact it well to prevent water from getting into the cracks and then this coating will serve for a long time.
p, blockquote 18,0,0,0,0 —>
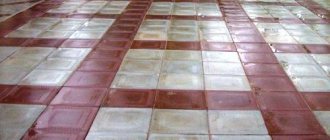
Applying markings and signs
Applying lines and marks with thermoplastic or paint will mark the asphalt surface and indicate any necessary warnings. For example, on the site in front of the house you need to mark out parking spaces for cars. Or put a warning sign about the danger for drivers. Thermoplastic is most suitable for these purposes since it is wear-resistant, has good adhesion to asphalt and has a long service life. Thermoplastic must be applied using special equipment, since it is necessary to constantly maintain a high temperature in the boiler and thoroughly mix the plastic mass.
This is interesting: Laying polycarbonate in a greenhouse 2022
p, blockquote 19,0,0,0,0 —>
p, blockquote 20,0,0,0,0 —>
If it is not possible to use specialized equipment, then the following recommendations must be followed:
p, blockquote 21,0,0,0,0 —>
- The asphalt surface must be dry and clean, then the plastic will adhere securely to the surface.
- The melting point of plastic is in the range from 140 to 180 ºС. After the plastic has melted, it must be constantly stirred to avoid the appearance of clots.
- To apply thermoplastic, you need to use ready-made molds that will allow the plastic mass to harden on the asphalt.
- The cooling time of thermoplastic is only a few minutes.
p, blockquote 22,0,0,0,1 —>
We looked at two methods of laying asphalt, thanks to which you can obtain a high-quality and durable coating. The first method is beneficial when paving large areas. And the second is for arranging a household plot. In any case, a properly laid asphalt pavement will withstand heavy loads and will last a very long time.
Stage one. excavation work
The first thing we pay attention to is. area that will be prepared for laying asphalt. Do not forget about underground communications, vegetation with root systems and drainage systems. Large roots must be removed, otherwise they will lift the asphalt surface, damaging its integrity. In the place where you need to lay asphalt, remove the top layer of soil. In a small area, you can deal with it using improvised means, making a excavation with a shovel. But paving a large span of road surface requires the use of special equipment. bulldozers, excavators. The thickness of the removed layer may vary. It all depends on the purpose of the asphalted area. If this is a pedestrian path. The depth of the excavation can vary from 10 to 30 centimeters. If this is a carriageway. It is advisable to dig deeper, counting on the passage of trucks. Excess soil must be removed so that it does not wash onto the driveway during rain, does not interfere with transport, and does not clog the drainage system. It is necessary to provide for the installation of a drainage system. The water that appears during precipitation should not wash away the asphalt. We compact the prepared area of land using a roller.
Pothole repair using vibrating rammers
Atlas Copco is professional equipment that is used for pothole repair of asphalt pavements. The equipment is distinguished by its high power and the ability to choose the necessary device for a specific job. For example, if serious repairs are needed, you can use a double-drum vibratory roller, which combines the functions of conventional rollers with compact dimensions and manual start.
Atlas Copco equipment for asphalt compaction has won its place in the construction market and is rightfully considered one of the most powerful, reliable and productive.
Third stage. laying asphalt pavement
Completing this stage requires preparing the asphalt concrete mixture manually or purchasing it at the factory. Let us note in advance that preparing high-quality asphalt at home is extremely difficult. Therefore the best way out. purchase the required amount of bitumen mixture from an asphalt plant or the nearest Avtodor.
The advantages of purchasing factory-made asphalt are obvious:
- Firstly, the consumer receives a high-quality final product, saving time on the production process.
- Secondly, for wholesale orders, a discount and free delivery directly to the site are possible.
If you decide to install the asphalt pavement yourself, it’s worth remembering. The bitumen mixture is laid at a temperature not lower than 5 C in dry weather. Otherwise, the asphalt will lose its quality and it will be impossible to level it well and compact it. There are hot asphalt and cold asphalt. Thus, hot bitumen mixture must be laid immediately after delivery to the site. The faster, the stronger the road surface will be. Cold bitumen mixture is universal, as it can be installed in any season.
The main advantages and disadvantages of asphalt pavements
- optimal price-quality ratio due to the low cost of materials used;
- simple asphalt laying technology that allows you to do the work yourself;
- speed of covering even large areas compared to the installation of concrete or prefabricated paving slab structures. Installation is completed in a few hours;
- ease of repair of damaged fragments
- when framing areas, paths, flower beds with small borders, a beautiful and aesthetic appearance of courtyards is obtained;
- waterproof coating
- sufficient strength, reliability and durability when properly executed;
- asphalt paving at the dacha will not allow weeds to grow through the coating;
- the possibility of using specialized technical means;
- ease of maintenance, in the summer it is enough to sweep away the debris with a broom and wash the surface with a regular garden hose, and in the winter it is convenient to remove snow on a flat surface.
- characteristic odors emanating from asphalt in the heat, especially in the first time after paving the site, which is due to the presence of bitumen components that emit unpleasant odors when heated, creating a certain discomfort;
- yard areas are mainly compacted with hand rollers, which does not ensure high strength of the upper layers. As a result, asphalt heated by the sun's rays can become deformed under the weight of heavy vehicles;
- difficulty when it is necessary to deliver small volumes of asphalt mixture to the site for fragmented repairs. Most suppliers may refuse this due to lack of profitability;
- inability to compete in beauty of appearance with expensive coatings.
Composition and types of asphalt concrete
Asphalt concrete is an artificial material obtained by rational selection of mixture components and its compaction after laying. Depending on the incoming components, the ratio of their mass parts and physical characteristics, there are many types of asphalt, divided into brands and types.
The composition of any asphalt concrete includes:
- mineral powders obtained by crushing rocks with a high content of carbon compounds (limestone or other fossilized organic deposits). The high content of such powders gives the material increased viscosity combined with strength. The property of such mixtures to dampen internal vibrations of structures without the formation of cracks in the coating allows the construction of road passages on road bridges. Successfully used for paving roads and sites
- bitumen, contained in most types in small quantities (from 4 to 5%). The exception is cast mixtures containing ≥ 10% bitumen. Bitumen gives the mixture increased fluidity, facilitating its distribution over the coating area, and elasticity after compaction and hardening. The main use of cast asphalt is paving of areas with complex terrain and repairing road surfaces. Increased bitumen content is used for asphalts laid in harsh climatic zones, at low temperatures and the need to open traffic immediately after the completion of a section of road or bridge crossing;
- sand is used in most types of asphalt concrete, the only exception being mixtures with a high gravel content. Natural sands are thoroughly cleaned, while artificial sands, obtained by crushing rocks, are immediately ready for use;
- crushed stone or gravel, which plays the role of a protective component that forms the asphalt concrete frame to absorb significant loads.
This is interesting: Styling for short hair photo for the 2019 celebration
Based on the content of fillers, the following types are distinguished:
- A - from 50 to 60% crushed stone;
- B - 40...50% crushed stone or gravel;
- B - gravel or crushed stone from 30 to 40%;
- G - sand or screenings from crushing ≤ 30%;
- D - content of natural or artificial sands up to 70%.
Depending on the largest sizes of mineral grains in the mixture, they are divided into the following classes:
- coarse-grained first class - ≤ 40 mm. Used for paving highways with heavy traffic of heavy-duty vehicles and other highways of different classes;
- second class - with small grains ≤ 20 mm. Installed on pedestrian streets and squares;
- third - sand mixtures with grains ≤ 10 mm. Small fractions of grains are in close contact, which allows you to create perfectly smooth surfaces. The main purpose is pedestrian sidewalks, garden paths, improvement of courtyard areas and sports grounds.
The second brand is most widely used in asphalting roads, their repair and arrangement of private courtyards with the construction of transport entrances.
Depending on the laying temperature, asphalt mixtures are divided into 2 types:
- Hot, laid with a temperature of ≥ 110 degrees. The hot mixture is transported by special transport, called Kocher, or in dump trucks with a heated body. If necessary, preparation for asphalting is carried out by softening the base under the influence of high temperatures. After leveling, the mixture is rolled with rollers. The resulting durable coating is most widely used in road work and landscaping of urban and suburban areas;
- Cold ones, which are placed with temperatures ≥ 5 degrees. When preparing, bitumen with a reduced viscosity is used, which allows the mixture to remain in a loose state for a longer time, and after rolling it hardens faster. Most often, such asphalt concrete is used for pothole repairs, laying on sidewalks and courtyard driveways that are not subject to intense loads.
Any high-quality asphalt concrete can only be made from certified materials, therefore, when ordering, you must require quality certificates and a passport for asphalt concrete.
Stages of paving
For laying asphalt, it is recommended to choose dry weather with a positive temperature of ≥ 10 degrees.
The step-by-step procedure includes the following work:
- On a sheet of graph paper, a diagram of the location of the house, outbuildings, paths to them, the area around the house and the passage for the car is drawn to scale. The roots of growing trees can deform the covering, so it is desirable that the trees are located at a distance of ≥ 2 m from the intended contours.
- Calculation of material requirements. It is recommended to cover the entire area with geotextiles with an overlap on the walls and cover it with a layer of sand 10 cm thick, crushed stone for the paths will be needed 5 cm thick, for the platform 15 cm, and directly for the driveway 25 cm, the number of enclosing elements is calculated according to the length of the contours, subject to asphalting. Asphalt will be required in the amount of 1 t per 10 m2 with a layer thickness of 5 cm; on driveways it is recommended to lay asphalt in two layers (5 plus 3 cm). The order is made for hot, fine-grained mixtures; sandy ones can be laid on the paths, but they are also hot.
- Prepare the following tools:
- a shovel for each worker;
- durable cord;
- mop-mop made of a meter-wide board with a handle 2.5 m long;
- a manual rammer, which is a piece of timber or round log with a square metal plate (20 cm side) fixed at the base and a handle in the form of a longitudinal wooden plank nailed on top;
- manual roller weighing ≥ 100 kg.
To periodically lubricate the tool to prevent hot asphalt concrete from sticking to it, you will need a small amount of diesel fuel.
- Transferring the outlined contours to the terrain with wooden pegs.
- Excavation of soil to the depth of the listed layers with removal of roots of weeds, bushes and trees. The asphalt surface should be level with the surrounding surface of the earth or rise up to 5 cm (it all depends on the terrain and your desire). Base seal.
- Installation of curbs at the same level as the future asphalt concrete or 2...3 cm higher. First, curbs are installed along the edges of the path or area, leveled in height, a cord is pulled along which intermediate elements are laid out. Fixation of curbs is carried out using cement mortar and filling with compacted soil.
- Backfilling with sand, for effective compaction, wetting the sand cushion with water is used, laying geotextiles to reduce the pressing of crushed stone into the sand.
- Laying crushed stone with careful rolling with a roller. Larger fractions are placed downwards, and decluttering is carried out on top with smaller fractions. Compacted crushed stone is poured with bitumen mastic.
- The delivered asphalt is unloaded in separate piles. To prevent it from cooling down, the layout must be done quickly with the assistance of several assistants. Leveling is done using a motor mop. One person begins rolling the surface with a hand roller; to achieve greater effect, a person with a solid build can stand on the roller. With the provided transverse slopes, rolling is carried out from the bottom up. The movement of the roller should be smooth, without jerking. It is important to maintain the same number of passes on all lanes. It is unacceptable to stop the roller on areas that have not frozen to avoid sticking to the coating. In hard-to-reach places, the asphalt is compacted using hand compactors. We must not forget about the need to periodically wet the instruments with diesel fuel. If possible, it is recommended to roll most of the surface with large rollers or vibrating plates, available in specialized organizations. This will significantly increase the strength and quality of the laid coating.
- Finally, you can paint the entire asphalt area with special asphalt paints to obtain the required shades.
At this point the work can be considered completed.
Preparation of the working mixture
For self-preparation you will need the following materials:
- Portland cement M400 or higher;
- expanded polystyrene granules with a diameter of 2...4 mm, sold packaged in large bags (it is recommended to purchase spherical granules, although they are more expensive than round ones);
- air-entraining additive SDO in the form of powder or concentrated solutions;
- pure water;
- plasticizing additives.
Ready-made, specially selected dry mixtures with polymer additives for ease of laying solutions are available for sale (“Knauf-Ubo”, Polybeton).
It is recommended to use polystyrene concrete for the floor, grade D350. To prepare 1 m3 of solution you will need:
- cement - 290 kg;
- polystyrene - 1 m3;
- SDO in powder - 0.28 kg or 0.7 l of concentrate diluted in 3.5 l of water;
- water - 120 l;
- plasticizers.
When using ready-made mixtures, preparation is carried out in strict accordance with the manufacturer's instructions, which are available on each bag.
The process of self-cooking from individual components consists of the step-by-step implementation of the following operations:
- pouring granules into a container with a volume of ≥ 20 l;
- adding about 10% water;
- carefully move with a construction mixer or drill with a whisk attachment for 30 seconds;
- adding cement and 85% of the remaining water;
- stirring until the granules are completely enveloped in cement;
- dissolving SDO in the remaining amount of water and adding to the container;
- stirring until it reaches a thick creamy consistency. To increase ease of installation, plasticizers are added.
The advantage of asphalt paths
Speaking about asphalt, I would immediately like to say that this building material has more disadvantages than advantages in relation to a summer cottage.
Asphalting of a summer cottage
Asphalt pavement has only a few main advantages - low cost, high strength, simple creation technology and versatility. Often asphalt is chosen only because it has the lowest price compared to materials for paving garden paths such as paving slabs, paving stones, decking, natural stone, etc.
The disadvantages of asphalt are very significant factors that affect not only the landscape design of the garden plot. Among the most significant disadvantages are:
- In hot weather, asphalt evaporates and exposes the human body to harmful substances. In addition, the unpleasant smell itself will not allow you to have a rich rest in the garden, which is what we need.
- Asphalt coating has practically no decorative ability, so it is not only not suitable for decorating a site, but on the contrary, it will worsen the situation. Asphalt paths practically do not fit into garden styles, which is also very bad. The only exception is colored asphalt, to which various pigments are added, so that the coating can be not only the usual gray color, but also green, pink, blue, etc.
- If laid poorly, asphalt quickly deteriorates in winter: water gets into the cracks, freezes, and when it freezes, it destroys the coating.
- During the heat, the asphalt melts.
This is interesting: Laying a soft roof step by step video instructions 2019
As you can see, the disadvantages of asphalt pavement are more significant than the advantages, but despite this, it is recommended to build asphalt paths at functional nodes of the garden: for example, between the garage and the utility block. It is strictly forbidden to build asphalt paths near recreation areas, due to the harmfulness of asphalt.
How to lay asphalt with your own hands?
In order to lay asphalt at your dacha with your own hands, you need to carefully prepare the area, know the technology of laying asphalt, and have at least a homemade manual asphalt roller.
You should immediately draw your attention to the fact that it is very difficult to make asphalt yourself, because... it is necessary to heat the bitumen, mix it with crushed stone and additives and know the correct proportions. Since asphalt is not expensive, it is best to order a ready-made mixture from a road repair company. In this case, you will not lose a lot of money, but the asphalt will be delivered to you directly to the installation site hot, all that remains is to quickly level it, compact it and roll it.
So, let's get down to business!
Preparing the area for asphalt paving
First of all, we mark the boundaries of the future asphalt path. At this point, it is necessary to remove a layer of soil (at least 30 cm, it all depends on the purpose of the path) and make sure that no tree roots pass near the future path, otherwise they will soon begin to destroy the asphalt. If there are roots, cut them out with an ax. After this, we install curbs along the entire perimeter of the path, which will be the boundaries. The role of the curb is not only to prevent the spread of asphalt, but also a decorative function. To install curbs, we dig a small, level trench and plant them in cement mortar in this trench. To create an even border, we stretch the rope from the beginning to the end of the sides of the path and guide ourselves along this rope. Bricks can be used as a border, laid not only on the side edges, but also at an angle.
Preparing the area for asphalt paving
To prevent water from collecting on the asphalt path, make a small drain in advance: build the path at an inclination of 1-2 degrees and equip it with small drainages that direct the flow of water into the soil.
Laying new asphalt
As we said earlier, it is more advisable to order asphalt from the factory. After the asphalt is delivered to your site, you must immediately proceed to laying it, because the solution hardens quickly.
Laying new asphalt
First of all, we spread the asphalt with a shovel over the entire area of the path, making an even filling. Next, using a motor mop, we level the asphalt along the entire path, adding asphalt into the holes and leveling the bumps. Please note that the minimum thickness of the asphalt pavement must be at least 5 cm to ensure the strength of the garden path, so this requirement must be observed.
As mentioned earlier, asphalt hardens quickly, so to create a path it is better to invite several assistants to make the process faster.
As soon as part of the path is planned, we take a hand roller and begin to roll this section, while the rest plan the path further.
Mandatory requirement: before rolling the path, lubricate the roller with diesel fuel so that the asphalt does not stick to it and the path is perfectly level. You can also lubricate shovels with diesel fuel to make it easier to throw asphalt onto the path.
When working with the roller, you must move slowly, making only straight-line movements (reverse movements are prohibited). During rolling, seams will form at the joints between the lines; in order to remove them, it is necessary to roll across the seams.
Never leave the roller on the path after work.
For high-quality rolling, the roller must protrude beyond the border of the track by at least 10 cm.
If the weight of the roller is not enough to roll the track well, then you can ask one of the assistants to stand on the frame of the roller, then the weight will increase.
DIY video tutorial on laying asphalt
You can see the asphalt laying process in more detail in this video:
Laying asphalt on old pavement
If you decide to lay asphalt not on soil, but on old asphalt pavement or concrete screeds, then the process of preparing the area will change. Instead of a cushion of crushed stone and sand, you just need to repair the old coating. To do this, you need to rid the surface of dirt and various debris; if there are small cracks, they need to be widened manually so that in the future they are tightly clogged with asphalt.
After this, it is necessary to pour molten bitumen along the entire perimeter of the future garden path and, using a motor mop, spread the bitumen into strips of 50 cm (no less). Along the entire length of the path, it is necessary to make transverse bitumen strips in increments of half a meter, and then we create an asphalt path with our own hands using the technology indicated above.
How to repair an asphalt path?
Even if you have laid the asphalt with high quality with your own hands, the path will still sooner or later begin to collapse. The most often destructive factors are:
To repair asphalt pavement with your own hands, it is recommended to use cold asphalt, which can be laid even at low temperatures (minus).
Properties and purpose
The characteristics of polystyrene concrete take into account its lightness and practicality. This composite material is produced using simple technology with minimal financial investment.
Characteristics
Polystyrene concrete belongs to a group of composite building materials based on Portland cement or its varieties, silica filler, and a porous component.
The manufacturing process involves a uniform combination of raw materials, including:
- Cement mixture.
- Sand.
- Water.
- Granular polystyrene.
The solution is placed into prepared forms or formwork at the construction site. To create high-quality material, you can use simple mixers.
The main properties of polystyrene concrete include:
- Long service life - more than 100 years.
- Compliance with environmental safety standards.
- High degree of vapor permeability.
- Flame resistant.
- High moisture- and frost-resistant properties.
- Good noise insulation parameters.
The list of performance characteristics is as follows:
- Manufacturability - due to the light weight and correct geometry of the blocks, creating walls and ceilings based on them is quite simple and quick.
- Thermal insulation properties - a wall structure 30 cm thick can retain as much heat as a 180 cm brick wall. Thermal conductivity values vary from 0.7 to 0.1 W/mS. This helps reduce thermal energy costs by 5 times.
- Vapor permeability. Due to good moisture and air permeability, walls made of polystyrene concrete can “breathe”, which ensures stable humidity regulation.
- Durability - with use, polystyrene concrete blocks acquire additional strength. The declared service life exceeds 100 years.
- The temperature range at which the material is allowed to be used varies from -60...+70°C.
- Affordable price - 1 sq. m of polystyrene concrete walls will cost much less than the other option.
- Thermal inertia - buildings warm up effectively, while their cooling takes a long period of time.
- Environmentally friendly - since cement, water, tree resin and safe polystyrene are used to produce the material, the final product meets all environmental requirements.
- Flammability class - in terms of fire safety, polystyrene concrete belongs to class NG1 (non-flammable). The material is not afraid of the influence of open fire, since when ignited, the surface granules begin to evaporate.
- Weight - blocks measuring 200x300x600 mm weigh no more than 18 kg. This characteristic ensures high laying speed and reduced labor costs.
- Strength indicators - a wall 30 cm thick can withstand a distributed load of up to 35 tons per linear line. m.
- Waterproofing properties - the material absorbs no more than 4% moisture, which is 4 times less than brick or wood. The likelihood of fungi formation is virtually eliminated.
- Noise insulation - a 30 cm wall can absorb more than 70 dB of sound.